Advertisement

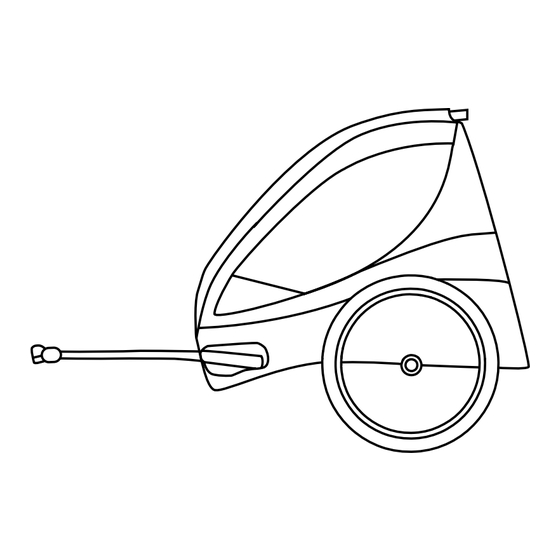
OWNER'S MANUAL
CLASSIC SERIES:
Cabriolet, Corsaire XL
Keep this Owner's Manual for future reference.
You should not use the Chariot child carrier before you have read and understood the contents of this Owner's
Manual. Failure to comply with the instructions contained herein may lead to an otherwise avoidable accident in which
you and/or your passenger(s) could suffer serious injury or death.
09/2006
WARNING
!
www.chariotcarriers.com
51100453

Advertisement

Table of Contents
loading

Summary of Contents for Chariot Carriers Classic Series

  • Page 1 OWNER’S MANUAL CLASSIC SERIES: Cabriolet, Corsaire XL Keep this Owner’s Manual for future reference. www.chariotcarriers.com WARNING You should not use the Chariot child carrier before you have read and understood the contents of this Owner’s Manual. Failure to comply with the instructions contained herein may lead to an otherwise avoidable accident in which you and/or your passenger(s) could suffer serious injury or death.
  • Page 2: Table Of Contents

    3.2 General safety instructions..........3.3 Before each journey............3.4 Safety instructions for travelling..........Chariot Carriers Inc. retains all rights to this Owner’s Manual. 3.5 Safety instructions for maintenance and repairs....No text, details, or illustrations from this manual may be either 3.6 Warning against unauthorised modifi...
  • Page 3: General Items

    The carrier is intended for use within the performance ranges specifi ed for the carrying of children in daylight hours, on Congratulations on choosing a Classic series CTS Trailer, the sidewalks, light traffi c public roads, and smooth paths. key component of the world‘s premiere Child Transport System Luggage may also be carried in the storage bags intended for (CTS).
  • Page 4: Overview Of Components

    2. Overview of Components 3. Safety WARNI N G The purpose of this section is to acquaint you with the symbols Here you will fi nd instructions where failure to comply may and safety instructions and make you aware of general dangers result in injury or even death to the user and/or the carrier‘s that might arise in using the carrier.
  • Page 5: General Safety Instructions

    3.2 General safety instructions With regards to the carrier Basics • Never carry any heavy or sharp protruding items in the storage space of the carrier if you are also carrying children • Before using the carrier, please read through the Owner’s at the same time (risk of injury on braking).
  • Page 6: Before Each Journey

    3.3 Before each ride: • Before each journey check the tire pressure. The minimum recommended pressure is 30 psi (2.1 bar) and the maximum • Make sure that the hitcharm is correctly fi tted and secured to is 35 psi (2.5 bar). Even if a higher pressure is permitted the carrier, see section 4.6.
  • Page 7: Description Of The Carrier

    4. Description of the Carrier NOTE: All references to orientation (i.e. left or right) is from the passengers point of view while sitting in the carrier. 4.1 Supplied as standard Pull the W shaped frame rearwards, until the frame is fully uprighted and both right-hand and left-hand auto-lock disks audibly engage.
  • Page 8: Wheel Assembly

    Folding the carrier 4.3 Wheel assembly To fold the carrier, pull on both auto-lock disks simultaneously, at the same time as pushing the W shaped frame forwards. Wheel assembly on the Cabriolet T I P The easiest way to assemble the wheel is to lay the carrier on its side.
  • Page 9: Assembling The Refl Ectors And The Safety Fl Ag

    4.4 Assembling the refl ectors and safety fl ag Wheel assembly on the Corsaire XL The wheels of the Corsaire XL are equipped with so-called Position a spoke refl ector between two outer spokes and an push-button axles. Pressing on the rubber cap in the wheel inner spoke in such a way that the inner spoke lies in the guide centre will loosen the retaining balls which lock the axle in the slot of the refl...
  • Page 10: Legal Requirements

    4.5 Legal requirements To fasten the rear refl ectors you need a Philips screwdriver. Remember that at dusk and in the dark, the bicycle and carrier must be equipped with CPSE approved lighting. Rear battery- powered lights for instance are suitable as working lighting. They can be attached to the exposed tube ends on the top right and left on the rear of the carrier, or hooked onto the web tabs located on the upper corners of the back fl...
  • Page 11: Attaching The Hitcharm

    4.6 Attaching the hitcharm The hitcharm should now protrude about 2 cm / 3/4 inch out of the rear side of the VersaWing 2.0, and the rear vertical holes in the VersaWing 2.0 and hitcharm must align with each other. The hitcharm is attached to the CTS Ready Chassis into the left “VersaWing 2.0”...
  • Page 12: Attaching The Axle-Mount Ezhitch

    Attaching the Axle-Mount ezHitch to the bicycle The Axle-Mount ezHitch must always be attached to the left-hand side of the bicycle (as seen in the direction of travel). Bicycle with solid axles: The quick-release skewer is not used in this case. Unscrew the rear wheels left-hand axle nut and the spacer or Correctly installed hitcharm.
  • Page 13: Attaching The Carrier

    Bicycles with a quick-release skewer In order to ensure that the hub is clamped suffi ciently in the bicycle‘s chainstay, the quick-release lever must begin Remove the existing quick-release skewer as it is no longer gripping as it moves from the open to the middle position, needed.
  • Page 14: Weight Distribution And Hitcharm Load

    Push the security pin from the top through both holes of the Finally, always attach the hitch’s back-up safety strap around the Axle-Mount ezHitch. bicycle frame. To do this, from above, put the hitch back-up safety strap around the chain stay, and attach the hook of the hitch back- up safety strap to the hitcharm D-ring located on the underside of the hitcharm.
  • Page 15: Suitability Of The Bicycle Used For Towing

    W AR N I N G If you are not confi dent about estimating the hitcharm load (tongue or nose weight), use a bathroom scale to help you: When used as a Bicycle Trailer, the stroller wheels must Put the bathroom scales next to the hitcharm of the loaded never be installed in their use position (wheels down).
  • Page 16: Use As A Pull Wagon

    W AR N I N G 4.12 Use as a pull wagon On short stretches and level surfaces, the carrier may be used Any assembly of the hitcharm other than the one described as a pull wagon. is not permitted. Any kind of incorrect assembly may lead to loss of the carrier during travel resulting in an accident For this, insert the hitcharm rotated through 90°...
  • Page 17: Seat And Seatbelts

    4.14 Seat and seatbelts padded shoulder harness buckle of the shoulder harness (under tab) lap belt crotch harness To fasten the child into the carrier, proceed as follows: Adjusting the padded shoulder harness The shoulder harness should always stay fastened to the To achieve the correct size of the padded shoulder harness, crotch belt by their lower buckle.
  • Page 18 T I P M: Sleeve through both webbing loops. This is the default setting. Always sleeve or unsleeve the shoulder belts as descri- bed above equally on both sides of the padded shoulder harness, otherwise the shoulder harness will not sit properly, and correct fi...
  • Page 19: Climate Control

    4.15 Climate control If only one child is being carried, the child must be placed in the centre of the seat. Strap the child in as follows: The two-in-one weather cover Fasten one of the shoulder harnesses to the middle two All models are equipped with the Chariot two-in-one weather vertical straps buckles on the backrest.
  • Page 20 The two-in-one weather cover is attached to the bottom of the For better ventilation during high temperatures, the rear fl ap can front of the passenger compartment with two buckles. be opened, rolled up and secured in place by two elastic loops. There is an insect mesh located under the rear fl...
  • Page 21: Adjusting The Suspension (Corsaire Xl Only)

    4.17 Parking brake (Corsaire XL only) Front side air vent For additional ventilation of the interior, the carriers are equipped with a side air vent to the front of each side window. It Installing the parking brake can be opened either fully or partly from the inside by means of a fabric fl...
  • Page 22 Screw the two self-locking nuts onto the two side bolts. Screw To apply the brake, the operating lever must be moved them on so that the end of the bolt protrudes through the nut, completely to the left. Once you have moved it past the but not so tight that the brake cannot move.
  • Page 23: Parts Lists And Exploded Views

    5. Parts lists and exploded views Parts List Cabriolet Part # Part Quantity 40100105 Upper Frame - Left 40100106 Upper Frame – Right 41100205 Lower Frame 40100403 Back Frame 40100723/4 Back Tube 40100601 Seat Frame 41100453 U-Frame 40101109 Hitch Arm & Securing Pin Strap 50103033/4 Axle Mounted Hitch &...
  • Page 24 Parts List Corsaire XL Part # Part Quantity 40100109 Upper Frame - Left 40100110 Upper Frame – Right 41100206 Lower Frame 40100405 Back Frame 40100723/4 Back Tube 40100601 Seat Frame 41100453 U-Frame 41101105 Hitch Arm & Securing Pin Strap 50103033/4 Axle Mounted Hitch &...
  • Page 25: Accessories

    6. Accessories Fabric Axle-Mount ez-Hitch for additional bike Check the fabric regularly for signs of damage (e.g. tears). Baby Bivy Contact your authorized Chariot retailer immediately if you fi nd Baby Supporter a tear in the fabric. The fabric can be repaired or replaced. Bunting Bag Classic Cargo Kit Hydration Kit...
  • Page 26: Specifi Cations

    8. Specifi cations Maintenance and care of bicycle trailers and jogging strollers: L x W x H, without hitcharm, Irrespective of Cabriolet (39˝ x 32˝ x 36˝) 100 x 82 x 92 cm • Type of use L x W x H, without hitcharm, •...
  • Page 28: Warranty

    10. Warranty...

This manual is also suitable for:

CabrioletCorsaire xl

Table of Contents