
Summary of Contents for Seiki SC-7300AUEO
- Page 1 ELECTRIC OVEN SC-7300AUEO INSTRUCTION MANUAL Please read this manual carefully before using, and keep it for future reference.
-
Page 3: Table Of Contents
CONTENTS General Safety Product Overview Installation Getting Started Other Useful Information Cooking Guidelines FAQs Specifications Customer Helpline... -
Page 4: General Safety
GENERAL SAFETY IMPORTANT INFORMATION Read this manual thoroughly before you start using the Electric Oven. The safety precautions instructions reduces the risk of fire, electric shock and injury when cor- rectly complied to. Please follow all instructions and take notice of all warnings. Pay close attention to messages that follow this safety alert symbol or the words DANGER, WARNING... - Page 5 GENERAL SAFETY INSTRUCTIONS (Cont.) WARNING! THE INSTALLATION OF THIS PRODUCT CAN ONLY EVER BE INSTALLED BY A LICENCED ELECTRICIAN. DO NOT IN ANY WAY TRY TO INSTALL THIS PRODUCT YOURSELF. To reduce risk of fire, electric shock or injury, always follow these basic precautions and accident prevention measures when using this appliance, including the below: NOTE: This appliance should be installed by an authorised electrician else warranty will be void.
- Page 6 GENERAL SAFETY INSTRUCTIONS (Cont.) USAGE CONDITIONS AND RESTRICTIONS • Supervision over children is to ensure that they do not play with the appliance. Never allow them to use, play with or crawl inside the appliance. Cleaning and maintenance must not be done by children. •...
- Page 7 GENERAL SAFETY INSTRUCTIONS (Cont.) OVEN SAFETY • Oven door must stay closed when using the grill function • While cooking, dont place pans or cookware on the base of your oven. Make sure to always place items on shelves provided. •...
-
Page 8: Product Overview
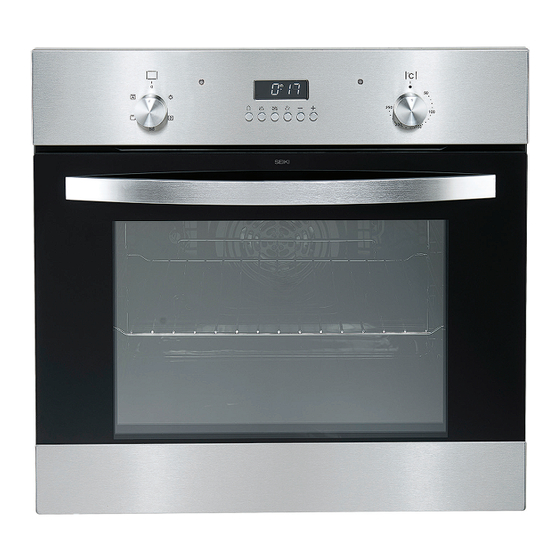
PRODUCT OVERVIEW Control Panel Handle Wire Shelf Fan Motor (behind steel place) Tray Lamp Door Grill Heating Element ACCESSORIES Baking Tray Oven Shelf OVEN PROGRAMMER/TIMER DISPLAY 10 - Auto Function Symbol 11 - Minute Minder Symbol 12 - Manual Operation Symbol... - Page 9 PRODUCT OVERVIEW (Cont.) CONTROL PANEL 3 4 5 6 7 8 1. Oven Function Selector 6. Manual Operation Button 2. Thermostat Control Knob 7. Minus Button 3. Minute Minder Button 8. Plus Button 4. Duration Button 9. LED Display 5. End Cook Button FUNCTION SELECTOR There are 5 options when deciding what to use: GRILL WITH FAN...
- Page 10 PRODUCT OVERVIEW (Cont.) TEMPERATURE SELECTOR Turn the temperature regulator knob clockwise to set the required temperature. The oven function must be set alongside temperature selection.
-
Page 11: Installation
INSTALLATION Before installing your appliance, read all safety instructions in this manual, especially the sections on electrical safety and installation. UNPACKING • When unpacking the appliance, be sure to keep all the packaging materials until you have made sure your new appliance is undamaged and in good working order. - Page 12 INSTALLATION (Cont.) IMPORTANT INSTALLAER ADVICE • Before connecting oven, make sure supply voltage corresponds with your mains supply voltage. WARNING!: This appliance must be earthed. INSTALLATION 1 Slide the oven through the cabinet aperture, align and secure. 2 Fix your oven with the 2 screws and washers as indicated in the figure to the right.
- Page 13 INSTALLATION (Cont.) ELECTRICAL CONNECTION • Before connecting oven, make sure supply voltage corresponds with your mains supply voltage. WARNING!: This appliance must be earthed. • This appliance comes pre-terminated with supply cord and plug. Below connection information is for reference only. •...
- Page 14 INSTALLATION (Cont.) CONNECTION DIAGRAM CAUTION! VOLTAGE OF HEATING ELEMENTS 220V~240V. For 220V-240V Earth one phase connect on: (brown wire) connect to L and (blue wire) connect to N, Safety wire (yellow green) connect to Connect the wires as indicated in the image to the right, using the brass links provided where necessary.
-
Page 15: Getting Started
GETTING STARTED BEFORE FIRST TIME USE • The best way is to make sure you are familiar with everything about the oven first before using this. Pay attention to everything in this manual in particular the safety instructions and cautions. •... - Page 16 GETTING STARTED (Cont.) Manual Operation Symbol Minute Minder Symbol Auto Function Symbol SELECTING MANUAL OPERATION MODE When your appliance is connected to your mains supply for the first time, the numbers on the timer display will flash. Before you can select a cooking function or set a temperature, you must set the appliance into “Manual Operation Mode”.
- Page 17 GETTING STARTED (Cont.) Manual Operation Symbol Minute Minder Symbol Auto Function Symbol SETTINGS THE DURATION FUNCTION This function will allow you to set a countdown time similar to the minute minder function. However, the oven will no longer continue to heat, once the countdown period has elapsed.
- Page 18 GETTING STARTED (Cont.) SETTING THE START AND END TIME FUNCTION This function will allow you to set a time in the future that the oven switches on at and a time that the oven will switch off at. • Use the thermostat control knob to set the temerature that you require. The manual operation will appear on the display.
- Page 19 GETTING STARTED (Cont.) BEFORE USING THE OVEN FOR THE FIRST TIME To remove the new cooker smell, heat up the oven when it is empty and closed. An hour of Top/Bottom heating at 240˚C is ideal for this purpose. Ensure that no packaging rem- nants have been left in the cooking compartment.
-
Page 20: Other Useful Information
OTHER USEFUL INFORMATION CLEANING AND MAINTENANCE CAUTION! • Before cleaning any part of the oven, be sure to have all controls are switched off and the oven has called down sufficiently. • Never use a steam cleaner to clean any part of the oven. •... - Page 21 OTHER USEFUL INFORMATION (Cont.) REPLACING THE LIGHT BULB WARNING! The oven must be disconnected from your mains supply before you attempt to either remove or replace the oven bulb to avoid the possibility of electric shock. • Remove all oven shelves, the drip tray and the side rack that is on the same side as the oven light.
- Page 22 OTHER USEFUL INFORMATION (Cont.) REMOVING OVEN DOOR 1. Open the door completely. 2. Lift up both latches at bottom of the door. 3. Slowly and gently close the oven door until you hear a sound of engagement, with both hand push and pull up at the same time so that the hinge bolt on the oven door removes from the oven.
- Page 23 OTHER USEFUL INFORMATION (Cont.) REMOVE THE INNER GLASS PANEL A. Press and old the two side of the grid with both hands to pull it out. B. Remove the inner glass C. Locate the glass stopper and remove it. Remove the glass for cleaning. To re-install the inner glass, gently place it back onto the door and re-insert the glass stopped to secure the glass in place.
-
Page 24: Cooking Guidelines
COOKING GUIDELINES USING THE OVEN • Before cooking, check that any accessories that are not required... -
Page 25: Faqs
FAQS If experiencing issues with your oven and isn’t operating correctly please check the following pages for solutions to the problems. If none of the solutions offered help solve the problem with your appliance then please contact our call centre on 1300 296 699. DO NOT ATTEMPT TO REPAIR THE APPLIANCE YOURSELF. -
Page 26: Specifications
SPECIFICATIONS Power Supply 220-240V~ 50/60Hz Total Power Consumption 1.8kW Cable/Section H05VV-F - 3 x 1.5mm2 Cable Length 1.5m Unit Dimensions 595 (w) x 530 (d) x 595 (h) mm Cutout Dimensions 560 (w) x 560 (d) x 600 (h) mm (Back of Oven) Energy Class Oven Lamp... -
Page 28: Customer Helpline
CUSTOMER HELPLINE: 1300 296 699 DISTRIBUTED BY: Ayonz Pty Ltd...
Need help?
Do you have a question about the SC-7300AUEO and is the answer not in the manual?
Questions and answers