Advertisement
Quick Links
Advertisement

Summary of Contents for CamOne CarCamOne V2
- Page 1 Manual Vers. 5.2...
- Page 2 On/Car-use Schalter On/Car use Switch Interruttore On/Car use On/Car use-interrupteur 1. Interruptor On/Car use Auslöser Shutter button Tasto Impostazione Bouton de 2.Botón de selección de modo Menüwahltaste Mode Button Tasto Mode déclenchement 3. Disparador 2-Digit LCD Display 2-Digit LCD display LCD Display Sélection du mode 4.
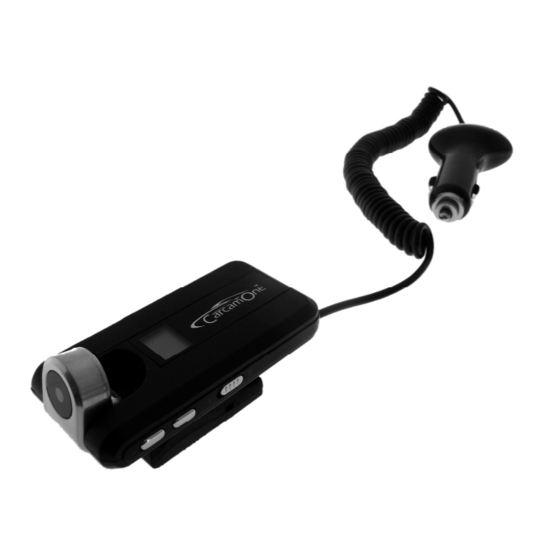
- Page 3 Inhalt Kamera Klettpad Fixierband 12V/24V Adapter mit SpiralKabel und Kamerasockel USB-Kabel ACHTUNG! Extrem hohe Beschleunigungskräfte können die Aufzeichnung beschädigen. BEACHTEN SIE: Die Privatsphäre anderer ist auch gesetzlich geschützt und sollte tabu sein. Das Aufzeichnen Dritter kann eine strafbare Handlung sein. Sie sind für Ihr Handeln verantwortlich.
- Page 4 Aufnahme drehen: Mittleren Taster gedrückt halten, bis die Ziffern der LCD-Anzeige gedreht angezeigt werden. Nun ist auch die Aufnahme um 180° gedreht. Zeitstempel: oberen Taster „M“ gedrückt halten. Im Display erscheint „- -„ für abgeschalteten Zeitstempel, „ | |“ erscheint für eingeschalteten Zeitstempel.
- Page 5 Verbindung zum PC Wählen Sie den Mode „PC“ zum auslesen der Daten oder „WC“ für den WebCam-Betrieb aus, bevor Sie die Kamera am Computer anschließen! Sobald die Kamera verbunden ist, ist das Menü nicht mehr ansteuerbar! Auslesen der Daten Wählen Sie den Menüpunkt „ “...
- Page 6 Zeitstempel [| | / - -] Die CarCamOne V2 verfügt über einen Zeitstempel der in die Aufnahme integriert werden kann. Durch drücken der Menütaste (3) für 10 Sekunden wird im Display der eingeschaltete Zeitstempel kurz mit „| |“, der ausgeschaltete Zeitstempel mit „- -“ angezeigt. Datum und Uhrzeit müssen zuvor synchronisiert werden.
-
Page 7: Fehlersuche
Eingeschränkte Gewährleistung des Akkus. Die enthaltenen LiPo-Akkus unterliegen der Kapazitätsreduktion mit jedem Lade-/Entlade-Zyklus und zählen als Verschleißteil. Insbesondere unsachgemäßer Gebrauch, Lagerung und Behandlung sowie die Abnutzung und der Verbrauch werden nicht von der Garantie abgedeckt. Der Akku ist mit einem sog. LiPo-Saver ausgestattet, der den Akku für einen gewissen Zeitraum vor Tiefentladung schützt. Schalten Sie die Kamera IMMER aus, wenn sie nicht benötigt wird, und Laden Sie die Kamera, wenn Sie sie für längere Zeit nicht benötigen. - Page 8 Content Camera Velcro-pad Eyelet band USB-Cable 12V/24V Cigarette Plug Adaptor with Baseplate ATTENTION! Through a collision at a high speed, the record can be deleted. ATTENTION! The privacy of others is protected by law and should be taboo. The recording of third party can be a illegal act. You are responsible for your acting.
- Page 9 Default Settings: Auto-Start in CC Mode, 180° turned recording to mount onto the dash board of the car, Timestamp activated 180° turn: Press the center button until the letters in the LCD-display turn 180°. This turns the recording as well. Timestamp: Press the „M“-button.
- Page 10 Charge the CarCamOne The charging starts on its own by connecting the CarCamOne with the PC or when installed inside the car. It will take approximately 3 hours to charge the CarCamOne. When connected to the PC the display will indicate the modes “ ”...
- Page 11 Time stamp [ | | / - -] The CarCamOne V2 has an integrated calendar now. This will allow to add the time and date into the recorded video. Press the menu button (3) for 10 seconds. Indicated by “ | | “ it will enable the date and time. Press again, indicated by ” - - “, it will be disabled.
-
Page 12: Troubleshooting
Trouble Shooting please note, the camera will record when the engine runs only. Key position “Ignition” will not start the camera. Error Cause Solution Display does not show anything, Green Bad contact between base plate and camera Clean the contacts with blue rubber, check the adaptor LED is blinking. - Page 13 Contenu du coffret Caméra Adhésif Velcro Cordelette Cordon USB 12V/24V Cordon allume cigare avec platine de montage ATTENTION! Suite à une forte collision l’enregistrement pourrait être effacé. ATTENTION! Le respect de la vie privée est un droit. L’enregistrement d’un tiers est soumis à réglementation, vous êtes seul responsable de vos agissements.
- Page 14 Montage de la CarCamOne sur la platine de montage Fixez la platine de montage (sur votre tableau de bord par exemple) et faites glisser sur celle-ci la caméra comme illustré ci avant. Conservez l’interrupteur de la caméra sur la position “CAR”! Assurez-vous que la caméra est correctement positionnée.
-
Page 15: Les Différents Modes
Autres utilisations possibles La batterie présente dans la caméra a une autonomie de 30 minutes. La batterie optionnelle « eXtreme BatteryPack » permet d’allonger l’autonomie jusqu’à 3,5h. De plus, la fixation frontale “Sportster HeadSet” permet l’utilisation de la caméra dans différentes activités sportives. Il en est de même pour le caisson étanche "DiveBox"... - Page 16 Horodatage [ | | / - -] La CarCamOne V2 est équipée d’un système d’horodatage. Il est alors possible d’ajouter dans les séquences vidéo les informations relatives à la date et l’heure. Pour cela appuyez sur le bouton (3) pendant dix seconds : signifie „- -„ l’horodatage désactivé et „| |“ l’horodatage activé.
- Page 17 Vous trouverez également le manuel d'utilisation ainsi que les renseignements d'installation relatifs à ces mises à jour. Limite de garantie des batteries: Il est à noter que chaque cycle de charge et de décharge réduit à la longue la durée de vie de la batterie, ceci fait partie de l'usure naturelle du produit et ne peut en aucun cas faire l'objet d'un rappel en garantie.
- Page 18 Contenido en el kit Camara Adhésivo Velcro Cordon USB 12V/24V Cordon encendedor con base de montaje ¡CUIDAO! La utilización de la cámara en automóviles para observar y reconstruir accidentes no está cubierta por la garantía. Un choque a alta velocidad puede llegar a la perdida de los datos que se hallan sobre la tarjeta. ¡¡CUIDAO! La ley protege la intimidad de las personas;...
- Page 19 Fijación de la CarCamOne sobre la base de montaje Fijar la base de montaje en su coche y pues añadir la cámara como ilustrado antes. ¡Conservar el interruptor de la cámara en posición “CAR”! Asegúrese que la cámara esta correctamente ubicado. En el caso de una mala polaridad la cámara podrá ser deteriorada. Arreglar de origen: Puesta en marcha Auto en modo CC, grabación hacia 180°...
- Page 20 Otras utilizaciones posibles La batería de la cámara tiene una autonomía de 30 minutos. Una batería adicional « eXtreme BatteryPack » permite añadir autonomía alrededor de 3,5h horas más. Además, la fijación frontal “Sportster HeadSet” también ofrece otras utilizaciones en el ámbito deportivo. Misma causa con la caja estanca "DiveBox"...
- Page 21 Fotografías en modo continuo [ La cámara tomará fotografías a intervalos de 4 segundos. La toma de fotografías se detendrá cuando se presione el botón del obturador o cuando la tarjeta SD esté llena. Vídeo de vigilancia [ EL modo soplón permite realizar grabaciones escondidas. La grabación va a ser activada hasta que algo o alguien se encuentra delante de la cámara.
- Page 22 Garantía limitada de la Batería La capacidad de la batería Li-po se ve reducida en cada ciclo de carga y descarga y esto forma parte de su naturaleza. Además, una mal utilización de la cámara como intentar repararla, abrirla o modificarla no podrán ser casos de garantía. La batería puede ser cambiada fácilmente gracias a la pieza de recambio cuya referencia es la siguiente: Art.No.: FC2006 220mAh Bateria LiPo Disposiciones relativas a los desechos Este símbolo que se ubica sobre la caja de esté...
- Page 23 Soddisfare dell'imballaggio Fotografica Velcro Accio Piastra di base Braccio + vite servi Cavo del USB ATTENZIONE! L'applicazione in auto per riprese e ricostruzione di incidente non è coperto da garanzia. Attraverso una collisione ad alta velocità la registrazione si puà cancellare. ATTENZIONE! La Privacy altrui è...
- Page 24 Spy Video [ La modalità Spy-Video consente l'osservazione agevole delle camere. La memorizzazione viene attivata ogni qualvolta sorgenti di calore si muovono nel campo di visuale della telecamera. Quando la scheda Sd è piena, la memorizzazione viene interrotta. SPY-Video continuo [ La registrazione avviene come già...
- Page 25 Technische Daten Technical Data Dati Tecnici Caractéristiques Datos técnicos techinques Größe: 40x80x14 mm Size: 40x80x14 mm Dimensione: 40x80x14 mm Taille: 40x80x14 mm Dimensiones: 40x80x14mm Gewicht: 37 g Weight: 37 g Peso: 37 g Poids: 37 g Peso: 37gr Auflösung Resolution Risoluzione Résolution Resolución...
- Page 26 CE – Declaration Herewith we declare that this item is in accordance with the essential requirements and other relevant regulations of the directive 2004/108/EC. A copy of the original declaration of conformity can be obtained at the following address. Hiermit erklären wir das dieses Modell den grundlegenden Anforderungen und den anderen relevanten Vorschriften der Richtlinie 2004/108/EG entspricht. Eine Kopie der Konformitätserklärung kann unter der nachfolgenden Adresse angefordert werden.
Need help?
Do you have a question about the CarCamOne V2 and is the answer not in the manual?
Questions and answers