Delta 989-DST Series Manual
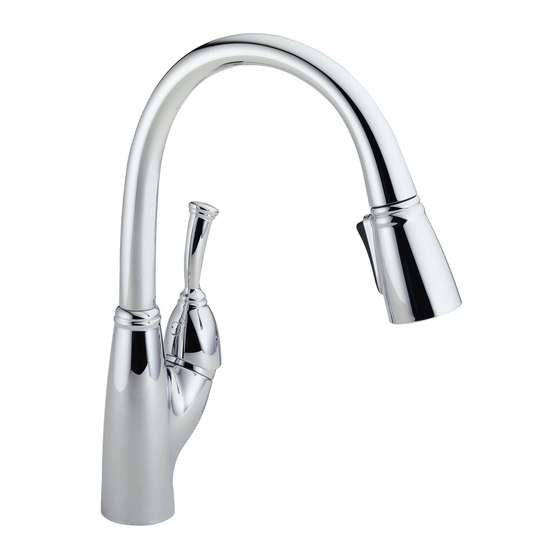
High-rise pull-down kitchen and bar / prep faucets
Hide thumbs
Also See for 989-DST Series:
- Quick start manual (32 pages) ,
- Installation manual (16 pages) ,
- Manual (16 pages)
Table of Contents
Advertisement
Quick Links
Models/Modelos/Modèles
989-DST, 999-DST, 4153-DST,
16968-DST & 19950-DST
Series/Series/Seria
Write purchased model number here.
Escriba aquí el número del modelo comprado.
Inscrivez le numéro de modèle ici.
WARNING: this faucet is not to be used with portable dishwashers!
ADVERTENCIA: ¡sesta llave no se debe utilizar con maquinas lavaplatos portatiles!
AVERTISSEMENT: on ne doit pas brancher un lave-vaissele portatif sur ce robinet!
For easy installation of your Delta faucet you will need:
• To READ ALL the instructions completely before beginning.
• To READ ALL warnings, care, and maintenance information.
Backflow Protection System
Your Delta Faucet pull-out spout incorporates a backflow protection
system that has been tested to be in compliance with ASME A112.18.3
and ASME A112.18.1 / CSA B125.1. It incorporates two certified check
valves in series, which operate independently and are integral,
non-serviceable parts of the wand assembly.
Para instalación fácil de su llave Delta usted necesitará:
• LEER TODAS las instrucciones completamente antes de empezar.
• LEER TODOS los avisos, cuidados, e información de mantenimiento.
Sistema de protección contra el contraflujo
Su llave de agua tipo deslizable Delta tiene un sistema de protección
contra el contraflujo, incorporado, que ha sido probado para cumplir con
los requisitos de ASME A112.18.3 y ASME A112.18.1 / CSA B125.1. Este
incorpora en la pieza de mano dos válvulas de retención o checadoras
certificadas en una serie, las cuales operan independientemente y son
piezas integrantes que no requieren servicio.
Pour installer votre robinet Delta facilement, vous devez:
• LIRE TOUTES les instructions avant de débuter;
• LIRE TOUS les avertissements ainsi que toutes les instructions
de nettoyage et d'entretien.
Dispositif anti-siphonnage
Le bec rétractable de votre robinet Delta comporte un dispositif
anti-siphonnage qui a été éprouvé et qui est conforme aux normes
ASME A112.18.3 et ASME A112.18.1 / CSA B125.1. Ce dispositif se
compose de deux clapets indépendants homologués, montés en série
dans le tube rigide, qui sont non réparables.
www.deltafaucet.com
HIGH-RISE PULL-DOWN KITCHEN AND
63235
BAR / PREP FAUCETS
LLAVES DE AGUA CUELLO DE GANSO,
DESLIZABLES, PARA COCINAS Y BARES / PREP
ROBINET À COL DE CYGNE ET BEC-DOUCHETTE
POUR ÉVIER DE BAR OU D'ÎLOT DE CUISINE
1
You may need
Usted puede necesitar
Articles dont vous pouvez avoir besoin:
T E FLO N
1/8"
08/24/2017
Rev. H
Advertisement
Table of Contents

Related Manuals for Delta 989-DST Series


Summary of Contents for Delta 989-DST Series
- Page 1 • LEER TODOS los avisos, cuidados, e información de mantenimiento. Sistema de protección contra el contraflujo Su llave de agua tipo deslizable Delta tiene un sistema de protección contra el contraflujo, incorporado, que ha sido probado para cumplir con los requisitos de ASME A112.18.3 y ASME A112.18.1 / CSA B125.1. Este incorpora en la pieza de mano dos válvulas de retención o checadoras...
- Page 2 Delta ® Esta es la garantía exclusiva por escrito de Delta Faucet Company y la garantía no es transfer- ible. Delta Faucet Company no será responsable por cualquier daño a la llave de agua que resulte del mal uso, abuso, negligencia o mala instalación o mantenimiento o reparación incorrecta, incluy-...
-
Page 3: Maintenance
Maintenance If faucet exhibits very low flow If leak persists–SHUT OFF WATER SUPPLIES. Note: A small amount of water may run out the A. Remove and clean aerator (1) (Note: some models Replace valve cartridge (7). When reinstalling parts, spout or drip for a very short period after the faucet require wrench (2) to remove aerator.), or make sure bonnet nut (6) is tightened securely with is shut off. - Page 4 Modèles Models / Modelos / RP60923 989-DST & 999-DST Friction Spacers & Clip RP47271p Aro para el Surtidor & Set Screw & Button RP80977 Arandela de Fricción Tornillo de Presión y Botón Wand Retainer & Vis de calage et bouton Replacement Kit Anneau du bec &...
- Page 5 Modèles Models / Modelos / RP62776p Set Screw & Button 4153-DST Tornillo de Presión y Botón Vis de calage et bouton RP62774p Spout Assembly Ensamble del Tubo de Salida RP62775p Lever Handle Manijas de Palanca Manette RP62773p Sprayer Assembly RP51502p Ensamble de rociador Pulvérisateur Casquete...
- Page 6 Modèles Models / Modelos / RP61368p RP60923 Set Screw & Button 16968-DST Friction Spacers Tornillo de Presión y Botón & Clip RP80977 Vis de calage et Bouton Wand Retainer & Aro para el Surtidor & Replacement Kit Arandela de Fricción Soporte para el mango y Anneau du bec &...
- Page 7 Modèle Model / Modelo / 19950-DST RP53879p Button Botón RP90248 RP93644p Bouton Aerator & Wrench ShieldSpray Assembly Aereador y Llave (includes aerator) RP60937p Aérateur et Clé Ensamble de ShieldSpray Lever Handle (incluye el aireador) Manijas de Palanca RP54233 Ensemble ShieldSpray Manette Set Screw (inclut aérateur)
-
Page 8: All Models
989-DST & 999-DST 16968-DST RP37490 RP37490 (Not Included (Not Included In All Models) In All Models) All Models Models 16968-DST Note: To improve stability on thin gage metal sinks, RP37490 thin deck aid (see illustration above) is available free of charge by calling 1-800- Place gasket (1) into groove on bottom of base ring (2). - Page 9 19950-DST / 4153-DST Optional / Opcional / Facultative RP37490 (Not Included In All Models) RP37490 (Not Included In All Models) Optional Escutcheon Installation For installations using the 10" escutcheon (Not included with all Model 19950-DST / 4153-DST models - To order see replacement parts page for your model), Place gasket (1) into groove on bottom of base ring (2).
-
Page 10: Hose Installation
Insert hose through spout tip only. Inserte la manguera solo a través de la punta del surtidor. Introduisez le tuyau souple dans l’extrémité du bec seulement. Hose Installation Screw the threaded fitting of hose (1) into spray head (2) to prevent Feed hose assembly (1) through spout (4) and hub (5). -
Page 11: Instalación De La Manguera
Hose Installation Slide hose weight (1) over end of hose (2). Push hose end (1) onto faucet outlet (2). Attach clip (3) over hose and outlet as shown. Pull down moderately to ensure connection has been made. Instalación De la Manguera Deje pasar el extremo de la manguera (1) por la salida de la llave de agua / grifo (2). - Page 12 Loop tubing (2) if it created. Delta is not responsible for tubing that is cut ● Tubing is cut too short: buy a coupling union and a is too long.
- Page 13 Correct method Incorrect Installation Instalación Incorrecta Método Correcto Installation Incorrecte Bonne méthode Do not install sleeve Ensure cut is straight. upside down. Custom Fit Connections - Plastic Sleeve Installation Instructions 1. Identify desired length of tube (1). Leave 1" - 2" of extra length to allow for easier No instale la manga Asegúrese que el corte installation and cut tube.
- Page 14 For Models with Soap Dispenser Turn on hot and cold water supplies (1). Pull Sprayer will lock into position when brought into Remove the bottle (1). Separate head (2) from body the hose assembly (2) out of the spout and proximity of the spout magnet.
- Page 15 Setting The Handle Limit Stop (Optional) because it limits the amount of hot water in the mix; however, this handle limit stop This faucet includes an integrated handle limit stop that has two positions. Position 1, to the left, allows full handle motion (the full range between “all cold” to “all hot”). will not always prevent scalding because it does not compensate for incoming pressure or sudden water temperature changes.
- Page 16 63235 Rev. H...
Need help?
Do you have a question about the 989-DST Series and is the answer not in the manual?
Questions and answers