Advertisement
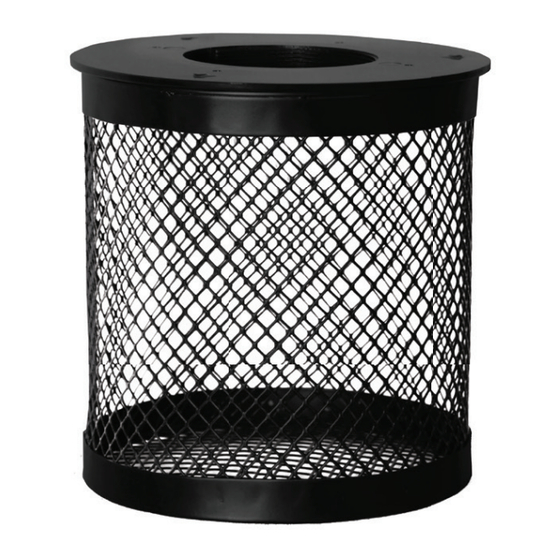
Heat Lamp Cage
1
CAUTION:
WHEN CHANGING THE HEAT LAMP BE SURE TO LET THE LAMP CAGE
AND BULB COOL DOWN BEFORE HANDLING.
For Reptile One
Brand Enclosures
and Terrariums
Ceramic Socket not included
- Sold Separately
Diagram A
Complete Cable Entry Dial Assembly - Supplied
with the Enclosure
Locking ring
Cable Dial ring
Diagram C
2
Included:
1 x Cage frame
1 x Cage frame lid
3
1 x C-Ring
4 x Screws
1 x Instruction
4
Manual
1. Unscrew the end cap on the ceramic socket.
2. Then carefully unscrew the ceramic socket around 5 mm
opening (2 Turns).
3. Place the C-Ring around the bottom of the screw thread, then
tighten the ceramic socket and end cap.
4. Remove the complete cable entry dial assembly on your Reptile
One Enclosure. The locking ring and Cable Dial are not required
for this assembly. (Diagram A)
5. Assemble and attach the ceramic socket to the enclosure as
shown in Diagrams B & C.
Diagram B
Cage Frame Lid
Cable Dial
Thread the plug back through the Cable Dial Ring to screw the
dail ring to the cage frame lid.
6. (Optional) For a more secure hold we recommend also using
the screws provided to secure the cage frame to the enclosure
when caging strong animals such as pythons.
7. Screw bulb into the ceramic holder.
8. Replace the Mesh cage frame by slotting in the locking
prongs and twisting counter-clockwise. (Refer to Diagram C)
1
2
3
4
Ceramic Socket
-Sold Seperately
Next Best Thing to Nature!
C-Ring
Locking Prongs
Cable Dial
ring
(supplied with
enclosure)
Lid Mesh
Advertisement
Table of Contents

Summary of Contents for Reptile One Heat Lamp Cage
- Page 1 Heat Lamp Cage Next Best Thing to Nature! Included: 1 x Cage frame 1 x Cage frame lid 1 x C-Ring 4 x Screws 1 x Instruction Manual CAUTION: WHEN CHANGING THE HEAT LAMP BE SURE TO LET THE LAMP CAGE AND BULB COOL DOWN BEFORE HANDLING.
- Page 2 For NON Reptile One Brand Enclosures and Terrariums 1. Unscrew the end cap on the ceramic socket. 2. Then carefully unscrew the ceramic socket around 5 mm opening (2 Turns). 3. Place the C-Ring around the bottom of the screw Ceramic socket not included thread, then tighten the ceramic socket and end cap.
Need help?
Do you have a question about the Heat Lamp Cage and is the answer not in the manual?
Questions and answers
How do I attach through side , not mesh top
To attach the Reptile One Heat Lamp Cage through the side instead of the mesh top, follow these steps:
1. Make a hole approximately 70mm in diameter in the side panel of your wooden or mesh enclosure.
2. Insert the ceramic socket (sold separately) through the hole and secure it with the end cap.
3. Attach the ceramic socket to the cage frame using the C-ring as shown in the diagram (not provided here).
4. Screw the bulb into the ceramic socket.
5. Replace the mesh cage frame by slotting in the locking prongs and twisting it counter-clockwise.
6. Secure the cage frame lid to the enclosure using the provided screws.
This setup allows the cage to be mounted through the side panel instead of the top mesh.
This answer is automatically generated