Table of Contents
Advertisement
Quick Links
Advertisement
Table of Contents

Related Manuals for DirectOut Technologies M.1K2


Summary of Contents for DirectOut Technologies M.1K2
- Page 1 M.1K2 Hardware Guide Version 1.3...
- Page 2 DirectOut GmbH cannot be held responsible for any misleading or incorrect information provided throughout this manual. DirectOut GmbH reserves the right to change specifications at any time without notice. DirectOut Technologies® is a registered trademark of the DirectOut GmbH. © DirectOut GmbH, 2016 page 2 of 44...
-
Page 3: Table Of Contents
Troubleshooting ................... 23 Maintenance ....................23 CHAPTER 6: Technical Data Appendix A - Emergency recovery Appendix B - DSUB-9 Pin assignments RS-232 ......................27 RS-4xx ......................27 GPO ......................27 M.1k2 Hardware Guide - Version 1.3 page 3 of 44... - Page 4 Appendix C - Installing / Replacing I/O modules Modules ...................... 29 Appendix D - How to - Network Appendix E - Firmware Update Instruction Appendix F - USB Serial Driver Installation Index page 4 of 44 M.1k2 Hardware Guide - Version 1.3...
-
Page 5: About This Document
About This Document How to Use This Document This document guides you through the installation and operation of the M.1K2. For information about the graphical user interface (GUI) please consult the offline help available from our website or use the online help within the gui. -
Page 6: Chapter 1: Overview Introduction
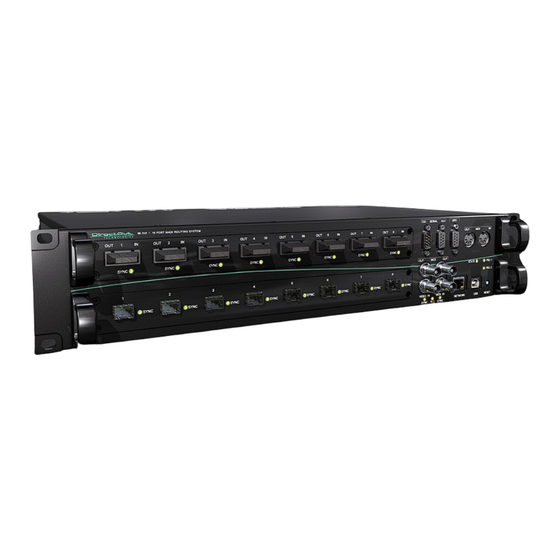
CHAPTER 1: Overview Introduction The M.1K2 is a 16 port MADI Routing System. It provides routing of whole ports down to single channel level offering a 1024 by 1024 crosspoint matrix. You can distribute MADI signals en bloc in a port matrix and you may also create your own MADI stream using the channel matrix. -
Page 7: Feature Summary
(84 V to 264 V AC / 47 Hz to 63 Hz / safety class 1) Applications M.1K2 can be used for distribution and creation of whole MADI streams, routing of single audio channels between MADI streams and independent routing of embedded serial data and MIDI data. -
Page 8: Chapter 2: Legal Issues & Facts
We would like to remind you to please check carefully whether the failure is caused by erroneous configuration, operation or connection before sending parts for repair. page 8 of 44 M.1k2 Hardware Guide - Version 1.3... -
Page 9: First Aid (In Case Of Electric Shock)
Check their pulse and reanimate if their respiration is poor. Lay the body down and turn it to one side. Call for a doctor immediately. • Having sustained an electric shock, Always consult a doctor. M.1k2 Hardware Guide - Version 1.3 page 9 of 44... -
Page 10: Updates
DirectOut website: www.directout.eu. Intended Operation M.1K2 is designed for distribution of MADI signals (AES10) and routing of serial data (RS-232 and RS-422/485) and MIDI data. WARN ING ! No compensation can be claimed for damages caused by operation of this unit other than for the intended use described above. -
Page 11: Conformity & Certificates
09648 Mittweida Germany Only stamped parcels will be accepted! WEEE-Reg.-No. DE 64879540 Contact DirectOut GmbH, Leipziger Str. 32, 09648 Mittweida, Germany Phone: +49 (0)3727 5665-100 // Fax: +49 (0)3727 5665-101 www.directout.eu M.1k2 Hardware Guide - Version 1.3 page 11 of 44... -
Page 12: Contents
• 2 x power chord • 2 x fixing unit for power plug • 1 x Hardware Guide To complete the delivery please download from the M.1K2 product page on the DirectOut website (www.directout.eu): • USB Serial driver • latest firmware Three different types of I/O modules are available: •... -
Page 13: Chapter 3: Installation
Remove the protective cap from the optical MADI port(s) before use. N OT E ! Retain the protective cap if the optical port is unused. This will protect against soiling which can lead to malfunction. M.1k2 Hardware Guide - Version 1.3 page 13 of 44... - Page 14 To check the fi rmware version, open the GUI in a browser and go to ‘Misc - Version - System Information’. NOT E ! For help with the fi rmware update procedure see „Appendix E - Firmware Update Instruction“ on page 32. page 14 of 44 M.1k2 Hardware Guide - Version 1.3...
- Page 15 Use the DirectOut Release Map to match your DirectOut device with the latest firmware or software release. Link: http://www.directout.eu/upload/dokumente/dotec_release_map.pdf TI P ! Keep any packaging in order to protect the device should it need to be dispatched for service. M.1k2 Hardware Guide - Version 1.3 page 15 of 44...
-
Page 16: Network Integration
CHAPTER 3: Installation Network integration To set up your DirectOut M.1K2 initially (or after a reset) you need a working IP connection with the controller of the device. M.1K2 is delivered with a fixed IP address (10.0.0.24). So first you will have to change the network settings of your computer to setup the IP connection. - Page 17 After setup log in and check the firmware version (go to ‘Misc -Version- System Information’). If a newer firmware is available, go to ‘Configuration- Device-Firmware Update’ and perform a firmware update. The latest version of the firmware is available on the M.1K2 product page at www.directout.eu. M.1k2 Hardware Guide - Version 1.3...
-
Page 18: Chapter 4: Operation
Note that an unlit LED does not guarantee that the device is free of voltage. To ensure that the device is completely disconnected from mains voltage, the power chords must be disconnected. page 18 of 44 M.1k2 Hardware Guide - Version 1.3... -
Page 19: Device State & Reset
The behaviour of the led ‘STATE‘ may be confi gured in the GUI. Please consult the offl ine help available from our website or use the online help within the GUI. M.1k2 Hardware Guide - Version 1.3 page 19 of 44... -
Page 20: User Data (Serial, Midi, Gpo)
** The pin assignment is described in „Appendix B - DSUB-9 Pin assignments“ on page 27 The USB port may be used as serial port too - see „Remote Operation“ on page 22. page 20 of 44 M.1k2 Hardware Guide - Version 1.3... -
Page 21: Clocking
CHAPTER 4: Operation Clocking M.1K2 may use a variety of clock sources: • internal (44.1 kHz / 48 kHz) • word clock • video (PAL / NTSC) • a specifi c MADI input port The system may be operated with one clock source only or may use different clock sources at a time (PolySync™). -
Page 22: Remote Operation
To use the USB port as virtual serial port a serial USB driver (for Windows®) has to be installed on the computer fi rst. The driver is available on the M.1K2 product page at www.directout.eu. See „Appendix F - USB Serial Driver Installation“ on page 36. -
Page 23: Chapter 5: Troubleshooting And Maintenance
To clean the device, use a soft, dry cloth. To protect the surface, avoid using cleaning agents. N OT E ! The device should be disconnected from the power supply during the cleaning process. M.1k2 Hardware Guide - Version 1.3 page 23 of 44... -
Page 24: Chapter 6: Technical Data
• Single mode 9/125 µm Sample Rate • 30 kHz - 50 kHz @ 1 FS • 60 kHz - 100 kHz @ 2 FS • 120 kHz - 200 kHz @ 4 FS page 24 of 44 M.1k2 Hardware Guide - Version 1.3... - Page 25 • 1 x USB 2.0 socket (Type B) • may be used as virtual serial port (Windows® only) Cable Specifications • coaxial cable - impedance 75 Ω, screening attenuation better than 85 dB M.1k2 Hardware Guide - Version 1.3 page 25 of 44...
-
Page 26: Appendix A - Emergency Recovery
LED returns to the idle state. NOT E ! This procedure will only reset the IP confi guration. All other device settings (e.g. routing, channel labels, clocking, ...) will remain unchanged. page 26 of 44 M.1k2 Hardware Guide - Version 1.3... -
Page 27: Appendix B - Dsub-9 Pin Assignments
RS-422 RX- RS-422 TX+ / RS-485 RX+ M.1K2 has four GPOs which can be switched manually or triggered by certain events. Ground-free switching is performed by Avago ASSR-1411-S optical MOSFETs, which can switch up to 60 V, 0.6 A AC or DC. - Page 28 Appendix C - Installing / Replacing I/O modules Appendix C - Installing / Replacing I/O modules Three different modules are available to fit in to the two slots of M.1K2. If necessary the modules may be replaced or swapped executing the following steps.
-
Page 29: Modules
Appendix C - Installing / Replacing I/O modules Modules BNC - Module, coaxial SC - Module, optical SFP - Module, empty cages M.1k2 Hardware Guide - Version 1.3 page 29 of 44... -
Page 30: Appendix D - How To - Network
DHCP server. NOT E ! You can use the device‘s MAC address (written on the back panel of the M.1K2) in order to find out the IP address that has been assigned to it by the DHCP server. -
Page 31: Appendix D - How To - Network
So there are 254 different IP addresses available (192.168.74.1 - 192.168.74.254). In a network environment each device (computer, printer, M.1K2…) needs its own and unique IP address. This can be achieved by a manual setup or by using a DHCP server within a network. -
Page 32: Appendix E - Firmware Update Instruction
(Configuration - Backup/Restore in the GUI) before performing the firmware update procedure. Installation Download the update file (‘M.1K2 Firmware’) from the product page at www.directout.eu Open an internet browser (e.g. Chrome, Firefox) and open the GUI of the controller. Go to ‘Configuration - Device’. -
Page 33: Appendix E - Firmware Update Instruction
Appendix E - Firmware Update Instruction M.1k2 Hardware Guide - Version 1.3 page 33 of 44... -
Page 34: Appendix E - Firmware Update Instruction
The network confi guration remains unchanged. After the update you need to log in again. You may check the version of the fi rmware by navigating to ‘Misc - Version’. page 34 of 44 M.1k2 Hardware Guide - Version 1.3... -
Page 35: Appendix E - Firmware Update Instruction
Appendix E - Firmware Update Instruction N OT E ! It is strongly recommended to clear the browser cache after the update to ensure proper browser behaviour at next login. M.1k2 Hardware Guide - Version 1.3 page 35 of 44... -
Page 36: Appendix F - Usb Serial Driver Installation
Installation Unpack the driver fi les into a temp directory. Connect the USB port of M.1K2 to an USB port of your computer. Switch the device on. When connecting the device Windows will try to download driver fi les from the Windows Update server. -
Page 37: Appendix F - Usb Serial Driver Installation
Appendix F - USB Serial Driver Installation Right click on ‘M.1K2’ and select ‘Update Driver Software…’. Browse to the location where you downloaded and unpacked the driver and select the folder. Click’Next’. A security warning will occur. Click ‘Install…’ to continue. -
Page 38: Appendix F - Usb Serial Driver Installation
Appendix F - USB Serial Driver Installation After a successful installation the ‚Device Manager‘ will show a ‚M.1K2 Serial Port‘. The port number is assigned by Windows automatically. Deinstallation To uninstall the driver the device must be connected to the computer. -
Page 39: Index
Intended Operation ........10 Modules ........... 29 Installing/Replacing ......28 Network ........... 30 DHCP ........... 30 DNS ............. 30 Gateway ..........30 IP Adress ..........30 Network Mask ........30 M.1k2 Hardware Guide - Version 1.3 page 39 of 44... - Page 40 Notes page 40 of 44 M.1k2 Hardware Guide - Version 1.3...
- Page 41 Notes M.1k2 Hardware Guide - Version 1.3 page 41 of 44...
- Page 42 Notes page 42 of 44 M.1k2 Hardware Guide - Version 1.3...
- Page 43 Notes M.1k2 Hardware Guide - Version 1.3 page 43 of 44...
- Page 44 DirectOut GmbH Leipziger Strasse 32 T: +49-3727-5665-100 09648 Mittweida F: +49-3727-5665-101 Germany www.directout.eu...
Need help?
Do you have a question about the M.1K2 and is the answer not in the manual?
Questions and answers