Advertisement
Advertisement
Table of Contents

Subscribe to Our Youtube Channel
Summary of Contents for Workwell uAttend CB6000
- Page 1 CB6000/CB6500 Product Manual...
-
Page 2: Table Of Contents
CONTENTS WALL MOUNT INTRODUCTION KEYPAD YOUR uATTEND ACCOUNT MENUS TROUBLESHOOTING DEPARTMENTS EMPLOYEES CHARACTER TABLES RFID CARD REGISTRATION LIMITED WARRANTY TIME CLOCK ACTIVATION SAFETY INFORMATION... -
Page 3: Introduction
INTRODUCTION CREATE YOUR ACCOUNT Setting up your uAttend Time Clock requires an interaction between your Time Clock and Cloud Portal. ADD DEPARTMENTS First we’ll begin in the Cloud, then we’ll finish AND EMPLOYEES with the Time Clock. Once you’ve completed the following 5 easy steps, your employees will be ready to use the RFID CARD time clock. -
Page 4: Your Uattend Account
CREATE YOUR uATTEND ACCOUNT Before you can set up your new uAttend Time Clock, you will need to set up your uAttend Cloud Account. Creating your uAttend Account Open your web browser and visit www.TrackMyTime.com/signup then follow the prompts. QUESTIONS? Call 1-888-287-2144 or Email support@canadiantime.com... - Page 5 Here are some helpful tips to make the setup as smooth as possible. Your Dealer ID will be found on the back of your Quick Start Guide. If the Dealer ID is missing, please contact Customer Support.
- Page 6 When selecting your plan size, keep in mind that your employees are your hourly workforce. Supervisors (not paid hourly) and administrators are not included in this number. Your plan is month-to-month and can be changed at any time. QUESTIONS? Call 1-888-287-2144 or Email support@canadiantime.com...
- Page 7 Your login URL is going to become the “web address” for your company’s uAttend Portal. For example, “The Great Cookie Co” may become trackmytime.com/gr8cookieco trackmytime.com/gr8cookieco...
-
Page 8: Departments
ADD DEPARTMENTS Departments are used to group users together within the uAttend system. You will need to set up at least one department before you add users to your account. Specify other department settings, such as Punch Rounding and Overtime Rules, during the initial setup or you may choose to enter that information later. - Page 9 4. Enter the full Department Name. Specify additional department settings on this screen now, or enter that information later. 5. Select... a. “Save & Add New” to add a new department. b. “Save & Continue” to add more rules and policies. c.
-
Page 10: Employees
ADD EMPLOYEES The number of employees you can add to your account is limited by the plan size you have chosen. Optionally change the size of your plan at any time by selecting your user icon in the upper right corner of your uAttend Portal, then “My Account” from the dropdown menu. - Page 11 3. Assign the user a role, then add their first and last name. Employees are the portion of your workforce that use the time clock to track their time. Supervisors can view and edit time cards, but do not punch in and out of the time clock.
-
Page 12: Rfid Card Registration
RFID CARD REGISTRATION Allow your employees to clock in and out using their assigned RFID card. RFID CARD REGISTRATION 1. Issue a uAttend RFID badge to your employee and make a note of the number. 2. From your Administrator Web Portal, select the Users tab. -
Page 13: Time Clock Activation
ACTIVATE YOUR TIME CLOCK The CB5000 allows you to connect to the Internet via LAN, while the CB5500 allows you to connect via LAN and WiFi. The process of activating your time clock via LAN is the same for the CB5000 and CB5500, so they have been grouped together in this step. - Page 14 3. Confirm that your account information is correct. 4. Select a time zone based on the location of the clock. 5. Press OK when setup is complete. ACTIVATION VIA WIFI 1. Plug your time clock into a power outlet. Your clock should be powered on. 2.
- Page 15 5. Enter your password. See the character table in the back of the manual for assistance. 6. Confirm that your password is correct. 7. Enter your Company ID and press OK. Your Company ID can be found in the upper right corner of your uAttend Web Portal.
-
Page 16: Wall Mount
WALL MOUNT Included with your time clock, you will find a metal back plate, a LAN cord, a power adapter, four drywall anchors, four screws, and a small bracket screw. You will need your own Phillips-head screwdriver. MOUNTING YOUR TIME CLOCK ONTO YOUR WALL Wall 1. - Page 17 Wall side view 5. Attach the power adapter and the LAN line (if applicable). 6. Align the three slots on the back of the clock with the three prongs on the back plate. Push down slightly to ensure the clock is securely fastened.
-
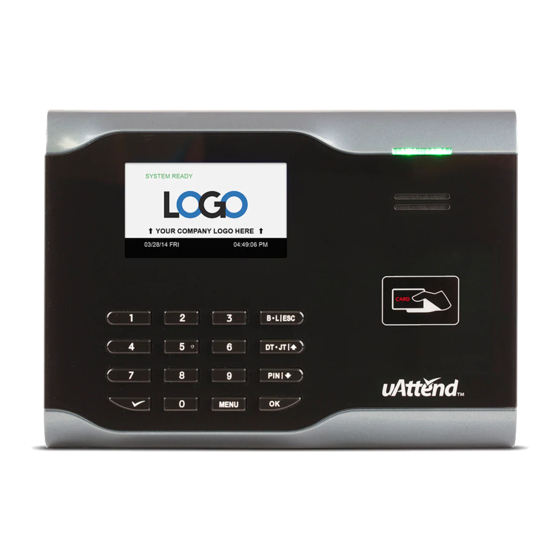
Page 18: Keypad
USING YOUR KEYPAD The table below explains the functionality of each key on the keypad. FUNCTION 1–0 Digits function as numbers for performing functions such as entering a PIN. Pressing the MENU key prompts a login screen for two levels of time clock access: MENU Administrator and Super User. - Page 19 PIN/DOWN Pressing the PIN/Down Arrow key in standby mode allows user to enter their PIN. In all ARROW other modes, this key is used to scroll down. Used to accept key entries. Used to access the uAttend menu (time card and employee service options). NOTE: To make changes to a menu option, press the MENU key, use the up and down keys to make your selection, then press OK.
-
Page 20: Menus
USING YOUR MENUS There are two user types for the CB Series Time Clock: Administrator and Super User. Each user type can access specific menus to perform functions. Administrator Menus The User Management menu offers the following option: • Change Password—used to change the default passwords for the Administrator and Super User. - Page 21 • Sound—used to turn your time clock sounds on and off. • Change Currency Icon—used to change the currency icon on display. The CommSet menu offers the following options: CB6000 and CB6500 models • LAN Settings—displays the DHCP status, current IP address, Subnet Mask, Gateway, DNS addresses, and Netspeed settings for LAN.
- Page 22 • Communicating Interface—allows you to select LAN or WiFi interface. If this option is set to LAN, the WiFi Settings and View WiFi Networks options will not display. If this option is set to WiFi, the LAN Settings option will not display. The System Management menu offers the following options: •...
-
Page 23: Troubleshooting
TROUBLESHOOTING See the following table for help with the error messages that you might encounter with your CB Series Time Clock. ERROR MESSAGE NOTES NET NOT FOUND This message displays if the time clock is not currently plugged into any networking device, or the networking device it is plugged into is turned off or is not functioning correctly. - Page 24 uAttend CONNECTIVITY This message displays if the time clock is unable to communicate with the uAttend ERROR server due to a firewall, content filter, or any other type of network block. INTERNET This message displays if the time clock is unable to communicate out of the local CONNECTIVITY ERROR network onto the Internet.
-
Page 25: Character Tables
CHARACTER TABLES To join a WiFi network (CB6500 model only), you will use the numeric keypad to enter numbers, letters, and symbols for your password. The following tables display the keys you will use to enter each letter or symbol. Switching To Numbers To enter numbers press the ESC key once. - Page 26 LETTER KEYS LETTER KEYS QUESTIONS? Call 1-888-287-2144 or Email support@canadiantime.com...
- Page 27 LETTER KEYS LETTER KEYS...
- Page 28 NOTE: You must press the key to access the symbol mode from alpha mode. SYMBOL KEYS SYMBOL KEYS [spacebar] PIN 8 “ PIN(x2) 0 < PIN(x2) 1 > PIN(x2) 2 PIN(x2) 3 PIN(x2) 4 PIN(x2) 5 PIN(x2) 6 & PIN(x2) 7 PIN 0 PIN(x2) 8...
-
Page 29: Limited Warranty
uATTEND DEVICE LIMITED WARRANTY This Warranty covers all uAttend™ Devices and any Devices which may now or in the future be connected to your uAttend Account. A. Warranty and Warranty Periods. Processing Point, Inc. (“PPoint”) warrants only to the original Purchaser that the Device will be free from defects in material and workmanship for the time during which (i) the original Purchaser subscribes to the uAttend System, and (ii) until such time the Device has been replaced (the “Warranty Period”). - Page 30 D. Limitations. No salesperson, representative, or agent of PPoint is authorized to make any guaranty, warranty, or representation that contradicts the terms contained in this Limited Warranty. Any waiver, alteration, addition, or modification to the warranties contained herein must be in writing and signed by authorized representatives of PPoint to be valid, binding, and enforceable.
- Page 31 3. Failure of the end user or any third party to exercise caution to protect from electrostatic discharge damage and adverse temperature, or physical abuse; or 4. Failure by the end user to follow the Return Appointment Process set forth below. F.
-
Page 32: Safety Information
uATTEND SAFETY INFORMATION IMPORTANT SAFEGUARDS FOR SAFE OPERATION & USE CAUTION/WARNING DANGEROUS VOLTAGE DO NOT CONNECT DAMAGED SUPPLY CORD SAVE THESE INSTRUCTIONS. THIS PRODUCT IS FOR COMMERCIAL USE ONLY. The time clock is an electrical device. In order to reduce the risk of fatal electrical shock and fire, basic safety precautions should be followed, including the following: 1. - Page 33 5. Do not place objects into the time clock. 6. For best operation, plug the time clock into its own electrical outlet. 7. Do not operate the time clock with a damaged cord or plug. 8. If an extension cord is used, the marked electrical rating of the extension cord should be at least as great as the electrical rating of the time clock.
- Page 34 QUESTIONS? Call 1-888-287-2144 or Email support@canadiantime.com...
- Page 36 Questions? Contact us Monday-Friday 8:00am–4:30pm Pacific (excluding Statutory Holidays) Call Email 1-888-CTS-2144 support@canadiantime.com (1-888-287-2144) Designed, Developed, and Supported by Processing Point, Inc. © Processing Point, Inc. All rights reserved. 2777 Loker Avenue Suite A Carlsbad CA 92010 www.ProcessingPoint.com Rev: 03/2018...
Need help?
Do you have a question about the uAttend CB6000 and is the answer not in the manual?
Questions and answers