Table of Contents
Advertisement
Advertisement
Table of Contents
Troubleshooting

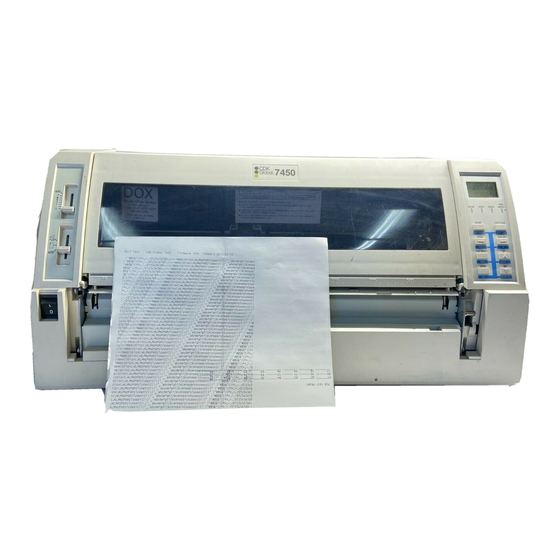
Summary of Contents for CDK Global 7450
- Page 1 CDK 7450 F&I Printer Service Guide B25201 B25201, published September 10, 2015...
- Page 2 Confidential and proprietary information, for internal purposes only. The disclosure or use of the information contained herein to any person who is not an employee of CDK Global, LLC, or its affiliates is expressly prohibited. © 2015 CDK Global, LLC. All rights reserved. The CDK logo is a trademark of CDK Global, LLC.
- Page 3 Trademark Credits: EPSON is a registered trademark of Seiko Epson Corporation. ESC/P-K2 is a registered trademark of Seiko Epson Corporation. IBM is a registered trademark of International Business Machines Corporation. IBM 2391 is a registered trademark of International Business Machines Corp. ...
-
Page 4: Table Of Contents
Table of Contents Safety ............................1 Control Panel ..........................3 Control Panel Key Functions ....................3 Basic Printer Functions ....................... 3 Calibration/Default Reset ....................4 Diagnostic Test Functions ....................5 Printer Alignment Functions ....................5 Alignment/Calibration & Test ...................... 6 HA Print Gap .......................... - Page 5 Printed Circuit Board Assembly replacement .................21 Main Printed Circuit Board Cabling ..................22 Print Head ..........................23 FFC Cable replacement ......................24 Ribbon Guide Assembly replacement ..................25 Carriage Motor Assembly replacement ..................26 Carriage Timing belt replacement ..................27 Platen replacement........................29 Friction Mechanism replacement ...................30 Ribbon Motor Assembly replacement ..................31 HA Motor replacement ......................32 Paper Edge Sensor replacement ...................33...
- Page 6 Home Sensor ........................59 Power Supply PCB ........................60 Power Supply Troubleshooting Flow ..................61 Troubleshooting ........................64 Error messages & Remedies ....................64 Trouble Symptoms ........................66 Specifications ..........................68 Exploded Drawings ........................74...
-
Page 7: Safety
7450 SAFETY This Manual is to help qualified service technicians repair or adjust your 7450 printer. Please read the manual carefully before repairing and making adjustments to your printer. The warranty will not cover any trouble with or damage to the printer resulting from repair or modification by unqualified persons. - Page 8 7450 Operational safety CAUTION Do not touch the print head immediately Do not put your finger on the tractor after printing because it is too hot. gear, when using the rear tractor. Do not put your finger under the tractor cover while loading fanfold paper.
-
Page 9: Control Panel
7450 CONTROL PANEL The liquid crystal display (LCD) on the control panel displays the current printer status, user messages and menu functions. Control Panel Key Functions Basic Printer Functions This key is used to enable printing (ONLINE light ON) or disable printing ONLINE (ONLINE light OFF). -
Page 10: Calibration/Default Reset
7450 Pressing this key temporarily changes the print impact for multipart forms HIGH IMPACT from NORMAL to DARK print mode. The HIGH IMPACT LED light is ON when DARK print mode is selected. Pressing this key feeds the line in the forward direction at a pitch of 1/6 inch regardless of the LF PITCH setting in the printer’s control panel menu. -
Page 11: Diagnostic Test Functions
7450 Diagnostic Test Functions Power-up while pressing ALT + MENU keys together. LCD will display the following: L.EG ~ left paper edge sensor value (sensor is located on head carrier) SENSOR & R.EG ~ right paper edge sensor value (sensor is located on head carrier) GAP MOTOR ... -
Page 12: Alignment/Calibration & Test
7450 ALIGNMENT/CALIBRATION & TEST HA Print Gap Scope: This adjustment is used to set the nominal operating print gap (space between printhead and platen). Performing this procedure is required after an Initialization #3 routine and may be necessary when replacing the printhead, or experiencing light, missing and smearing print. -
Page 13: Ha Gap Adj Up
7450 7. Press the RLF key to increase/adjust “HEAD GAP ADJ DW” value by five Explanation: current down value ~6~ (no “H” print) + 5 = 11, additional settings. the final down setting. 8. Press the TEAR OFF key to enter “HEAD GAP ADJ UP” mode and verify value displayed on LCD. -
Page 14: Multi-Part Print Gap
7450 16. With the printer power turned OFF, press and hold the LF and RLF keys while turning ON the printer power switch. Hold keys until printer initialization (carriage movement) is completed. 17. Press the TEAR OFF key to enter “HEAD GAP ADJ UP” mode. -
Page 15: Horizontal Print Registration
7450 Horizontal Print Registration Scope: This adjustment is used to align adjacent lines of print horizontally. Required materials: Cut-sheet paper, or pin feed paper Procedure: AUTO 1. Select control panel print gap, and Cut Sheet modes. Tractor mode and pin feed paper is optional. -
Page 16: Tear Off
7450 Tear Off (pin feed present distance) Scope: This adjustment is used to align the tractor pin feed paper tear off position. Required materials: Tractor pin feed paper Procedure: 1. Install tractor assembly and continuous pin feed paper. 2. Power ON printer. -
Page 17: Initialization #1
7450 Initialization #1 Scope: This function is used to restore feature USER default settings stored in memory. Procedure: 1. With the printer power turned OFF and no paper loaded, press and hold the HIGH IMPACT and LF keys while turning ON the printer power switch. Hold keys until printer initialization (carriage movement) is completed. -
Page 18: Initialization #2 (Tractor)
7450 Initialization #2 (Tractor) Scope: This function is used to calibrate and set rear tractor media sensor thresholds. Procedure: AUTO 1. Select control panel print gap, and Tractor modes. 2. With the printer power turned OFF and no paper loaded, press and hold the ONLINE and EJECT/LOAD keys while turning ON the printer power switch. - Page 19 7450 5. Refer to the HA AJUST label located inside the printer behind the printhead carrier. The numbers shown on the label represent the HA Print Gap settings made prior to shipment. These settings will be erased from the EEPROM by Initialization #3 routine.
-
Page 20: Diagnostic Test Functions
7450 Diagnostic Test Functions Hexadecimal Dump Function The hexadecimal dump function produces an exact printout of the codes received by the printer. Procedure: 1. To enter the hexadecimal dump mode, depress the SPEED button while turning ON the printer's power. -
Page 21: Interface
7450 INTERFACE USB Specifications USB version: 1.1 Full-Speed The following table provides the standardized contact terminating assignments by number and electrical value for Series “A” and Series “B” connectors. Contact Number Signal Name Color VBUS White Green Black Ethernet Specifications... -
Page 22: Serial Specifications (Db-9)
7450 Serial Specifications (DB-9) Cable Connector: 9-pin (male type) Printer Connector: 9-pin (D-sub connector/female type) Connector Pin Assignments: SIGNAL NAME SIGNAL HEAD EXPLANATION HOST The printer receives data from HOST. PRINTER The printer sends X-ON/X-OFF and data to the HOST. -
Page 23: Firmware Upgrade
PC with Windows OS Printer Update Utility Procedure: 1. Attach 7450 printer via USB cable to a Windows PC or laptop. 2. Install “Printer Update Utility” on the PC. 3. Power on printer. 4. If any Windows hardware wizard pops up, click CANCEL. - Page 24 7450 8. Click START, the four LED lights will flash and then blink in sequence. The printer will reset and return to a READY state when the flash process is complete. 9. Last, you must complete the INIT1, and INIT2 procedures. Refer to pages 11 &...
-
Page 25: Mechanical Replacement
7450 MECHANICAL REPLACEMENT Top Enclosure and Printer Cover replacement REMOVAL 1. Remove 3 pan head screws on the front and 4 truss head screws on the back to remove the top enclosure. Remove Screws Remove Screws Paper Rack Assembly replacement REMOVAL 1. -
Page 26: Mechanism Replacement
7450 Mechanism replacement REMOVAL 1. The paper rack and cover left and right side must be removed. 2. The top enclosure must be removed. 3. Loosen 2-pan head screws (M4 x 32.6) on the right and left front mechanism holder B, rotate the metal plate to the right. Remove the mechanism holders and the AC switch holder. -
Page 27: Printed Circuit Board Assembly Replacement
7450 Printed Circuit Board Assembly replacement MAIN PCBA 1. Strap on wrist or foot ESD grounding to prevent electronic component damage. Lift up the back of the mechanism, and disconnect all the harnesses from the NOTE: Follow “Mechanism replacement” printed circuit board assembly. -
Page 28: Main Printed Circuit Board Cabling
7450 Main Printed Circuit Board Cabling... -
Page 29: Print Head
7450 Print Head REMOVAL 1. Open the printer front cover and remove the ribbon cassette. 2. Remove 2 pan head screws that are securing the print head onto the carrier. Remove 1 screw from the carrier cover and pull the printhead toward the front of the printer. -
Page 30: Ffc Cable Replacement
7450 FFC Cable replacement REMOVAL (FFC Printhead Cables) 1. Print Head must be already removed. 2. Remove 4 pan head screws on the FFC Upper Plate, and then remove the FFC Upper Plate. 3. Move the Carriage Assembly to the gap of the Carriage Guiding Track. -
Page 31: Ribbon Guide Assembly Replacement
7450 Ribbon Guide Assembly replacement TOOLS: Philips Screwdriver, six inch long .002”, and .004” (qty-2) Feeler Gauges REMOVAL 1. Remove the printer top cover, 7-pan head screws. 2. Remove ribbon cassette. 3. Remove the carrier cover, 1-pan head screw. 4. Disassemble the print head by removing 2-pan head screws from the head carrier and pull the printhead toward the front of the printer. -
Page 32: Carriage Motor Assembly Replacement
7450 Carriage Motor Assembly replacement TOOL: Screwdriver REMOVAL 1. The top enclosure must be removed. 2. The Upper Housing Assembly must be out. 3. Remove 2 nuts and 4 Screws that are holding the Carriage motor to the mounting plate. -
Page 33: Carriage Timing Belt Replacement
7450 Carriage Timing belt replacement REMOVAL 1. Remove 4 captive screws securing the C motor to the motor plate. 2. Remove the screw from return Pulley Frame. Remove Screw... - Page 34 7450 3. Remove the timing belt from the pulley assembly by simply dislocating the pulley assembly from its holder. 4. Remove 2 screws to separate the timing belt from the carrier assembly. Remove Screws NOTE: When installing the timing belt onto the carrier assembly, align the timing...
-
Page 35: Platen Replacement
7450 Platen replacement REMOVAL Caution: avoid getting grease on the platen. 1. Remove top enclosure. 2. Remove 2 pan head screws from the mechanism stoppers left and right corners of the printer chassis. Rotate the mechanism up. 3. Detach the plastic gear on the left side of the platen shaft by removing1 pan head screw. -
Page 36: Friction Mechanism Replacement
7450 Friction Mechanism replacement Pinch Roller Drive Assembly REMOVAL 1. Remove top enclosure. 2. Unhook the friction springs (qty-7) from the FC shaft B. 3. Detach the paper feed intermediate gear on the left side of the pinch roller drive shaft by removing 1 pan head screw;... -
Page 37: Ribbon Motor Assembly Replacement
7450 Ribbon Motor Assembly replacement Ribbon Motor located on the FFC bottom plate assembly REMOVAL 1. Remove the top enclosure. 2. Remove 2 pan head tapping screws from the ribbon motor. Note: Replace motor with cable connector located on right lower side. -
Page 38: Ha Motor Replacement
7450 HA Motor replacement REMOVAL 1. Remove the top enclosure. 2. Remove screws, cut the tie wrap. 3. Remove HA sensor fixing plate by removing 1 pan head screw. 4. Remove 2 pan head tapping screws to disassemble the HA Driving Assembly. -
Page 39: Paper Edge Sensor Replacement
7450 Paper Edge Sensor replacement REMOVAL 1. Turn off the printer power switch, and then open the printer cover, move the print head to the left of the printer. 2. Remove ribbon cassette. 3. Remove the carrier cover. 4. Remove the paper edge sensor cover. -
Page 40: Carrier Replacement
7450 Carrier replacement REMOVAL 1. Remove the F guide shaft support “E” rings (left and right), remove both support brackets, and the springs. 2. Remove the F guide shaft screw, Adjust shaft and two bearings. 3. Remove the two HA motor screws from the fixing plate. - Page 41 7450 5. Remove the “E” rings from inside of the F guide shaft, remove the bearings. 6. Remove carrier cover screws, and cover. 7. Remove the two print head screws and detach the print head FFC- A, B and C cables.
- Page 42 7450 9. Remove the timing belt from the idler pulley assembly by dislocating the idler pulley assembly from its holder. 10. Remove the carrier assembly to the left of the printer. 11. Remove F guide shaft from the base plate R.
-
Page 43: Sensor Replacement
7450 Sensor replacement FC Home Sensor Assembly replacement FC Home Sensor Assembly consists of one FC home, and one OP home sensor located on base plate L assembly. REMOVAL 1. Remove the top enclosure. 2. Remove 2 pan head screws from the mechanism stoppers left and right corners of the mechanism. -
Page 44: Fc Home Sensor B Assembly Replacement
7450 FC Home Sensor B Assembly replacement FC Home Sensor B Assembly consists of one FC home, and one OP home sensor located on base plate R assembly. REMOVAL 1. Remove the top enclosure. 2. Remove 2 pan head screws from the mechanism stoppers left and right corners of the mechanism. -
Page 45: Home Sensor Assembly Replacement
7450 Home Sensor Assembly replacement Home Sensor Assembly is located on the left side of the FFC bottom plate assembly. REMOVAL 1. Remove the top enclosure. 2. Remove 2 pan head screws from the mechanism stoppers left and right corners of the mechanism. -
Page 46: Paper Edge Sensor Replacement
7450 Paper Edge Sensor replacement The Paper Edge Sensor is located on the ribbon guide assembly. REMOVAL 1. Remove the carrier cover, 1 pan head screw. 2. Disconnect the harnesses of the paper edge sensor from the head connecting PWB. -
Page 47: Parallelism Adjustment
7450 Parallelism Adjustment F Guide Shaft Parallelism Adjustment Parallelism is required when print darkness differs between the right and left sides of the paper. The following adjustment is intended for minor adjustment only. Contact the manufacturer for major adjustments. PROCEDURE: 1. -
Page 48: Lubrication
7450 Lubrication The manufacture specified lubricants should be used. Their usage and applicable areas are specified in the Exploded View. Part Numbers Description Apply between plastic parts, such as gears and pinch roller EM60L holder. Apply between the metal and plastic parts such as a gear and SFP-6 lever axle (metal stud). - Page 49 7450 Lubrication Examples EM60L, between mating gears. SFP-6, between the metal and plastic parts. HV-22, applied to carriage felt washers and main shaft.
-
Page 50: Electronics
7450 ELECTRONICS Main PCBA CPU M30842 (18.432 MHz), TQFP, 144pin Flash M29W320ET (32M bits), TSOP, 48pin Static RAM IS62WV12816BLL, TSOP, 44pin FPGA A3P030 (18.432MHz), VQFP, 100pin FPGA A3P060 (18.432MHz), TQFP, 144pin Reset circuit MC motor drive circuit (4circuit) Head Adjust motor drive circuit... - Page 51 7450 (12) MSPCK(Input): Basic clock input for module transmitting and receiving signal (13) LTXD,LRXD: Data input and output of serial data interface. (14) XWR,XRD(output): write and read signal to Flash and SRAM. (15) Analog input AN0: Detection of head temperature AN1: Detection of Jam sensor (front/rear) (16) LCDDATABUZZ: LCD data output and also control buzzer.
- Page 52 7450 ☆ Flash M29W320ET Parallel flash: TSOP I/O, 48 pin, 32M bits. Main function Maintains printer setup data (information including number of printing lines, margins, starting position for printing and lateral alignment). Data is read when power is turned on, and data is written at setup and when power is turned off.
- Page 53 7450 ☆ SDRAM IS62WV12816BLL Parallel flash: TSOP I/O, 44 pin. Main function Read and run the printer program. Data is lost when power is turned off. Explanation of terminals D0-5(bidirectional): Data output. Connect with CPU. XRAMCS(Input): Chip select. Active when "High". Connect with CPU.
- Page 54 7450 (12) XRD, XWR(Input): Read signal, write signal. (13) CRCLK(Input): Clock for C motor drive. (14) HPWD(Input): For start timing of printing. (15) CLK(Input): 18.432 MHz clock. (16) RESET(Input): Reset signal. (17) HDP1-HDP24(Output, open drain): Pin waveform output. ● A3P060 pin assignment...
- Page 55 7450 ☆ FPGA A3P03018.432MHz, VQFP, 100pin Acts at 18.432MHz. Main function Controls centronics I/F Controlling and observing sensors Port explanation (1) A0-A4,A16-A17,A20-A23(Input): Address input. (2) D0-D15(I/O): Data bus. (3) C_STR(Input): Chip select. (4) XRD, XWR(Input): Read signal, write signal. (5) RESET(Output): "High" for centronics I/F initial input.
- Page 56 7450 ◆ Regarding DMA FPGA transfers printing data to FPGA directly by DMA from DRAM without going through the CPU in order to transmit data developed in DRAM to FPGA from DRAM at high speed(DMA: Direct Memory Access). The following is an explanation of this process.
-
Page 57: Ha Motor Driver Circuitry
7450 HA Motor Driver Circuitry The HA motor is a 4-phase stepper motor, driven by double-phase excitation, and controlled by FPGA A3P060. During standby, transistor Q9 is turned OFF and the HA motor is supplied with standby current from the 40 V power line through R79. -
Page 58: Ribbon Motor Driver Circuitry
7450 Ribbon Motor Driver Circuitry The ribbon motor is a 4-phase stepper motor, driven by double-phase excitation, and controlled by FPGA A3P060. During standby, transistor Q7 is turned OFF and Q8 is turned ON so that the ribbon motor is supplied with standby current from the 40 V power line through R75 and R76. -
Page 59: Mc Motor Driver Circuitry
7450 MC Motor Driver Circuitry The MC Motors are 4-phase stepper motors, driven by double-phase excitation, and controlled by FPGA A3P060. There are four MC Motors: MC1 to MC4. To select a motor to operate, set the motor’s corresponding signal of MCON1 through MCON4 to HIGH. Only one motor may be... -
Page 60: Lf/Hc Motor Driver Circuitry
7450 LF/HC Motor Driver Circuitry The line feed(LF) motor and head carriage (C) motor are both a 4-phase stepper motor, driven by 1/2 phase (C motor) or 2-phase (LF Motor) excitation, and controlled by U3 (FPGA A3P060) and U1(CPU). The signals (LF motor: LFA, LFB, LFXA, LFXB, LFBA, LFBB, LFBXA, LFBXB and C motor: CRA, CRB, CRXA, CRXB) are phase drive signals which controls the direction and the step width of the motor. - Page 61 7450 ☆ Carriage Motor drive circuit Carriage Motor uses a 4-phase stepping motor, and it is set in single phase excitation by FPGA A3P060 at standby 1/2-phase excitation at rotation of the motor. The current value reaching the motor is decided by turning on CVH1-CVH5.
-
Page 62: Print Pin Driver Circuitry
7450 Print Pin Driver Circuitry The control signal from Gate Array turns on or off the transistors SMA5106(U9-U14). When the transistor is turned ON, the current starts flowing out of the print pin coil and producing the pin striking force due to an electromagnetic phenomenon. -
Page 63: Print Head Pin Configuration
7450 Print head Pin Configuration The print head connector has 32 pin terminals. Approximately 9 ohms of resistance should be measured between COMMON terminal and each pin terminal. PRINTWIRE PRINTWIRE NUMBER NUMBER NUMBER NUMBER C,3,7,11,15 C,14,19,22,23 C,5,9,13,17 C,2,6,10,18 C,4,12,20,21 C,1,8,16,24... -
Page 64: Detecting Circuitry
7450 Detecting Circuitry MC sensor When the rear tractor is selected, the micro switch turns ON, causing No.141 of U1 to set too LOW. Note: MC Sensor belongs to this circuit type. Refer to the circuit diagram for those details. -
Page 65: Home Sensor
7450 Home Sensor A photo-interrupter type sensor is used to detect a carriage position. If the voltage level at HS (U1/ 10) is LOW, the printer detects the carriage at home position. If the carriage is out of the home position, the voltage level is HIGH. -
Page 66: Power Supply Pcb
7450 Power Supply PCB Outline This is a self-oscillating, RCC type switching power supply circuit. The output voltage is controlled by the switching frequency. The rated input is 120V, 60Hz for U.S.A. and 100V for JAPAN setting (adding to the Jumper at CN2) and 230V, 50Hz for European setting (Removing the Jumper at CN2). -
Page 67: Power Supply Troubleshooting Flow
7450 Power Supply Troubleshooting Flow PCBA Troubleshooting When the power switch is turned on. Is AC power cord properly attached? • Turn the power switch off then reinstall the power cord again. Fuse blown? • Check the jumper of CN2 (for 100V/120V model). - Page 68 7450 Current Consumption (First, check 40V generating circuit, because +5V is regulated from the 40V output.) If you have X100 attenuater built-in probe, check the waveform at 200KHz frequency between the drain of P1 and primary GND (heat sink panel of P1).
- Page 69 7450 F2 fuse, P2, ZD3 OK? If not, replace If no +5V, check FB3. If still no +5V, consult your dealer.
-
Page 70: Troubleshooting
7450 TROUBLESHOOTING Error messages & Remedies • HEAD PROTECTION Print head is overheated. The printer automatically resumes to its normal print operation when the print head cools down. • COVER OPEN The cover is opened. Check if the cover is closed properly. - Page 71 7450 • FUNCTION MCMTR2 The MC2 Sensor (Rear Friction) detects an error when the ERROR printer is initialized or when the rear friction is adjusted. Check to determine whether anything is obstructing the operation of the Rear Friction Motor. Check the connection of the MC2 Sensor (Rear Friction) harness.
-
Page 72: Trouble Symptoms
7450 Trouble Symptoms The lamp does not light and no display on LCD Possible cause: Power cable is defective or loose. Power lines from the power switch are disconnected. Loose connection between the main board assembly and indicator PCB. Loose connection on the Main board assembly and power PCB. - Page 73 7450 Improper carriage movement Possible cause: Carriage runs along a bent carriage bar. Carriage Motor is defective. Timing belt is too loose. Print head position is too close to the platen. Main board assembly is defective. Remedy: Readjust the head position, repair/replace defective components, check motor for mechanical problems, or check pulses from Main board assembly.
-
Page 74: Specifications
7450 SPECIFICATIONS Printing Specifications PRINTING METHOD Serial impact dot matrix PRINT HEAD 24 pins Pin Diameter: .008” Head life: 500 million stroke/pin PRINT DIRECTION Bi-directional logic seeking PRINT SPEED High 2 400 cps (10 cpi) High 1 300 cps (10 cpi) - Page 75 7450 PAPER HANDLING Fanfold paper, Rear Push Insertion: Rear Ejection: Front 5” ~ 15.9” Paper Width: Cut Sheet, Manual Insertion: Front Ejection: Front or Rear 5” ~ 16.9” Paper Width: Change of Paper Path: Lever and software command Paper Thickness Adjustment:...
- Page 76 7450 CUT SHEET (Single-part with Manual Insertion) 5” ~ 16.9” Paper Width: 0.003” ~ –0.005” Paper Thickness: Paper Weight: 60-100g/m Unprintable Area: 0.012” Top: 0.012” Bottom: 0.012” (except landscape) Right: 0.012” (except landscape) Left: CUT SHEET (Multi-part with Manual Insertion) 5”...
- Page 77 7450 CHARACTER PITCH 10, 12, 15, 17, 20 cpi Proportional DOWNLOAD CHARACTER ANK 128 characters GRAPHICS RESOLUTIONS 360 x 180 dpi (HXV) Horizontal adjacent dots cannot be printed PRINTER DRIVER Windows 98/Me, NT 4.0, 2000/XP/7 Control Switches & Indicators POWER...
- Page 78 7450 Detection & Protection Function Paper Detection Paper Edge Detection Paper Jam Detection Paper Skew Error Detection Head Gap Detection Head Overheat Protection Cover Open Detection Acoustic Noise Less than 58 dB(A) (LQ printing, fanfold, ISO 7779) Reliability PRINT HEAD LIFE...
- Page 79 7450 Others TEMPERATURE At Operation from 41 to 104 degree (Fahrenheit) At Storage from 40 to 131 degree (Fahrenheit) HUMIDITY At Operation 40% RH–90% RH (No condensing) ≤93% RH (No condensing) At Storage 25” (W) x 18.3” (D) x 11.6” (H)
-
Page 80: Exploded Drawings
7450 EXPLODED DRAWINGS... - Page 81 7450...
- Page 82 7450...
- Page 83 7450...
- Page 85 7450...
- Page 86 7450...
- Page 87 7450...
- Page 88 7450 Parts list I.D. Number Assembly Name Specification Number Range 150-199 Whole Printer 7450-EXP000 200-219 Upper Housing Assembly 7450-EXP010 220-239 Bottom Housing Assembly 7450-EXP020 240-289 Tractor Assembly 7450-EXP030 290-309 Front Table Assembly 7450-EXP040 310-509 Mechanism Assembly 7450-EXP050 510-529 Control Panel Assembly...
- Page 89 7450 I.D. Assy Specification No. Part Number Catalog No. Name 7450-EXP020 Bottom housing assembly N104-249 100000004170 Sound-absorbing sponge N104-211 100000004169 Bottom enclosure FP8800-PSM010-C 130475 100000050212 Rubber heel 124*15*1.8 100000004174 Rubber blanket N104-244 100000004172 Insulating sheet B Power supply board 120V~50Hz 2.3A...
- Page 90 7450 100*2.5mm 100000010212 Binder φ6*φ12*0.8 130462 100000000312 E ring I.D. Assy Specification No. Part Number Catalog No. Name 7450-EXP040 130407 Front table assembly N104-208 200000025490 Paper support N104-200 130416 200000025483 Front table base L N104-191 100000004227 Front table support PW3M3*6*#6...
- Page 91 7450 N104-144 130429 100000003377 Timing belt PW3M3*8*#6 100000000637 Pan head screw N104-103-2 100000003324 Carriage guide shaft N104-107-A 100000003350 HA cam shaft 26AWG 4Pin 200000000247 Home sensor assembly N104-132-A 100000004153 FFC bottom plate assembly N104-101 100000003333 Carriage guiding track N104-177 100000003335...
- Page 92 7450 N104-067A 200000000245 FC home sensor assembly PW2M2*8 100000003272 Pan head screw N104-036 200000025445 Reduction gear B N104-043 200000025478 Intermediate gear N104-037 200000025479 Intermediate gear C N104-037B 100000003310 Compression spring N104-040 200000025459 OP switching cam N104-050 200000025446 Paper feed shaft gear...
- Page 93 7450 N104-029 130464 100000003284 Platen N104-047 100000003287 Cam shaft B N104-130 100000003336 Cartridge holder R N104-03 100000003275 Paper guide plate N104-131 100000003337 Cartridge holder L N104-002-A 100000003273 Baseplate L assembly N104-145-A 130109 200000021009 Pulley Carriage Return φ3*φ7*0.6 100000001865 E ring...
- Page 94 7450 I.D. Assy Specification No. Part Number Catalog No. Name 7450-EXP051 Control panel assembly FP8800-PAK012 510000011310 Control panel label N104-238 200000025436 LCD cover M2*1.6 100000004195 Hexagon nut N104-239 200000025466 Indicator house Control panel PCB 130106 200000029143 assembly FP8800-JSM001 100000050213 Rubber piece...
- Page 95 7450 N104-180B 130423 100000003322 Ring felt N104-159 100000003379 Home sensor cutoff plate N104-156B-1 130438 100000003373 Rear guide roller spacer N104-170 100000004162 FFC guide plate N104-171 130459 200000025505 FFC cover N104-175 130458 100000004168 FFC holder N104-153B-1 200000025511 Plastic guide slider N104-179...
- Page 96 7450...