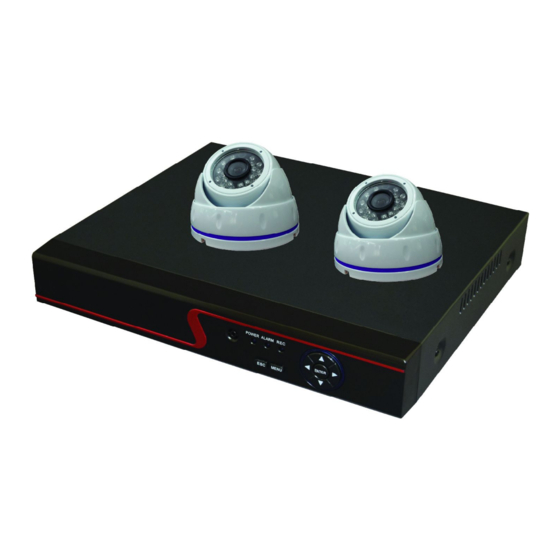
Summary of Contents for Facina VKFK2AHD2MP
- Page 1 4CH 1080P AHD KITS Model number: VKFK2AHD2MP Camera model number: VKC2MPDW 4ch AHD DVR model number: VKDVR2MPHB4...
- Page 2 AHD camera Specification: Model VKC2MPDW Video Standard PAL/NTSC Image Sensor+DSP IMX323+V30E IR Distance 25Meters Resolution 1080P 2.0MP Minimum Illumination IR LED on:0 Lux Electronic Shutter NTSC1/60-1/100.000Sec S/N Ratio 48dB or more Gamma 0.45 Lens 3.6 mm Video Output 1.0Vp-p,75Ù BNC Leds 24pcs¢5 ir leds Power Supply...
- Page 3 Remote Access, With DNS,easy to monitor remotely Ø 2,Specification: Model VKDVR2MPHB4 System Main processor Hi3520D V300 Interface Preview Codec H.264 Monitor quality VGA,HDMI Encode ability 4*1080N/4*1080P@15fps Decode ability 4*1080N/4*1080P@15fps Onvif support Video analog:4*1080P; Multi-mode input hybrid:4*1080N(analog)+4*960P(network); Network only:16*1080P;9*1080P;16*960P;4*5M; Each screen can be set to 192(16*12) detection areas; Motion Detection multi-level sensitivity Audio compression G.711A...
-
Page 4: Software Operation
3,Software operation 1,Appearance&interface Instructions 1.1 Front-end panel 1.2.Rear Panel Power before replacing. 2 Boot up / shut down & user login 2.1 HDD installation (Skip this if you do not need storage): Install the HDD(Skip this if you do not need storage): 2.2 Boot up Connect to power,the indicator turns on,DVR boots up. -
Page 5: System Login
2.3 Shut down To shut down the device,there are soft-Off and hard-off. Soft-off:Go to<MainMenu>-<Logout>-<Shoutdown) Hard-off:Plug the power on the rear panel. Note:1,power recovery:When DVR is shut down abnormally,reboot it,all recordings will be saved automatically and restore to the previous status. 2,Replace the HDD:Shut down the power before replacing. -
Page 6: Network Settings
3 Network settings Go to [Main Menu] .> [System] .>[Network], as follows: [IP address]:default is 192.168.1.10; [Subnet Mask]:default is 255.255.255.0; [Gateway]”default is 192.168.1.1 Note:IP address of the speed dome must share the same network segment With the rounter and conform to its IP instead of conflicting with other IP to ensure the device access to network;Go to [main menu]>[system]>[network],select DHCP Enable[Router should enable DHCP] 4 Record settings... - Page 7 [Channel] Choose the corresponding channel number.Choose the all option To set the entire channels. [Redundancy] Choose the redundancy function to double backup the file. [Length] Set the time length of each video file between 1min to 120min. 60 minutes is deault value. [Mode] Set video state:schedule,manual or stop.
-
Page 8: Channel Management
6 channel management ote:not all models support this function Go to <main menu>-<system>-<digital>-<Channel Type>configure, you can connect IP camera under pure network or hybrid network. Go to <main menu>-<system>-<Digital>-<Digital Channels> to add IP camera to Digital channels <Enable> * means enable,setting are effective after enabling. <Channel>... -
Page 9: Lan Access
7 LAN Access. When connected to the network, login DVR to start remote monitoring via IE browser, 7.1 DVR connection Open IE browser, enter IP address, take 192.168.1.10 as an example, input http:192.168.1.10 to connect. 7.2 DVR login Enter user name and password. (default user name is admin, no password), Change the administrator password timely after login, as follows: Note: Plug-ins need to be installed if you login via IE brower.IE is default to intercept plug in. - Page 10 8.1 PC access (1)Enter http://www.xmeye.net/index (2) Install step by step according to the gudies.(Maybe install ActiveX by step) 3)Click login to enter cloud service interface,as follows: (4) After successful configuration, wherever and whenever you are, as long as you can surf Internet, access...
-
Page 11: Mobile Access
8.2 Mobile Access Network environment: wifi,3G Mobile system: Android, IOS Software Name: XMEye Software Download: Google Market, app store How do I setup DVR for XMEye app? Make sure Cloud Access is enabled, then add your DVR/NVR by serial number, and you will be able to view it remotely using XMEye app. - Page 12 Device Serial Number The serial number can be found under Main Menu->Info->Version, it's 16 characters or longer, containing numbers and letters. App download Scan here App:XMEYE Iphone APP Android APP Due to our policy of continuous improvement we reserve the right to change specification without prior notice.

Need help?
Do you have a question about the VKFK2AHD2MP and is the answer not in the manual?
Questions and answers
Hi I use xm eye app with my facina surveillance. It has worked well but now for some reason it is no longer recording but camera is working in real time. I keep being told Channel 1 video was not found. Can you help with how to remedy this please. Thanks in advance.
To fix the issue of "Channel 1 video not being found" on your Facina VKFK2AHD2MP surveillance system when using the XMEye app, follow these steps:
1. Check Network Settings
- Ensure your DVR/NVR is connected to the internet.
- Navigate to System -> NetService, double-click on Cloud, and enable it.
2. Verify Internet Connection
- Confirm that the network cable is properly connected.
- Check if your network settings are correct (DHCP or Static IP).
3. Configure Port Forwarding
- Open port 34567 on your router for the DVR/NVR.
- If you do not have a static IP, consider setting up DDNS.
4. Check Device Serial Number
- Ensure you are using the correct device serial number for remote access.
- Find it under Main Menu -> Info -> Version (16+ characters, numbers, and letters).
5. Confirm Camera and Channel Settings
- Ensure the camera connected to Channel 1 is properly powered.
- Check if the camera is detected by the DVR/NVR.
- Try switching the camera to another channel to see if the issue is with the camera or the channel itself.
6. Restart the DVR/NVR
- Power cycle the DVR/NVR and check if the issue persists.
If the problem continues, consider resetting the DVR/NVR to default settings and reconfiguring it.
This answer is automatically generated