Table of Contents
Advertisement
Advertisement
Table of Contents

Related Manuals for Spark Bikes Spark

Summary of Contents for Spark Bikes Spark
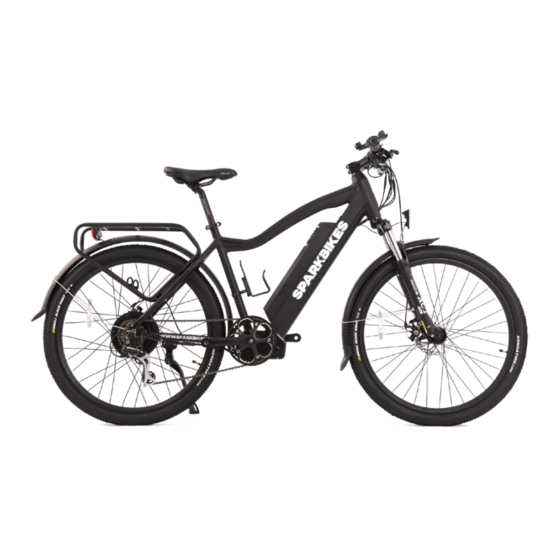
- Page 1 Owner’s Manual Spark...
-
Page 2: Table Of Contents
Contents Welcome and Comments …………….…………………………………………… Handlebar Assembly …………….…………………………………………… Fender Assembly …………….…………………………………………… Front Wheel Assembly …………….……………………………………………. 3 Chain Slap Guard Assembly …………….……………………………………………. 3 Seat Assembly …………….……………………………………………. 4 Pedals Assembly …………….……………………………………………. 4 Battery Charge …………….………………………………………….… 5 Battery Care …………….………………………………………….… 5 LCD Display …………….………………………………………….…... -
Page 3: Welcome And Comments
Congratulations on purchasing a Spark Bike. You have chosen a bike that will give you a superb riding experience. This manual will help you install and keep your bike in its best shape ensuring that you will enjoy every ride. -
Page 4: Handlebar Assembly
Handlebar Assembly Required tools: - 4mm Allen key 1) Unscrew the four bolts from the stem and remove the cap. 2) Insert the handlebar and place the cap. Screw in the bolts to tighten the cap. Fender Assembly Required tools: - 4mm Allen key - 5mm Allen key - 10mm Wrench... -
Page 5: Front Wheel Assembly
Front Wheel Assembly Required tools: -15mm Wrench Remove the bolts and washers from the wheel axle. Insert the wheel into the fork hooks ensuring that the disc brake rotor is inserted into the brake pads. 3) Insert the hook washer pointing downward to fit into the fork. -
Page 6: Seat Assembly
Seat Assembly 1) Open the lever, insert the seat post, adjust the height, and close the lever to lock. 2) Rotate the lever to adjust the tightness. To adjust the seat position loose the bolt under the seat. You can tilt the seat angle up and down, and move forward or backward to fit your comfort. -
Page 7: Battery Charge
Battery Charge Ensure that the battery is fully charged before your first ride. The charging port is located at the bottom end of the battery. To charge the battery, lift the rubber lid and insert the charging cable into the charging port. The charger will show a red light indicating that the battery is charging. -
Page 8: Lcd Display
LCD Display The LCD screen along with the control buttons are placed on the handlebar. They are used to control various aspects including: 1. Battery Level 2. Pedal Assist Level 3. Speed and Distance 4. Switching Lights ON/OFF Switching the Power ON/OFF Press and hold the power button for one second. -
Page 9: Lcd Parameter Setting
Changing the Speed Mode When LCD is switched ON, press the power button to change the speed mode. The data sequence Average Speed > Max Speed > Actual Speed > Single Trip > ODO >Time Battery Indicator The battery on the display has five bars indicating the battery power. - Page 10 The sequence of the parameter - Data Cleanup The symbol for data cleanup is Cr. Use the + (up)/-(down) button to navigate between “y” for yes and “n” for no. To confirm your selection press the power button. - Kilometer/Mile The symbol for kilometer/mile is S7, press + (up)/-(down) button to switch between kilometre or mile.
-
Page 11: Lcd Error Code Definition
1 minute to 15 minutes. Press the power button to choose your preference. All other LCD settings are preset by Spark Bikes to technically match your bike specifications and to ensure that Spark Bikes complies with local laws. If you require further information on specific settings, please contact Spark Bikes. -
Page 12: Cleaning And Maintenance
Cleaning and Maintenance: • It is good practice to clean your bike after a wet ride and store in a dry place to avoid rust. • When cleaning or servicing your bike, always remove the battery. • To increase the life of your bike, regularly lubricate your chain, shifter, and rear sprocket. -
Page 13: Warranty
These parts are user-friendly and can be easily replaced by the user. If an electrical problem is found, our team will provide the necessary support to resolve the problem. If the problem persists, Spark Bikes will replace the defective part free of charge. - Page 14 Notes ——————————————————————————————————————— ——————————————————————————————————————— ——————————————————————————————————————— ——————————————————————————————————————— ——————————————————————————————————————— ——————————————————————————————————————— ——————————————————————————————————————— ——————————————————————————————————————— ——————————————————————————————————————— ——————————————————————————————————————— ——————————————————————————————————————— ——————————————————————————————————————— ——————————————————————————————————————— ———————————————————————————————————————...
Need help?
Do you have a question about the Spark and is the answer not in the manual?
Questions and answers