Advertisement
Quick Links
Advertisement

Related Manuals for myappliances ART28008


Summary of Contents for myappliances ART28008
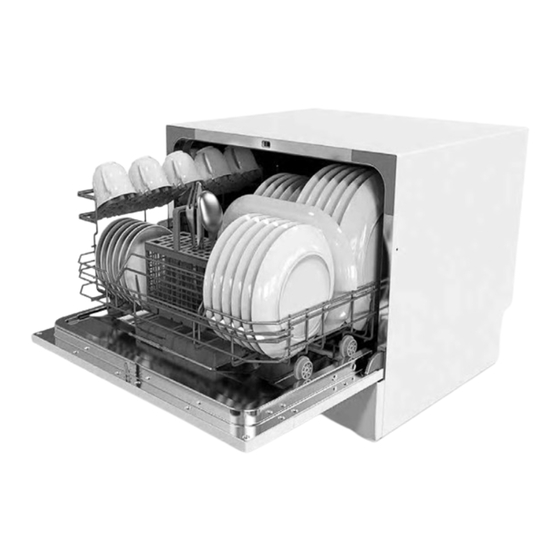
- Page 1 ART28008...
- Page 2 Dear Customer, Please carefully read this manual bef ore using the dishwasher, it will help you to use and maintain the Control Pan el...........3 dishwasher properly. Dishwasher Features........3 Keep it to refer to it at a later date. Pass it on to any subsequent owner of the appliance. This manual contains sections on safety Instructions, 、...
- Page 3 When using your dishwasher, follow the precautions listed below: This appliance is intended to be used in household and similar applications such as: -staff kitchen areas in shops, offices and other working environments; -farm houses; -by clients in hotels, motels and other residential type environments;...
- Page 4 This appliance must be earthed. In the event of a malfunction or breakdown, grounding will reduce the risk of an electric shock by providing a path of least resistance of electric current. This appliance is equipped with a cord having an equipment-earthing conductor and a earthing plug.
- Page 5 2) Warning: Knives and other utensils with sharp points must be loaded in the basket with their points down or placed in a horizontal position. Check that the detergent comparment is empty after completion of the wash cycle. Do not wash plastic items unless they are marked dishwasher safe or the equivalent.
-
Page 6: Control Pan El
Dispose of the dishwasher packaging material correctly. All packaging materials can be recycled. Plastic parts are marked with the standard international abbreviations: for polyethylene, e.g. sheet wrapping material for polystyrene, e.g. padding material POM polyoxymethylene, e.g. plastic clips polypropylene, e.g. Salt filler Acrylonitrile Butadiene Styrene, e.g. - Page 7 For detailed operating method read the corresponding content on the instruction manual. Switch on the appliance Press the Power switch button to switch on the appliance, Open the door. With each wash cycle. Compartment Fill the detergent dispenser For programmes with pre-wash only. (Follow the user instructions!) Check the rinse aid level Electric indicator on control panel (if provided).
-
Page 8: Cutlery Basket
To get the best performance from your dishwasher, read all operating instructions before using it for the first time. Delay time:2/4/6/8 hours option . Power Button: To turn on/off the power supply. Washing Program Selector: Pres s the button Delay Button : To press the button to delay. to select wa sh cycles. - Page 9 If your model have water softener, you may skip this section. Always use salt int ended for use with dishwasher. The salt contain er is located beneath the basket and should be filled as follows: Attention! Only use salt spe cif ically desi gne d for u se in dishwashers! All other types of salt not speci fically de sig ned fo r use in a dishwasher, especiall y table sal t, will damage the w ater sof tener.
- Page 10 Step 2: select a certain level of salt consumption Press the Start/pa use button to select the proper set according to your local environment, the sets will change in the following sequence: H1->H2->H3->H4->H5->H6; Step 3: Exit the status of salt adjustment Without any operation in five seconds, the machine will exit from set mode, the machine is into standby status There are 6 levels of salt consumption in all.It is recommended to select the level according to below table: Water Hardness level...
- Page 11 Function of Rinse Aid Rinse aid is automatically added during the last rinse, ensuring thorough rinsing, and spot and streak free drying. Attention! Only use branded rinse aid for dishwasher. Never fill the rinse aid dispenser with any other substances (e.g.
-
Page 12: Wash Cycle Table
Normally new pulverised detergent is with out phosphate. The water so ftener function of phosphate is not given. In this case we recommend to fill salt in the salt con taine r even when ° the hardness of water is only 6 dH. If dete rgents witho ut phosphate we re used in case of ha rd water often white spots appear at dishes and glasse s. - Page 13 Dishwasher detergent is corrosive! Take care to keep it out of reach of children. Prop er Use of De terg ent Use only deterge nt specifically made for use in dishwashers. Keep you r deterge nt fresh and dry. Don't put powder detergent in to the dispenser until you're ready to wash dishes . Fill in detergent Fill the detergent dispenser with detergent.
- Page 14 (For best performance of the dishwasher, follow these loading guidelines. Features and appearance of baskets and cutlery baskets may vary from your model.) Scrape off any large amounts of leftover food. Soften remnants of burnt food in pans It is not necessary to rinse the dishes under running water. Place objects in the dishwasher in following way: 1.Items such as cups, glasses, pots/pans, etc.
- Page 15 Cutlery should be pla ced in the cutlery basket with handles at the bottom. If the rack has side baskets, the spoon should be loaded individually into the appropriate slots, especially long utensils should be placed in the horizontal position at th e front o f the upper b asket as shown. Forks Soup spoons 3 Dessert spoons...
- Page 16 ℃ Pre-wash 50 ℃ Wash (70 For heaviest soiled crockery, Rinse 、 and normally soiled pots 3/15g Rinse 、 pans dishes etc with dried (1 or 2 pieces) Intensive ℃ Rinse (70 on soiling. Drying Pre-wash For normally soiled loads, ℃...
- Page 17 Premise: You can modify the washing program, When the dishwasher just runs for a short time. Otherwise, the detergent may have already been released, and the appliance may have already drained the wash water. If this is the case, the detergent dispenser must be refilled (see the section entitled "...
- Page 18 The filter prevent larger remnants of food o r other o bje cts from getting inside the pump. The filter system consis ts of a coarse filte r, a flat (Main filter) and a micro filter (fine filter). Main filter Food and soil particles trapped by this filter are pulverized by a special jet on the spray arm and washed down to drain.
- Page 19 Remarks: - Inspect the filters for blo cking e very time the dis hwa sher has been used. - By unscrewing the coarse filter.you can remove the filter sys tem.Remove any foo d remna nts and clean the filters under running water. The entire filter assembly should be cleaned once a week.
-
Page 20: Connection Of Drain Hoses
Cleaning the Spray Arms The spray arms can be easily removed for periodic cleaning of the noz zles , to prevent possible clogging. Wash them under running water and ca refu lly replace them in th eir seats, checking that their rotary movement is in no way impeded . Grasp the mid dle of the spray arm, pull it upwards to remove it. - Page 21 Position the applianc e in the desired location. The back should rest against the wall behind it, and the sides, along the adjacent cabinets or wall. The dishwasher is equipped with water supply and drain hoses that can b e positioned to the right or the left to facilitate proper installation. For personal safety: Do not use an extension cord or an adapter plug with this appliance.
- Page 22 Insert the drain hose into a drain pipe with a minimum diameter of 4cm, or let it run into the sink, making sure to avoid bending or crimping it. Use the spe ial plastic support that comes with the appliance. The free end of the hose must be at a height lower than75cm and must not be immersed in water to avoid the back flow of it.
- Page 23 How to Drain Excess Water From Hoses If the sink is 1000 higher from the floor, the exces s water in hoses cannot be drained directly into the sink. It will b e necessary to drain excess water from hoses into a bowl or suitable container that is held outside and lower than the sink.
- Page 24 Fuse blown, or the Replace fuse or reset circuit breaker. Remove any other circuit breaker tripped. appliances sharing the same circuit with the dishwasher Power supply is not Make sure the dishwasher is turned on and the door is turned on. closed securely.
-
Page 25: Error Codes 2
The dishes were not See notes in " Loading the Dishwasher Baskets ". loaded correctly. The programme was Select a more intensive programme. not powerful enough. See" Wash Cycle Table . " Not enough detergent Use more detergent, or change your detergent. was dispensed. - Page 26 Height : 438mm Width : 550mm Depth : 500mm Voltage connected Load : see rating label Water pressure: 0.04-1.0MPa Power supply: see rating label Capacity: 6 Place settings...
- Page 27 Technical Data Sheet Sheet of hous ehold dishwasher according to EU Directive 1059 /2010: Type / Description UBDWMTT Standard place settings En ergy efficiency class An nual energy consumption 174kWh En ergy consumption of the standard cle aning cycle 0.61 kWh Po wer consumption of off-mode 0.49 W Po wer consumption of left-on mode...
Need help?
Do you have a question about the ART28008 and is the answer not in the manual?
Questions and answers