Table of Contents
Advertisement
Quick Links
Contents
1
Introduction ............................... 5
1.1
General ................................................... 6
1.2
Technical data ........................................ 6
1.3
Environmental tips .................................. 7
2
Safety ......................................... 9
2.1
Fire prevention ........................................ 9
2.1.1
Avoidance of fire risks ............................ 9
2.1.2
Fire-fighting ............................................. 9
2.1.3
In case of fire .......................................... 9
2.2
General ................................................. 10
2.3
Road safety .......................................... 10
2.4
Towing .................................................. 12
2.5
Gas system ........................................... 12
2.5.1
General instructions .............................. 12
2.5.2
Gas bottle ............................................. 13
2.6
Electrical system ................................... 14
2.7
Water system ........................................ 14
3
Before the journey .................. 15
3.1.1
Initial start-up ........................................ 15
3.2
Payload ................................................. 15
3.2.1
Terms .................................................... 15
3.2.2
Calculating the payload ........................ 18
3.2.3
Loading the vehicle correctly ................ 19
3.3
Towing .................................................. 20
3.4
Entrance step ....................................... 21
3.5
Removable partition wall ...................... 22
3.6
Flat screen ............................................ 23
3.7
Gas regulator ........................................ 23
3.8
Snow chains ......................................... 24
3.9
Road safety .......................................... 24
4
During the journey .................. 27
4.1
Driving the motorhome ......................... 27
4.2
Driving speed ........................................ 27
4.3
Brakes ................................................... 28
4.4
Seat belts .............................................. 28
4.4.1
General ................................................. 28
4.4.2
Fastening the seat belts correctly ......... 28
4.5
system .................................................. 29
4.6
seat ....................................................... 29
4.7
Headrests ............................................. 29
4.8
Seating arrangement ............................ 30
4.9
Filling up with diesel ............................. 30
5
Pitching the Motorcaravan ..... 31
5.1
Handbrake ............................................ 31
5.2
Entrance step ....................................... 31
5.3
Ramps .................................................. 31
5.4
230 V connection .................................. 31
5.5
Refrigerator ........................................... 31
2999828 - 05/18 - EHG-0012-00EN
6
Living ....................................... 33
6.1
Doors .................................................... 33
6.1.1
extendable ............................................ 33
6.1.2
Rear doors ............................................ 33
6.2
External flaps ........................................ 34
6.3
Ventilation ............................................. 34
6.4
Windows ............................................... 35
6.4.1
Hinged window ..................................... 35
6.4.2
Roman shade and insect screen .......... 37
6.4.3
Cabin black-out shade .......................... 38
6.5
Skylights ............................................... 38
6.5.1
Skylight with snap latch ........................ 39
6.5.2
Heki skylight ......................................... 40
6.5.3
Wind-up skylight ................................... 41
6.6
Tables ................................................... 42
6.6.1
support leg ............................................ 42
6.6.2
Folding worktop .................................... 43
6.7
PVC-floor covering ............................... 43
6.8
Lamps ................................................... 43
6.8.1
Lighting system and USB socket .......... 44
6.8.2
Lamp in the rear area ........................... 45
6.9
TV unit .................................................. 46
6.10
Beds ..................................................... 47
6.10.1
Transverse rear bed ............................. 47
6.10.2
Longitudinal rear beds .......................... 47
6.10.3
Bunk bed in the rear ............................. 49
6.11
for sleeping ........................................... 50
7
Gas system .............................. 51
7.1
General instructions ............................. 51
7.2
Gas bottles ........................................... 52
7.3
DuoControl CS ..................................... 53
7.4
Changing gas bottles ............................ 56
7.5
Gas isolator taps .................................. 57
8
Electrical system ..................... 59
8.1
General safety instructions ................... 59
8.2
Terms ................................................... 59
8.3
12 V power supply ................................ 60
8.3.1
Living area battery ................................ 60
8.3.2
power supply ........................................ 62
8.3.3
the vehicle engine ................................ 62
8.3.4
Charging the starter battery .................. 62
8.4
Transformer/rectifier (EBL 119) ............ 63
8.4.1
Battery cut-off switch ............................ 65
8.4.2
Battery selector switch ......................... 65
8.4.3
Battery monitor ..................................... 65
8.4.4
Charging the battery ............................. 66
Contents
1
Advertisement
Table of Contents

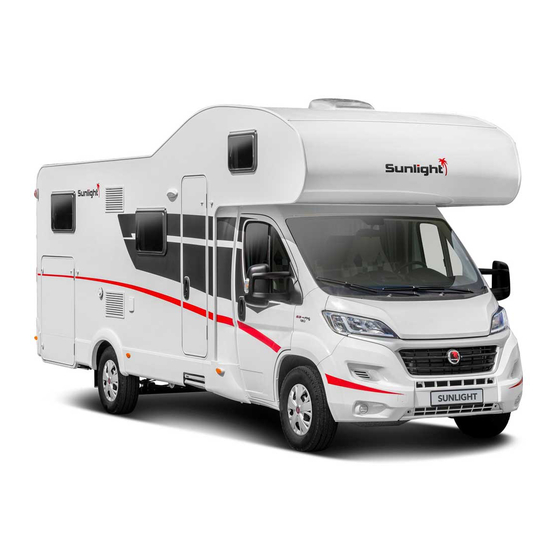
Summary of Contents for Capron Sunlight A68 2018
-
Page 1: Table Of Contents
Contents Contents Introduction ....... 5 Living ........33 General ........... 6 Doors ............ 33 Technical data ........6 6.1.1 Insect screen on the sliding door, Environmental tips ........7 extendable ..........33 6.1.2 Rear doors ..........33 Safety ......... 9 External flaps ........ - Page 2 Contents Panel (LT 100) ........66 11.2 Interior care ........100 8.5.1 12 V main switch ........67 11.2.1 Refrigerator......... 101 8.5.2 LED array for battery voltage ....67 11.3 Stainless steel surfaces ...... 101 8.5.3 LED array for tank fill level ....68 11.4 Water system ........
- Page 3 Contents Helpful notes ......127 15.5 Tips on staying overnight safely during travel ........129 15.1 Traffic rules in foreign countries ..127 15.6 Tips for winter campers ...... 129 15.2 Help on Europe's roads ...... 127 15.7 Travel checklists ......... 130 15.3 Gas supply in European countries ..
- Page 4 Contents 2999828 - 05/18 - EHG-0012-00EN...
-
Page 5: Introduction
Introduction Introduction Please read this instruction manual completely before using the vehicle for the first time! Always keep this instruction manual in the vehicle. Also inform all other us- ers of the safety regulations. The non-observance of this symbol can lead to personal injury. The non-observance of this symbol can lead to damage being caused ... -
Page 6: General
Introduction General The vehicle is constructed in accordance with the latest technology and the recognised safety regulations. Nevertheless, personal injury may result and the vehicle may be damaged if the safety instructions in this instruction man- ual are not followed. Before using the vehicle for the first time, equip it with the legally prescribed equipment (e.g. -
Page 7: Environmental Tips
Introduction Environmental tips Be considerate of the environment. Remember that: All kinds of waste water and household waste are not to be disposed of in drains or in the open countryside. On board, collect waste water only in the waste water tank or – if neces- ... - Page 8 Introduction 2999828 - 05/18 - EHG-0012-00EN...
-
Page 9: Safety
Safety Safety Chapter overview This chapter contains important safety instructions. The safety instructions are for the protection of persons and property. Fire prevention 2.1.1 Avoidance of fire risks Never leave children in the vehicle unattended. Keep flammable materials clear of heating and cooking appliances. ... -
Page 10: General
Safety General The oxygen in the vehicle interior is used up by breathing and the use of gas operated appliances. That is why the used air must be replaced permanently. For this purpose, forced ventilation options (e.g. sky- lights with forced ventilation) are fitted to the vehicle. Never cover or block forced ventilations from the inside or outside with objects such as e.g. - Page 11 Safety During the journey, persons are only to sit on the permitted seats (see chapter 4). The authorised number of seats is stipulated in the vehicle documents. Seat belts must be worn by all passengers. Fasten your seat belts before the beginning of the journey and keep them fastened during the journey.
-
Page 12: Towing
Safety Towing Care is to be taken when connecting and detaching a trailer. Risk of accident and injury! No persons are to be between the motorhome and the trailer during positioning for connecting and detaching. Gas system 2.5.1 General instructions ... -
Page 13: Gas Bottle
Safety Ignition safety valves must close within 1 minute after the gas flame has extinguished. A clicking sound is audible. Check function from time to time. The built-in gas devices are exclusively meant for use with propane or butane gas or a mixture of both. -
Page 14: Electrical System
Safety Use the gas pressure regulator defroster if the temperature falls below 5 °C. Use only 11 kg or 5 kg gas bottles. Camping gas bottles with built-in check valve (blue bottle with max. 2.5 or 3 kg content) are can be used in exceptional cases with a safety valve. -
Page 15: Before The Journey
Before the journey Before the journey Chapter overview This chapter contains important information which has to be noted before commencing your journey or carrying out any tasks before the journey. At the end of the chapter there is a checklist which once again summarises the most important points. - Page 16 Before the journey Maximum permissible The maximum permissible gross weight in a laden condition is the weight gross weight in a laden that a vehicle may never exceed. condition The maximum permissible gross weight in a laden condition consists of the actual weight and the payload.
- Page 17 Before the journey Conventional load The conventional load is the weight specified by the manufacturer for the passengers. Conventional load means: 75 kg are calculated for every seat specified by the manufacturer, regardless of how much the passengers actually weigh. The driver's seat is already included as part of the mass in ready-to-drive condition and must not be calculated as part of the conventional load.
-
Page 18: Calculating The Payload
Before the journey 3.2.2 Calculating the payload The payload calculation at the factory is partly based on all-inclusive weights. For safety reasons, the maximum permissible gross weight in a laden condition must not be exceeded. The maximum permissible gross weight and the weight including spe- cial equipment fitted at the factory (actual weight) is shown in the vehi- cle documents, but not the weight of the loaded vehicle (see sec- tion 3.2.1). -
Page 19: Loading The Vehicle Correctly
Before the journey 3.2.3 Loading the vehicle correctly For safety reasons, never exceed the maximum permissible gross weight in a laden condition. Distribute the load evenly on the left and right sides of the vehicle. Distribute the load evenly on both axles. In doing so, observe the axle loads specified in the vehicle documents. -
Page 20: Towing
Before the journey Calculate all storage spaces of the vehicle in the same way. In a last step, add all weights calculated for the rear axle to the rear axle load and add (or subtract) all weights calculated for the front axle to (from) the front axle load. -
Page 21: Entrance Step
Before the journey Entrance step Before commencing the journey and after short interruptions of the journey, ensure that the entrance step is completely retracted. Do not step on the entrance step until it has extended completely. There is a risk of injury! ... -
Page 22: Removable Partition Wall
Before the journey Fig. 2 Drive rod (entrance step) Fig. 3 Fixing clamp (entrance step) On the bottom of the entrance step, pull off both locking clips (Fig. 2,2) on the drive rods (Fig. 2,1). Release both drive rods from the retaining bolts. ... -
Page 23: Flat Screen
Before the journey Flat screen Before commencing the journey, store the flat screen securely. Gas regulator Operating gas-operated appliances during the journey is permitted only if the gas system has the relevant equipment. The hose break guard and crash sensor prevent an escape of gas in the event of an accident. -
Page 24: Snow Chains
Before the journey Snow chains Only mount snow chains if there is a clearance of at least 50 mm be- tween the tyres and the vehicle body. When using snow chains, the tyres, wheel suspension and steering are subjected to an additional load. - Page 25 Before the journey Checks Checked Housing body, inside Windows and skylights closed and locked Television securely stored Television antenna retracted (if one is built in) Loose parts stored away or fixed in position Open storage spaces empty Sink cover closed Refrigerator door secured Refrigerator set to 12 V operation All drawers and flaps closed...
- Page 26 Before the journey 2999828 - 05/18 - EHG-0012-00EN...
-
Page 27: During The Journey
During the journey During the journey Chapter overview This chapter contains instructions on how to drive the motorhome. Driving the motorhome The base vehicle is a commercial vehicle (small truck). Adjust your driving technique accordingly. Before commencing the journey and after short interruptions of the journey, ensure that the entrance step is completely retracted. -
Page 28: Brakes
During the journey Brakes Have defects on the braking system immediately remedied by an au- thorised specialist workshop. Before each journey Before each journey, check by means of a braking test: Do the brakes function? Do the brakes react evenly? ... -
Page 29: Isofix Child Safety Seat Mounting System
During the journey ISOFIX child safety seat mounting system Fig. 7 ISOFIX child safety seat mounting system If the vehicle is equipped with the ISOFIX child safety seat mounting system, the vehicle seats suitable for it are marked with the ISOFIX symbol. These vehicle seats have retaining clips (Fig. -
Page 30: Seating Arrangement
During the journey Seating arrangement During the journey, persons are only to sit on the permitted seats. The authorised number of seats is stipulated in the vehicle documents. Seat belts must be worn by all passengers. Seats which may be used during travel are equipped with a seat belt. Filling up with diesel ... -
Page 31: Pitching The Motorcaravan
Pitching the Motorcaravan Pitching the Motorcaravan Chapter overview This chapter contains instructions on how to pitch the vehicle. Pitch the vehicle so that it is as horizontal as possible. Use ramps where necessary. Otherwise, the water from the shower tray will not be able to drain properly. - Page 32 Pitching the Motorcaravan 2999828 - 05/18 - EHG-0012-00EN...
-
Page 33: Living
Living Living Chapter overview This chapter contains instructions about living in the vehicle. Doors Only drive with locked doors. Locking the doors can prevent them from opening of their own accord, e.g. during an accident. Locked doors also prevent forced entry, e.g. when waiting at traffic ... -
Page 34: External Flaps
Living The opening angle of both rear doors is limited to approx. 90° at the factory. This limitation can be released if necessary. Fig. 9 Push button to release the limitation Releasing the opening Open the rear door (Fig. 9,2) as far as it will go. ... -
Page 35: Windows
Living Condensation Ensure that there is a continuous exchange of air by providing frequent and efficient ventilation. This is the only method for ensuring that condensation is not formed during cool weather. During the colder season, a pleasant living climate is created if heating output, air distribution and ventilation are syn- chronised. - Page 36 Living Fig. 10 Catch lever in "closed" posi- Fig. 11 Hinged window with auto- tion matic hinges, open Opening: Turn the catch lever (Fig. 10,3) a quarter turn towards the centre of the window. Open hinged window half up to the required position. Allow the hinged ...
-
Page 37: Roman Shade And Insect Screen
Living If it rains, the "continuous ventilation" hinged window position could lead to splashing water penetrating the living area. Therefore, close the hinged windows completely. 6.4.2 Roman shade and insect screen The windows are fitted with a Roman shade and an insect screen. Roman shade and insect screen are fixed to each other. -
Page 38: Cabin Black-Out Shade
Living 6.4.3 Cabin black-out shade Open cabin black-out shade before commencing the journey. Fig. 14 Cabin black-out shade on Fig. 15 Cabin black-out shade on side pane windscreen Closing: Take cabin black-out shade out of the storage compartment above the ... -
Page 39: Skylight With Snap Latch
Living Depending on the weather, close the skylights far enough to prevent moisture from entering. Do not climb on the skylights. Before commencing the journey, close the skylights. Before commencing the journey, check that the skylights are closed and ... -
Page 40: Heki Skylight
Living 6.5.2 Heki skylight Fig. 17 Safety knob (Heki skylight) Fig. 18 Guide (Heki skylight) The Heki skylight is opened on one side only. Opening: Press the safety knob (Fig. 17,2) and pull the bar (Fig. 17,1) down with both hands. -
Page 41: Wind-Up Skylight
Living Insect screen To close and open the insect screen: Pull the insect screen by the handle to the opposite handle of the Ro- Closing: man shade. Opening: Press the rear part of the handle of the insect screen. The latch is relea- ... -
Page 42: Tables
Living Tables 6.6.1 Suspension table with separable support leg The maximum permissible load on the swung-out table-top extension is 3 kg. Fig. 23 Suspension table with sep- arable support leg The suspension table size can be enlarged by swinging out a table top ex- tension. -
Page 43: Folding Worktop
Living 6.6.2 Folding worktop The folding worktop is designed only for minimal loads (e.g. kitchen utensils). Do not use the folding worktop as a repository for heavy ob- jects. Magnet Worktop Holder Fig. 24 Folding worktop (driving posi- tion) To increase the size of the kitchen work surface, a folding worktop can be folded out at the side of the kitchen counter. -
Page 44: Lighting System And Usb Socket
Living 6.8.1 Lighting system and USB socket Bulbs and light fittings can be extremely hot. Allow the light bulbs and lamp holders to cool down before touching them. If the light is switched on or still hot, there must always be a safety dis- tance of at least 30 cm between stores or curtains and flammable ob- jects. -
Page 45: Lamp In The Rear Area
Living Removing fluorescent tube: Release and shift one of the brackets away from the lamp body. Remove lamp body. Turn both brackets through 90° and remove from rail. Fig. 27 USB socket element The USB socket element (Fig. 27,1) can be inserted, turned, and removed in the same way as the spotlight. -
Page 46: Tv Unit
Living TV unit Before commencing the journey, store the flat screen securely. The information about the operation of the TV unit can be obtained in the manufacturer's instruction manual. The flat screen is attached to a pull-out above the headrests of the bench. Fig. -
Page 47: Beds
Living 6.10 Beds 6.10.1 Transverse rear bed The maximum load of the rear bed is 200 kg. But in particular with regard to small children less than 6 years of age, users should ensure that they cannot fall out of the bed. Fig. - Page 48 Living Conversion for sleeping: Fold bed base down or insert bed base. Distribute the cushions on the lying surface. Fig. 33 After the conversion (variant Fig. 34 After the conversion (variant with 3 cushions) with 4 cushions) Conversion for transporting Stack the cushions on the left-hand bottom cupboard.
-
Page 49: Bunk Bed In The Rear
Living 6.10.3 Bunk bed in the rear Only use the bunk bed in the rear with fall out protection. The bunk bed consists of 2 removable bed bases, 4 cushions, a fall out pro- tection, and an attachable ladder. The maximum permitted load on each bed base of the bunk bed is 100 kg. -
Page 50: Converting Seating Group For Sleeping
Living 6.11 Converting seating group for sleeping Fig. 40 Removable board on the right-hand bedding box Push both seats in the driver's cabin fully forwards. Convert the table to a bed foundation (see section 6.6.1). Remove additional removable board (Fig. 40,2) from the right-hand bed- ... -
Page 51: Gas System
Gas system Gas system Chapter overview This chapter contains instructions regarding the gas system of the vehicle. The operation of the gas operation appliances of the vehicle is described in chapter 9. General instructions The operator of the gas system is responsible for the performance of recurring inspections and for complying with the maintenance inter- vals. -
Page 52: Gas Bottles
Gas system The built-in gas devices are exclusively meant for use with propane or butane gas or a mixture of both. The gas pressure regulator as well as all built-in gas devices are designed for a gas pressure of 30 mbar. ... -
Page 53: Gas Pressure Regulating System Duocontrol Cs
Gas system Use only 11 kg or 5 kg gas bottles. Camping gas bottles with built-in check valve (blue bottle with max. 2.5 or 3 kg content) are can be used in exceptional cases with a safety valve. Use the shortest possible tube lengths (150 cm max.) for external gas bottles. - Page 54 Gas system Fig. 43 Gas bottles with DuoCon- Fig. 44 DuoControl regulating system trol Construction of the unit The DuoControl regulating system consists of a reversing valve (Fig. 43,4) and a crash sensor (Fig. 43,5). The DuoControl regulating system is in- stalled between the gas tubes (Fig.
- Page 55 Gas system Operating unit At the operating unit (Fig. 45), the gas supply via the DuoControl regulating system is switched on and off. The regulator taps (Fig. 43,2) of the gas bot- tles and the gas isolator taps of the devices must be opened manually. Summer and winter operation are switched with the rocker switch (Fig.
-
Page 56: Changing Gas Bottles
Gas system You may also change an empty gas bottle while gas-operated devices are in operation. Changing the gas bottle: Turn the knob (Fig. 44,1) a half turn in the direction of the currently used gas bottle. In this way, this gas bottle is the primary bottle now, and the empty gas bottle becomes the reserve bottle. -
Page 57: Gas Isolator Taps
Gas system Place a filled gas bottle in the gas bottle compartment. Fix gas bottle in place with the fixing belts. Position the gas pressure regulator (Fig. 47,2) with gas tube (Fig. 47,1) on the gas bottle and tighten the knurled nut (Fig. 47,3) (normally a left- hand thread). - Page 58 Gas system 2999828 - 05/18 - EHG-0012-00EN...
-
Page 59: Electrical System
Electrical system Electrical system Chapter overview This chapter contains instructions regarding the electrical system of the ve- hicle. The operation of the electrical appliances of the housing body is described in chapter 9. General safety instructions Only allow qualified personnel to work on the electrical system. ... -
Page 60: Power Supply
Electrical system For example, if a battery can dispense 4 amps for 20 hours, then it has a capacity of 4 A x 20 h = 80 Ah. If more current flows, the discharging time of the battery will decrease pro- portionately. - Page 61 Electrical system Charge the battery for at least 20 hours before laying up. Use the charger module provided on the transformer/rectifier to charge the living area battery. When charging externally, use a regulated charger that is suitable for the battery type and the capacity of the living area battery.
-
Page 62: Charging Batteries Via A 230 V Power Supply
Electrical system Appliances such as the refrigerator, charger, solar charge regulator, panel, or similar, take power from the battery, even when the 12 V main switch is turned off. Therefore disconnect the living area battery from the 12 V power supply, if the vehicle will not be used for a long period of time. -
Page 63: Transformer/Rectifier (Ebl 119)
Electrical system Observe the instruction manuals for the base vehicle and the charger. Irreparable damage to the battery will result if it is overcharged. Charging with an external When charging the starter battery with an external charger, proceed as fol- charger lows: Turn off the vehicle engine. - Page 64 Electrical system Fig. 49 Transformer/rectifier (EBL 119) Main supply socket 230 V~ Output: Block 1 – refrigerator Input: Block 2 – control lines Output: Block 4 - heater, safety/drainage valve, basic light (lighting in the en- trance area), entrance step Output: Block 3 –...
-
Page 65: Battery Cut-Off Switch
Electrical system 8.4.1 Battery cut-off switch After switching the battery cut-off switch back on again: Put the basic light (lighting in the entrance area), entrance step, heater and spare 4 back into service (depending on the model). To do so, switch on the 12 V main switch briefly. -
Page 66: Charging The Battery
Electrical system 8.4.4 Charging the battery When the vehicle engine is running, a relay in the transformer/rectifier alter- nator switches on the living area battery and the starter battery together and recharges them with the vehicle generator. When the vehicle engine is switched off, the batteries are automatically disconnected from one another again by the transformer/rectifier. -
Page 67: 12 V Main Switch
Electrical system 8.5.1 12 V main switch The 12 V main switch (Fig. 50,1) switches the panel and the 12 V power supply of the living area on and off. Exception: Depending on the model, basic light (lighting in the entrance area), and entrance step remain ready to operate. -
Page 68: Led Array For Tank Fill Level
Electrical system Battery voltage Mobile operation Battery operation Power operation (vehicle moving, (vehicle station- (vehicle station- (values during no mains connec- ary, no mains con- ary, mains con- operation) tion) nection) nection) 12.3 V to 13.5 V 12 V power supply Normal range 12 V power supply (red, yellow, and... -
Page 69: Power Supply
Electrical system LED indicator Tank fill level Level indicator All LEDs light up Full tank 3 LEDs light up Tank approx. 3/4 full 2 LEDs light up Tank approx. 1/2 full 1 LED lights up Tank approx. 1/4 full Bottom LED flashes Tank empty Further information can be obtained in the manufacturer's instruction ... -
Page 70: Connecting The 230 V Power Supply
Electrical system 8.6.2 Connecting the 230 V power supply The external 230 V power supply must be protected by fuse with a fault current protection switch (FI-switch, 30 mA). To prevent overheating, the cable must be fully uncoiled from the ca- ble reel. -
Page 71: Fuses
Electrical system Unplugging the connection: Switch off the safety cut-out (Fig. 51,1) in the fuse box (Fig. 51,2). Loosen the detent on the camping distributor and unplug the connecting cable from the socket. Loosen the detent on the vehicle unplug the plug connector and close ... - Page 72 Electrical system Fuses on the starter The fuses are installed in the vicinity of the starter battery. The starter bat- battery tery is on the floor between the seats in the driver's cabin and can be ac- cessed under a cover. Flat fuse 15 A/blue (control for relay) Jumbo flat fuse 20 A/yellow...
-
Page 73: 230 V Fuse
Electrical system 8.7.2 230 V fuse Check the fault current protection switch for each connection to the 230 V power supply, at least once every 6 months. Fig. 56 230 V fuse box with safety cut-out and FI-switch A fault current protection switch (FI-switch) in the fuse box protects the com- plete vehicle from fault current (0.03 A). - Page 74 Electrical system 2999828 - 05/18 - EHG-0012-00EN...
-
Page 75: Appliances
Appliances Appliances Chapter overview This chapter contains instructions regarding the appliances of the vehicle. The instructions refer exclusively to the operation of the appliances. Further information about the appliances can be found in the instruction manuals for the appliances, included separately with the vehicle. General For safety reasons, spare parts for pieces of heating appliances must ... -
Page 76: To Heat Properly
Appliances The circulation fan is automatically switched on when the hot-air heater is activated, and it stays on. This puts an immense strain on the living area battery, if the vehicle is not connected to an external 230 V power supply. -
Page 77: Heater And Production Of Hot Water (Truma Combi)
Appliances 9.2.2 Heater and production of hot water (Truma Combi) If the heater is not in operation when there is a risk of frost, empty the domestic water container. The power supply of the heating control system cannot be interrupted by means of the 12 V main switch. - Page 78 Appliances Switching off: Turn the rotary switch (Fig. 59,6) to " " (Fig. 59,3). Close the gas isolator tap "Heater/boiler" and the regulator tap on the gas bottle. After switching off the heater, the circulation fan may still run for a moment to use up the residual heat.
-
Page 79: Heater And Production Of Hot Water (Truma Combi D)
Appliances Filling/emptying domestic The domestic water container can be supplied with water from the water water container tank. Filling the domestic water Switch on the 12 V power supply on the panel. container with water: Close the safety/drainage valve. Turn the knob (Fig. 60,1) perpendicular ... -
Page 80: Independent Vehicle Heater (Webasto)
Appliances 9.2.4 Independent vehicle heater (Webasto) Do not operate the heater in closed spaces. Danger of suffocation! Do not operate the heater at petrol stations. Danger of explosion! The inside and the engine can be heated with the independent vehicle heater. - Page 81 Appliances Diagnostics LED Frost protection Gas OFF Gas ON Switch Control LED, gas flame ignited Fig. 62 Boiler operating panel Switching on the boiler: Open the regulator tap on the gas bottle and the gas isolator tap "Heater/boiler". Make sure that the drain cock has been closed. ...
-
Page 82: Wall Flue
Appliances While heating, water drips from the drain pipe of the pressure relief valve. In order to protect the pressure relief valve from calcifications: ac- tuate the pressure relief valve at least twice a year. In order to do this, turn the lever of the drain cock through 90°... - Page 83 Appliances During activation and operation of the gas cooker, no flammable ob- jects or highly inflammable objects such as dishcloths, napkins etc. must be near the gas cooker. Fire hazard! The process of ignition must be visible from above and must not be covered by cooking pans placed on the cooker.
-
Page 84: Refrigerator
Appliances Release the control knob and turn to the desired setting. If ignition is unsuccessful, repeat the entire procedure. Switching off: Turn the control knob to the 0-position. The flame fades. Close the gas isolator tap "Cooker" and the regulator tap on the gas bot- ... - Page 85 Appliances On/off button with blue indicator lamp Night mode button Temperature setting button Display of the cooling level Fig. 67 Operating controls (refrigera- tor) Switching on: Press on/off button (Fig. 67,1) and hold for approximately 2 seconds. The blue indicator lamp shows that the refrigerator is working. The dis- play (Fig.
-
Page 86: Refrigerator Door Locking Mechanism
Appliances When the refrigerator is defrosted: insert the stopper of the drainage opening again. Clean the refrigerator. 9.4.2 Refrigerator door locking mechanism During the journey the refrigerator door must always be closed and locked in the closed position. Turn the locking wheel on the refrigerator door only when the refrigerator ... -
Page 87: Sanitary Fittings
Sanitary fittings Sanitary fittings Chapter overview This chapter contains instructions regarding the sanitary fittings of the vehi- cle. 10.1 Water supply, general Fill water tank from supply systems that have been verified to provide drinking water quality. Only use such hoses or containers when filling that have been ap- proved for use with drinking water. -
Page 88: Water Tank
Sanitary fittings 10.2 Water tank The water tank holds 90 l. For driving safety and for regulatory reasons, when the vehicle is motion the fill quantity must be reduced. If the water is drained using the safety drainage rotary handle (see section 10.2.4), a residual quantity of ap- proximately 20 litres will remain in the water tank. -
Page 89: Filling The Water System
Sanitary fittings 10.2.2 Filling the water system When filling the water tank, observe the maximum permissible gross weight of the vehicle. Luggage must be reduced accordingly when the water tank is full. The water pump will overheat without water and can get damaged after ... -
Page 90: Topping Up The Water
Sanitary fittings 10.2.3 Topping up the water When filling the water tank, observe the maximum permissible gross weight of the vehicle. Luggage must be reduced accordingly when the water tank is full. To fill the water tank with drinking water, proceed as follows: Open drinking water filler neck (Fig. -
Page 91: Draining Water
Sanitary fittings 10.2.5 Draining water Fig. 74 Water tank with rotary handle Turn the rotary handle (Fig. 74,1) on the water tank in an anticlockwise direction as far as possible beyond the resistance to fully open the drain- age opening. 10.2.6 Emptying the water system If the vehicle is not used for several days or if it is not heated when there... -
Page 92: Waste Water Tank
Sanitary fittings Fig. 75 Safety/drainage valve closed Fig. 76 Safety/drainage valve open Open the safety/drainage valve (Fig. 75). To do this, turn the knob (Fig. 75,1) parallel to the safety/drainage valve. The push button (Fig. 75,2) jumps out. The open safety/drainage valve is shown in Fig. -
Page 93: Toilet Compartment
Sanitary fittings Fig. 77 Operation of the waste water The waste water tap for the waste water disposal is installed on the left-hand side of the vehicle. The square bolt for opening the waste water tap is directly accessible under the vehicle floor. -
Page 94: Toilet
Sanitary fittings Fig. 80 Toilet compartment with shower For showering, close the door (Fig. 80,1) and completely close the shower curtain (Fig. 80,2) so that all walls are protected. Pull shower handset out and hook it into the opening provided for this ... -
Page 95: Swivel Toilet
Sanitary fittings 10.5.1 Swivel toilet The flushing of the Thetford toilet is fed directly from the water system of the vehicle. The toilet bowl can be moved into the optimal position. Fig. 81 Thetford toilet bowl Fig. 82 Flush button/indicator lamp (swivelling) (Thetford toilet) The operating unit is located close to the toilet bowl. -
Page 96: Winter Operation
Sanitary fittings Press both push-button locks (Fig. 83,2) simultaneously with your thumb and open the flap for the sewage tank. Swivel flap fully upwards and carefully set on the exterior wall. The flap is kept open magnetically. Pull the retaining clip (Fig. 84,2) upwards and pull out the sewage tank ... -
Page 97: Care
Care Care Chapter overview This chapter contains instructions regarding the care of the vehicle. At the end of the chapter there is a checklist of measures you must carry out if you are not going to use the vehicle for an extended period of time. 11.1 External care 11.1.1... -
Page 98: Windows Of Acrylic Glass
Care Wash down the vehicle with plenty of water, a clean sponge or a soft brush. In the case of stubborn dirt add dish washing liquid to the water. Painted exterior walls may also be cleaned with a caravan cleaner. ... -
Page 99: Underbody
Care 11.1.5 Underbody The underbody of the vehicle is partly coated with an age-resistant under- body protection. Should the underbody protection be damaged, repair imme- diately. Do not treat areas coated with underbody protection with spray oil. Only use products approved by the manufacturer. Our authorised deal- ... -
Page 100: Interior Care
Care 11.2 Interior care If possible, treat stains immediately. Acrylic glass windows are delicate and require very careful handling (see section 11.1.4). Synthetic parts in the toilet and living area are very delicate and should be treated with care. Do not use solvents, alcohol-containing cleansers or scourers. -
Page 101: Refrigerator
Care Brush blinds with a soft brush or vacuum with the brush attachment of the vacuum cleaner. Grease or stubborn dirt may be removed with a mild soap at 30 °C (curd soap). Brush Roman shades with a soft brush or vacuum with the brush attach- ... -
Page 102: Water System
Care Removing rust stains: Clean the stainless steel surface with an ordinary household sponge and with cleanser. If necessary, use a soft cleaning cloth and stainless steel cleaner. Rinse the stainless steel surface and dry it with household wipes. ... -
Page 103: Disinfecting The Water System
Care Leave the water taps open until the mixture of water and cleaning agent has reached the drain. Close all water taps. Flush the toilet several times. Allow the cleaning agent to act in accordance with the manufacturer's ... -
Page 104: Winter Care
Care 11.5 Winter care De-icing salt damages the underbody and the parts open to water spray. We recommend that you wash the vehicle more frequently during wintertime. Mechanical and surface treated parts and the underside are under particular strain, and should therefore be cleaned thoroughly. If there is any risk of frost, always run heater at a minimum of 15 °C. -
Page 105: Lay-Up
Care 11.6 Lay-up 11.6.1 Temporary lay-up If the vehicle has been stationary for a long period (approx. 10 months) have the braking and gas systems checked by an author- ised specialist workshop. Take into consideration that water is undrinkable after only a short time. -
Page 106: Winter Lay-Up
Care Activity Done Interior Place upholstery in an upright position for ventilation, and cover Clean refrigerator Allow refrigerator and freezer compartment doors to remain slightly open Search for traces of animals that have gained entry Disconnect the flat screen from the mains and, if necessary, re- move it from the vehicle Gas system Close regulator tap on the gas bottle... -
Page 107: Starting Up The Vehicle After A Temporary Lay-Up Or After Lay-Up Over Winter
Care Activity Done Interior Set up the de-humidifier (granulate) Remove cushions and mattresses from the vehicle and store them in a dry place Air the interior every 3 weeks Empty all cabinets and storage compartments, open flaps, doors and drawers Thoroughly clean the interior If there is a risk of frost, do not leave the flat screen in the vehicle Electrical system... - Page 108 Care Activity Done Gas system Put the gas bottles in the gas bottle compartment, tie down and connect to the gas pressure regulator Electrical system Connect to 230 V external power supply Install the living area battery and starter battery, insert the fuses on the living area battery and fully charge the battery ...
-
Page 109: Maintenance
Maintenance Maintenance Chapter overview This chapter contains instructions about official inspections and inspection and maintenance work in the vehicle. At the end of the chapter you will find important instructions on how to obtain spare parts. 12.1 Official inspections Depending on the national legislative provisions, the following official inspec- tions must be carried out periodically: Main inspection ... -
Page 110: Maintenance Work
Maintenance 12.3 Maintenance work As with every machine, this vehicle requires maintenance. The extent and frequency of the maintenance work required depend on conditions of opera- tion and use. More difficult operating conditions make it necessary to service the vehicle more often. Have the base vehicle and the appliances serviced at the intervals specified in the corresponding instruction manuals. -
Page 111: Spare Parts
Maintenance 12.7 Spare parts Every alteration of the original condition of the vehicle can alter road behaviour and jeopardize road safety. The special equipment and original spare parts recommended by us have been specially developed and supplied for your vehicle. These products are available at your dealer. -
Page 112: Warning And Information Stickers
Maintenance 12.9 Warning and information stickers There are warning and information stickers on and inside the vehicle. Warn- ing and information stickers are for the sake of safety and must not be re- moved. Replacement stickers can be obtained from an authorised dealer or a ... -
Page 113: Wheels And Tyres
Wheels and tyres Wheels and tyres Chapter overview This chapter contains instructions regarding the tyres of the vehicle. At the end of the chapter there is a table you can use to find the correct tyre pressure for your vehicle. 13.1 General ... -
Page 114: Tyre Selection
Wheels and tyres Fig. 88 Tightening the wheel nuts or wheel bolts cross-wise Tighten the wheel nuts or wheel bolts in the order shown in Fig. 88. In order to do this, use a torque wrench and comply with the specified tightening torque (see section 13.5). -
Page 115: Tyre Specifications
Wheels and tyres The maximum permissible speed for a tyre (with full load-carrying capacity) is indicated by the speed index (= SI). Together, load index and speed index form the operating code of a tyre. This is an official component of the com- plete, standardised dimensions description which appears on every tyre. -
Page 116: Tyre Pressure
Wheels and tyres 13.6 Tyre pressure Tyres overheat if the tyre pressure is too low. This can cause serious tyre damage. Check tyre pressure before a journey or every 2 weeks. Wrong tyre pressure causes excessive wear and can lead to damage or even to tyre burst. - Page 117 Wheels and tyres The vehicles are constantly brought up to the newest technical standards. It is possible that new tyre sizes are not yet included in this table. If this is the case, any dealer will be happy to provide the newest values. Types Tyre size Front air pres-...
- Page 118 Wheels and tyres 2999828 - 05/18 - EHG-0012-00EN...
-
Page 119: Troubleshooting
Troubleshooting Troubleshooting Chapter overview This chapter contains instructions about possible faults in your vehicle. The faults are listed with their possible causes and corresponding remedies. The specified faults can be remedied with relative ease and without a great deal of specialised knowledge. In the event that the remedies detailed in this instruction manual should not be successful, an authorised specialist work- shop must find and eliminate the cause of the fault. - Page 120 Troubleshooting Fault Cause Remedy Living area battery is not Fuse on terminal D+ of Replace fuse charged during vehicle the alternator is defective operation Disconnector relay in the Contact customer service transformer/rectifier is de- fective 12 V indicator lamp does 12 V power supply is Switch 12 V power supply not light up...
- Page 121 Troubleshooting Fault Cause Remedy No voltage at a con- Self-resetting Polyswitch Check plug connectors and nected appliance fuse has tripped cables. Switch off 12 V power supply for approx. 2 minutes, then switch it back on Self-resetting Polyswitch Remedy cause of Pol- fuse has tripped several yswitch tripping times (3 times), system...
-
Page 122: Gas System
Troubleshooting 14.3 Gas system In case of a defect of the gas system (gas odour, high gas consump- tion) there is danger of explosion! Close regulator tap on the gas bot- tle immediately. Open doors and windows and ventilate well. ... -
Page 123: Heater/Boiler
Troubleshooting 14.5 Heater/boiler Fault Cause Remedy Heater does not ignite Temperature sensor on Pull out plug on operating operating unit or remote unit. The heater then sensor defective works without thermostat. Contact the customer ser- vice as soon as possible Boiler empties, Internal temperature be- Heat inside... -
Page 124: Independent Vehicle Heater (Webasto)
Troubleshooting Fault Cause Remedy Green LED is flashing af- Overrun is active to re- No error; overrun switches ter switching the heater off duce temperature of appli- off after approximately ance 5 minutes After the appliance is Electronics defective Contact customer service switched on, the green and red LEDs come on If these measures do not lead to the elimination of the fault, contact the... -
Page 125: Water Supply
Troubleshooting Fault Cause Remedy Cooling power decreases, Ambient temperatures are If possible, ensure a lower internal temperature in- too high ambient temperature (e.g. creases park the vehicle in the shade) Ventilation insufficient Keep the ventilation slots clear Contact customer service if necessary Battery capacity low Charge the battery... -
Page 126: Body
Troubleshooting Fault Cause Remedy Water drains from the The vehicle is not in a hor- Position the vehicle hori- shower tray slowly or does izontal position zontally not drain at all Milkiness of the water Tank filled with dirty water Clean water tank mechan- ically and chemically;... -
Page 127: Helpful Notes
Helpful notes Helpful notes Chapter overview This chapter contains helpful tips for the journey. At the end of the chapter there is a checklist containing the most important equipment for the journey. 15.1 Traffic rules in foreign countries The vehicle driver is required to inform himself as to the traffic rules of ... -
Page 128: Gas Supply In European Countries
Helpful notes 15.3 Gas supply in European countries In Europe, there are several different connection systems for gas bottles. It is not always possible to fill or exchange your gas bottles in a foreign country. Get information about the connection system in the country you are travelling to before embarking on your journey, e.g. -
Page 129: Tips On Staying Overnight Safely During Travel
Helpful notes 15.5 Tips on staying overnight safely during travel Prudent behaviour is the most important protective measure for insuring a safe night in the motorhome. The risk of thievery is reduced to a minimum when the following basic rules are observed: During high season do not spend the night at highway rest stops or ... -
Page 130: Travel Checklists
Helpful notes 15.7 Travel checklists The following checklists will help that nothing important is left at home alt- hough not everything on the checklists might be necessary. Do not leave checking of documents (e.g. vehicle papers and infor- mation) as well as checking the condition of the vehicle until just before commencing the trip. - Page 131 Helpful notes Object Object Object Vehicle/tools Waste water contai- Gas tube Snow chains (win- ter) Adapter socket Fabric tape Screwdriver CEE adapter Watering can for Current-measuring drinking water instrument Wire Cable reel Wheel chocks Spare wheel Glue First-aid kit Spare lamps Universal pliers Vehicle jack Spare fuses...
- Page 132 Helpful notes 2999828 - 05/18 - EHG-0012-00EN...
- Page 133 Index Index 12 V fuses ............71 For Thetford toilet ......... 72 Cabin black-out shade On the living area battery ......72 Closing ............38 On the starter battery ........72 Opening ............38 12 V main switch ..........66 Cable reel ............
- Page 134 Index Condensation on the double acrylic glass pane ..........35 Fault current protection switch ......69 Condensation on the screwed Check ............73 connections in the floor ........34 Filling the tank ............ 30 Connecting cable see 230 V connection ... 70 Fire Conventional load ..........
- Page 135 Index General instructions ........6, 12 Insect screen, conversion door No gas ............122 Closing ............33 Operation ............53 Opening ............33 Switching automatics ........53 Insect screen, Heki skylight Troubleshooting .......... 122 Closing ............41 Opening ............41 Insect screen, window Closing ............
- Page 136 Index Switching on ..........85 Temperature, adjusting ......... 85 Net curtains, cleaning ........100 Troubleshooting .......... 124 Nose weight ............20 Refrigerator door locking mechanism Closing ............86 Locking in the ventilation position ....86 Opening ............86 Official inspections ........... 109 Risk of frost damage ........
- Page 137 Index Special equipment Battery ............119 Description ............5 Body ............126 Marking ............5 Braking system ..........119 Safety instructions ........10 Electrical system ......... 119 Spotlight ............. 44 Extractor hood ..........123 Removing ............44 Furniture flaps ..........126 Shifting ............
- Page 138 Index Water system Wheel rim type ..........113 Care ............102 Wheels, changing ..........113 Cleaning ............102 Tightening torque ........115 Disinfect ............103 Windows ............. 35 Drinking water filler neck ....... 88 Insect screen ..........37 Emptying ............91 Roman shade ..........
Need help?
Do you have a question about the Sunlight A68 2018 and is the answer not in the manual?
Questions and answers