Table of Contents
Advertisement
Advertisement
Table of Contents

Related Manuals for Sionyx AURORA


Summary of Contents for Sionyx AURORA
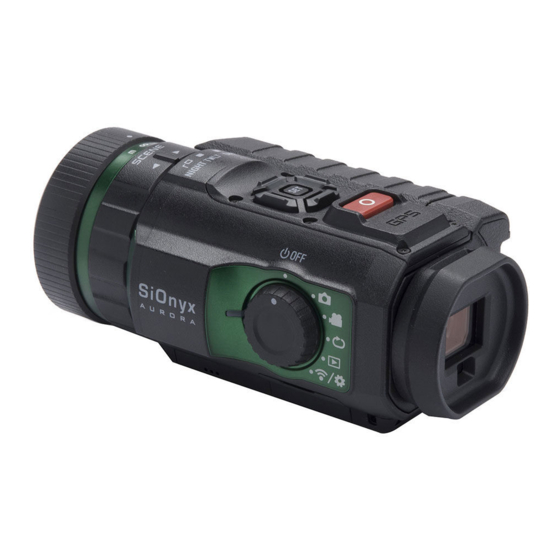
- Page 1 AURORA NIGHT VISION CAMERA User Manual...
- Page 2 SiOnyx, LLC 100 Cummings Center, Suite 135P Beverly, MA 01915 (978) 922-0684 support@sionyx.com Follow us on Facebook @SiOnyxNightVision Aurora User Manual...
-
Page 3: Table Of Contents
1.3.5 Focusing Ring ..........................13 Inserting the Micro SD Card ..................13 Setting the Date and Time ..................15 Downloading the SiOnyx Aurora App to Connect to Your Camera .....18 Attaching the Neck Strap ....................23 Chapter 2. Photos and Videos................25 Taking a Photo and Shooting a Video ..............25 2.1.1 Taking a Photo ..........................25... - Page 4 Date and Time .........................80 4.4.1 GPS Set ............................80 4.4.2 Format ............................83 SD Card ..........................85 Chimes ..........................87 Audio ..........................88 GPS ............................89 4.8.1 Turning GPS On ..........................89 4.8.2 Changing the GPS Format ......................90 4.8.3 GeoTag Image ..........................93 WIFI .............................94 Aurora User Manual...
- Page 5 5.1.1 Operating Temperature Range .....................95 5.1.2 Tips on Reducing Battery Usage ..................95 5.1.3 Battery Storage and Handling....................95 5.1.4 Battery Disposal .........................95 Camera Specifications ....................96 SiOnyx Customer Care ....................97 Chapter 6. Troubleshooting ................98 Chapter 7. Warranty ..................99 Aurora User Manual...
-
Page 6: Chapter 1. Getting Started
Chapter 1. Getting Started Congratulations on purchasing your new SiOnyx Aurora Night Vision camera! Let’s get started! 1.1 Unpacking the Box The SiOnyx Aurora Night Vision camera box contains the following items: 1. Camera 2. SX-50 lithium-ion battery 3. USB cable 4. - Page 7 Chapter 1. Getting Started 2. Remove the Viewfinder by pulling down on the Viewfinder Release button. 3. Pull the Viewfinder straight out. 4. Slide the battery into the battery slot. Aurora User Manual...
- Page 8 A green light appears and blinks slowly during the charging process. When the battery is fully charged, the light will turn off. Note. It will take about 2-3 hours to charge the battery to 100% and it will last approximately 2 hours of shooting video. Aurora User Manual...
-
Page 9: Removing The Battery
1. Open the Viewfinder by pulling down on the Viewfinder Release button. 2. Pull the Viewfinder straight out. 3. Press the tab on the left side of the battery and slide the battery out. 4. Slide the Viewfinder back into its slot. Aurora User Manual... -
Page 10: Viewing The Battery Charge
To view the remaining battery charge, rotate the Settings Dial to Photo, Video, Loop or WiFi/Settings. The battery gauge icon is on the bottom right of the screen. 1.3 Viewing the Camera Modes and Settings Here’s an overview of the camera buttons. Click here to view a related video Aurora User Manual... -
Page 11: Button Overview
(Photo, Video, Loop, Playback, Settings) 1.3.2 Settings Dial The Settings Dial turns the camera on and off as well as to set the camera mode. • Power Off • Photo • Video • Loop • Playback • WiFi/Settings Aurora User Manual... -
Page 12: Viewfinder
Note. By default the EVF timeout is set to automatic. The Viewfinder will turn off when the camera is moved away from your eye. See “Section 2.4.3 EVF Time Out” on page 58 for more information. 1.3.4 Scene Ring Use the Scene Ring to adjust the lens to the time of day. Aurora User Manual... -
Page 13: Focusing Ring
Note. The camera does not come with a Micro SD card. You need to purchase a Micro SD/Micro SDHC Class 10 or UHS-1 with a capacity of up to 32GB. 1. To insert the Micro SD card, remove the Viewfinder by pulling down on the Viewfinder Release button. Aurora User Manual... - Page 14 3. Insert the SD card into its slot and push it until it locks. To remove it, push it again and it will release. Pull it straight out. CAUTION Don’t force the SD card into the slot or the data my be damaged. 4. Slide the Viewfinder back into its slot. Aurora User Manual...
-
Page 15: Setting The Date And Time
1. To set the date and time, rotate the Settings Dial to the WiFi/Settings menu Click here to view a related video 2. Press SET to access the WiFi/Settings menu. 3. This warning will appear until the date and time are set. Aurora User Manual... - Page 16 83). To set the date and time manually, toggle down to Manual Set. When your SiOnyx Aurora is powered on for the first time, you will be prompted to set the date and time. This prompt will persist until the date and time has been set.
- Page 17 5. To set the Date Format, toggle right and press SET. 6. Select the Date Format at the top of the screen. Select an option and press SET. See “Section 4.4.2 Format” on page 83 for more details. Aurora User Manual...
-
Page 18: Downloading The Sionyx Aurora App To Connect To Your Camera
8. Toggle left twice to exit to the main menu and toggle left twice to return to the main WIFI/Settings menu. 1.6 Downloading the SiOnyx Aurora App to Connect to Your Camera The SiOnyx Aurora app works as your camera’s Viewfinder with all your camera controls. The app is available at the App Store and Google Play. - Page 19 Chapter 1. Getting Started 2. To connect your smartphone or tablet to the camera, rotate the Settings Dial to the WiFi/Settings Mode to access the menu 3. Toggle down to WIFI and toggle right to WIFI On and press SET. Aurora User Manual...
- Page 20 5. Go to the WiFi setting on your smartphone or tablet and select the SiOnyx camera WiFi connection. Note. If you’re using an iPhone or iPad, turn off Bluetooth in iOS Settings before connecting to Aurora. Do not use the Control Center.
- Page 21 Chapter 1. Getting Started The password displays as the KEY in the Viewfinder. Once the WiFi connection is established, the Viewfinder displays “WIFI connection established. ” Note. The camera will continue to display this message until you disconnect from WiFi. Aurora User Manual...
- Page 22 7. Open the SiOnyx Aurora app and tap the camera name. Now you’re on the home screen of the app, which is called the Media Center. Note. For more information about how to use the SiOnyx Aurora Mobile App, click here for the complete mobile app guide.
-
Page 23: Attaching The Neck Strap
A detachable neck strap allows you to keep the camera accessible on any adventure. 1. Separate the neck strap into two parts. 2. Make a loop at either end of the strap. 3. Insert the loop into one end of the neck strap holder and pull it through. Aurora User Manual... - Page 24 4. Place the end of the strap through the loop. 5. Repeat the entire procedure on the other side of the neck strap holder. 6. Redo the clasp on the strap. 7. Pull the straps to tighten the loops. Aurora User Manual...
-
Page 25: Chapter 2. Photos And Videos
Chapter 2. Photos and Videos Shutter button WiFi/Setting 2.1 Taking a Photo and Shooting a Video 2.1.1 Taking a Photo 1. To take a photo, rotate the Settings Dial to Photo Mode 2. Press the Shutter button to take a photo. Aurora User Manual... -
Page 26: Shooting A Video
Chapter 2. Photos and Videos 2.1.2 Shooting a Video 1. To shoot a video, rotate the Settings Dial to Video Mode 2. Press the Shutter button to start and stop the video. Aurora User Manual... -
Page 27: Adjusting The Focus
You can also turn on Focus Peak under the Overlay menu. See “Chapter 2.4.2.1 Focus Peak” on page 50 for more information about Focus Peak. Refer to “Section 1.3.3 Viewfinder” on page 12 to adjust the Viewfinder. Aurora User Manual... -
Page 28: Zooming In And Out
2.1.5 Setting Exposure Compensation Exposure Compensation adjusts the brightness and darkness of the scene. Toggle up and down to adjust the Exposure Compensation. Note: Exposure Compensation is not the same as EVF brightness. See “Section 2.4.1 Brightness” on page Aurora User Manual... -
Page 29: Using The Scene Ring
Twilight – approximately one hour before sunrise and one hour after daylight (f/2.0) • Day – sun or clouds (f/5.6) 2.2 Viewing and Deleting Photos and Videos You can use the Playback Mode features to view and delete photos and videos. Click here to view a related video Aurora User Manual... -
Page 30: Viewing And Zooming In On Photos And Videos
To return to normal view, long press the left toggle until is restored to normal size, and double-click SET. 2.2.2 Viewing Thumbnails of Photos and Videos You can view four or nine thumbnails of photos and videos in the Playback Mode. 1. Rotate the Settings Dial to Playback Mode Aurora User Manual... - Page 31 Chapter 2. Photos and Videos 2. You’ll see the latest photo or video you shot. 3. Toggle up twice quickly and you’ll four thumbnails. Aurora User Manual...
-
Page 32: Playing Videos
2. Toggle to the video that you want to play and long press SET until the video starts playing. 2.2.4 Deleting Photos and Videos Delete photos and videos in the Playback Mode 1. Rotate the Settings Dial to Playback Mode. Aurora User Manual... - Page 33 Press SET to remove the checkmark. 4. To delete the photo or video, long press SET until the trash can starts to flash, then release the SET button. The image or video is now deleted. Aurora User Manual...
-
Page 34: Deleting Multiple Photos And Videos
3. Toggle to the photos or videos that you want to delete. 4. Select the image and press SET. You’ll see a green checkmark in the bottom right-hand corner. Do this for each image that you want to delete. 5. Long press SET until a trash can appears. Aurora User Manual... -
Page 35: Shooting Photos: Settings
There are two shutter settings: Auto and Manual. Your camera is set to Auto by default. You can adjust the shutter speed. 1. Turn the camera on by rotating the Settings Dial to Photo Mode 2. Press SET to access the Camera menu. Aurora User Manual... - Page 36 5. Toggle up and down to scroll through the shutter speed settings. 6. Press SET to select the shutter speed that best suits your scene. You can set the shutter speed from 1/8000 of a second to 1.5 seconds. Aurora User Manual...
- Page 37 7. Toggle left and press SET to exit the Shutter speed. The shutter speed is now visible at the bottom of the screen. Note. All features remain selected when the camera is turned off and then on again. Aurora User Manual...
-
Page 38: Burst
1. Turn the camera on by rotating the Settings Dial to Photo Mode 2. Press SET to access the menu. 3. Toggle down to Burst and then right to the options. 4. Select the option the best suits your scene and press SET. Aurora User Manual... - Page 39 6. To take a photo, press the Shutter button. With Chimes on (recommended), you can hear clicks for every photo the camera takes. Continue to press the Shutter button until the clicks stop. Note. All features remain selected when the camera is turned off and then on again. Aurora User Manual...
-
Page 40: Hdr
1. Turn the camera on by rotating the Settings Dial to Photo Mode 2. Press SET to access the menu. 3. Toggle down to HDR and right to On or Off and press SET. 4. Press SET to exit the menu. Aurora User Manual... - Page 41 Chapter 2. Photos and Videos 5. The HDR icon will be visible in the Viewfinder. Note. All features remain selected when the camera is turned off and then on again. Aurora User Manual...
-
Page 42: Self Timer
1. Turn the camera on by rotating the Settings Dial to Photo Mode 2. Press SET to access the menu. 3. Toggle down to Self Timer and right to the options. 4. Toggle down to the amount of delay you require and press SET. Aurora User Manual... - Page 43 When you press the Shutter button chimes will sound to count down the delay, followed by a click when the picture is taken. Note. All features remain selected when the camera is turned off and then on again. Aurora User Manual...
-
Page 44: Panorama
The camera will produce a 180-degree photo. 1. Turn the camera on by rotating the Settings Dial to Photo Mode 2. Press SET to access the menu. 3. Toggle down to Panorama and right to Portrait or Landscape. Aurora User Manual... -
Page 45: Time Lapse
You can also have the camera take photos over a set time period using the Time Lapse duration feature. This means the camera can take photos for one hour up to 24 hours. 1. Turn the camera on by rotating the Settings Dial to Photo Mode Aurora User Manual... - Page 46 Chapter 2. Photos and Videos 2. Press SET to access the menu and toggle down to Time Lapse. 3. Toggle right to On and right again to set the Rate. Aurora User Manual...
- Page 47 Chapter 2. Photos and Videos 4. Choose a Rate by pressing SET. 5. Toggle down to Duration and right to select the number of hours. 6. Toggle left twice and press SET to exit. Aurora User Manual...
-
Page 48: Shooting Photos And Videos: Advanced Settings
You can adjust the brightness of the Viewfinder using the Brightness feature. The default is Auto and you can change it to high, medium, or low. The brightness level in the Viewfinder will change with each scene mode: Night, Twilight, or Day. Aurora User Manual... - Page 49 3. Toggle right on Brightness and select the option best suited to your eye and situation and press SET. 4. Press SET again to exit out of the menu. Note. All features remain selected when the camera is turned off and then on again. Aurora User Manual...
-
Page 50: Overlay
1. Turn the camera on by rotating the Settings Dial to Photo, Video, or Loop Mode 2. Long press the SET button to access the menu. 3. Toggle down to Overlay and then toggle right and down to Focus Peak. Aurora User Manual... - Page 51 5. Toggle left and press SET to exit the menu. Now when you look through the Viewfinder, you’ll see a red edge where your subject is in focus. Note. All features remain selected when the camera is turned off and then on again. Aurora User Manual...
- Page 52 1. Turn the camera on by rotating the Settings Dial to Photo, Video, or Loop Mode 2. Long press the SET button to access the menu. 3. Toggle down to Overlay and then toggle right and down to Grid. Aurora User Manual...
- Page 53 4. Toggle right again and select On and press SET. 5. Toggle left and press SET to exit. The Grid will now be visible in the Viewfinder. Note. All features remain selected when the camera is turned off and then on again. Aurora User Manual...
- Page 54 1. Turn the camera on by rotating the Settings Dial to Photo, Video, or Loop Mode 2. Long press the SET button to access the menu. 3. Toggle down to Overlay and then right and down to Pitch & Roll. Aurora User Manual...
- Page 55 Chapter 2. Photos and Videos 4. Toggle right to On and press SET. 5. Toggle left and press SET to exit. The Pitch & Roll feature will now be visible in the Viewfinder. Aurora User Manual...
- Page 56 52) and Pitch & Roll (See “Section 2.4.2.3 Pitch & Roll” on page 54). 1. To turn the Toggle All option on, rotate the Settings Dial to Photo, Video, or Loop Mode 2. Long press the SET button to access the menu. Aurora User Manual...
- Page 57 Chapter 2. Photos and Videos 3. Toggle down to Overlay and then right to select the Toggle All option. 4. Select All Off or All On and press SET. Aurora User Manual...
-
Page 58: Evf Time Out
The Electronic Viewfinder contains a proximity sensor that automatically turns the Viewfinder on or off to save battery life. When the proximity sensor is blocked (e.g., by your eye) it will turn the Viewfinder on. 1. Turn the camera on by rotating the Settings Dial to Photo, Video, or Loop Mode Aurora User Manual... - Page 59 3. Toggle down to EVF Time Out and toggle right to the Time Out options. 4. Toggle down to the option you want and press SET twice to select the Time Out and then exit. Note. The EVF setting does not appear in the Viewfinder. Aurora User Manual...
-
Page 60: Night Glow
Click here to view a related video 1. To change the Night Glow settings, first turn the Scene Ring to Night. 2. Turn the camera on by rotating the Settings Dial to Photo, Video, or Loop Mode Aurora User Manual... - Page 61 5. Select the option that best suits your scene and press SET and SET again to exit. Note. The Night Glow setting doesn’t appear in the Viewfinder. Note. All features remain selected when the camera is turned off and then on again. Aurora User Manual...
-
Page 62: Quick Review
Note. This feature only works in Photo Mode. 1. Turn the camera on by rotating the Settings Dial to Photo Mode 2. Long press the SET button to access the menu. 3. Toggle down to Quick Review and right to the options. Aurora User Manual... -
Page 63: Invert Image
1. Turn the camera on by rotating the Settings Dial to Photo, Video, or Loop Mode 2. Long press the SET button to access the menu. 3. Toggle down to Invert Image and toggle right to turn the option on. Press SET and SET again to exit. Aurora User Manual... -
Page 64: Shooting Videos: Settings
Electronic Image Stabilization (EIS) uses electronic processing to stabilize video. If the EIS setting is turned on, it will minimize blurring and compensate for shaking of the camera. 1. Turn the camera on by rotating the Settings Dial to Video or Loop Mode Aurora User Manual... - Page 65 Chapter 2. Photos and Videos 2. Press SET to access the menu. 3. Toggle right on EIS to turn the option Off or On. Press SET to select and SET again to exit. Aurora User Manual...
-
Page 66: Setting The Frame Rate
2.5.2 Setting the Frame Rate The frame rate is the speed at which the camera records video. 1. Turn the camera on by rotating the Settings Dial to Video or Loop Mode 2. Press SET to access the menu. Aurora User Manual... - Page 67 6. The Frame Rate will be displayed at the bottom of the Viewfinder. Note. For best results when using the Day setting on the Scene Ring, select 60 fps. With the Twilight or Night setting, select 30 fps or slower. Aurora User Manual...
-
Page 68: Resolution
1. Turn the camera on by rotating the Settings Dial to Video or Loop Mode 2. Press SET to access the menu. 3. Toggle down to Resolution and right to choose 720p or 360p. Press SET to select and SET again to exit. Aurora User Manual... - Page 69 Chapter 2. Photos and Videos 4. The Resolution will be visible at the bottom of the Viewfinder. Note. All features remain selected when the camera is turned off and then on again. Aurora User Manual...
-
Page 70: Hdr
1. Turn the camera on by rotating the Settings Dial to Video or Loop Mode 2. Press SET to access the menu. 3. Toggle down to HDR and right to select On or Off. Press SET to select and SET again to exit. Aurora User Manual... - Page 71 Chapter 2. Photos and Videos 4. The HDR icon will be visible at the bottom of the Viewfinder. Note. All features remain selected when the camera is turned off and then on again. Aurora User Manual...
-
Page 72: Chapter 3. Loop Mode
3.1 Trigger Type You can set the Trigger to be activated by the Shutter button or a sensor. 1. To set the Trigger Type, rotate the Settings Dial to Loop Mode 2. Press SET to access the Loop menu. Aurora User Manual... - Page 73 3. Toggle right on Trigger Mode to select Shutter or Auto. Press SET to select and SET again to exit. 4. The Trigger settings will be visible in the Viewfinder. Note. All features remain selected when the camera is turned off and then on again. Aurora User Manual...
-
Page 74: Trigger Mode
1. To set the Trigger Mode, rotate the Settings Dial to Loop Mode 2. Press SET to access the menu. 3. Toggle right on Trigger Mode and press SET to select Mode and SET again to exit. Aurora User Manual... - Page 75 Chapter 3. Loop Mode 4. The Trigger Mode will be visible in upper left of the Viewfinder. Note. All features remain selected when the camera is turned off and then on again. Aurora User Manual...
-
Page 76: Chapter 4. Wifi/Settings Mode
1. Turn the camera on by rotating the Settings Dial to WiFi/Settings Mode to access the menu 2. The WiFi/Settings menu appears. Note. To exit out of the WiFi/Settings menu, simply rotate the Settings Dial to another Mode. 3. Toggle right on About to access the menu. Aurora User Manual... -
Page 77: Factory Reset
Factory Reset returns the camera to its default settings. 1. Turn the camera on by rotating the Settings Dial to WiFi/Settings Mode to access the menu 2. Toggle right on About and down to Factory Reset. Select ‘Yes’ to reset your camera. Aurora User Manual... -
Page 78: Auto Power Off
The Auto Power OFF option turns the camera off automatically at time frames of Never, 5 minutes, 10 minutes, or 20 minutes. The default setting is Never. 1. Turn the camera on by rotating the Settings Dial to WiFi/Settings Mode to access the menu Aurora User Manual... -
Page 79: Compass
The camera has an electronic compass built in. The compass is calibrated at the factory, but If you feel that your compass is directionally off you can recalibrate it manually. Click here to view a related video 1. Turn the camera on by rotating the Settings Dial to WiFi/Settings Mode to access the menu Aurora User Manual... -
Page 80: Date And Time
GPS Set. 4.4.1 GPS Set You can have the GPS set the time. 1. Turn the camera on by rotating the Settings Dial to WiFi/Settings Mode to access the menu Aurora User Manual... - Page 81 Chapter 4. WIFI/Settings Mode 2. Toggle down to Date and Time and right to GPS Set and right again to options. Aurora User Manual...
- Page 82 4. Toggle left twice to exit the menu. 5. If you want to set the Daylight Savings Time to on, toggle down to DST and right to On and press SET. 6. Toggle left twice to exit the sub-menus. Aurora User Manual...
-
Page 83: Format
You can change the format of the date and time. 1. Turn the camera on by rotating the Settings Dial to WiFi/Settings Mode to access the menu 2. Toggle down to Date and Time and toggle right to Format. Aurora User Manual... - Page 84 4. The selectable options are at the top of the screen. The default Date Format is month-date-year. You can also change the format to date-month-year or year-month-date. To change the format, toggle up and down and the format will change. 5. Select the option you want and press SET. Aurora User Manual...
-
Page 85: Sd Card
7. Toggle left twice to exit the menu. 4.5 SD Card If your SD card becomes corrupt, you can format it through the camera. 1. Turn the camera on by rotating the Settings Dial to WiFi/Settings Mode to access the menu Aurora User Manual... - Page 86 3. Toggle to Yes and press SET. 4. If you don’t want to format the SD Card, select No and press SET and toggle left to the main menu. CAUTION Formatting your SD card will erase all of the card data! Aurora User Manual...
-
Page 87: Chimes
1. Turn the camera on by rotating the Settings Dial to WiFi/Settings Mode to access the menu 2. Toggle down to Chimes and right to turn Chimes Off or On. 3. Choose Off or On and press SET. Aurora User Manual... -
Page 88: Audio
1. Turn the camera on by rotating the Settings Dial to WiFi/Settings Mode to access the menu 2. Toggle down to Audio and right to the volume options. 3. Select the volume option you prefer and press SET. Aurora User Manual... -
Page 89: Gps
Note. The GPS only works when you’re outside and requires 1-2 minutes for the camera to receive an initial location. 1. Turn the camera on by rotating the Settings Dial to WiFi/Settings Mode to access the menu Aurora User Manual... -
Page 90: Changing The Gps Format
4. Turn the camera to either the Photo, Video, or Loop Mode and go outside to receive a signal. 5. GPS coordinates are in the upper right corner of the menu. 4.8.2 Changing the GPS Format You can change the GPS format from degrees/minutes/seconds to decimals. Aurora User Manual... - Page 91 Chapter 4. WIFI/Settings Mode 1. Turn the camera on by rotating the Settings Dial to WiFi/Settings Mode to access the menu 2. Toggle down to GPS and right to the menu. Aurora User Manual...
- Page 92 Note: GPS consumes power and should be turned off to extend battery life when not in use. 6. Turn the camera to either the Photo, Video, or Loop Mode and go outside to receive a signal. The GPS coordinates are in the upper right side of the Viewfinder. Aurora User Manual...
-
Page 93: Geotag Image
EXIF viewers and some versions of Windows® by right-clicking on the photo, selecting properties and then details. For videos, it’s stored as custom metadata for each frame. 1. Turn the camera on by rotating the Settings Dial to WiFi/Settings Mode to access the menu Aurora User Manual... -
Page 94: Wifi
3. Toggle down to GeoTag Image and right to the Off or On option. Press SET to select. 4. Toggle left to exit the GPS menu. 4.9 WIFI To learn more about WiFi, see ”Section 1.6 Downloading the SiOnyx Aurora App to Connect to Your Camera” on page Aurora User Manual... -
Page 95: Chapter 5. Reference Information
Chapter 5. Reference Information 5.1 Battery 5.1.1 Operating Temperature Range The operating temperature range of the Aurora camera is 14 °F – 104 °F (-10 °C – 40 °C) at 90% relative humidity. 5.1.2 Tips on Reducing Battery Usage To save your battery’s power, follow these tips: 1. -
Page 96: Camera Specifications
1/480 sec, 1/1000 sec, 1/2000 sec, 1/4000 sec, 1/8000 sec GPS, Accelerometer, Compass WiFi, USB 2.0 Connectivity Micro SD 4-32 GB (not included) Storage Micro OLED display Viewfinder Water-Resistant IP67 Water-Resistant Rechargeable 2h continuous Lithium-ion Battery iOS, Android Apps Aurora User Manual... -
Page 97: Sionyx Customer Care
IP67 under IEC standard 60529. Aurora is water resistant to 3 feet for 30 minutes. If your Aurora is wet or has recently been in water, be sure to dry it off thoroughly before removing the Viewfinder to prevent any water from entering the body of the camera. -
Page 98: Chapter 6. Troubleshooting
5 minutes after being set to On. view of the sky. No Photo In Playback mode when there is no image to In Playback mode there are no photos to display. display on SD Card. Turn Settings Dial to another Mode. Aurora User Manual... -
Page 99: Chapter 7. Warranty
SiOnyx; (h) to defects caused by normal wear and tear or otherwise due to the normal aging of the SiOnyx Product; or (i) if any serial number has been removed or defaced from the SiOnyx Product. - Page 100 If a claim is received within the Warranty Period and the SiOnyx Product is found to have failed based on a phone evaluation by SiOnyx Aurora Customer Care we will, at our option: •...
- Page 101 SiOnyx Aurora Customer Care at (833) SiOnyx 1 (833-746-6991). All orders must be inspected by customers within 30 days of the date of purchase. After this time, SiOnyx will not be responsible for items damaged in shipping, lost, or any other issues not related to technical support.
Need help?
Do you have a question about the AURORA and is the answer not in the manual?
Questions and answers