Table of Contents
Advertisement
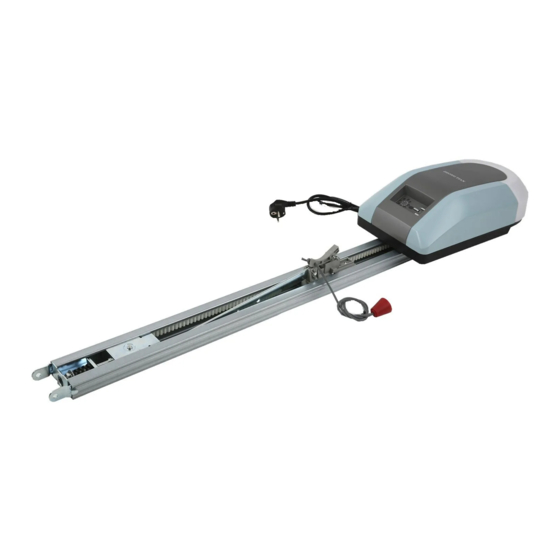
Chain/Belt Drive Garage Door Opener
To reduce the risk of injury to persons or damage to property
Please use this opener only with a one-piece or sectional residential door
INSTALLATION AND OPERATION MANUAL
Please save this manual for future reference
WARNING
Read all instructions and warnings before use. Failure to follow all instructions
may result in serious personal injury or product damage.
Advertisement
Table of Contents

Summary of Contents for Lockdoor ZTGD800
- Page 1 Chain/Belt Drive Garage Door Opener To reduce the risk of injury to persons or damage to property Please use this opener only with a one-piece or sectional residential door INSTALLATION AND OPERATION MANUAL Please save this manual for future reference WARNING Read all instructions and warnings before use.
-
Page 2: Table Of Contents
CONTENTS 1,User Information 1-1,Safety Notes…………………………………………………………………..3 1-2,Important Safety Instructions………………………………………………..3 1-3, Important Safety Requirements and Regulations……………………...3-4 2,Package Contents……………………………………………………………..…5 3, Features and Benefits 3-1,Technical Parameters………………………………………………………..6 3-2,Using Door Type……………………………………………………………6-7 3-3,Function Instruction…………………………………………………………..7 4, Tools Needed…………………………………………………………………….8 5, Assembly 5-1,Assemble the rail and trolley ( for a multi-part rail) ………………………..9 5-2,Install the straight door arm/curved door arm…………………………...10 5-3,Position and secure the chain(for a multi-part rail)….……………….10 5-4,Tighten the chain (for a multi-part rail)... -
Page 3: 1,User Information
1, User Information 1-1,Safety Notes: Garage doors are the largest automated moving object in most homes. Care needs to be taken when using this system. Since moving objects, springs under tension, and electric motors can cause injuries, your safety and the safety of others depend on you reading the information in this manual. - Page 4 1, User Information (Continued) away from moving parts. Permanently fix the label warning against entrapment in a prominent place or near any fixed controls. Permanently fix the label concerning the manual release adjacent to its actuating member. After installation, ensure that the mechanism is properly adjusted and that the drive reverses when the door contacts a 40mm high object placed on the floor.
-
Page 5: 2,Package Contents
2, Package Contents... -
Page 6: 3, Features And Benefits
3, Features and Benefits 3-1,Technical Parameters Model Number ZTGD800 ZTGD1000 Pull and Push Force 800N 1000N Motor Voltage 24V DC 24V DC Voltage 240V, 50HZ 240V, 50HZ Speed 120mm/s 120mm/s Temperature Range -20℃ ~ +45℃ -20℃ ~ +45℃ Remote Control Code 433.92MHZ... -
Page 7: 3-3,Function Instruction
3, Features and Benefits (Continued) One piece overhead garage door: Maximum height 7.3’ 3-3,Function Instruction Opens door smoothly with soft starts and stops Electronic limit setting provides precise door travel control Easy programming with control panel Door will reverse automatically if be obstructed during close ... -
Page 8: 4,Tools Needed
4,Tools Needed The tools illustrated below may be used during installation and adjustment of your opener (items not supplied): time assistance for certain tasks... -
Page 9: 5, Assembly
5, Assembly 5-1, Assemble the rail and trolley( for a multi-part rail) CAUTION: To prevent injury from pinching, please keep hands and fingers away from the joints while assembling the rail... -
Page 10: 5-2,Install The Straight Door Arm/Curved Door Arm
5, Assembly (Continued) 5-2, Install the straight door arm/curved door arm 5-3, Position and secure the chain( for a multi-part rail) WARNING: To avoid possible serious injury to fingers from moving garage door opener: Always keep hand clear of sprocket while operating opener Securely attach chain spreader before screwing... -
Page 11: 5-4,Tighten The Chain (For A Multi-Part Rail
5, Assembly(Continued) 5-4, Tighten the chain( for a multi-part rail) NOTES: During future maintenance, please always pull the emergency release handle to disconnect the trolley before adjusting the chain. Sprocket noise can result if the chain is too loose. Check for proper tension and readjust chain if necessary. 5-5, Fasten the rail to the power head CAUTION: To avoid serious damage to garage door opener, please only use those bolts/fasteners mounted in the top of the opener. -
Page 12: Installation
6, Installation Please read the following warnings before proceeding to the installation section. IMPORTANT INSTALLATION INSTRUCTIONS WARNING: To reduce the risk of severe injury or death: Please read and follow all installation warnings and instructions. Please install garage door opener only on properly balanced and lubricated garage door. -
Page 13: 6-2,Install The Header Bracket
6, Installation(Continued) 6-2, Install the header bracket You can attach the header bracket either to the wall above the garage door, or to the ceiling. Please follow the instructions which will work best for your particular requirements. Please do not install the header bracket over drywall. If installing into masonry, use concrete anchors(not provided) -
Page 14: 6-3,Attach The Rail To The Header Bracket
6, Installation(Continued) 6-3, Attach the rail to the header bracket Align the rail with the header bracket. Insert the clevis pin through the holes in the header bracket and rail. Secure with the R fastener... -
Page 15: 6-4,Position The Garage Door Opener
6, Installation(Continued) 6-4, Position the garage door opener CAUTION: To prevent damage to garage door, with help of another person. Step1, Attach the “U” bracket on the rail, connect with short angle iron with screws. - Page 16 6, Installation(Continued) Step2, Position the rail horizontally and measure the distance there between motor and ceiling. Make sure the garage door opener is aligned with the header bracket. Measure the distance from each side of the garage door opener to the ceiling. Cut two long angle irons accordingly, and connect with two short angle irons with same screws.
- Page 17 6, Installation(Continued) Step4,Attach the middle of rail to ceiling with hanging bracket, anchors , screws, and angle irons( not included, should be applied by door suppliers) WARNING: To avoid possible serious injury from a falling garage door opener, fasten it securely to structural supports of the garage. Concrete anchors must be used if installing any brackets into masonry If at the beginning of step2, when you position the rail horizontally, your engine is found stuck to the ceiling, Only “U”...
-
Page 18: 6-5,Install The Door Bracket
6, Installation(Continued) 6-5, Install the door bracket CAUTION: Fiberglass, aluminum or lightweight steel garage doors will require reinforcement before installation of door bracket. Please contact your door manufacturer for reinforcement kit. OPTION A SECTIONAL DOORS Step1, Center the door bracket on the previously marked vertical centerline used for the header bracket installation. - Page 19 6, Installation(Continued) Step2, Position the top edge of the bracket 2”-4”(5-10cm) below the top edge of the door, or directly below any structural support across the top of the door. Step3, Mark, drill holes and install as follow...
-
Page 20: 6-6,Connect The Door Arm To The Trolley
6, Installation(Continued) OPTION B ONE-PIECE DOORS Center the door bracket on the top of the door, in line with the header bracket as shown. 6-6, Connect the door arm to the trolley Installation will vary according to the garage door type. Follow the instructions which apply to your door. - Page 21 6, Installation(Continued) Step3, Bring arm sections together. Find two pairs of holes that line up and join sections. Select holes as far apart as possible to increase door arm rigidity and attach using the bolts, nuts and lock washers.
- Page 22 6, Installation(Continued) Step4, Pull the emergency release handle toward the garage door opener until the trolley release arm is horizontal. The trolley will re-engage automatically when the garage door opener is activated. OPTION B ONE-PIECE DOORS Step1, Close the door. Disconnect the trolley by pulling the emergency release handle Step2, Attach the straight door arm to the door bracket using the clevis pin.
-
Page 23: Install The Protector System
6, Installation(Continued) Manually check that the door opens and closes completely and correctly. Bring the door in the engaged position. 6-7, Install the protector system WARNING: Be sure power is NOT connected to the garage door opener BEFORE installing the safety beam. To prevent SERIOUS INJURY or DEATH from closing garage door: Correctly connect and align the safety beam. - Page 24 6, Installation(Continued) NOTE: When installing the safety beam check the following: Sensors are installed inside the garage, one on either side of the door. Sensors are facing each other with the lenses aligned and receiving sensor lens does not receive direct sunlight. Sensors are no more than 6 inches (15cm) above the floor and the light beam is unobstructed.
- Page 25 6, Installation(Continued) Step2, Wire the safety beam Run the wire from both sensors to the garage door opener. Attach the wire to the wall and ceiling with the staples. Separate the wires, plug it with quick plug.
-
Page 26: 7,Adjustments
7, Adjustments 7-1,Introduction WARNING : Without a properly installed safety reversal system, persons(particularly small children) could be seriously injured or killed by a closing garage door. - Incorrect adjustment of garage door travel limits will interfere with proper operation of safety reversal system. -
Page 27: Symbols Introduction
7, Adjustments(Continued) 7-2, Symbols Introduction State of Lamp State of Button 8 LED lamps and 3 buttons are used for programming: “P” Enters into and selects programming menus. “+” “-” Multi-function; move door during programming and advance through menus. 7-3, Setting the UP(Open) Travel Limit Step1, Plug your plug in, LED3 turns on Step2, Press and release the "P"... -
Page 28: Setting The Down(Close) Travel Limit
7, Adjustments(Continued) Step4, Press and release the “P” button to save, LED 4 will begin flashing The UP(Open) Travel limit is now programmed. 7-4, Setting the DOWN(Close) Travel Limit Step1, LED4 is flashing now, press and hold the “-” to begin closing the garage door. When the garage door is fully closed, release the “-”. - Page 29 7, Adjustments(Continued) Step2,Press and release the “P” button, LED4 will begin flashing Step3,Press and release the “P” button, LED6 will begin flashing Step4,Press and release “+”(plus) or“-”(minus) button to adjust force of UP(Open), the factory set is fourth gear, the biggest force is eighth gear. And the smallest force is first gear.
-
Page 30: Test The Safety Reversal System
7, Adjustments(Continued) 7-6, Test the Safety Reversal System WARNING: Without a properly installed safety reversal system, persons(particularly small children) could be seriously injured or killed by a closing garage door: Safety reversal system must be tested every month After any adjustments are made, the safety reversal system must be tested. Door must reverse on contact with 2”(5cm) high object(or 3X8 laid flat) on the floor. -
Page 31: 8, Programming
8, Programming NOTE: Before you begin programming, check to make sure there are no objects in the garage door opener. 8-1, Programming Remotes Wireless Wall Mounted Remote(Optional on some models) NOTE: THE REMOTE CONTROLS AND WIRELESS WALL MOUNTED REMOTE INCLUDED WITH THIS OPENER... -
Page 32: 8-2,Replacing Battery In Remote And Wireless Wall Mounted Remote
8, Programming(Continued) 8-2, Replacing battery in remote and Wireless Wall Mounted Remote(optional on some models) CAUTION: Incorrect battery replacement can be dangerous . Always replace with the same battery type. Use longlife batteries. Step1, Slacken screws on rear of remote control/wireless wall mounted remote and remove cover. - Page 33 8, Programming(Continued) 8-3-3, Method of use The use of the keypad is based on "combinations", i.e. numbers of from 1 to 9 digits that the user is required to key in by means of the keys. Once the combination has been Entered the user then presses confirm key or ...
- Page 34 8, Programming(Continued) 8-3-4, Programming with garage door opener NOTE: THE WIRELESS KEYPAD INCLUDED WITH THIS OPENER HAVE BEEN PRE-PROGRAMMED AT THE FACTORY, FACTORY SET PIN IS “11 The following instructions are for wireless keypad purchased separately in addition to those provided with this opener, but also can be used for wireless keypad that require re-programming.
- Page 35 8, Programming(Continued) 8-3-5, Changing a Combination This function allows you to change the combination associated with channel 1 1.Press the "0" key and hold it down while pressing and releasing 0 2.Release the "0"key . 3.Type in the current (original) combination and press 11...
-
Page 36: 9, Clearing Remotes
9, Clearing Remotes CAUTION: Clearing memory for remotes from the powerhead will clear ALL programmed remotes, wireless wall mounted remotes and wireless keypads. Your opener will no longer recognize any signal from any remote device, including missing remote device. ALL remaining( or recovered) remotes, wireless wall mounted remotes and wireless keypads MUST be reprogrammed. -
Page 37: 10, Trolley User Manual
10, Trolley User Manual WARNING: To prevent possible SERIOUS INJURY or DEATH from falling garage door: If possible, use emergency release handle to disengage trolley ONLY when garage door is CLOSED. Weak or broken springs or unbalanced door could result in an open door falling rapidly and/or unexpectedly. -
Page 38: 11, Troubleshooting
11, Troubleshooting... -
Page 39: 12, Warranty
12, Warranty ONE YEAR LIMITED WARRANTY 2 YEAR MOTOR LIMITED WARRANTY MODEL ZTGD800 AND ZTGD1000 We warrant to the first retail purchaser of this products, for the residence in which this product is originally installed, that is free from defects in material for a period of one year from the date of purchase, except that the motor which is warranted to be free from defects in material for a period of 2 years. -
Page 40: 13, Accessories And Repair Parts
13, Accessories and Repair Parts Accessories ZT-07 Keychain Remote Control: Can work with ALL openers. With key ring. ZTCL Wireless Keypad(Optional): For use outside of the home to enable access to the garage. Can work with ALL openers. ZTPC Safety Beam(Optional): To prevent SERIOUS INJURY or DEATH from closing garage door. -
Page 41: Accessories And Repair Parts
13, Accessories and Repair Parts(Continued) Repair Parts Part Description photo Number Chain/Belt [30] Trolley Assembly “U” Bracket ( with hole) “U” Bracket (without hole) Straight Door Arm [15] Curved Door Arm [10] Mounting Bracket [13] Angle iron [12] Angle iron [32] Door Bracket [11]...