Table of Contents
Advertisement
Quick Links
iScan System Guide
For Research Use Only. Not for use in diagnostic procedures.
ILLUMINA PROPRIETARY
Catalog # SY-950-1001DOC
Material # 20000396
Document # 11313539 v01
August 2015
Customize a short end-to-end work ow guide with the Custom Protocol Selector
support.illumina.com/custom-protocol-selector.html
Advertisement
Table of Contents

Related Manuals for illumina iScan

Summary of Contents for illumina iScan
- Page 1 System Guide For Research Use Only. Not for use in diagnostic procedures. ILLUMINA PROPRIETARY Catalog # SY-950-1001DOC Material # 20000396 Document # 11313539 v01 August 2015 Customize a short end-to-end work ow guide with the Custom Protocol Selector support.illumina.com/custom-protocol-selector.html...
- Page 2 This document and its contents are proprietary to Illumina, Inc. and its affiliates ("Illumina"), and are intended solely for the contractual use of its customer in connection with the use of the product(s) described herein and for no other purpose. This document and its contents shall not be used or distributed for any other purpose and/or otherwise communicated, disclosed, or reproduced in any way whatsoever without the prior written consent of Illumina.
-
Page 3: Revision History
Added troubleshooting information for malfunctioning status August lights in the iScan Reader Issues section. 2015 Document # 11313539 Document # 11313539 Updated to reflect iScan Control Software (ICS) version 3.2, February Rev. B including automated genotype calling functionality and other 2011 features. - Page 4 [This page intentionally left blank] Material # 20000396 Document # 11313539 v01...
-
Page 5: Table Of Contents
Using LIMS with the iScan System Chapter 3 Loading BeadChips Procedure Summary Cleaning a BeadChip Loading BeadChips onto a Carrier Loading a Carrier into the iScan Reader Rescanning Barcodes Chapter 4 Configuring iScan Control Software Introduction Omitting BeadChips from a Scan... - Page 6 Appendix 8 Troubleshooting Handling Errors Issue Types Registration Issues Auto-Alignment Issues iScan Reader Issues Image Quality Issues iScan Control Software Display Issues Index Technical Assistance Material # 20000396 Document # 11313539 v01...
-
Page 7: Chapter 1 Overview
Chapter 1 Overview Overview Introduction Additional Resources Instrument Components Consumables Required iScan System Requirements Scanning Process Overview iScan System Guide... -
Page 8: Introduction
(AutoLoader2 or AutoLoader 2.x model), to maximize throughput to thousands of samples per day. When used with Infinium® HD BeadChips and the AutoLoader, the iScan System can report up to 225 million genotypes in a single day, offering the fastest path to discovery. -
Page 9: Additional Resources
System Safety and Provides safety information and product compliance Compliance Guide (part # statements for the iScan system. 15022905) Visit the iScan System support page on the Illumina website for access to documentation, software downloads, and online training. iScan System Guide... -
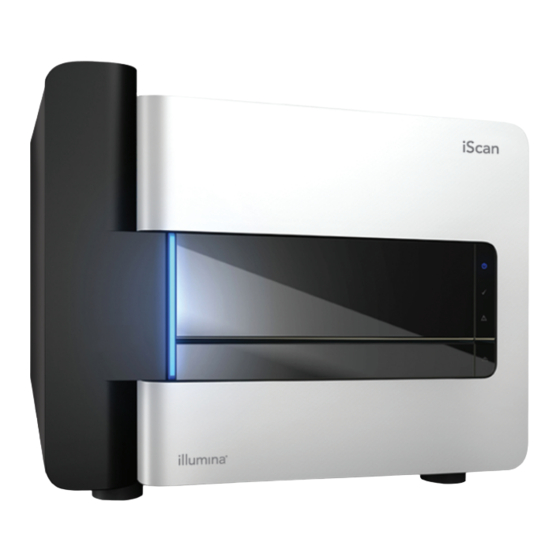
Page 10: Instrument Components
1 at a time into the adapter plate in the iScan Reader tray. NOTE The adapter plate is calibrated to each individual iScan Reader. Do not switch adapter plates between iScan Readers. Figure 1... - Page 11 Status Lights The iScan Reader status indicator lights and scan bar on the front panel show the status of the instrument. Figure 2 Status Lights and Scan Bar Status Light Description Steady blue indicates that the instrument is on. Power (blue)
- Page 12 Drive C: is ~75 GB in size and is installed with all the generic scanner software required to run the iScan System. It has 2 partitions, 1 for the Windows operating system and 1 for the BIOS. This drive contains at least 30 GB in free disk space on this drive to keep the scanner from slowing down or timing out during a scan.
- Page 13 BeadChip Carriers The iScan System comes with 1 BeadChip carrier. The carrier holds up to 4 BeadChips for scanning at 1 time. The BeadChip carriers consist of the following components. Figure 3 BeadChip Carrier Latches (closed) Raised Stops BeadChip Slots...
- Page 14 The format for the number is _1stBeadChipBarcode. Power Cords and Other Accessories The iScan System comes with power and connection cords that are connected for you by authorized Illumina personnel as part of the system installation. Do not unplug or disconnect any cords unless instructed by Illumina Technical Support.
-
Page 15: Consumables Required
Consumables Required This section lists the Illumina kits and user-supplied consumables required to scan BeadChips using the iScan System. Illumina BeadChip Kits Before you begin scanning, complete the appropriate assay for your BeadChip and application. The iScan System is compatible with the following types of BeadChips:... -
Page 16: Iscan System Requirements
Reader. Air Table Specifications The iScan Reader instrument is sensitive to vibrations. Therefore, an air table is required to help isolate the reader from vibrations produced by the surrounding environment. The air table is placed between the reader and the laboratory benchtop and is hooked up to a regulator connected to the house air line. -
Page 17: Scanning Process Overview
Illumina for your BeadChips. Download the Decode File Client from your MyIllumina account. Start the iScan System. Load the BeadChips onto a carrier, load the carrier into the iScan Reader tray, and scan the BeadChip carrier barcodes. For more information, see Loading BeadChips on page If necessary, select a different image format, scan settings, data normalization settings, and input/output path. - Page 18 Material # 20000396 Document # 11313539 v01...
-
Page 19: Chapter 2 Starting The Iscan System
Chapter 2 Starting the iScan System Starting the iScan System Procedure Summary Powering up the iScan System Starting the iScan Control Software Using LIMS with the iScan System iScan System Guide... -
Page 20: Procedure Summary
Procedure Summary Perform the following steps to start the iScan System. Power up the iScan Reader. Power up the iScan System computer. Start the iScan Control Software. These steps are described in the following sections, along with information on using LIMS with the iScan System. -
Page 21: Powering Up The Iscan System
Press the Power switch on the back panel. Figure 6 iScanPower Switch The iScan Reader status indicator lights on the front panel show the status as the instrument powers up. For more information, see Status Lights on page Power Up the Instrument Control Computer Press the Power button on the instrument control computer. -
Page 22: Starting The Iscan Control Software
The iScan Control Software automatically connects to and initializes the iScan Reader. If your iScan System is configured to work with LIMS, select your LIMS server from the drop-down menu and then enter your user name and password. -
Page 23: Using Lims With The Iscan System
Infinium LIMS Illumina LIMS Enabling and Disabling LIMS If you use a LIMS, enable it for use with the iScan System before beginning a scan. Click the menu button in the upper left corner of the screen, and then select Tools | Options. - Page 24 Material # 20000396 Document # 11313539 v01...
-
Page 25: Chapter 3 Loading Beadchips
Chapter 3 Loading BeadChips Loading BeadChips Procedure Summary Cleaning a BeadChip Loading BeadChips onto a Carrier Loading a Carrier into the iScan Reader Rescanning Barcodes iScan System Guide... -
Page 26: Procedure Summary
Always wear gloves when handling BeadChips. Clean the BeadChips. Load the BeadChips onto a BeadChip carrier. Load the carrier into the iScan Reader. These steps are described in the following sections, along with instructions on how to rescan barcodes. Material # 20000396... -
Page 27: Cleaning A Beadchip
Cleaning a BeadChip Before placing BeadChips on the iScan Reader, always wipe off excess protective coating and residue from the back side of the BeadChip. Using an alcohol wipe or a lint-free tissue moistened with ethanol or isopropanol, carefully wipe the back side of the BeadChip. -
Page 28: Loading Beadchips Onto A Carrier
Loading BeadChips onto a Carrier BeadChip carriers hold the BeadChips in place during the scan process. Hold the BeadChip by the barcode end. Place the BeadChip in a slot so that the nonbarcode end presses up against the raised stop. Figure 7 Placing BeadChips Place up to 4 BeadChips onto the carrier, each in its own slot. - Page 29 Make sure that the BeadChips are settled down firmly into the slots and are perfectly flat. If any BeadChips remain uneven, press and release the Lift button again. If further adjustment is required, manually adjust the BeadChips. Only handle BeadChips by the edges. Figure 10 BeadChips Correctly Placed in Carrier iScan System Guide...
-
Page 30: Loading A Carrier Into The Iscan Reader
Tray button is located below the status LEDs. Figure 11 Open/Close Tray Button NOTE If a BeadChip carrier is already in the iScan Reader tray, lift the carrier straight up and out of the tray to remove the carrier. Material # 20000396 Document # 11313539 v01... - Page 31 Adapter Plate iScan Reader Tray NOTE The adapter plate is specific to each individual iScan Reader. Do not switch adapter plates between iScan Readers. Line up the notches on the carrier with the silver beads on the adapter plate in the iScan Reader tray.
- Page 32 Figure 14 Placing the BeadChips If the carrier moves back and forth after it is placed on the tray, the iScan Reader is automatically centering and positioning the BeadChips for proper scanning. Close the iScan Reader tray using 1 of the following methods:...
-
Page 33: Rescanning Barcodes
Scanner | Scan Barcodes. You can manually enter the barcodes into the position that corresponds to the BeadChip location in the carrier. You can also manually delete barcodes to remove BeadChips from a scan. iScan System Guide... - Page 34 Material # 20000396 Document # 11313539 v01...
-
Page 35: Chapter 4 Configuring Iscan Control Software
Chapter 4 Configuring iScan Control Software Configuring iScan Control Software Introduction Omitting BeadChips from a Scan Changing Scan Settings iScan System Guide... - Page 36 Introduction This chapter explains how to configure the iScan Control Software to perform a scan. If the default configuration values are already correct, simply click Scan to continue. Material # 20000396 Document # 11313539 v01...
- Page 37 All sections of a BeadChip must be scanned when using LIMS. You cannot remove sections from the scan. On the iScan Control Software Setup screen, the BeadChip preview area is on the left side of the screen. At the top of the BeadChip preview area, select a BeadChip to change the scan settings.
- Page 38 Click OK. Applying a Custom Scan Setting to a BeadChip On the iScan Control Software Setup screen, click Settings at the end of the row of the BeadChip whose scan settings you want to change. In the Open Scan Setting File dialog, select the custom scan settings file you created and click Open.
- Page 39 Beeline or GenomeStudio Software. Configuring iScan Control Software to normalize your data requires you to set up a mapping file that associates a type of BeadChip with its manifest and cluster files.
- Page 40 NOTE When the iScan System is running under LIMS, you cannot change the input or output paths. These paths are designated by the LIMS project management software. Refer to the LIMS Project Manager Guide for instructions on how to change input and output path locations.
-
Page 41: Chapter 5 Scanning
Chapter 5 Scanning Scanning Introduction Starting a Scan Monitoring the Scan Progress Pausing, Resuming, and Stopping a Scan Completing a Scan iScan System Guide... -
Page 42: Introduction
This section describes how to start, monitor, pause, stop, and complete scanning of BeadChips. NOTE Before starting a scan, the lasers must stabilize. Make sure that the iScan Reader has been on for at least 30 minutes before beginning a scan. Material # 20000396... -
Page 43: Starting A Scan
As each section is scanned, the image and intensity data are saved on the instrument control computer or in a network location in the output path specified on the iScan Control Software Setup screen. Unless a serious error halts the scan process, the scanning process continues until all sections are scanned or until you pause or stop the scan. -
Page 44: Monitoring The Scan Progress
Reader during scanning. Flashing LED lights indicate which components are in use for each action. Information Bar The Information Bar is located across the bottom of the iScan Control Software Scan screen. The Information Bar summarizes the following information: Scan Settings file... -
Page 45: Pausing, Resuming, And Stopping A Scan
To stop the scan, click Cancel. A confirmation message appears. If you confirm the command, the scan process stops immediately and does not complete the current section. All completed sections are saved to disk. If you choose to rescan the BeadChip later, rescan all incomplete sections. iScan System Guide... -
Page 46: Completing A Scan
LIMS. After a chip is submitted to LIMS, unsuccessful areas cannot be rescanned. NOTE If 1 or more sections of a BeadChip did not successfully scan, click Rescan on the iScan Control Software Review screen to rescan the BeadChip. The iScan Control Software only rescans the sections that are not successfully scanned. -
Page 47: Chapter 6 Viewing Scan Results
Chapter 6 Viewing Scan Results Viewing Scan Results Introduction Log Files Scan Metrics Images Generated Files iScan System Guide... -
Page 48: Introduction
Introduction This chapter describes how to review the results of your scan using: Log Files Scan Metrics Images Generated Material # 20000396 Document # 11313539 v01... -
Page 49: Log Files
Log Files During each run, the iScan Control Software creates a log file that lists each step in the scanning process. These logs are also copied into the data output folder for each BeadChip for troubleshooting purposes. To view the current log file, perform the following steps. -
Page 50: Scan Metrics
Scan Metrics The scan metrics for each BeadChip appear in the Scan Metrics table at the top of the Review screen. This table allows you to review intensity values in the red and green channels, check the registration and focus metrics for each BeadChip stripe, and determine whether intensity data was normalized for each scanned BeadChip section. -
Page 51: Images
Images This section describes how to review images of the scanned BeadChips in the iScan Control Software before closing the software. After you click Done on the Review screen, you are returned to the Welcome screen and are no longer able to view the images in the iScan Control Software. - Page 52 Icon Description Overlay Cores—Allows you to confirm the registration of a specific Red or Green image. When Overlay Cores is selected, the position of a particular bead microwell (core) as determined in the beadmap file (*.dmap) is represented as a blue circle over top of the image. When registration is successful, the intensity for individual beads lies inside the region covered by the core and the overall pattern of cores is consistent with the pattern of bead intensities on the image: that is, the cores overlay on the individual beads...
- Page 53 Move the Brightness slider up to increase image brightness or down to decrease image brightness. Adjusting the Contrast Click the image control icon to show the Contrast control bar. Move the Contrast slider up to increase the image contrast or down to decrease the contrast. iScan System Guide...
- Page 54 Adjusting the Color Move the slider on the Color control bar up to adjust the color toward red. Move the slider down to adjust the color toward green. Material # 20000396 Document # 11313539 v01...
-
Page 55: Generated Files
If 1 or more stripes fail scanning or registration in a sample section, the stripes can be rescanned from the iScan Control Software Review screen using the Rescan button. Upon rescan, new intensity data files are generated. When failed sections on a BeadChip are immediately rescanned within the current scan session, new image files are created only for the sections that are scanned. - Page 56 Image Files Each image file (*.tiff, *.jpeg, or *.png) is also saved on the instrument control computer or network under the BeadChip ID (barcode identifier) folder in the output path folder. File names for each individual node are generated based on the position of the section in the BeadChip.
-
Page 57: Chapter 7 Shutting Down, Maintenance, And Service
Chapter 7 Shutting Down, Maintenance, and Service Shutting Down, Maintenance, and Service Introduction Shutting Down the iScan System Maintenance Service iScan System Guide... - Page 58 Introduction This chapter describes instructions for shutting down the iScan System, along with maintenance, and service recommendations. Material # 20000396 Document # 11313539 v01...
- Page 59 Shutting Down the iScan System Perform the steps to shutting down the iScan System in the following order. Eject BeadChips. Open the iScan Reader tray. To remove the carrier, lift it straight up and out of the tray. Close the iScan Control Software.
- Page 60 To clean the equipment, dampen a cloth with water and a mild detergent and wipe down all external surfaces. There are no internal surfaces that require cleaning. Maintaining and Calibrating the iScan System Contact Illumina Technical Support to schedule yearly maintenance and calibration. Material # 20000396 Document # 11313539 v01...
- Page 61 Service CAUTION There are no user-serviceable items inside the equipment. Refer any service requests to qualified Illumina service personnel. iScan System Guide...
- Page 62 Material # 20000396 Document # 11313539 v01...
-
Page 63: Appendix 8 Troubleshooting
Appendix 8 Troubleshooting Troubleshooting Handling Errors Issue Types Registration Issues Auto-Alignment Issues iScan Reader Issues Image Quality Issues iScan Control Software Display Issues iScan System Guide... -
Page 64: Handling Errors
Reporting errors Viewing Error Details as they Occur If an error occurs when using the iScan System, an error message box is displayed. To take a screen capture of the error message, press the Alt and Print Screen keys simultaneously. -
Page 65: Issue Types
Issue Types Issues that can appear when using the iScan System fall into the following general categories: Registration issues Autoalignment issues iScan Reader issues Image quality issues iScan Control Software display issues The following sections describe these types of issues, with solutions for each. -
Page 66: Registration Issues
Decode data cannot be found during registration / Cannot find bead map files Cause Resolution Incorrect bead map Verify the bead map (*.dmap) file location in the iScan System file location Options dialog box, available by selecting Tools | Options. specified. Bead map files not Verify the existence of the bead map files for the array by navigating in proper location. - Page 67 Options screen. See the AutoLoader2 User Guide or the AutoLoader 2.x stripes less than or User Guide, depending on your AutoLoader system. equal to the error threshold percentage specified in the AutoLoader Options screen. Carrier barcode Remove any obstructions to the barcode. cannot be read. iScan System Guide...
-
Page 68: Auto-Alignment Issues
Reader tray. BeadChips. Reload the BeadChips, making sure that they are secure and flat in the carrier. Reload the carrier in the iScan Reader tray, making sure that it is flat and aligned. Make sure that the notches on the tray match the beads on the adapter plate and the front presses against the front alignment features. - Page 69 Autotilt peaks do not appear on the align screen Cause Resolution BeadChips do not Remove the BeadChip carrier from the iScan Reader tray and reseat lie flat within the the BeadChips. Make sure that they lie flat within the slots on the carrier.
-
Page 70: Iscan Reader Issues
Initialization failure Remove any external hard drive or other USB device before turning error when starting on the iScan Reader and its computer, allowing the override.cfg file the iScan Control to be loaded on the internal drive H. Software. - Page 71 Fault light illuminates Cause Resolution iScan Reader Click the Menu button in the upper left corner of the iScan Control requires Software screen, and then select Scanner | Initialize. reinitialization. iScan Control Software (ICS) displays FPGA timeout errors Cause Resolution Problems with Take a screen capture of the error and save it.
- Page 72 Reload the carrier and rescan. If the barcode still fails to be read, try to enter the barcode number manually into the correct position using the iScan Control Software. Material # 20000396...
-
Page 73: Image Quality Issues
System displays “Cannot initialize camera frame grabber” error Cause Resolution Camera cable on Tighten connection, then restart the scanner and restart the iScan back of scanner is Control Software. Power cycle the scanner and/or PC as many times loose. as necessary until the frame grabber is able to initialize successfully. - Page 74 Bead images are blurred Cause Resolution Autotilt values are Remove the BeadChip carrier from the iScan Reader tray and reseat out of range, slide is the BeadChips. Make sure that they lie flat within the slots on the not seated properly, carrier.
-
Page 75: Iscan Control Software Display Issues
If the cable seems tight, reseat the frame camera and frame grabber card. grabber card. Large number of Contact Illumina Technical Support to schedule a field service call. ports have been installed on the computer. iScan System Guide... - Page 76 Material # 20000396 Document # 11313539 v01...
-
Page 77: Index
45 information bar 38 LIMS Menu button 10 enabling and disabling 17 overlay cores 46 using with the iScan System 17 progress indicator 38 loading BeadChips 20 show green and red channels 46 log files 43 status bar 38... - Page 78 Reader powering up 15 reinitializing 16 Reader tray 5 red stripes 61 scan BeadChips 36 completing 40 custom settings 32 generated files 49 log files 43 metrics 44 monitoring 38 pausing 39 progress 38 resuming 39 reviewing images 45 starting 37 stopping 39 show green and red channels 46 status bar 38...
-
Page 79: Technical Assistance
0800.451.650 Belgium 0800.81102 Norway 800.16836 Denmark 80882346 Spain 900.812168 Finland 0800.918363 Sweden 020790181 France 0800.911850 Switzerland 0800.563118 Germany 0800.180.8994 United Kingdom 0800.917.0041 Ireland 1.800.812949 Other countries +44.1799.534000 Safety data sheets (SDSs)—Available on the Illumina website at support.illumina.com/sds.html. iScan System Guide... - Page 80 Illumina 5200 Illumina Way San Diego, California 92122 U.S.A. +1.800.809.ILMN (4566) +1.858.202.4566 (outside North America) techsupport@illumina.com www.illumina.com...
Need help?
Do you have a question about the iScan and is the answer not in the manual?
Questions and answers