Table of Contents
Advertisement
Advertisement
Table of Contents
Troubleshooting

Summary of Contents for BLADDERSCAN BVI 3000
- Page 1 BLADDERSCAN BVI 3000 OPERATIONS & MAINTENANCE MANUAL...
- Page 2 0900‑0383‑15‑60...
- Page 3 BLADDERSCAN BVI 3000 OPERATIONS & MAINTENANCE MANUAL Effective: March 6, 2015 Caution: Federal (United States) law restricts this device to sale by or on the order of a physician.
- Page 4 Verathon Inc. Verathon, the Verathon torch symbol, BladderScan, and the BladderScan symbol are either trademarks or registered trademarks of Verathon Inc. All other brand and product names are trademarks or registered trademarks of their respective owners.
-
Page 5: Table Of Contents
TABLE OF CONTENTS IMPORTANT INFORMATION .............................. 1 OVERVIEW ..................................1 Product Description ............................... 1 Statement of Intended Use ............................1 Essential Performance ..............................1 Statement of Prescription ............................. 1 Notice to All Users ................................. 1 SAFETY INFORMATION ..............................2 Biological Safety ................................2 Contraindications ................................ - Page 6 CONFIGURING USER SETTINGS ..........................15 Procedure 1. Program the Name ..........................15 Procedure 2. Set the Date .............................17 Procedure 3. Set the Time ............................19 Procedure 4. Adjust User Preferences .........................21 USING THE INSTRUMENT ...............................24 SCANNING A PATIENT ..............................25 Procedure 1. Measure Bladder Volume ........................25 Procedure 2.
- Page 7 TROUBLESHOOTING ..............................41 Procedure 1. Run a Self Test ..........................41 Procedure 2. Troubleshoot Power Issues ......................42 Procedure 3. Troubleshoot an Error Message ......................42 Procedure 4. Clear a Paper Jam ..........................44 Procedure 5. Test the Printer ..........................45 Procedure 6. Verify Instrument Accuracy......................47 DEVICE DISPOSAL ...............................47 WARRANTY ..................................48 Disclaimer of Additional Warranties ..........................48...
-
Page 9: Important Information
Caution: Federal (United States) law restricts this device to sale by or on the order of a physician. NOTICE TO ALL USERS The BladderScan BVI 3000 should be used only by individuals who have been trained and authorized by a physician or the institution providing patient care. All operators should read this manual prior to using the instrument. -
Page 10: Safety Information
The ultrasonic output power of the BladderScan BVI 3000 is not user‑adjustable and is limited to the minimum level necessary for effective performance. Data on acoustic output levels can be found in the chapter... - Page 11 • A patient who has open skin or wounds in the suprapubic area. • A patient with ascites. • A pregnant patient. WARNING Risk of explosion. If you use the BladderScan BVI 3000 instrument in the presence of flammable anesthetics, the hazard of potential explosion exists. Operations & Maintenance Manual: Important Information...
- Page 12 Contact Verathon Customer Care for all servicing needs. WARNING Risk of electric shock or burns. Do not use the BladderScan instrument in conjunction with high‑frequency surgical equipment. WARNING This product may only be cleaned and disinfected by using the approved processes provided in this manual.
- Page 13 (two meters) is maintained between the patient and these components. WARNING Risk of explosion, fire, or serious injury. The BladderScan BVI 3000 system is battery‑powered. Failure to note the following when handling the battery may result in serious injury or damage: •...
-
Page 14: Introduction
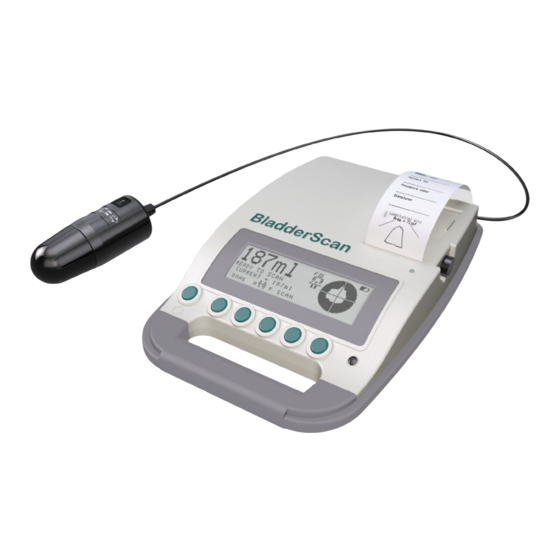
INTRODUCTION COMPONENTS & FEATURES The BladderScan BVI 3000 consists of four main components: the scanhead, the control unit, rechargeable batteries, and the battery charger. In addition, you may purchase optional accessories and additional supplies such as ultrasound gel, thermal paper for the printer, a mobile cart, or a carrying case. For more information about available accessories, see System Components &... -
Page 15: Control Unit
CONTROL UNIT The control unit provides all operating controls for the scanning procedure by means of six buttons. The measured bladder volume and a target‑shaped aiming icon are clearly displayed on the LCD screen, helping the operator to achieve accurate measurement results. Figure 2. -
Page 16: Scanhead
Two NiMH rechargeable batteries are included with the BladderScan BVI 3000. One battery can be recharged in the battery charger while the other is being used to power the BVI 3000. This ensures that there is no instrument downtime due to battery charge. -
Page 17: System Components & Accessories
BladderScan BVI 3000 battery charger ACCESSORIES Battery, 7.2 volt (V), 2 provided Printer paper BladderScan BVI 3000 In‑Service CD, containing the operations & maintenance manual and a video tutorial Acoustic coupling gel Carrying case (Optional) Mobile cart (Optional) BUTTONS, ICONS, & CONNECTIONS BATTERY ICON The battery icon, located in the upper‑right corner of the LCD, indicates the power status of the battery currently... -
Page 18: Setting Up
In order to maintain electrical safety, use only the provided battery charger and batteries. The BladderScan BVI 3000 draws very little power when it is turned off; however, if you do not plan to use your instrument for several weeks, you should remove the battery to prevent it from discharging. - Page 19 “top off” the charge, and the green light flashes quickly. At this point, you may use the battery in the BVI 3000 instrument. • Slowly Flashing Green—If the green light flashes slowly upon inserting a battery, then the battery level is too low for fast‑charge mode.
-
Page 20: Procedure 2. Insert Or Remove A Battery
PROCEDURE 2. INSERT OR REMOVE A BATTERY INSERT A BATTERY 1. Ensure the battery has been properly charged according to the instructions in the procedure Charge the Batteries on page 10. 2. If a battery is already in the control unit, remove it according to the instructions in the following section Remove a Battery. -
Page 21: Procedure 3. Connect The Scanhead To The Control Unit
PROCEDURE 3. CONNECT THE SCANHEAD TO THE CONTROL UNIT 1. Align the scanhead cable connector so that the arrow is facing up. Arrow on scanhead cable connector 2. Press the connector directly into the port until you hear a click. 3. -
Page 22: Procedure 4. Load The Thermal Paper Roll
6. Insert the end of a new paper roll, with the thermal side down, into the paper input slot. The BVI 3000 senses the presence of the paper and automatically feeds the paper through the instrument. Note: To verify that you are loading the paper with the thermal side down, flick your nail over the paper. If a black mark appears, this is the thermal side. -
Page 23: Configuring User Settings
CONFIGURING USER SETTINGS PROCEDURE 1. PROGRAM THE NAME You can customize the BladderScan BVI 3000 instrument by entering your facility or provider name. This information is subsequently included on all printouts of exam results. 1. Turn the BVI 3000 on by pressing the power button. - Page 24 VERATHON_ ERASE DONE 7. When you are finished entering the name, press the DONE button. & ’ VERATHON_ ERASE DONE The name you entered is now displayed on the Main Menu screen. BVI 3000 VERATHON 05/22/14 13:27 SCAN PRINT NOTES...
-
Page 25: Procedure 2. Set The Date
PROCEDURE 2. SET THE DATE Once set, the BVI 3000 clock recognizes the number of days in each month, including February during leap years. It has its own lithium battery and maintains the correct date and time for at least ten years, even if the rechargeable battery is removed. - Page 26 05/22/14 DONE 8. When you are finished entering the date, press the DONE button. 05/22/14 DONE The date you entered is now displayed on the Main Menu screen. BVI 3000 VERATHON 05/22/14 13:27 SCAN PRINT NOTES...
-
Page 27: Procedure 3. Set The Time
To convert 12‑hour clock time to 24‑hour format, if the time is after noon, add 12 hours to the clock time (Example: 3:00 PM + 12 hours = 15:00). 1. Turn the BladderScan BVI 3000 on by pressing the power button. - Page 28 6. Press the MM button to decrease the minute value, or press the MM button to increase the minute value. 13:27 DONE 7. When you are finished entering the time, press the DONE button. 13:27 DONE The time you entered is now displayed on the Main Menu screen. BVI 3000 VERATHON 05/22/14 13:27 SCAN PRINT NOTES...
-
Page 29: Procedure 4. Adjust User Preferences
PROCEDURE 4. ADJUST USER PREFERENCES On the Preference screen, various BVI 3000 operating parameters can be customized for personalized use. The following table documents the configurable parameters and their available values. Table 3. User Preferences PARAMETER RANGE OR VALUE DESCRIPTION... - Page 30 ¥ Set the currency for calculating cost savings to yen Reset the user‑controllable scan counter to zero. Note: There are two scan counters in the BVI 3000. One Scan count screen — may be reset by users, and the other may only be reset by an authorized Verathon representative.
- Page 31 4. On the Alternate Menu screen, press the PREF button. VER: 3.020 (D949) Box ID: 00001965 Copyright 2013 by VERATHON Corporation SELF NAME DATE TIME PREF TEST 5. On the Preferences screen, select the parameter that you wish to adjust by using the SEL and SEL buttons.
-
Page 32: Using The Instrument
USING THE INSTRUMENT WARNING Risk of explosion. If you use the BladderScan BVI 3000 instrument in the presence of flammable anesthetics, the hazard of potential explosion exists. WARNING Risk of electric shock or burns. Do not use the BladderScan instrument in conjunction with HF surgical equipment. -
Page 33: Scanning A Patient
SCANNING A PATIENT Verathon advises new operators to use the BladderScan BVI 3000 on patients with moderately full bladders, ® rather than initially attempting to locate nearly empty bladders. An in‑service training video has been supplied with your instrument. It is recommended that you view the video as a supplement to the procedures provided in this manual. - Page 34 8. Place an ample amount of gel midline on the patient’s abdomen approximately 1 inch (3 cm) above the symphysis pubis. Note: Do not spread the gel over the patient's abdomen, and use a sufficiently thick quantity to ensure proper transmission of ultrasound waves. 9.
-
Page 35: Procedure 2. Verify Aim & Accuracy
PROCEDURE 2. VERIFY AIM & ACCURACY After completing a scan, the BVI 3000 displays two volumes on the Aiming screen: the largest volume measured and the current volume. The light area inside the target‑shaped Aiming icon represents the position of the bladder relative to the scanhead. - Page 36 3. If you need to adjust your aim, do the following: • Press the X button. This clears the inaccurate scan results. Note: If your instrument does not have an X button, press the DONE button and then press the SCAN button.
-
Page 37: Procedure 3. Confirm The Scan Results
PROCEDURE 3. CONFIRM THE SCAN RESULTS The Results screen displays the longitudinal and horizontal scan planes from the largest image taken during the exam. The light areas represent the bladder. The dark, triangular surfaces, called scan planes, represent the scanhead’s field of vision. Figure 9. - Page 38 3. If the scan plane result is accurate, do one or more of the following in order to complete the scan and save the results: • If you want to add a patient ID number, press the # button, and then complete the procedure Add a Patient ID Number (Optional) on page 31.
-
Page 39: Managing Scan Results
MANAGING SCAN RESULTS PROCEDURE 1. ADD A PATIENT ID NUMBER (OPTIONAL) A patient ID number (maximum 10 digits) can be added to the scan result and will be included on the printout. You may access the Patient ID Number screen from the Scan Results screen. The Patient ID Number screen displays 0000000000. -
Page 40: Procedure 2. Add Notes (Optional)
PROCEDURE 2. ADD NOTES (OPTIONAL) After a scanning procedure has been completed, it is possible to annotate the measurement results, and these annotations will be included on the printout. You may access the Notes screen from the Scan Results screen. Figure 10. - Page 41 3. If you selected PATIENT VOIDED or PATIENT CATHED in Step 2, enter the amount of urine (rounded to the nearest 10 ml) that was voided or catheterized by pressing the plus + and minus – buttons. Note: By default, the amount of voided or catheterized urine is equal to the volume measured during the scan.
-
Page 42: Procedure 3. Print The Scan Result (Optional)
Scan Results screen. If you are on the Scan Results screen and you press the PRINT button, the instrument automatically prints the scan results without displaying the Print screen. Figure 11. Print Screen Figure 12. Printout of Scan Results BladderScan (tm) LAST IMAGE VERATHON COST SAVING... - Page 43 4. When printing is completed, tear the paper from the instrument by pulling the printout towards the back of the instrument. 5. If desired, create a photocopy of the printout. The BVI 3000 instrument prints on thermal paper. Over time, the printout will fade. For maximum storage life, Verathon recommends that you create a photocopy of the ®...
-
Page 44: Procedure 4. Print A Histogram Of Cost Savings (Optional)
• Cost of UTIs avoided—Literature suggests that the additional costs associated with treating UTI amount to $680.00 per patient infection. The default setting is $680. Total cost savings as a result of using the BVI 3000 = (Caths Avoided x Catheter Costs) + (UTIs Avoided x UTI Costs). - Page 45 UTIs AVOIDED SAVINGS $49,107 5. If desired, create a photocopy of the printout. The BVI 3000 instrument prints on thermal paper. Over time, the printout will fade. For maximum storage life, Verathon recommends that you create a photocopy of the ®...
-
Page 46: Cleaning & Disinfecting
CLEANING & DISINFECTING Routine cleaning and maintenance will help ensure safe and effective operation of the BladderScan BVI 3000 system. Clean and disinfect the instrument before use and between patient exams. For more information, please contact your authorized BladderScan Service Center, your local BladderScan distributor, or Verathon ®... -
Page 47: Procedure 2. Disinfect The Instrument
The level of disinfection required for a device is based on the type of tissue it contacts during use. Based on the intended use of the BladderScan BVI 3000 system, low‑level disinfection is the minimum level required. 1. Ensure the instrument has been properly cleaned according to the procedure Clean the Instrument page 38. -
Page 48: Maintenance & Troubleshooting
For more information, please contact the Verathon Service Center or your local distributor. If the calibration due date for your BVI 3000 has passed, the message “Calibration Due” will appear every time you turn on the instrument. You can still measure bladder volume; however, this message will continue to appear until an authorized Verathon Service Center calibrates the instrument. -
Page 49: Troubleshooting
• BUS Test —Microprocessor bus • NVRAM Test —Non‑volatile, battery‑backed memory • SRAM Test—Main memory • FLASH Test—Flash memory 1. Turn the BladderScan BVI 3000 on by pressing the power button. 2. On the Main Menu screen, press the ALT button. BVI 3000... -
Page 50: Procedure 2. Troubleshoot Power Issues
When the battery’s charge is too low to allow normal operation (but not too low to permit operation of the internal circuitry) the BVI 3000 displays the following message: BATTERY CHARGE LEVEL IS TOO LOW FOR INSTRUMENT OPERATION. RECHARGE BEFORE NEXT USE. - Page 51 54. 1. Locate the source of the interference. 2. Disable or remove the interference source, or use the BVI 3000 away from the interference source. 3. If these efforts do not restore normal operation, contact Verathon Customer Care.
-
Page 52: Procedure 4. Clear A Paper Jam
PROCEDURE 4. CLEAR A PAPER JAM IMPORTANT If the paper jam is inaccessible, do not try to disassemble the printer. Contact your authorized Verathon ® Service Center or your local Verathon distributor for service. 1. On the right side of the instrument, next to the paper roll well, lower the printhead release lever. 2. -
Page 53: Procedure 5. Test The Printer
1. Ensure a paper roll has been inserted into the instrument according to the instructions in the procedure Load The Thermal Paper Roll on page 14. 2. On the Main Menu screen, press the PRINT button. BVI 3000 VERATHON 05/22/14 13:27 SCAN... - Page 54 5. If you would like to cancel printing while it is in progress, press the ABORT PRINT button. PRINTING IN PROGRESS ABORT PRINT 6. When printing is completed, tear the paper from the instrument by pulling the printout towards the back of the instrument.
-
Page 55: Procedure 6. Verify Instrument Accuracy
PROCEDURE 6. VERIFY INSTRUMENT ACCURACY Measurement accuracy is dependent upon aiming the scanhead so that the bladder falls entirely within the measurement cone and following the proper instructions for use. When confirming measurement accuracy, ensure that you are measuring the bladder volume according to the instructions in this manual. 1. -
Page 56: Warranty
The information, descriptions, recommendations, and safety notations in this manual are based upon Verathon experience and judgment, as of June 2014, with respect to the BladderScan BVI 3000 instrument. The contents of this manual should not be considered to be all‑inclusive or covering all contingencies. -
Page 57: Product Specifications
BVI 3000 on patients with moderately full ® bladders, rather than initially attempting to locate a bladder with a low volume. • Warning: There is the possible hazard of explosion if the BVI 3000 is used in the presence of flammable anesthetics. ACCURACY RANGE Given the tremendous variation of healthy and compromised human anatomy, a guaranteed accuracy specification for the instrument used on humans would be difficult. -
Page 58: Component Specifications
COMPONENT SPECIFICATIONS CONTROL UNIT & SCANHEAD SPECIFICATIONS Table 7. General Specifications SPECIFICATION VALUE Classification Electrical Class II, Applied Part BF Input Rechargeable nickel–metal hydride (NiMH) battery. Transient overvoltage Category II Integrated printer Thermal printer IPX1 (drip‑proof, a higher than ordinary level of protection from Ingress protection against water drips, leaks, and spills) Table 8. - Page 59 Table 9. Ultrasound Acoustic Output Parameters Values in this table are the maximum readings obtained from three test results. SPTA.3 SPPA.3 ACOUSTIC OUTPUT (mW/cm (W/cm Global Maximum Value 0.218* 0.0676 2.95 (MPa) 0.317 (mW) 0.0676 0.238 (MHz) 2.12 2.12 2.12 (cm) 2.80 2.80...
-
Page 60: Battery Charger Specifications
Use only the battery charger supplied. Use of any other charger may damage the battery pack. The power supply for the battery charger used with the BVI 3000 is tested to IEC 60601‑1 requirements and is in compliance with UL and CSA equivalent standards. -
Page 61: Battery Specifications
BATTERY SPECIFICATIONS SPECIFICATION VALUE Battery type Rechargeable nickel–metal hydride (NiMH) Nominal voltage 7.2 V Battery service life >500 cycles (IEC standard), approximately 2 years at 5 cycles per week Charging time and conditions 160 mA for 16 hours at 20°C (68°F) Rated capacity 1.6 Ah Charging voltage... -
Page 62: Electromagnetic Compatibility
Guidance and Manufacturer’s Declaration—Electromagnetic Emissions The BladderScan BVI 3000 system is intended for use in the electromagnetic environment specified below. The customer or the user of the BladderScan BVI 3000 system should assure that it is used in such an environment. EMISSIONS TEST COMPLIANCE ELECTROMAGNETIC ENVIRONMENT –... -
Page 63: Electromagnetic Immunity
Guidance and Manufacturer’s Declaration —Electromagnetic Immunity The BladderScan BVI 3000 system is intended for use in the electromagnetic environment specified below. The customer or the user of the BladderScan BVI 3000 system should assure that it is used in such an environment. COMPLIANCE... - Page 64 Guidance and Manufacturer’s Declaration —Electromagnetic Immunity The BladderScan BVI 3000 system is intended for use in the electromagnetic environment specified below. The customer or the user of the BladderScan BVI 3000 system should assure that it is used in such an environment. COMPLIANCE...
-
Page 65: Recommended Separation Distances
The BladderScan BVI 3000 system is intended for use in an electromagnetic environment in which radiated RF disturbances are controlled. The customer or the user of the BladderScan BVI 3000 system can help prevent electromagnetic interference by maintaining a minimum distance between portable and mobile RF communications equipment (transmitters) and the BladderScan BVI 3000 system as recommended below, according to the maximum output power of the communications equipment. -
Page 66: Symbol Directory
SYMBOL DIRECTORY SYMBOL MEANING Warnings & Cautions Warning or Caution —Consult accompanying documents. Read instructions before connecting or operating. Do not incinerate Non‑ionizing, electromagnetic radiation Product Use & Specifications Refer to the operations & maintenance manual Manufacturer Use‑by date Use in indoor, dry location only Catalog (part) number Serial number Batch code... - Page 67 SYMBOL MEANING Orient scanhead so that icon aligns with the patient's head and feet Scan Power on/off Electrical & Power Class II equipment Type BF applied part Energy Efficiency Level V Battery pack reference part number Direct current Ground symbol, earth terminal Standards &...
-
Page 68: Glossary
GLOSSARY TERM DEFINITION 6HRLTR6 Battery cell designation Ampere Alternating current Ampere‑hour Celsius CISPR International Special Committee on Radio Interference Centimeter Canadian Standards Association Direct current Electromagnetic compatibility Electromagnetic interference Electrostatic discharge Essential performance The system performance necessary to achieve freedom from unacceptable risk Fahrenheit Gram Gigahertz... - Page 69 TERM DEFINITION Radio frequency Relative humidity RoHS Restriction of Hazardous Substances Thermal index Thermal index for bone Thermal index for the cranium Thermal index for soft tissue Urinary tract infection Volt Vrms Voltage root mean squared Watt WEEE Waste electrical and electronic equipment Operations &...
- Page 72 verathon.com...
Need help?
Do you have a question about the BVI 3000 and is the answer not in the manual?
Questions and answers
How do I change the calibration due date? Unit is no longer supported by company. Service manual says to send it in for annual calibration. Company does not do this anymore.
The calibration due date for the BladderScan BVI 3000 cannot be changed manually. If the calibration due date has passed, the message "Calibration Due" will appear every time the instrument is turned on. To remove this message and ensure accurate measurement performance, the device must be calibrated by an authorized Verathon Service Center.
This answer is automatically generated
@Mr. Anderson If the OEM will not calibrate the unit anymore . Who can I send it to to get the calibration preformed? Thanks,
Is there a way to change the Calibration Due Date on a BVI 3000 without sending it in to the company. I was told no support anymore from the OEM.
No, the calibration due date on a BladderScan BVI 3000 cannot be changed without sending it to an authorized Verathon Service Center. The message "Calibration Due" will continue to appear until the instrument is calibrated by the service center.
This answer is automatically generated