
Summary of Contents for Hovamp MT-02
- Page 1 HOVAMP MT-02 OWNER’S MANUAL AM/FM STEREO RADIO, CD, USB, BLUETOOTH AND FULL SIZE STEREO PHONOGRAPH...
-
Page 2: Important Safety Instructions
CAUTION TO PREVENT FIRE OR SHOCK HAZARD, DO NOT USE THIS PLUG WITH AN EXTENSION CORD, RECEPTACLE OR OTHER OUTLET UNLESS THE BLADES CAN BE FULLY INSERTED TO PREVENT BLADE EXPOSURE. TO PREVENT FIRE OR SHOCK HAZARD, DO NOT EXPOSE THIS APPLIANCE TO RAIN OR MOISTURE. WARNING: TO REDUCE THE RISK OF ELECTRIC SHOCK DO CAUTION NOT REMOVE COVER (OR BACK), NO USER SERVICEABLE... -
Page 3: Preparation For Use
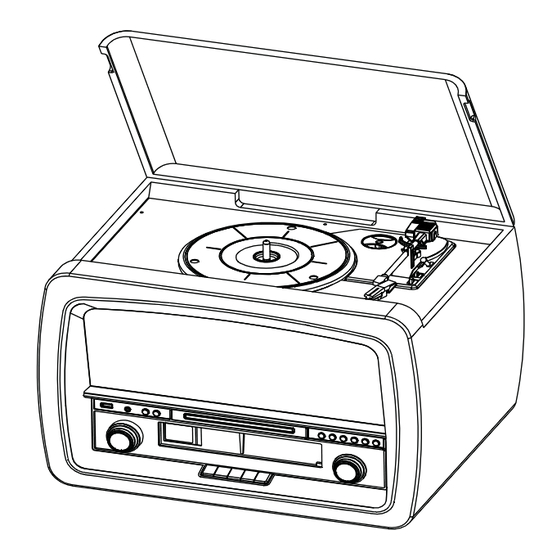
PREPARATION FOR USE Transit screw • Carefully remove the unit from the display carton and remove all packing material from the unit. • Unwind the AC power cord and extend it to its full length. • Unwind the FM Antenna wire and extend it to its full length. • Place the unit on a stable, level surface, convenient to an AC outlet out of a strong magnetic field. - Page 4 LOCATION OF CONTROLS AND INDICATORS FRONT PANEL 1. Phonograph Lid 20. CD Drawer 2. Turntable 21. Tuning Control 3. Speakers 22. PLAY/PAUSE Button ( 4. USB Socket 23. STOP Button ( ) 5. POWER Button 24. DN/F.R Button ( ) 6.
-
Page 5: Back Panel
BACK PANEL 34. FM antenna 35. DC 12V 2A in jack PHONOGRAPH 43. 45 rpm Adapter 44. Turntable 45. Transit Screw 46. Cue Lever 47. Speed Selector (33/45/78 rpm) 48. Tone Arm Lock. 49. Tone Arm with Stylus 50. Autostop Button OPERATING INSTRUCTIONS POWER ON 1. - Page 6 NOTE: 1. You may press the FUNCTION button on panel or long press PLAY/PAUSE button on Remote control for 2 seconds to change the playing mode between CD and USB. 2. USB memory can not greater than 16G, Otherwise it is possible can not be player. PLAYING IN MP3 MODE (UNDER CD/USB OPERATION) 1.
-
Page 7: Antenna Information
USB RECORDING 1. CD RECORDING Plug U DISK into USB Socket. Then press CD/USB button. Place CD into the CD drawer, Play the track which will be recorded. Press RECORD button twice to start recording. If whole CD will be played, recording will be effected for all the tracks. Each audio track coincides with its MP3 file, stop recording manually. -
Page 8: Playing Records
CD OPERATION 1. Press the CD/USB button to enter CD mode, the ‘ ’ and, ‘DISC᾿ icon will be shown on the screen. The unit can play CD, CD-R and CD-RW. 2. Press the OP/CL button to open the CD drawer. 3. Place your disc (MP3 is compatible) in the CD drawer with the label side facing up. -
Page 9: Compact Disc Care
COMPACT DISC CARE • To remove a disc from its storage case, press down on the centre of the case and lift the disc out, holding it carefully by the edges. • Fingerprints and dust should be carefully wiped off the discs recorded surface with a soft cloth. Unlike conventional records, compact discs have no grooves to collect dust and microscopic debris, so gently wiping with a soft cloth should remove most particles. -
Page 10: Technical Specifications
Information, where you can leave the batteries and accumulators for free, is provided to you at the store, at your local authority. User manuals download links: www.maker-times.com/informationclass_11/ Service mail: hovamp@hotmail.com MADE IN CHINA...
Need help?
Do you have a question about the MT-02 and is the answer not in the manual?
Questions and answers