Table of Contents
Advertisement
Quick Links
Installation, OPERATION & APPLICATION GUIDE
for 8330*331* and 8330*335*
MULTIPLE ZONE THERMOSTAT CONTROLLER SYSTEM
Last digit represents
specific model number
This thermostat should be installed and programmed by trained technicians only. Adhere to all local
and national codes. Disconnect all power to the system before installing, removing, or cleaning.
The 8330*331* and 8330*335* zone thermostats create a climate control system that allows the
operator to control up to four air conditioners or heat pumps and up to four heating sources with only
one thermostat.
The thermostat system will operate in both heat and cool modes, but will not allow the user to
run simultaneously in heat and cool mode. Depending on the system that has been installed and
programmed into the thermostat, each zone can be set up for a combination of the following systems:
cool only units, heat/cool units, heat pump units and heating appliances.
This thermostat will work with any RV Products air conditioner that is controlled with an RV Products
zone control box.
A zone is an area of a motor coach that is climate controlled. This system can control up to four zones
in a motor coach.
8330*331* and 8330*335* function identically. The only difference is the color of the thermostat.
Description of Controls: Liquid Crystal Display (LCD)
The LCD display screen is the main interface between the user and the thermostat. It is located in the
upper left of the thermostat. This will display which zone the user is looking at. When the system is
first powered up, the thermostat determines how many zones are connected to the system and only
displays the zones detected.
The LCD also displays the mode that the particular zone is currently in. These will range from Cool
Auto, Cool High, Cool Low, Fan High, Fan Low and Off in cooling, and from Gas Heat, Heat Elec
(heat pump or electric strip heat) and Off in heating.
Also, the LCD displays the room temperature and setpoint temperature in the displayed zone. If the
word Set is shown above the temperature then the setpoint or desired temperature is shown. If the
word Set is not shown, then the temperature shown is the actual room temperature in the displayed
zone.
Note: The thermostat is designed to display temperatures from 41°F to 103°F however it will operate
from -40°F to +175°F. If temperature is between -40°F and 41°F then 41 will be displayed as
the room temperature. Also if the temperature is between 103°F and 175°F then 103 will be
displayed. When temperature extremes fall outside the operating limits of the thermostat, "Er"
will display in the temperature space of the LCD to show that current ambient temperature
has exceeded thermostat capabilities. Additionally, if there is a problem with one of the remote
temperature sensors, "Er" will display on the thermostat.
Note: If the system is in cooling and is programmed to have only a heating appliance connected in a
zone then the thermostat will still display the room temperature in that zone. But the user will
not be able to operate any cooling appliance in that zone because there is not one connected
in that zone. Additionally, if the system is in heating and is programmed to have only a cooling
appliance connected in a zone then the thermostat will still display the room temperature in that
zone, but the user will not be able to operate any heating appliance in that zone because there
is not one connected in that zone. Your homeowner packet should contain literature that will list
what heating and cooling appliances are installed in each zone of your motor home.
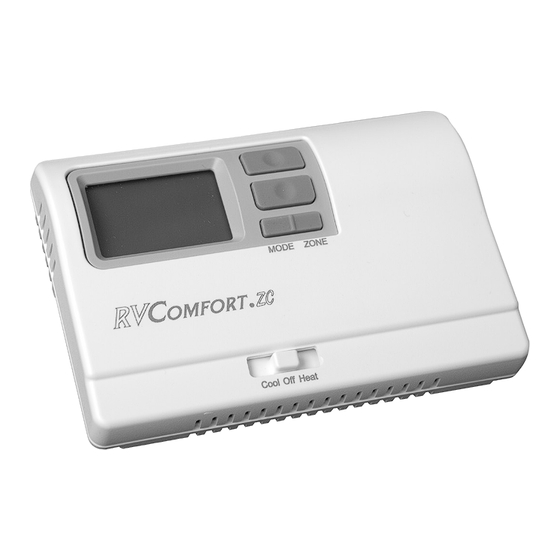
Note: Thermostat may be black
with white markings or white
with gray markings as shown.
Caution
Application
Operation
Setpoint Button
The Setpoint button is located just to the right of the LCD display. This button
adjusts the desired temperature setpoint up and down. To change the setpoint
press the up or down arrow once. This displays the word Set on the LCD and
puts the system in the mode to change the setpoint. Then, each press of the up
or down arrow changes the setpoint up or down for the displayed zone by one
degree per press of the button.
The setpoints are not adjustable when the thermostat is turned off. Also setpoint
is not adjustable for the displayed zone when the displayed zone is set to run Fan
High or Fan Low in that zone, or if the displayed zone is turned to Off.
The setpoints are stored permanently in memory for each zone in both heating and cooling.
This allows the user to switch between heating and cooling at season changes and still have
the same settings as the previous year.
Operation Slide Switch
The thermostat operation slide switch is located near the bottom center of the
thermostat. This switch slides left and right to put the thermostat into either
heating, cooling or off.
The center position is the off position. When the switch is here, the system will
not operate any heating or cooling appliances. However, the LCD display will still
show the room temperatures in each zone.
When the slide switch is in the far right position, the system is in heating. The heating appliance
selected will operate when the zone room temperature is one degree below the desired setpoint
temperature. The heating appliance will continue to run until the zone room temperature is one
degree above the desired setpoint temperature.
When the slide switch is in the far left position, the system is in cooling. The cooling appliance
connected in the particular zone will operate according to the mode the zone is set to.
Mode/Zone Button
The mode/zone button is located on the lower right part of the thermostat. This
button allows the user to toggle through the different area zones and the different
modes for heating and cooling.
By pressing the zone side of the button the user toggles through each zone. When the
system is first powered up, it determines how many zones are in the system and only displays the
detected zones.
By pressing the mode side of the button, the user toggles through the different modes for the system.
When the slide switch is set to cool, the thermostat will toggle through the following modes: Cool
Auto, Cool High, Cool Low, Fan High, Fan Low and Off. When the slide switch is set to heat, the
thermostat will toggle through the following modes: Gas Heat, Heat Elec and Off. However, this will
only happen if the system has both gas and electric heat in a zone. For instance, if a system only
has an air conditioner and a gas furnace in a zone, then when set to heat, the user will only be able
to toggle through Gas Heat and OFF because there is not electric heat available. Furthermore, if
the system does not have an appliance connected in a zone, then the user will not be able to toggle
modes in that zone.
Setting the Thermostat
The thermostat default setting for each zone upon initial startup is 78°F. for cooling and 68°F. for
heating. The fan speed for the cooling mode is COOL AUTO, which is set to vary the fan speed
according to the cooling needs. The fan speed for the heating mode is dependent on the type of heat
that is installed for each zone and can not be changed.
Note: The temperature setpoint cannot be adjusted in the following situations: when the slide switch
is set to OFF, when the zone is turned off for either heating or cooling mode or when the fan is
set to be running continuously in either high or low speed.
Set Temperature
1. Place the slide switch in either the COOL or the HEAT position. The current room temperature for
that zone will display.
2. Press either the UP or DOWN arrow once to place the thermostat in the SET mode. At this point
the thermostat displays the current setpoint for the displayed zone. (SET will show on the LCD
display).
3. Press the appropriate arrow button to change the set point temperature to the desired setting.
Each press of the up arrow will increase the setpoint temperature by one degree. Each press of the
down arrow will decrease the setpoint temperature by one degree.
4. Pressing ZONE button to toggle to the next zone or letting the thermostat sit idle for a few seconds
will store the temperature setting in the thermostat memory.
5. This process should be done for each zone.
Set Fan Speed for Cooling Mode
1. Place the slide switch in the COOL position.
2. Pressing the MODE button will toggle through the available speeds.
• "COOL AUTO" setting allows the fan speed to vary depending on the cooling needs. This is the
default setting.
• "COOL HIGH" or "COOL LOW" setting will set the fan speed to run continuously at high or low,
but the upper unit will cycle when cooling is needed.
• "FAN HIGH" and "FAN LOW" setting will set the fan to run continuously at high or low speed. The
upper unit will not run to produce cooling. Setpoint is not adjustable in this mode.
• "OFF" will turn the upper unit off for zone displayed. By continuing to press the "MODE" button,
you can toggle through the settings for the zone displayed until you have determined the setting
you desire. Setpoint is not adjustable in this mode.
3. Once you have established the settings for Zone 1, press the ZONE button to store settings in
thermostat memory and proceed to the next zone.
Repeat steps for each zone.
Up button
Down button
Advertisement
Table of Contents

Related Manuals for RV Products 8330*331 Series

Summary of Contents for RV Products 8330*331 Series
- Page 1 This thermostat will work with any RV Products air conditioner that is controlled with an RV Products Setting the Thermostat zone control box.
- Page 2 Heat Pump Lockout Note: There is a built-in delay between programming and operation of the new program. (Example: – If the system has both gas heat, (LP furnace or hydronic heat) and changing fan speed to low from high; it will take approximately 20 seconds until the fan speed electric heat,(electric strip heat or heatpump) appliances installed in the same zone, then the system is changed.) The thermostat must sit idle for five seconds before the signal is sent to the will automatically switch from Heat Electric to Gas Heat if the electric heat can not satisfy the desired...
-
Page 3: Programming The Thermostat
For further explanation, see troubleshooting section of manual. plug on the thermostat. RV Products suggests the thermostat wiring be a minimum of 18 gauge. Zone arrangement should be set with the front of the vehicle as zone 1 and progress toward the rear of the coach. -
Page 4: Troubleshooting
Unit not responding Communication signal lost to that zone (Signal wire might have vibrated loose). The system locks out operation below 9.75 VDC. System Wiring Diagram RV Products A Division of Airxcel, Inc. P.O. Box 4020, Wichita, KS 67204 Web: www.rvcomfort.com...
Need help?
Do you have a question about the 8330*331 Series and is the answer not in the manual?
Questions and answers