Table of Contents
Advertisement
Advertisement
Table of Contents

Subscribe to Our Youtube Channel
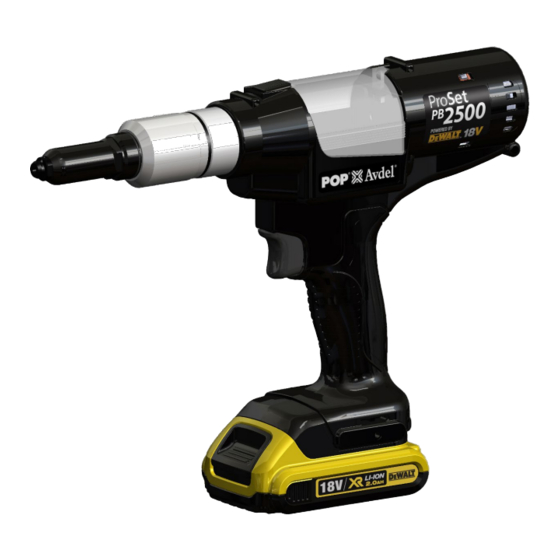
Summary of Contents for Pop ProSet PB2500
- Page 1 Service Manual...
-
Page 4: Table Of Contents
©2016 STANLEY Black & Decker All rights reserved. The information provided may not be reproduced and/or made public in any way and through any means (electronically or mechanically) without prior explicit and written permission from STANLEY Engineered Fastening. The information provided is based on the data known at the moment of the introduction of this product. -
Page 5: Safety Definitions
1. Safety Definitions The definitions below describe the level of severity for each signal word. Please read the manual and pay attention to these symbols. DANGER: Indicates an imminently hazardous situation which, if not avoided, will result in death or serious injury. -
Page 6: Important Safety Instructions For All Battery Chargers
WARNING: We recommend the use of a residual current device with a residual current rating of 30mA or less. CAUTION: Burn hazard. To reduce the risk of injury, charge only DEWALT®/POP®Avdel® rechargeable batteries. Other types of batteries may burst causing personal injury and damage. -
Page 7: Important Safety Instructions For All Battery Packs
DO NOT attempt to charge the battery pack with any chargers other than the ones in this manual. The charger and battery pack are specifically designed to work together. These chargers are not intended for any uses other than charging DEWALT®/POP®Avdel® rechargeable batteries. Any other •... -
Page 8: Specific Safety Instructions For Lithium-Ion (Li-Ion)
WARNING: Never attempt to open the battery pack for any reason. If battery pack case is cracked or damaged, do not insert into charger. Do not crush, drop or damage battery pack. Do not use a battery pack or charger that has received a sharp blow, been dropped, run over or damaged in any way (i.e., pierced with a nail, hit with a hammer, stepped on). -
Page 9: Specifications
Do not charge damaged battery packs. Do not expose to water. Charge DeWALT/POP-Avdel battery packs only with designated DeWALT/POP-Avdel chargers. Charging battery packs other than the Have defective cords replaced designated DeWALT/POP-Avdel batteries with a immediately. - Page 10 U.K. & Ireland 230 V tools 3 Amperes. in plugs * PB Series tools are compatible with DEWALT/POP-Avdel 18V nom/20V max Li-Ion slide type batteries ** Charging duration is based on the DCB115 DEWALT Charging units 2.1.4. Nom. Rivet Dia.
-
Page 11: Placing Specifications
2.2. PLACING SPECIFICATIONS 2.4mm 3.2mm 4.0mm 4.8mm Rivet Type 3.0mm 4.3mm 5.0mm 6.0mm 7.0mm [3/32´´] [1/8´´] [5/32´´] [3/16´´] OPEN END ● ● ● ● ● CLOSED END ● ● ● HR (except SSHR) ● ● ● SSD SSHR ● ● ●... -
Page 12: Main Components List
Rivet 2.5. OPTIONAL ACCESSORIES WARNING: Since accessories, other than those offered by POP-Avdel® have not been tested with this product, use of such accessories with this tool could be hazardous. To reduce the risk of injury, only POP- Avdel® recommended accessories should be used with this product. -
Page 13: Tool Use & Set Up
Also make sure that the voltage of your charger corresponds to that of your mains. Your DeWalt/POP-Avdel charger is double insulated in accordance with EN60335; therefore no earth wire is required. -
Page 14: Chargers
4.2. CHARGERS Your tool uses a charger. Be sure to read all safety instructions before using your charger. The DEWALT/POP-AVDEL charger requires no adjustment and is designed to be as easy as possible to operate. Charging Procedure (fig. 2) Plug the charger into an appropriate outlet before inserting the battery pack. (Refer to the Charger •... -
Page 15: Battery Packs
4.3. BATTERY PACKS Your tool is designed to work specifically with DEWALT/POP-Avdel 18V/20V max Li-Ion battery packs. Inserting and Removing the Battery Pack from the Tool (fig. 3) NOTE: For best results, make sure your battery pack is fully charged. The tool will shut off without warning when the battery is fully discharged. -
Page 16: Proper Hand Position
WARNING: To reduce the risk of serious personal injury, ALWAYS use proper hand position. WARNING: To reduce the risk of serious personal injury, ALWAYS hold securely in anticipation of a sudden reaction. 5.1. Proper Hand Position Proper hand position requires one hand on the main handle (I) fig. 1. 5.2. -
Page 17: Servicing The Tool
6. Servicing the tool 6.1. Maintenance frequency Item Frequency General Tool Inspection Daily Clean & lubricate Nose Equipment 5,000 rivets Clean & grease Ball Screw and Thrust Bearing 50,000 rivets* *Recommend contacting authorized service centre 6.2. Cleaning ALWAYS wear approved eye protection at all times when cleaning equipment Tool Exterior Keep the brushless motor exhaust vent openings (H) free from dust and dirt. -
Page 18: Spare Parts - Tools
Separate collection. This product must not be disposed of with normal household waste. Should you find one day that your POP-Avdel® product needs replacement, or if it is of no further use to you, do not dispose of it with household waste. Make this product available for separate collection. -
Page 19: Jaws, Jaw Guide, Jaw Pusher And Jaw Pusher Spring
7. Jaws, Jaw Guide, Jaw Pusher and Jaw Pusher Spring SA Jaw Pusher, 6 SA Jaw Pusher, 4 Jaw Guide Jaws Jaw Pusher Spring SA Jaw Pusher, 5 BOM for Jaws, Jaw Guide, SA Jaw pusher and Jaw Pusher Spring 13300 1set JAWS... - Page 20 Jaw Guide Jaws Put the Jaws into the Jaw Guide (as shown) so that the teeth are on the inside. Jaw Guide Jaws After inserting the Jaws, check that they are set correctly. Pulling Head Jaw Pusher Spring Put the Jaw Pusher Spring into the Pulling Head.
- Page 21 Jaw Pusher Spring Put the SA Jaw Pusher through the Jaw Pusher Spring. SA Jaw Pusher Jaw Guide Tighten the Jaw Guide, with Jaws, to the Pulling Head, with pulling Jaw Case Lock, by hand until it stops. Jaw Case Lock Pulling Head Jaw Guide Turn back a little until the rotation is locked by...
- Page 22 Set a battery on to the tool to check the operation. Battery Check the tool operates correctly by pulling and releasing the trigger. Check for: Pulling operation Return operation Reset operation Full stroke → Stroke end clutch operation → Return to home position →...
-
Page 23: Sa Nose Housing And Sa Nose Piece
8. SA Nose Housing and SA Nose Piece SA Nose Housing SA Nosepiece BOM for SA Nose Housing and SA Nosepiece SA NOSE HOUSING TP133-570 SA NOSEPIECE, 6 TP124-542 SA NOSEPIECE, 5 TP124-541 SA NOSEPIECE, 4 TP124-540 *See BOM page for option SA Nosepiece Insert the SA Nosepiece on to the SA Nose Housing and screw on by hand. - Page 24 Nose Hosuing Nut Apply grease to the inside of Nose Housing Nut (see adjacent picture). Apply grease Mast Hosuing SA Nose Hosuing Insert the SA Nose Housing on to the Mast Housing of the tool. Mast Hosuing SA Nose Hosuing Tighten the SA Nose Housing on to the thread of the Mast Housing by hand.
-
Page 25: Operation Test And Appearance Check
9. Operation Test and Appearance check Operation Check Set 20 rivets of 4.8mm(3/16”) SSD-6*-BS and 10 rivets of 4.8mm(3/16”) AD-6*-ABS to check followings: The tool does not slip Rivet setting is done in one stroke There is no protruding mandrels ... -
Page 26: Accessories
10. Accessories JP (JAPAN) Model number PB2500-JP183 BATTERY PACK DCB183-JP(1PC) CHARGER DCB115-JP SA NOSEPIECE, 4 TP124-540 SA NOSEPIECE, 5 TP124-541 JAW PUSHER ASSEMBLY, 4 TP124-635 JAW PUSHER ASSEMBLY, 5 TP124-548 FOAM SPACER TRM00194(1PC) INSTRUCTION MANUAL TRM00622 BRIEF INSTRUCTION TRM00623 MANUAL NA (NORTH AMERICA) Model number PB2500-NA203... - Page 27 GB (GREAT BRITAIN) Model number PB2500-GB183 BATTERY PACK DCB183-QW(1PC) CHARGER DCB115-GB SA NOSEPIECE, 4 TP124-540 SA NOSEPIECE, 5 TP124-541 JAW PUSHER ASSEMBLY, 4 TP154-502 JAW PUSHER ASSEMBLY, 5 TP154-505 FOAM SPACER TRM00194(1PC) INSTRUCTION MANUAL TRM00201 XE (AUSTRALIA) PB2500-XE-B-KIT Model number SA NOSEPIECE, 4 TP124-540 SA NOSEPIECE, 5...
-
Page 28: Exploded View
11. Exploded View... -
Page 29: Bom
12. BOM PB2500-JP Part number Description Part number Description Accessories TP124-542 Sa Nosepiece, 614 TP124-503 O ring TP124-540 SA, Nosepiece, 414 TP114-013 Nosepiece, 614 TP124-524 O ring TP094-552 Steel ball TP124-518 Nosepiece, 414 PRS2500-01 Jaw guide TP094-552 Steel ball 13300 1set TP124-541 SA, Nosepiece, 514... - Page 30 PB2500-NA Part number Description Part number Description Accessories TP124-542 Sa Nosepiece, 614 TP124-503 O ring TP124-540 SA, Nosepiece, 414 TP114-013 Nosepiece, 614 TP124-524 O ring TP094-552 Steel ball TP124-518 Nosepiece, 414 PRS2500-01 Jaw guide TP094-552 Steel ball 71210-15001 Jaws 1set TP124-541 SA, Nosepiece, 514 TP154-500...
- Page 31 PB2500-QW Part number Description Part number Description Accessories TP124-542 Sa Nosepiece, 614 TP124-503 O ring TP124-540 SA, Nosepiece, 414 TP114-013 Nosepiece, 614 TP124-524 O ring TP094-552 Steel ball TP124-518 Nosepiece, 414 PRS2500-01 Jaw guide TP094-552 Steel ball 71210-15001 Jaws 1set TP124-541 SA, Nosepiece, 514 TP154-500...
- Page 32 PB2500-GB Part number Description Part number Description Accessories TP124-542 Sa Nosepiece, 614 TP124-503 O ring TP124-540 SA, Nosepiece, 414 TP114-013 Nosepiece, 614 TP124-524 O ring TP094-552 Steel ball TP124-518 Nosepiece, 414 PRS2500-01 Jaw guide TP094-552 Steel ball 71210-15001 Jaws 1set TP124-541 SA, Nosepiece, 514 TP154-500...
- Page 33 PB2500-XE Part number Description Part number Description Accessories TP124-542 Sa Nosepiece, 614 TP124-503 O ring TP124-540 SA, Nosepiece, 414 TP114-013 Nosepiece, 614 TP124-524 O ring TP094-552 Steel ball TP124-518 Nosepiece, 414 PRS2500-01 Jaw guide TP094-552 Steel ball 71210-15001 Jaws 1set TP124-541 SA, Nosepiece, 514 TP154-500...
- Page 34 PB2500-XD Part number Description Part number Description Accessories TP124-542 Sa Nosepiece, 614 TP124-503 O ring TP124-540 SA, Nosepiece, 414 TP114-013 Nosepiece, 614 TP124-524 O ring TP094-552 Steel ball TP124-518 Nosepiece, 414 PRS2500-01 Jaw guide TP094-552 Steel ball 71210-15001 Jaws 1set TP124-541 SA, Nosepiece, 514 TP154-500...
-
Page 35: Troubleshooting Guide
13. Troubleshooting Guide Symptom Cause Remedy Tool does not operate when switch Battery is defective Replace battery is pressed. Battery is not fully charged Charge battery Battery is not fully seated Remove battery and re-insert. Reset tool to home. Battery pack has reached operating Remove battery &... - Page 36 Broken rivet stems jammed in Nose Service and clean Nose Assembly. Equipment. Refer to Accessories Manual. Check Nose Equipment is correct for rivet Broken rivet stems jammed in Pulling Empty Stem Collector and clear Head Assembly. Pulling Head Assembly. Debris in Nose Piece. Service and clean Nose Assembly.
- Page 37 TRM00791...
Need help?
Do you have a question about the ProSet PB2500 and is the answer not in the manual?
Questions and answers