
Summary of Contents for Idromatic ENDURA 3K
- Page 1 ENDURA Service manual IDROMATIC S.R.L. Via F. Petrarca Borgoforte, 127 - 46034 BORGO VIRGILIO (MN) ITALY 60.55.40202 REV01...
-
Page 2: Table Of Contents
INDEX 1 Safety rules 2 Related documents 3 Spare parts 4 Description of the machine 5 Operating logic of the machine 5.1 Working logic 5.2 Alarms and working of the boiler 6 Technical data 7 Hydraulics diagram 8 Electric diagram 8.1 Diagram 3K-4K single phase 8.2 Diagram 6K three phase 9 Hydralics group... -
Page 3: Safety Rules
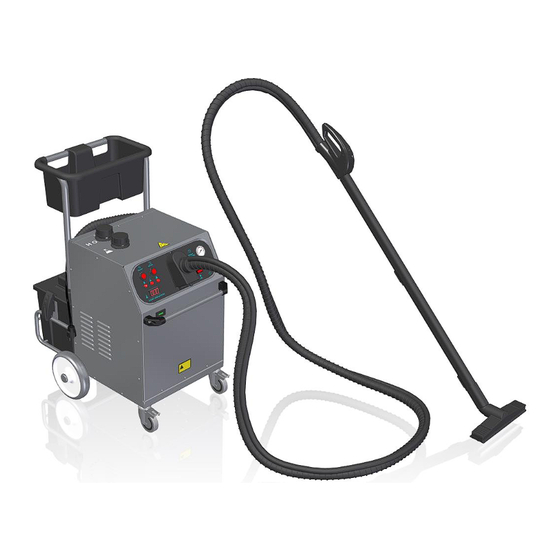
1. SAFETY RULES THE REPAIRS MUST BE CARRIED OUT BY TECHNICAL PERSONNEL PREVIOUSLY INSTRUCTED TO MAKE THIS WORK OR THAT IS QUALIFIED AS ELECTRICIAN. Electric risk Hot Steam jets Obligation to use protective gloves 2. RELATED DOCUMENTS Consult this manual referring to the drawings of EXPLOSES and ELECTRICAL DIAGRAMS ESP_ENDURA_data_REV SCH_ENDURA_data_REV 3. - Page 4 4. MACHINE DESCRIPTION LEFT PANEL STEAM BOILER RIGHT PANEL VACUUM MOTOR TO DISASSEMBLE PANELS NECESSARY KEY nr 3...
- Page 5 DETERGENT TANK WATER TANK DIRT RECOVERY TANK SUCTION INLET AIR OUTLET...
- Page 6 ELECTRIC BOX SUCTION HEAD ASSEMBLY DETERGENT PUMP HEATER WATER PUMP...
- Page 7 COOLING AIR INLET BOILER DISCHARGE THREADED CAP...
- Page 8 STEAM REGULATION BOILER MANOMETER VALVE MAIN SWITCH BOILER TEMPERATURE HOURMETER DISPLAY DETERGENT/WATER SELECTION VALVE HEATER SWITCH STEAM/VAC SOCKET...
- Page 9 STEAM TRIGGER 12V DETERGENT/WATER INJECTION BUTTON TRIGGER ON/OFF VACUUM SUCTION STEAM OUTLET...
-
Page 11: Operating Logic Of The Machine
5. OPERATING LOGIC OF THE MACHINE The general power-up function takes place from the control panel by means of a bistable light switch. (ie switch pressed remains in ON position that corresponds to closing contact) The function of switching on the heating in the steam boiler takes place from the control panel by means of a bistable light switch. - Page 12 The float of the water tank as well as the detergent is in reed contact, normally closed if there is no water and normally open if water is present. LAMP ON LAMP OFF 5.2 ALARMS AND BLOCKS ALARM LAMP WATER RESERVE DETERGENT RESERVE LAMP LAMP...
- Page 13 Alarm table The alarm lamp (Fig.4 item 5) warns the user in case of anomalies during normal machine operation. If the warning light blinks, the machine is in a locked state and must be switched off and on again to resume normal operations.
- Page 14 Flow-chart software sw 1.09 WATER LAMP ON WATER LAMP OFF START contact is closed contacr is open NO WATER INSIDE WATER INSIDE THE THE BOILER S1=+5Vcc BOILER S1<0.5Vcc WATER IN THE BOILER ? BOILER STARTING PROCEDURE WATER PUMP OFF ALARM LAMP ON HEATER ON (Enabled by control panel switch) WATER PUMP ON untill boiler level is reached SOLENOID VALVE (enabled by trigger)
-
Page 15: Technical Data
6. TECHNICAL DATA ENDURA 3K ENDURA 4K ENDURA 6K Electrical connection Voltage 220-240 220-240 Type of current 1~ 50/60 1~ 50/60 3~ 50/60 Maximum power load 3000 3700 6400 Maximum current load Protection degree IPX5 IPX5 IPX5 Protection class Maximum allowed net impdance 0.150... - Page 16 7. SCHEMA IDRAULICO...
-
Page 17: Electric Diagram
8. ELECTRIC DIAGRAMS 8.1 Versions 3K e 4K single-phase... - Page 18 8.2 Version 6K three-phase...
-
Page 19: Water Pump And Detergent Pump
9. HYDRAULICS GROUP 9.1 Water and detergent vibration pumps Pump values WATER PUMP 55W - ENDURA 3K – 4K WATER PUMP 70W - ENDURA 6K DETERGENT PUMP WATER PUMP Water vibration pump and detergent injection pump 230Vac connected with connectors with internal diode. - Page 20 BY-PASS VALVE Screw in clockwise to decrease the discharge in by-pass, increasing the water flow in the boiler. In case of failure of the water pump to start (unscrew the by-pass screw almost completely) to deaerate the suction circuit until the water comes out of the by-pass drain. Then fully tighten the screw DETERGENT / WATER PUMP for injection with steam FLOW-RATE REGULATION VALVE...
-
Page 21: Steam Regulation Valve
STEAM TO THE GUN + DETERGENT DETERGENT FROM PUMP The panel-mounted knob only regulates the steam flow exiting the boiler Turning counterclockwise increases the flow rate. ENDURA 3K With an adjustment of approximately 1/3 of the maximum opening, the pressure remains constant 6... - Page 22 9.3 SELECTION VALVE FOR WATER/DETERGENT INJECTION DETERGENT TANK TO DETERGENT PUMP INLET SELECTOR WATER TANK The tap selects the liquid (DETERANT or WATER) DOES NOT MIX THE 2 FLOWS The selection is made with the knob oriented. The knob in the central position does not allow flow.
-
Page 23: Boiler Assembly Group
10 . BOILER ASSEMBLY GROUP PRESSURE SWITCH SAFETY VALVE BOILER LEVEL SENSOR AUTOMOATIC THERMOSTAT STEAM SOLENOID VALVE MANUAL RESET SAFETY THERMOSTAT NON RETURN VALVE HEATING ELEMENTS THERMOCOUPLE SENSOR... - Page 24 10.1 HEATING ELEMENTS HEATER WITH 3 HEATING ELEMENTS connected 230ac HEATER GASKET TEFLON Heating elements 2”G with gasket Special tool to unscrew the heater...
- Page 25 Color of the cables RESISTANCE 230Vac LINE RESISTANCE RESISTANCE How to measure the heating elements 3kW R1=R2=R3 = 52,5 Ohm 5kW R1=R2=R3 = 32,5 Ohm...
- Page 26 10.2 PRESSURE SWITCH REGULATION Unscrew counter-clockwise direction to discharge operating pressure in the boiler Screw clockwise to increase Settings: ENDURA 3K – regolazione a 7 bar ENDURA 4K – regolazione a 7 bar ENDURA 6K – regolazione 8 bar...
- Page 27 10.3 Dismounting the heating elements Unscrew the boiler level sensor to allow emptying of water in the boiler by fall KEY 22 Unscrew the boiler drain plug and completely empty the water inside before proceeding KEY 19 Disconnect the electrical connections of the 2 thermostats / resistance cover and thermocouple probe a) DISMOUNT THERMOSTATS b) KEY 19...
-
Page 28: Electric Heater
Unscrew with appropriate key the electric heater Unscrew with appropriate KEY Once the resistance has been loosened to make it easier to exit the boiler, unscrew the boiler lock nut with the 24-key and slightly raise the boiler. PAY ATTENTION TO THE ELECTRICAL CONNECTIONS and not to damage the resistance contacts and thermostats. - Page 29 10.3 Boiler cleaning procedure See table for boiler cleaning interveals. Degrees ° dH ° dF mmol/l Hr interveal Soft 0- 7 0-12 0-1,3 Medium 7-14 12-25 1,3-2,5 Hard 14-21 25-37 2,5-3,8 Very hard >21 >37 >3,8 Follow this procedure DISCONNECT THE UNSCREW WITH 22 KEY ELECTRIC PLUG FROM THE LEVEL SENSOR...
- Page 30 CONNECT THE PLUG MOUNT THE CAP AND DO NOT TIGHT PREPARE DESCALING TURN ON THE ACID SOLUTION MACHINE WITH MAIN SWITCH RESPECT CORRECT DILUITION (DO NOT SWITCH ON (10-15%) THE BOILER!) WAIT UNTIL THE PUNT THE SMALL WATER PUMP FILLS FUNNEL INSIDE THE THE BOILER UNTIL BOILER...
-
Page 31: Pressure Switch
10.4 DISMOUNT THE BOILER ASSEMBLY 1. Disconnect electrical connections of the boiler level sensor, pressure switch, thermostats and steam solenoid valve 2. Disconnect the resistance and temperature probe electrical connections (see chapter 10.3) 3. Unscrew the pressure gauge bulb 14. (pay attention to internal sealing washer) 4. -
Page 32: Electric Box
11 . ELECTRIC BOX AND ELECTRONICS 11.1 Electric Box HOUR METER POWER SUPPLY 12V ELECTRONIC BOARD WATER PUMP HEATER CONTACTOR RELAIS DETERGENT PUMP RELAIS TRIGGER RELAIS FOR VACUUM MOTOR RELAIS with 230V coil FOR BOILER MAIN FUSE SLOW 16 A Power supply 230V-12V is on with green light Trigger relais for vacuum is off with red lamp and if on the lamp turns green. - Page 33 WITH MAIN SWITCH ON THE VOLTAGE 230Vac BEETWEN 3-4 AND 12Vcc ON 1-2 GREEN LIGHT 230 V 12 Vcc GENERAL SWITCH TURNS ON: 1) 230V / 12V POWER SUPPLY 2) ELECTRONIC BOARD 3) SUCTION MOTOR (impulse relay controlled by handle with green ON indicator) 4) DETERGENT PUMP (relay controlled by handle) 5) STEAM ELECTROVALVE (trigger only at the end of the initial water loading in the boiler) 6) HOURMETER...
- Page 34 11.2 Control panel lighting switches Front MAIN SWITCH 12 A - 250V BOILER RELAIS SWITCH 12 A – 250V Back MAIN SWITCH BOILER RELAIS SWITCH Connections VOLTAGE TO 3-4 – POWER SUPPLY ON BOILER RELAIS L – N SWITCH 230Vac...
- Page 35 11.3 Pcb Boiler level sensor connection +5 V cc IF <0,5 Vcc (grounded) MACHINE FRAME...
-
Page 36: Trigger Relais
11.4 Trigger relais 12V for vacuum motor RED LED – RELAIS OFF GREEN LED – RELAIS ON... - Page 37 11.5 Thermocouple sensor and digital display SUPPLY VOLTAGE 12Vcc RESPECT THE COLORS The probe is of type K (Cr-Al) and of the isolated type. In case of ERROR with E2 display it means that the display has no signal coming from thermocouple. Check the correct wiring and the colors of the thermocouple cables before replacing the probe.
- Page 38 11.6 Connessioni presa vapore-aspirazione bordo macchina Vista posteriore del connettore (vista da interno macchina) DC – 12V RELE3 POMPA DETERGENTE DC - MORSETTO PCB (minifit CN 5) ELETTROVALVOLA VAPORE DC – 12V RELE’4 IMPULSI ASPIRAZIONE...
-
Page 39: Vacuum Components Group
12. VACUUM COMPONENTS GROUP 12.1 Operating system DIRT SUCTION RECOVERY TANK WITH FILTERING SYSTEM SUCTION TURBINE AIR DISCHARGE MOTOR COOLING SUCTION BRUSH MOTOR: Under normal operating conditions, the brushes have a duration of 800-900 hours, after which the brushes or the motor itself must be replaced. During normal operation the regular glare is reduced to a minimum while in the brush-worn state there is an increase in sparks and more pronounced noises... - Page 40 12.2 Filtering system SOLID/LIQUID FILTER WITH FLOATING VALVE DUST REMOVABLE FILTER...
- Page 41 12.3 Suction vacuum head FILTER WITH BALL HOUSING CARTRIDGE GASKET Grease with silicone grease on the edge of the filter holder gasket if it is possible to remove and reassemble.
Need help?
Do you have a question about the ENDURA 3K and is the answer not in the manual?
Questions and answers