
Related Manuals for Faithfull FAI DET31

Summary of Contents for Faithfull FAI DET31
- Page 2 INTRODUCTION This advanced electronic detector can detect and locate wooden studwork, metal and AC voltage, providing a clear indication of concealed objects prior to drilling, nailing or screwdriving. FEATURES 1. Find wood and metal studs. 2. Find and identify a stud centre 3.
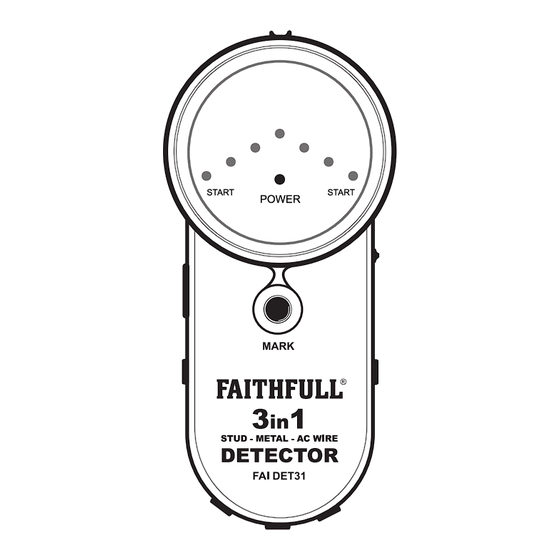
- Page 4 3. Bottom Signal LED There are 2 bottom signal LEDs. In most situations, the two bottom signal LEDs turn on first when the detector approaches the target object. 4. Power LED It lights as a power indicator when the TEST button is pressed.
- Page 5 OPERATING INSTRUCTIONS Stud Detection Procedure Fig.1 Fig.2 Fig.3 1. Set the selector switch to "STUD" position. 2. Calibration: Place the unit against wall. Depress and hold the TEST button down, the detector will begin calibration. When it sounds two beeps, the calibration is complete.
- Page 6 b. Continue moving sideways across wall until all the signal LEDs and the buzzer turn off, then reverse direction and locate opposing edge by using the same procedure. When the LED lights and buzzer sounds continuously stop moving and mark a spot in the detectors groove on the walls surface (fig 3), the midpoint between two marks is the centre of the stud.
- Page 7 Metal Detection Procedure Fig.1 Fig.2 Fig.3 1. Set the selector switch to the "METAL" position. 2. Calibration: Hold this detector in air away from any metal object, Depress and hold the TEST button down, the detector will begin calibration. When it sounds two beeps, the calibration is complete.
- Page 8 AC Voltage Detection Procedure Fig.1 Fig.2 Fig.3 For maximum sensitivity, begin by placing the detector in a position away from live wiring. 1. Set the selector switch to the "AC WIRE" position. 2. Calibration: Depress and hold the TEST button down , the detector will begin calibration.
- Page 9 Note 1. Wires deeper than the detection limit from surface, in conduit or behind plywood shear wall will not be detected use caution when using the detector under these circumstances. 2. Rubbing or banging the unit on the wall may generate static electricity and cause a false indication.
- Page 10 NOTE 1. Depending on the proximity of electrical wiring or pipes to the wall surface, the unit may detect them in the same manner as studs. Caution should always be used when nailing, sawing, or drilling into walls, floors, and ceilings that may contain wiring or pipes.
-
Page 11: Specification
SPECIFICATION Stud mode Wood stud of 30x30mm: ≤14mm Detection Metal mode Iron pipe of dia. 25mm: ≤25mm depth Typical depth of 50mm for AC mode 90-250V at 50-60Hz. Operation condition -7~40°C below 75% RH Storage condition -20~50°C below 85% RH Battery 9V, 6F22 or equivalent Dimension... -
Page 12: Battery Replacement
BATTERY REPLACEMENT If the built-in buzzer sounds 5 quick beeps after you start depressing and holding the TEST button, you should replace the battery immediately. Remove the battery door, and disconnect the depleted battery and replace with a new equivalent 9V battery.
Need help?
Do you have a question about the FAI DET31 and is the answer not in the manual?
Questions and answers