
Related Manuals for Agrident AWR300

Summary of Contents for Agrident AWR300
- Page 1 User Guide and Instructions for using 1) AWR Link Software & 2) Select Sheepware From TGM Software Solutions Ltd...
-
Page 3: Table Of Contents
Contents A new type of EID Stick ................1 Before you start ..................2 Operating the AWR ................3 Setting Tag Read Mode ................4 Reading a Tag ..................5 Starting a New Group ................8 Printing from the Stick and Bluetooth Options ........9 -Interface Setup ................... - Page 4 5. Groups .................... 13 6. Medicine ..................13 7. Milk Recording ................13 8. Tupping / Scan ................14 9. Weight / Muscle ................14 Synchronising the stick with AWR Link Software (V2.1) ....... 15 -Download Tag Lists ................17 -Using Task Mode.
-
Page 5: A New Type Of Eid Stick
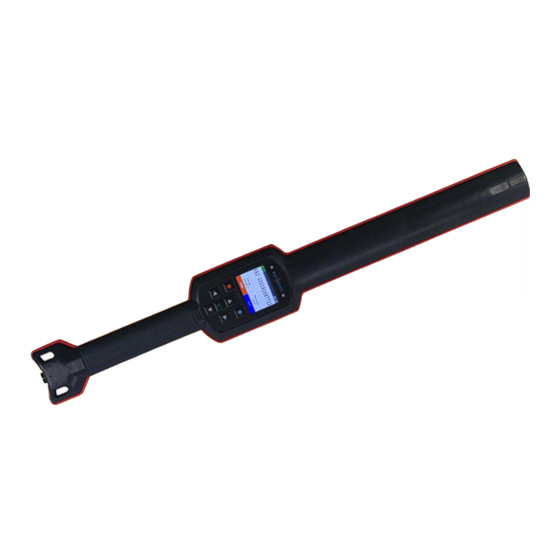
A new type of EID Stick We believe this is the only stick reader available on the market with the ability to have a built in database for under £650/€800. This new reader offers exciting possibilities for farmers. As well as having superb reach for scanning batches of sheep, management information can also be recorded. -
Page 6: Before You Start
Before you start You should fully charge the internal high-capacity lithium-ion battery prior to the first use. Use the provided Y-Cable and power adapter. Please connect the Y-Cable to the bayonet connector at the bottom of the reader and the power supply to the circular connector of the Y- Cable. -
Page 7: Operating The Awr
Operating the AWR Tip lights up 3 colours: Green = Successful Read Blue = Duplicate Read Red = Searching for Tag in continuous Read Mode The Stick will vibrate for a brief moment when a tag is read successfully to let you know the tag was definitely recorded. -
Page 8: Setting Tag Read Mode
Setting Tag Read Mode The stick can read tags individually or continuously. To change Read Mode press Menu, Setup, Reader Settings, Set Read Mode and pick either Single Read or Continuous Read. For individual reading of tags the user must press the Enter button each time they want to read a tag. -
Page 9: Reading A Tag
Reading a Tag After you press the Green button to read a tag you will see the following data about the animal..Press the Red soft-key to see the Tag-data (EID, Visual ID, Date and Time of reading and Alert text (if one has been recorded). Press the Red soft-key again to enter the... - Page 10 Here you can see: Visual ID, EID, Alert, Flock, Date of Birth, Sex, Type, Breed, Sire, Dam, Batch, Feed Group, Lambs Alive/Dead, Previous Births*, Weights History* and Medicine History* for the animal. Use the arrows to scroll through each database screen. ID, DOB, Sex, Type, Breed Last 2 recorded comments Parents, Groups...
- Page 11 (*Only visible when Select Sheepware Management Software is installed on your PC) Download a trial from www.tgmsoftware.com...
-
Page 12: Starting A New Group
Starting a New Group To start a new group either: Press New Group (Blue soft-key) on the main screen Press Menu (Red soft-key) then New Group You can Name the Group by using the Arrow and Enter Keys -Initially Red soft-key deletes characters and Blue soft-key cancels to Main Screen... -
Page 13: Printing From The Stick And Bluetooth Options
Printing from the Stick and Bluetooth Options Firstly you need to setup the Printer to communicate with the stick. -Interface Setup Press Menu, Setup, Interface Setup, Bluetooth Set Bluetooth Mode as Master mode Press Back and choose Setup Printer -Printer Setup Press Set Printer Type and pick your own Printer name from the list Press Set Printer Interface and choose Bluetooth -Printer Connection... -
Page 14: Reconnection After Power-Off
-Reconnection after Power-off The stick remembers the last device it was connected to by Bluetooth. So if it or the Printer turns off to save battery, once they’re turned on again they will automatically connect to each other. -Printing Barcodes If you need for any reason to Print a barcode Press Print then Print Barcode and scan a tag. -
Page 15: Task Mode
Task Mode The AWR300 becomes a much more powerful tool than the average stick when you use Task Mode, allowing you to record a series of common tasks about your animals. -Choosing the type of task Press Menu, Tasks, Choose another Task, scroll to the desired Task and press Enter. -
Page 16: Task Scenario Examples
Task Scenario Examples To change the type of task you are recording. Press Menu, Tasks, Choose another Task (pick from the list of 9 tasks). Now choose New Task Entry. You would be advised to set up your lists of common breeds, suppliers, customers, flocks, death reasons, illnesses, locations, medicines, batches, feed groups etc in the AWR Link program (page 23) before you start recording tasks intensively on the reader. -
Page 17: Alert / Comments
3. Alert / Comments You spot a Ewe with bad feet and you want to record a comment about her. Press New Task Entry. Choose Single, either use arrow keys to enter Farm Tag or Press Enter to read EID, Choose Comment, Press Red Soft-key to save task. -
Page 18: Tupping / Scan
8. Tupping / Scan You are scanning ewes for number of lambs. Press New Task Entry. Choose Multiple, either use arrow keys to enter Farm Tag or Press Enter to read EID, Choose Preg Scan, Choose number of lambs (for example 2) , Choose Comment. -
Page 19: Synchronising The Stick With Awr Link Software (V2.1)
Synchronising the stick with AWR Link Software (V2.1) (Turn to page 33 for instructions on how to use with Select Sheepware.) - Page 20 Connect the stick to the computer via the cable or enable Bluetooth on the computer and connect to the stick via Bluetooth. On your computer, for the first connection, you must switch on Bluetooth, search for devices, choose to pair with the AWR and enter pairing number 1234.
-
Page 21: Download Tag Lists
-Download Tag Lists -Open AWR Link -Click on Download Tag Lists to download a list of tag numbers. -Then click on Download Group Data from Device -The AWR Link program will automatically connect to the reader, provided it is switched on at this stage. -If connected, there will be a green indicator shown. - Page 22 -The file name will be AWR + Date + Time.txt e.g. AWR 19_04_18_11_011.csv -Click on Save to save the file. You may choose where to save it. -It is possible to choose from 3 different lists: 1. All tags 2. Last group of tags read 3.
- Page 23 1. All Tags sorted within group by tag – lists all tags read. Sorted in 0rder of tag number within each group 2. Tags in last group 3. Tags in selected group...
- Page 24 -To print the currently selected list, click Print Selected List. -To open a previously saved file, click on Open a saved file. -To delete all data from the stick click on Delete All Group Data from Device.
- Page 25 **This is not reversible and once the data has been erased it is completely gone. The downloaded file will still be in the location it was saved in, but the stick will be empty of all data.** -You will be prompted ‘Do you want to delete all data from the device’ -Click Yes or No as appropriate.
- Page 26 -For users where sheep are on common grazing land, it’s possible for sheep from another flock to get mixed in with their own. AWR Link allows you to compare 2 lists of tags so you can see which sheep don’t belong in your flock or which sheep are missing.
-
Page 27: Using Task Mode
-Using Task Mode. -Click on Tasks. -Before using the stick for the first time, set up the task lists. Click on Lists. -You may set up 17 lists for the AWR tasks, to enable fast entry of data. -Click on the last entry of each list then press the down arrow on your keyboard to add... -
Page 28: Initialising Tasks
-Initialising Tasks -If you have purchased the AWR/AWL from TGM Software, we will have already installed the Task functions so there is no need to do the following step. -If you have purchased the AWR/AWL from another supplier and you want to use our Task functions for management recording in conjunction with this free software, you will have to click the Initialise and Upload Tasks button. -
Page 29: Downloading Task Data
-Downloading Task Data -After you have recorded some management information using the task mode of the stick and you want to download it to the AWR Link software, connect the stick and click on Download Task Data. Each task will be downloaded. -You can view the downloaded data in each of the nine categories. -
Page 30: Medicine Record Keeping
-Medicine record keeping In AWR Link V2.1, there are many new features which allow you to keep/modify all the necessary medicine reports to comply with veterinary inspections. You can now use the above 5 buttons to: 1) View Quality Assurance Report (complete veterinary register) 2) Print Medicine Purchase Report 3) Add a New Line to the grid (for individual or group treatment) 4) Modify Medicines used (e.g. -
Page 31: Print Medicine Purchase Report
2) Print Medicine Purchase Report 3) Add a New Line to the grid You can add a new line to the register for either a single animal or a group of animals. Click ‘Add New Line’ and fill in the top row. The group or individual treatment will now be in the Quality Assurance Report. -
Page 32: Modify Medicines Purchased
To make a change to a group, click and drag your mouse down the left column and/or hold down the Ctrl key on the keyboard and click each animal you want to change something for: Then click ‘Modify Medicines used for the sheep below’: You can change the date, medicine, quantity, unit, number of days, illness, administrator, prescriber or batch number. -
Page 33: Printing
-Printing -Users can print directly from the task and database views, without opening MS Excel. -The print function will print currently filtered data. So it is easy to filter some selected sheep and then print the result of the filter. e.g. -
Page 34: Spreadsheets
-Spreadsheets -Tasks recorded in the AWR will be automatically saved to nine spreadsheets, one spreadsheet for each major task event. -However, users can filter, sort, and print, without ever opening a spreadsheet. No MS Excel experience is required, so Version 2.0 is much easier to use for the user who is not very confident with MS Excel. -
Page 35: Database
-Database -Animals added via task mode are added to a simple database. -Click on View animals in database to review. -The database may be uploaded to the AWR. This enables you to look up animals details on the AWR screen. To upload to AWR, click Upload animals to device. - Page 36 -Users can print directly from the task and database views, without opening MS Excel. Click Reports and Printing. -The print function will print currently filtered data. So it is easy to filter some selected sheep and then print the result of the filter. -Sorting may be done on any column in task or database view, by clicking on the column heading.
-
Page 37: Synchronising The Stick With Select Sheepware
Synchronising the stick with Select Sheepware (Turn to page 15 for instructions on how to use with AWR Link.) - Page 38 Select Sheepware program. Make sure the AWR300 is selected as the type of reader you are trying to synchronise in the System menu. (System > Default Settings > Connected Devices). Save & Exit.
- Page 39 You will be prompted to make sure the reader is switched on. If you have recorded any groups of sheep in a list, i.e by using the ‘New Group’ option, first you will be prompted to choose what type of event you were recording e.g.
- Page 40 The sync process continues and you will be shown a review screen, with the total numbers of each type of task which has been recorded and is about to be saved. You can review the data by clicking on each individual tab for each Task.
- Page 41 You will now be asked if you wish to upload the database to the reader. Click ‘Yes’ or ‘No’ as appropriate. You will now be asked if you wish to erase all Task data on the reader.
- Page 42 If you are confident that the data you have recorded on the reader has been saved, click ‘Yes’. If you have any reason to suspect something went wrong with the saving process , Click ‘No’ and contact TGM Software immediately. You will now be asked if you wish to erase all Group data on the reader.
-
Page 43: Appendix
Appendix: -Menu Structure Menu New Group Tasks Data Print Setup New Task Entry Show Data Print Last Group Reader Settings Show Memory Info Clear Data Select Group Display Choose Another Task Memory Info Print All Groups Interface Setup Search VID in DB Print Barcode Configuration Search EID in DB... - Page 44 Finally, if you have used AWR Link and the time comes to convert to the fully integrated Select Sheepware management program, TGM Software Solutions Ltd can convert the data recorded in this basic system and import it to the more comprehensive system. Please contact TGM Software Solutions Ltd if you wish to do this by Email...
Need help?
Do you have a question about the AWR300 and is the answer not in the manual?
Questions and answers