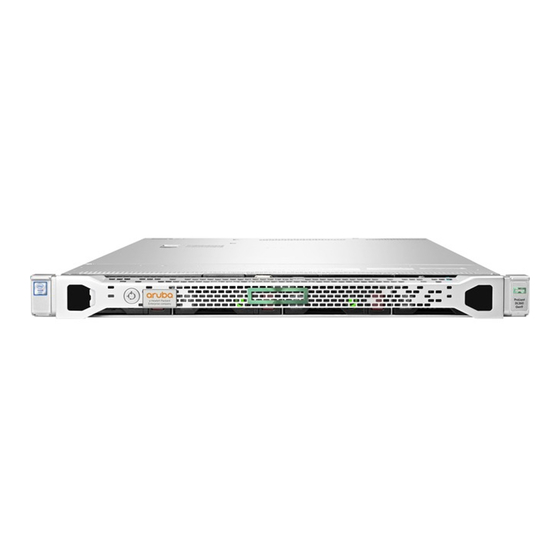
Aruba ClearPass Policy Manager C1000 Getting Started Manual

Aruba ClearPass Policy Manager C1000 Getting Started Manual

Clearpass 6.7
Table of Contents

Advertisement

This Getting Started Guide describes the procedures for installing and configuring ClearPass Policy Manager on
a hardware appliance, as well as how to install ClearPass on a VMware vSphere Hypervisor host and on a host
that runs Microsoft's hypvervisor, Hyper-V™.
Due to a negative performance impact when ClearPass 6.7 is installed on a KVM appliance, Aruba will not post the
KVM image with this release. For more information, refer to the "6.7.0 Upgrades on KVM Hypervisors are Deferred"
section in the ClearPass 6.7 Release Notes.
This Getting Started Guide provides the following information:
About the ClearPass Access Management System
l
Setting Up the ClearPass Hardware Appliances
l
Using the VMware vSphere Hypervisor Web Client to Install ClearPass on a Virtual Machine
l
Using Microsoft Hyper-V to Install ClearPass on a Virtual Appliance
l
About the ClearPass Access Management System
This section contains the following information:
ClearPass Access Management System Overview
l
Supported Browsers
l
Key Features
l
Advanced Policy Management
l
ClearPass Policy Manager Hardware and Virtual Appliances
l
ClearPass Specifications
l
ClearPass Access Management System Overview
The Aruba ClearPass Access Management System provides a window into your network and covers all your
access security requirements from a single platform. You get complete views of mobile devices and users and
have total control over what they can access.
With ClearPass, IT can centrally manage network policies, automatically configure devices and distribute
security certificates, admit guest users, assess device health, and even share information with third-party
solutions—through a single pane of glass, on any network and without changing the current infrastructure.
Role-Based and Device-Based Access
The ClearPass Policy Manager™ platform provides role-based and device-based network access control for
employees, contractors, and guests across any wired, wireless, and VPN infrastructure.
ClearPass works with any multivendor network and can be extended to business and IT systems that are
already in place.
ClearPass 6.7 Getting Started Guide|
ClearPass 6.7 Getting Started Guide
1

Advertisement

Table of Contents
loading
Need help?

Need help?

Do you have a question about the ClearPass Policy Manager C1000 and is the answer not in the manual?

Questions and answers

Summary of Contents for Aruba ClearPass Policy Manager C1000

  • Page 1 Microsoft's hypvervisor, Hyper-V™. Due to a negative performance impact when ClearPass 6.7 is installed on a KVM appliance, Aruba will not post the KVM image with this release. For more information, refer to the "6.7.0 Upgrades on KVM Hypervisors are Deferred"...
  • Page 2: Supported Browsers

    Guest access with extensive customization, branding and sponsor-based approvals. Supports NAC and EMM/MDM integration for mobile device assessments. Comprehensive integration with the Aruba 360 Security Exchange Program. SAML 2.0 Identity Provider, which allows seamless single sign-on (SSO) to cloud or on-premise applications.
  • Page 3: Advanced Policy Management

    SAML 2.0 Service Provider, which allows seamless and secure access to ClearPass components using federated/unified identity. Advanced reporting and granular alerts. Active and passive device fingerprinting High performance, scalability, High Availability, and load balancing A Web-based user interface that simplifies policy configuration and troubleshooting Network Access Control (NAC), Network Access Protection (NAP) posture and health checks, and Mobile Device Management (MDM) integration for mobile device posture checks Social and Cloud Identity Network and Cloud Application single sign-on (SSO) via OAuth 2.0...
  • Page 4: Clearpass Policy Manager Hardware And Virtual Appliances

    ClearPass OnConnect for SNMP-based enforcement on wired switches Advanced reporting, analytics and troubleshooting tools Interactive policy simulation and monitor mode utilities Multiple device registration portals—Guest, Aruba AirGroup, BYOD (bring your own device), and unmanaged devices ClearPass 6.7 Getting Started Guide...
  • Page 5 Admin/Operator access security via CAC (Common Access Card) and TLS (Transport Layer Security) certificates Framework and Protocol Support RADIUS, RADIUS CoA, TACACS+, Web authentication, and SAML v2.0 EAP-FAST (EAP-MSCHAPv2, EAP-GTC, EAP-TLS) PEAP (EAP-MSCHAPv2, EAP-GTC, EAP-TLS, EAP-PEAP-Public) EAP-TTLS (EAP-MSCHAPv2, EAP-GTC, EAP- TLS, EAP-MD5, PAP, CHAP) EAP-TLS PAP, CHAP, MSCHAPv1, MSCHAPv2, and EAP-MD5 Wireless and wired 802.1X and VPN...
  • Page 6: Setting Up The Clearpass Hardware Appliances

    Logging in to the ClearPass Hardware Appliance Powering Off the ClearPass Hardware Appliance Resetting the System Passwords to the Factory Defaults About the ClearPass Hardware Appliances Aruba provides three hardware appliance platforms: ClearPass Policy Manager C1000 ClearPass Policy Manager C2000 ClearPass Policy Manager C3000...
  • Page 7: Clearpass C1000 Hardware Appliance

    ClearPass C1000 Hardware Appliance The ClearPass Policy Manager C1000 hardware appliance (SKU: JZ508A) is a RADIUS/ TACACS+ server that provides advanced policy control for up to 500 simultaneous sessions. The ClearPass C1000 appliance has a single 1 TB SATA disk with no RAID disk protection.
  • Page 8 You can also access the ClearPass hardware appliance by connecting a monitor and keyboard to the hardware appliance. Table 2 provides the specifications for the ClearPass Policy Manager C1000 hardware appliance. Table 2: ClearPass C1000 Appliance Specifications ClearPass C1000 Appliance...
  • Page 9: Clearpass C2000 Hardware Appliance

    ClearPass C1000 Appliance Specifications AC input frequency 50/60 Hz auto-selecting Environmental Operating temperature 5º C to 35º C (41º F to 95º F) Operating vibration 0.26 G at 5 Hz to 200 Hz for 15 minutes Operating shock 1 shock pulse of 20 G for up to 2.5 ms Operating altitude -16 m to 3,048 m (-50 ft to 10,000 ft) ClearPass C2000 Hardware Appliance...
  • Page 10 Callout C2000 Port/Component Number UID (Unit ID) The UID LED helps you identify and locate a system, especially in high-density rack environments. Additionally, the UID is used to indicate that a critical operation is underway on the host, such as Remote console access or ROM flash. The "current state"...
  • Page 11: Clearpass C3000 Hardware Appliance

    ClearPass C2000 Appliance Specifications Dimensions (WxHxD 17.11” x 1.70” x 150.5” Weight (max configuration) Up to 19.18 lbs Power Specifications Power consumption (maximum) 250 watts Power supply HPE 900W AC 240 VDC Power Input FIO Module NOTE: The optional HPE 900W Redundant Power Supply supports 100 VAC to 240 VAC;...
  • Page 12 Figure 3 Ports and Components on the ClearPass C3000 Hardware Appliance Callout C3000 Port/Component Number UID (Unit ID) LED The UID LED helps you identify and locate a system, especially in high-density rack environments. Additionally, the UID is used to indicate that a critical operation is underway on the host, such as Remote console access or ROM flash.
  • Page 13 Table 4: ClearPass C3000 Appliance Specifications ClearPass C3000 Appliance Specifications Hardware Model HPE DL360 Gen 9 CPUs (2) Xeon 2.4GHz E5-2620_V3 with Six Cores (12 Threads) Memory 64 GB Memory Hard drive storage (6) 300GB Serial-Attach SCSI (SAS) (10K RPM) 60 GB Hot- Plug hard drives (RAID-10 controller) Out-of-Band Management HPE Integrated Lights-Out (iLO): Advanced...
  • Page 14: Before Starting The Clearpass Installation

    ClearPass C3000 Appliance Specifications Operating vibration Random vibration at 0.000075 G²/Hz Operating shock 2 G's Operating altitude 3,050 m (10,000 ft) Before Starting the ClearPass Installation Before starting the ClearPass installation and configuration procedures for the hardware appliance, determine the following information for the ClearPass server on your network, note the corresponding values for the parameters listed in Table 5, and keep it for your records:...
  • Page 15: Configuring The Clearpass Hardware Appliance

    Configuring the ClearPass Hardware Appliance The initial setup dialog starts when you connect a terminal, PC, or laptop running a terminal emulation program to the Serial port on the ClearPass hardware appliance. To configure the ClearPass Policy Manager hardware appliance: 1.
  • Page 16: Activating Clearpass

    3. To activate ClearPass on this hardware appliance, click Activate Now. When you click Activate Now, ClearPass Policy Manager attempts to activate the product over the Internet with Aruba Networks license activation servers. If the ClearPass Policy Manager hardware appliance does not have Internet access, you can perform the...
  • Page 17: Logging In To The Clearpass Hardware Appliance

    Figure 5 Performing Offline Activation 4. If the ClearPass server is connected to the Internet, click the Activate Now button. You receive the message, "Product has been successfully activated" and the Admin Login dialog is displayed. Logging in to the ClearPass Hardware Appliance After a successful activation, the Admin Login dialog appears.
  • Page 18: Changing The Administration Password

    Figure 7 ClearPass Policy Manager Landing Page Changing the Administration Password When the cluster password for this ClearPass server is set upon initial configuration, the administration password is also set to the same password (see Configuring the ClearPass Hardware Appliance). If you wish to assign a unique admin password, use this procedure to change it.
  • Page 19: Powering Off The Clearpass Hardware Appliance

    Figure 9 Changing the Administration Password 3. Change the administration password, verify the new password, then click Save. Powering Off the ClearPass Hardware Appliance This procedure gracefully shuts down the hardware appliance without having to log in. To power off the ClearPass hardware appliance: 1.
  • Page 20 3. To reset the system account passwords to the factory default values, enter y. 4. You can now log in with the new administrator password emailed to you by Aruba Technical Support. Using the VMware vSphere Hypervisor Web Client to Install ClearPass on a Virtual Machine This section documents the procedures for using the VMware vSphere®...
  • Page 21 Introduction The VMware vSphere® Web Client enables you to connect to a vCenter Server system to manage an ESX host through a browser. This section assumes that the VMware vSphere Web Client has been installed. For information about installing and starting the vSphere Web Client, go to VMware Documentation.
  • Page 22: Virtual Appliance Platforms

    Virtual Appliance Platforms Aruba provides three virtual appliance platforms, plus an evaluation platform: ClearPassPolicy Manager C1000V ClearPassPolicy Manager C2000V ClearPassPolicy Manager C3000V ClearPassPolicy Manager CLABV Before Starting the ClearPass Installation Before starting the ClearPass installation and configuration procedures for the virtual appliance, determine the...
  • Page 23: Vsphere Web Client Clearpass Installation Overview

    Web Client consists of four stages: 1. Download the vSphere Hypervisor software image from the Download Software > ClearPass > Policy Manager > Current Release > ESXi folder on the Aruba Support Center and unzip it to a folder on your server to extract the files.
  • Page 24 The Review Details screen opens. 8. Review the information presented, then click Next. The Accept EULAs screen opens. 9. Read the End User License Agreements (EULA) and click Accept, then click Next. The Select Name and Folder screen opens. Figure 11 Selecting the Name and Location for the Deployed Template 10.
  • Page 25 Figure 13 is Thin Provision. In a production environment, to ensure that the virtual appliance will not run out of disk space, Aruba recommends using the Thick Lazy Zeroed virtual disk format. The Setup Networks screen appears. Figure 14 Configuring the Networks for VM Deployment 13.
  • Page 26: Adding A Virtual Hard Disk

    Adding a Virtual Hard Disk After the OVF file has been deployed and before you power on, you must add a virtual hard disk to the virtual machine hardware and make sure that the network adapters are assigned correctly. 1. From the ClearPass Policy Manager Appliance, select the Summary tab. Figure 15 Virtual Appliance Summary Tab 2.
  • Page 27 Figure 16 Editing the Virtual Machine Settings 3. Add a new virtual hard disk: a. Consult the ClearPass Policy Manager Release Notes for determining the correct size of the virtual hard disk to add to your ClearPass virtual appliance. b. From the New Device drop-down, select New Hard Disk. c.
  • Page 28: Launching The Clearpass Virtual Appliance

    For the latest test information on the recommended disk sizes for a virtual hard disk, refer to the Release Notes in the appropriate version folders under Aruba Support Center > Documentation > Software User & Reference Guides > ClearPass > Release Notes.
  • Page 29: Completing The Virtual Appliance Setup

    Two console screens appear sequentially, which indicate that first the ClearPass Installer reboots, then the virtual appliance reboots. When the rebooting process is complete, the ClearPass virtual appliance is configured, and it will power on and boot up within a couple of minutes. The whole process, from deploying the OVF image to the login banner screen, typically takes between 30 and 40 minutes.
  • Page 30: Initial Login And Activation Of The Clearpass Platform License

    Configuration on the virtual appliance console is now complete. The next task is to activate the ClearPass license, which is described in the next section. Initial Login and Activation of the ClearPass Platform License Upon initial login to a ClearPass 6.7 server, you are prompted to enter the ClearPass Platform License Key. The ClearPass licenses on each cluster node are converted to ClearPass Platform Licenses.
  • Page 31: Logging In To The Clearpass Virtual Appliance

    7. To activate ClearPass on this virtual appliance, click Activate Now. When you click Activate Now, ClearPassPolicy Manager attempts to activate the license over the Internet with Aruba Networks license activation servers. If the ClearPassPolicy Manager virtual appliance does not have Internet access, you can perform the license...
  • Page 32: About Software Updates

    2. Click Log In. The ClearPass Policy Manager opens. Figure 23 ClearPass Policy Manager Landing Page About Software Updates This section describes the ClearPass server software update process. ClearPass checks for available updates to the ClearPass Webservice server. The administrator can download and install these updates directly from the Software Updates page (depending on the Cluster-Wide Parameter settings for those parameters).
  • Page 33: Software Updates Page

    You can also: Reinstall a patch in the event the previous installation attempt fails. Uninstall a skin. Software Updates Page To update the software on the current ClearPass server: 1. Navigate to Administration > Agents and Software Updates > Software Updates. Figure 24 displays the Software Updates page: Figure 24 Software Updates Page...
  • Page 34 To download the Posture and Profile Data Updates to the client (for example, a Windows laptop): 1. From the client device, log in to the Aruba Support Center. 2. Select the Download Software tab, then navigate to ClearPass > Tools >...
  • Page 35 Parameter Action/Description These patch binaries will appear in the table and can be installed by clicking the Install button. When logged in as appadmin, you can manually install the Upgrade and Patch binaries imported via the CLI using the following commands: system update (for patches) system upgrade (for upgrades)
  • Page 36: Changing The Administration Password

    Changing the Administration Password When the cluster password for this ClearPass server is set upon initial configuration (see Completing the Virtual Appliance Setup on page 29), the administration password is also set to the same password. If you wish to assign a unique admin password, use this procedure to change it.
  • Page 37: Using Microsoft Hyper-V To Install Clearpass On A Virtual Appliance

    Using Microsoft Hyper-V to Install ClearPass on a Virtual Appliance This section documents the procedures for installing the ClearPass Policy Manager virtual appliance on a host that runs Microsoft's hypervisor, Hyper-V™, as well as completing important administrative tasks, such as registering for ClearPass software updates and changing the admin password.
  • Page 38 I/O without a sustained high I/O throughput. ClearPass Policy Manager requires a continuous sustained high data I/O rate. Virtual Appliance Platforms Aruba provides three virtual appliance platforms, plus an evaluation platform: ClearPassPolicy Manager C1000V ClearPassPolicy Manager C2000V ClearPassPolicy Manager C3000V ClearPassPolicy Manager CLABV ClearPass 6.7 Getting Started Guide...
  • Page 39: Clearpass Hyper-V Virtual Appliance Installation Summary

    Microsoft Hyper-V consists of four stages: 1. Download the Microsoft Hyper-V package from the Download Software > ClearPass > Policy Manager > <Current_Release_Number> > Hyper-V folder on the Aruba Support Center and unzip it to a folder on your server to extract the files.
  • Page 40: Importing The Virtual Machine

    To import the virtual appliance: 1. Download the software image from the Download Software > ClearPass > Policy Manager >  <Current_Release_Number> >  Hyper-V folder on the Aruba Support Center and unzip it to a folder on your server to extract the files.
  • Page 41 Figure 29 Selecting the Virtual Machine 7. Make sure the correct virtual appliance is highlighted, then click Next. The Choose Import Type dialog opens. Figure 30 Specifying the Import Type 8. In the Choose Import Type step, select Copy the virtual machine, then click Next. When you choose Copy the virtual machine, Hyper-V creates new and unique identifiers for the virtual appliance.
  • Page 42 9. You can choose to either specify an alternate location to store the virtual appliance's files or accept the defaults: a. To specify an alternate location to store the virtual appliance's files, click (enable) the Store the virtual machine in a different location check box, specify the following folders, then click Next: Virtual machine configuration folder Snapshot folder Smart Paging folder...
  • Page 43: Adding A Hard Disk To A Virtual Machine

    The following screen will be displayed to allow you to (optionally) specify the Data interface of the ClearPass Policy Manager virtual appliance. Figure 34 Specifying the Data Interface (Optional) 12. You can choose to either specify the virtual switch that will be used for the Data interface or bypass this dialog.
  • Page 44 Figure 35 Specifying the Controller 4. To select the controller to attach the virtual hard disk to, in the Navigation (left) pane, select IDE Controller 0 (Hard Drive is selected by default), then click Add. The Hard Drive dialog opens. Figure 36 Configuring the Hard Drive 5.
  • Page 45 7. From the Before You Begin dialog, click Next. The Choose Disk Format dialog opens. Figure 37 Specifying the Disk Format 8. For the disk format, choose VHDX, then click Next. The Choose Disk Type dialog opens. Figure 38 Specifying the Virtual Hard Disk Type 9.
  • Page 46 For the latest information on the recommended disk sizes for a virtual hard disk, refer to the Release Notes in the appropriate version folder in the Aruba Support Center at Documentation > Software User & Reference Guides > ClearPass > Release Notes..
  • Page 47 authorization policy so that a user or group of users can complete this procedure. Virtual hard disks are stored as .vhd files, which makes them portable, but it also poses a potential security risk. We recommend that you mitigate this risk by taking precautions such as storing the .vhd files in a secure location.
  • Page 48: Completing The Virtual Appliance Configuration

    Figure 42 Launching the VM Console The initial virtual machine console screen is displayed. At the bottom of the console screen is the following prompt: Enter 'y' or 'Y' to proceed: 3. To proceed with the installation, enter y. ClearPass setup and installation begins. The console screen appears.
  • Page 49 password: <password> This initiates the Policy Manager Configuration wizard. 3. Configure the ClearPass virtual appliance. Follow the prompts, replacing the placeholder entries in the following illustration with the information you entered in Table Enter hostname: Enter Management Port IP Address: Enter Management Port Subnet Mask: Enter Management Port Gateway: Enter Data Port IP Address:...
  • Page 50 Figure 44 Activating ClearPass 7. To activate ClearPass on this virtual appliance, click Activate Now. ClearPass Policy Manager attempts to activate the license over the Internet with Aruba license activation servers. If the ClearPass Policy Manager virtual appliance does not have Internet access, you can perform the...
  • Page 51 Figure 45 Activating the ClearPass Platform License 8. If the ClearPass server is connected to the Internet, click the Activate Now button. After successfully activating ClearPass online, you will see a message above the Admin Login screen indicating that the product has been successfully activated. Logging in to the ClearPass Virtual Appliance After a successful Platform License activation, the Admin Login dialog opens.
  • Page 52 Figure 47 ClearPass Policy Manager Landing Page About Software Updates This section describes the ClearPass server software update process. ClearPass checks for available updates to the ClearPass Webservice server. The administrator can download and install these updates directly from the Software Updates page (depending on the Cluster-Wide Parameter settings for those parameters).
  • Page 53 Uninstall a skin. Software Updates Page To update the software on the current ClearPass server: 1. Navigate to Administration > Agents and Software Updates > Software Updates. Figure 48 displays the Software Updates page: Figure 48 Software Updates Page 2. Specify the Software Updates parameters as described in the following table: Table 9: Software Updates Page Parameters Parameter Action/Description...
  • Page 54 To download the Posture and Profile Data Updates to the client (for example, a Windows laptop): 1. From the client device, log in to the Aruba Support Center. 2. Select the Download Software tab, then navigate to ClearPass > Tools >...
  • Page 55 Parameter Action/Description Uninstall To uninstall a skin, click Uninstall (for details, see Using Microsoft Hyper-V to Install ClearPass on a Virtual Appliance). NOTE: You cannot uninstall cumulative or point patch updates. The Needs Restart link appears when an update needs a reboot of the server Needs Restart in order to complete the installation.
  • Page 56 The Edit Admin User dialog opens. Figure 50 Changing the Administration Password 3. Change the administration password, verify the new password, then click Save. Powering Off the ClearPass Virtual Appliance This procedure gracefully shuts down the virtual appliance without having to log in. To power off the ClearPass virtual appliance: 1.
  • Page 57: Maintaining Clearpass Policy Manager Services

    Maintaining ClearPass Policy Manager Services This section contains the following information: Starting or Stopping ClearPass Services Summary of the Server Configuration Page Subset of CLI for ClearPass Maintenance Tasks Starting or Stopping ClearPass Services From the Services Control page, you can view the status of a service (that is, see whether a service is running or not), and stop or start Policy Manager services, including any Active Directory domains to which the current server is now joined.
  • Page 58: Summary Of The Server Configuration Page

    Figure 52 Server Configuration > Services Control Page You will notice that the Virtual IP service is the only service that is not running. It's normal for the Virtual IP service to be stopped when it is not being used. From the Services Control page, you can: View the status of all the services: Running or Stopped.
  • Page 59: Subset Of Cli For Clearpass Maintenance Tasks

    You can access the CLI from the console using the serial port on the ClearPass appliance hardware, or remotely using SSH, or use the VMware vSphere, Microsoft Hyper-V, or KVM console to run the virtual appliance. ***************************************************************************************** * Policy Manager CLI v6.7(0), Copyright © 2017, Aruba Networks, an HPE Company * Software Version : 6.7.0 062080 ***************************************************************************************** Logged in as group Local Administrator [appadmin@company.com]#...
  • Page 60 CLI Task Examples View the Policy Manager Data and Management Port IP Address and DNS Configuration [appadmin]#show ip Reconfigure DNS or Add a New DNS [appadmin]#configure dns <primary> [secondary] [tertiary] Reconfigure or Add Management and Data Ports [appadmin]#configure ip <mgmt | data > <ipadd> netmask <netmask address> gateway <gateway address >...
  • Page 61: Open Source Code

    Copyright © Copyright 2018 Hewlett Packard Enterprise Development LP All rights reserved. Specifications in this manual are subject to change without notice. Originated in the USA. All other trademarks are the property of their respective owners. Open Source Code This product includes code licensed under the GNU General Public License, the GNU Lesser General Public License, and/or certain other open source licenses.

Table of Contents

Save PDF