Table of Contents
Advertisement
Advertisement
Table of Contents

Related Manuals for WatchBot 3.0

Summary of Contents for WatchBot 3.0
- Page 1 User Guide For the latest version of the user guide go to www.watchbotcamera.com...
- Page 2 Please visit www.watchbotcamera.com/guide for the most up to date information on the latest features and configuring your WatchBot HD. You can also download the latest version of the user guide. Cloud Storage Push Notifications Motion Sensor Trigger Areas...
- Page 3 Use WatchBot to monitor live video of the camera’s surroundings - or have WatchBot act as an alarm, notifying you when unauthorised movement has been detected.
- Page 4 What's In The Box 1 WatchBot Camera 1 DC Power Supply 1 Wall Mounting Kit 1 Alarm Connection Adapter 1 RJ45 Ethernet Cable 1 User Guide www.watchbotcamera.com/support...
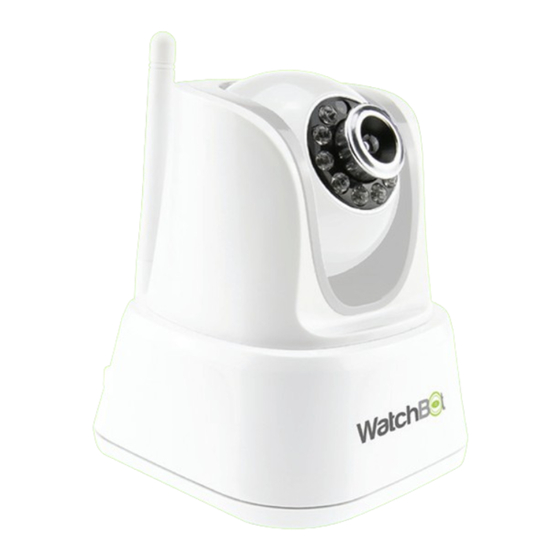
- Page 5 WatchBot Overview Day/Night Sensor Camera Lens (Twist to focus) Ifra-red LEDs Pan and Tilt Motion Microphone WiFi Antenna Built-in speaker RJ45 Ethernet port I/O Connector Audio out Power Input Micro SD slot Reset Button www.watchbotcamera.com/support...
- Page 6 Quick Set Up Guide - Mobile Devices 1. Using the power adaptor supplied, plug one end to the power connection of the WatchBot and the other end into an electrical socket. 2. Connect your WatchBot camera directly to your router using the supplied Ethernet cable.
- Page 7 Quick Set Up Guide - Desktop Application 1. Using the power adaptor supplied, plug one end into the power connection of the WatchBot and the other end into an electrical socket. 2. Connect your WatchBot camera directly to your router using the supplied Ethernet cable.
- Page 8 WatchBot and you are viewing the camera through the software. To configure your WatchBot to work wirelessly, you must ensure: i. The WatchBot is connected to the router with an Ethernet cable; ii. The WatchBot is linked to the desktop application.
- Page 9 Bot and you are viewing the camera through the mobile app. To configure your WatchBot to work wirelessly, you must ensure: i. The WatchBot is connected to the router with an Ethernet cable ii. The WatchBot is linked to the mobile application.
-
Page 10: Table Of Contents
System Requirements Network Requirements PC Requirements Restrictions Maintenance and Protection Product Overview Basic Features WatchBot Setup 1.1 The WatchBot Camera 1.2 WatchBot Software Installation Connecting WatchBot Components Connecting WatchBot 1.5 WiFi Configuration Setting Passwords Operator Controls Directional Controls 3.2 WatchBot Patrol... - Page 11 SECTION PAGE Advanced Settings Motion Detection Email Alerts Pan and Tilt DDNS SD Record Scheme The WatchBot App Adding a New Camera 5.2 Viewing The WatchBot Camera Settings Attaching the Wall Bracket Troubleshooting Glossary www.watchbotcamera.com/support...
-
Page 12: Introduction And Safety
Introduction and Safety System Requirements A PC is recommended for the initial set up of the WatchBot camera. Once the WatchBot is configured, it can be used without being connected to a computer. Network Requirements for Optimum Performance Wireless router. -
Page 13: Maintenance And Protection
WatchBot. • Touching the WatchBot lens will leave fingerprints and may cause image blurring. • Do not expose the WatchBot and its components to liquid; this may cause the camera’s hardware to short circuit and become a fire hazard. -
Page 14: Basic Features
Basic Features • Plug and play technology • Wireless operation - place wherever you want • Compatible with multiple devices • Built-in motion detection and proximity sensor • Email alert triggered by motion detection system • Auto Day/Night mode with visibility of up to 5 metres in the dark •... -
Page 15: Watchbot Setup
1 . 3 Connecting WatchBot Components 1. Take the WatchBot out of the box and remove all packaging. 2. Plug the power adaptor into the WatchBot before plugging it into an electrical socket. -
Page 16: Connecting Watchbot
1 . 4 Connecting WatchBot With your WatchBot attached to your router and the software ready, follow the steps below to connect your WatchBot with the software. 1. Open the WatchBot program. You will be presented with the following screen. - Page 17 1 . 4.1 Connecting WatchBot on the Same Network This section should be followed if your computer is connected to the same network as your WatchBot. If you are connecting to your Watch- Bot remotely, (over the internet) please go to section 1.4.2 1.
- Page 18 2. Click Open Search Tools to open the WatchBot search window. 3. Click Search to locate your WatchBot. The software will scan your network for all connected WatchBot cameras. www.watchbotcamera.com/support...
- Page 19 4. Double click on the WatchBot you want to connect to and click The Device ID (DID) of the WatchBot is located on the base of the camera. 5. Close the camera list window and return to the camera tab at the top of the screen.
- Page 20 *Note: You do not need to complete this section if you have already connected the software to WatchBot when on the same network. 1. Open the WatchBot application and click Preferences at the top of the screen. 2. Click Camera List at the bottom left of the screen and click Add.
- Page 21 *Note: If you are setting up more than one camera repeat steps 2 and 3 It is highly recommended that a password is set as soon as possible 4. Click Camera at the top left of the screen. *Note: Linked cameras will be listed at the bottom of the screen. 5.
-
Page 22: Wifi Configuration
This section assumes that you have successfully set up the Watch- Bot and you are viewing the camera through the software. To enable the WatchBot to work wirelessly, you must ensure the WatchBot is connected to the router with the Ethernet cable and linked to the desktop application. - Page 23 6. Click Save and Apply. The WatchBot will then reboot, allow 2 minutes for the WatchBot to reboot. 7. Once the WatchBot has restarted, disconnect the power and Ethernet cables from the back of the camera. 8. Reconnect the power cable only. The camera will reboot again.
-
Page 24: Setting Passwords
Once you have updated your username and password click Save and Apply. Your camera will reboot. You now need to update the WatchBot settings with the new user- name and password. Select the Preferences tab and click Camera List. This will open a new window, select the WatchBot and click Modify. -
Page 25: Operator Controls
3 . 0 Operator Controls Controls for WatchBot can be accessed on the left hand side of the window. 3 . 1 Directional Controls The directional controls allow you to pan and tilt the WatchBot, moving it left, right, up and down. -
Page 26: Watchbot Patrol
WatchBot to monitor during the night. 3 .5 Mirroring the Image If required, the video image on the camera can be mirrored horizon- tally and vertically. This is useful when the WatchBot is installed on the ceiling; the footage can be corrected if needed. www.watchbotcamera.com/support... -
Page 27: On-Screen Display (Osd)
3 .6 On-Screen Display (OSD) Clicking on the OSD button will display the WatchBot name and time and date on the video feed. 3 .7 Saving Presets WatchBot can save up to 3 preset viewpoints. Simply position the camera at the desired position and click the save the preset button. -
Page 28: Advanced Settings
PC; take snapshots of the area for 30 seconds and then send the images to up to 4 different email addresses. To set the WatchBot to trigger alerts when motion is detected, se- lect Alarm from the left hand menu and tick Motion Detect Armed. - Page 29 Tick Scheduler to set the time periods you want the motion detection alarm to be active. The schedule is divided into 7 days with each hour divided into 15 minute intervals. Select the times you wish for motion detection to be active.
-
Page 30: Email Alerts
4 . 2 E m a i l A l e r t s To enable the WatchBot camera to send images via email when motion alerts are triggered, you are required to configure your email provider details. This can be found by navigating to Email in the left hand menu. -
Page 31: Pan And Tilt
1. Override Preset Settings: Disables any saved position presets when active. 2. Call Preset on Boot: When the WatchBot reboots, it will re-centre to a predefined position. 3. Pan and Tilt Speed: Adjusts the turning speed of the camera between three preset speeds: slow, medium, fast. -
Page 32: Ddns
4 . 4 D D N S The WatchBot can be configured to work with a DDNS server. A DDNS address can be used as an alternative way to access your WatchBot from another location via a web browser. You can input the details of the DDNS server and access your WatchBot via the DDNS server address. -
Page 33: Sd Record Scheme
SD Card once motion is detected. 5 minutes of video uses approximately 20MB Tick Timer Recording to set the WatchBot to record on to the SD card at specific times of the day. Select the times on the days you want to record and click Save and Apply. -
Page 34: The Watchbot App
Please note: To record live pictures and video footage on the mobile app, you will need the premium WatchBot Pro version of the software. 5.1 Adding a New Camera Launch the app and click Add New Camera. - Page 35 You are able to give your WatchBot a name so you can easily identify it. Android There are three ways you are able to connect the app to your WatchBot. 1. Manually enter the WatchBot camera ID. 2. Scan the QR barcode on the base of the WatchBot.
- Page 36 Click Scan QR Code and scan the QR barcode on the base of the WatchBot. This will automatically populate the required information of the WatchBot. You will still be required to enter the username and password. 3. Search.
-
Page 37: Viewing The Watchbot
5.2 Viewing the WatchBot To view your WatchBot, tap camera located at the bottom left of your screen. Tap on the image of the camera you wish to view. Android You will now be viewing a live feed of your WatchBot. - Page 38 The green arrows on the edges of the screen can be used to move the camera up, down, left and right. To use all of WatchBot’s features, just tap once on the live video stream. You will then be able to see all the controls that you can use to operate your camera remotely.
- Page 39 Android www.watchbotcamera.com/support...
- Page 40 Tap the WatchBots you want to view from the list on the right of the screen. Tap >> to hide the sidebar. Tap and hold on the image to either remove the WatchBot from the multi-screen or view it in full screen. www.watchbotcamera.com/support...
-
Page 41: Camera Settings
5.3 Camera Settings To configure your WatchBot’s settings, navigate to your main screen and tap on the icon to the right of the camera. Android You are then presented with the WatchBot settings. Android www.watchbotcamera.com/support... - Page 42 5.3.1 WiFi Settings Tap on WiFi from the WatchBot camera settings. Select the WiFi network you want to connect to. Android Enter your WiFi password and confirm (please note passwords are case sensitive). www.watchbotcamera.com/support...
- Page 43 5.3.2 User Settings You can set 3 different usernames and passwords for each WatchBot granting different levels of access: Administrator: Full access to camera control and settings; Operator: Full access to camera control; Visitor: Access to camera without control. Android Tap on User Setting from the WatchBot camera settings.
- Page 44 2. By NTP - tick/turn on Use NTP to automatically set the time according to the NTP server selected. 3. Sync with device time - to synchronise the WatchBot’s time with your device: Android - tap Synchronise with device.
- Page 45 Motion Detect. The sensitivity of the sensor can be adjusted to the environment. If the WatchBot is connected to an external alarm system, use the alarm input to enable or disable this feature. If you want an image to be sent to you when motion is detected via email, tick/turn on Email.
- Page 46 5.3.5 Email Configuration Select Email from the WatchBot camera settings to configure the WatchBot camera to send images via email when motion alerts are triggered. Sender: Your email address. SMTP Server: Select your email provider from the drop down menu. This will auto-complete the server and port sections. If your provider is not listed, your settings can be manually entered into the fields.
- Page 47 Specify how long you want the camera to record on to the micro- SD Card once motion is detected; 5 minutes of video footage uses approximately 20MB. Tick/turn on Timer Recording to set the WatchBot to record on to the micro-SD card at specific times of the day. Android...
-
Page 48: Attaching The Wall Bracket
Locate the brass coloured screw hole in the centre of the base of the WatchBot, and position it over the wall bracket attachment. Gently rotate your WatchBot on to the bracket until firmly attached. Finally, angle your WatchBot into your desired position. -
Page 49: Troubleshooting
Troubleshooting Visit the WatchBot Support Page at: www.watchbotcamera.com/support I have forgotten the administrator username and/or password... To reset the administrator username and password, press and hold down the ‘RESET’ button on the camera base for 5 seconds. Release, and the username and password will be reset back to the factory default administrator username and password. - Page 50 Internet. My WatchBot won’t work when I remove the Ethernet cable... Check that you have set up the correct WiFi details on the WatchBot. See section 1.5 WiFi set up, ensure that your wireless password has been entered correctly (passwords are case sensitive).
-
Page 51: Glossary
WiFi, such as a personal computer, smartphone, tab- let, digital audio player or video game console, can connect to the Internet via a wireless network access point. Ethernet The wire used to connect a device (computer/WatchBot) to a router to provide internet connectivity. www.watchbotcamera.com/support... - Page 52 www.watchbotcamera.com...
Need help?
Do you have a question about the 3.0 and is the answer not in the manual?
Questions and answers