Table of Contents
Advertisement
Quick Links
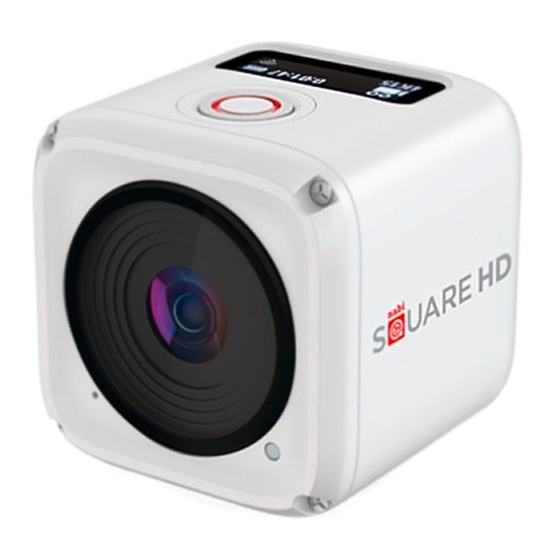
Square HD
Product Overview
1
2
3
4
5
6
Installing the Battery and Memory Card
1
2
Turning the Device On
Press and hold the Power button (
to turn on the camera.
Recording Videos
By default, the camera is automatically in Video mode
when turned on.
1. Press the Shutter button to start recording.
00:07:38
Blink per 1 sec. while recording
2. Press the Shutter button to stop recording.
Capturing Photos
1. Press the Power button to switch to Photo mode.
2. Press the Shutter button to take a photo.
NOTE: To view the recorded files, you have to transfer
those files to your computer first or connect your
camera to an external display.
Connecting to an External Display
To view the recorded files, connect this camera to
an external display (i.e. TV) using the HDMI cable as
shown in the illustration.
When connected, press the Power button
repeatedly to select the desired operation icon and
press the Shutter button to confirm the selection.
Select
to play the video.
Select
to view the previous file.
Select
to view the next file.
Select
to start the
slideshow.
21003 Quick Start Guide
7
8
9
10
11
Before you start using your camera, you need to
insert the included battery and a memory card (sold
separately).
1. Push the latch down to unlock the IO/battery cover.
2. Slide the IO/battery cover away from the device
and open the cover.
3. Insert the battery into the battery compartment,
observing the correct polarity.
4. With the gold contacts facing down, insert the
memory card into the memory card slot. Push the
memory card until it clicks into place.
5. Close the IO/batttery cover and push the latch
upwards to securely lock the cover.
NOTE: Use the USB cable to charge the battery.
Switching Modes
) for 2 seconds
Press the Power button repeatedly to switch modes.
Animation
After 1 sec.
1080P60
Video mode
Changing the Camera Settings
1. Press the Power button repeatedly to switch to Settings mode.
2. Press the Shutter button to enter Settings mode.
3. Press the Power button repeatedly to select the desired menu option.
Video Resolution menu
4. Press the Shutter button to enter the submenu.
5. Press the Power button repeatedly to select the desired setting.
6. Press the Shutter button to confirm the selection.
NOTE: To return to Video mode, press and hold the Shutter button for 2 seconds.
Names of Parts
1. OLED Display
2. Shutter Button (
)
3. Buzzer
4. Lens
5. Microphone
6. Processing LED
7. Wi-Fi Button (
)
12
8. Power Button (
)
9. Power LED Indicator
10. Wi-Fi LED Indicator
11. Strap Eyelet
12. IO/Battery Cover
Animation
After 1 sec.
52:38
238
8
MP
Photo mode
1080P-60FPS
8 MP
Photo Resolution menu
EXIT
Exit
52:38
1080P60
Video mode
Connecting to a Computer
System Requirements
To transfer the recorded files to a computer or use this device as a
webcam, connect this camera to a computer or notebook using the
USB cable as shown in the illustration.
When connected, press the Power button repeatedly the to select
the desired mode and press the Shutter button to confirm the
selection.
Select PC to transfer files.
Select PC CAMERA to use this device as a webcam.
Specifications
Image Sensor
8MP CMOS
Lens
Fixed Focus Lens
OLED Display
128*36 (0.9 inch), Mono White
Memory
microSD, microSDHC and
microSDXC memory card
up to 32GB. (Class 10 or higher)
Image Resolution
Video:
4K/15fps, 2.7K/30fps
1080p/60fps, 1080p/50fps
720p/120fps, 720p/100fps
Still image:
8MP, 6MP WIDE (16:9), 6MP
Wi-Fi
802.11 b/g/n
Waterproof
IPX8 (10m)
Operating Temperature: -5 to 40 degrees Celsius
Connecting to a Mobile Device
Select the SSID of this unit to connect this camera to your
mobile device.
1. Turn on the Wi-Fi function on your mobile device.
2. Select the camera's SSID (Wireless network name).
3. Enter the password to connect with your mobile device.
NOTE: The default SSID and password settings are:
SSID: Nabi-actioncamera
Password: Ab123Cd45
Animation
Animation
After 1 sec.
After 1 sec.
3/1S
238
2S
2S
238
238
8
8
MP
MP
Photo Burst mode
Time Lapse mode
3/1sec.
2 sec.
Photo Burst menu
Time Lapse menu
DELETE
OFF
Delete menu
Wireless Control menu
WINDOWS
Windows XP(SP2) or Vista and later
MAC OS X 10.4.11 or later
3.2GHz Pentium 4 or faster
2.0GHz Intel Core Duo or faster
DirectX 9.0c or later
Minimum 1GB of system RAM
Minimum 1GB of system RAM
Video card with minimum 128MB
Video card with minimum 256MB
of RAM
of RAM
Settings mode
CAPTURE
SETTINGS
Capture Settings
menu
SETUP
Setup menu
MACINTOSH
PC
PC CAMERA
Advertisement
Table of Contents

Summary of Contents for NABI Square HD
-
Page 1: Specifications
Square HD 21003 Quick Start Guide Product Overview Specifications Names of Parts Image Sensor 8MP CMOS 1. OLED Display Lens Fixed Focus Lens 2. Shutter Button ( OLED Display 128*36 (0.9 inch), Mono White 3. Buzzer Memory microSD, microSDHC and microSDXC memory card 4. - Page 2 REGULATORY STATEMENTS Federal Communication Commission Interference Statement This device complies with part 15 of the FCC Rules. Operation is subject to the following two conditions: (1) This device may not cause harmful interference, and (2) this device must accept any interference received, including interference that may cause undesired operation. This device has been tested and found to comply with the limits for a Class B digital device, pursuant to Part 15 of the FCC Rules.
Need help?
Do you have a question about the Square HD and is the answer not in the manual?
Questions and answers