
Subscribe to Our Youtube Channel
Related Manuals for Shibaura N843L

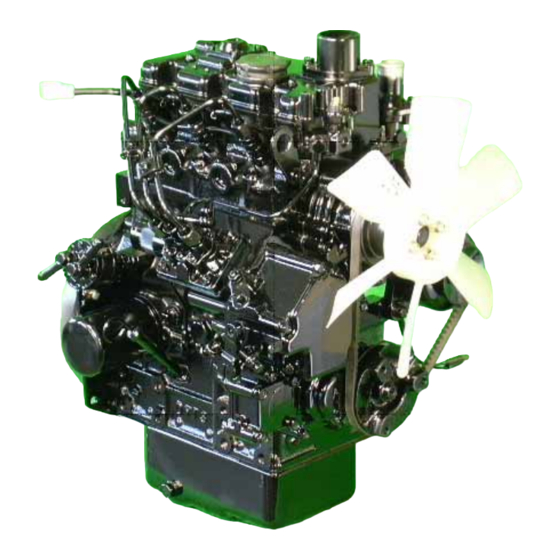
Summary of Contents for Shibaura N843L
- Page 1 SHIBAURA DIESEL ENGINE MODELS: S773L, N843, N843L WORKSHOP MANUAL SUPPORTED BY HUSTLER TURF EQUIPMENT AND EXCEL INDUSTRIES, INC.
-
Page 2: Foreword
FOREWORD This workshop Manual includes repair and adjustment procedures required for the diesel engine models S773L, N843, and N843L. When servicing to keep the engine in the best condition, you will find this Manual very useful as a guidebook. This Workshop Manual was prepared in Jul. 2008. Specifications contained in this Manual are subject to change without notice for subsequent engineering changes. -
Page 3: Table Of Contents
Table of Contents FOREWORD ............c-2 Section 1: Safety . - Page 4 Flywheel ............4-2 Piston and connecting rod assembly .
-
Page 5: Section 1: Safety
SECTION 1: SAFETY ▲ Provide adequate ventilation when charging batteries. ▲ Do not smoke near battery. ▲ Never check fuel level with an open flame. ▲ Never use an open flame to look for leaks anywhere on the equipment. This safety alert symbol is used to call attention to a ▲... -
Page 6: Avoid Acid Burns
▲ leak under pressure, use a piece of cardboard or Never check battery charge by placing a metal wood—never use your hands. Relieve all object across the posts. Use a voltmeter or pressure in the system before disconnecting or hydrometer. ▲... -
Page 7: Fuel Handling
attachment while the tractor engine is running or environmently correct maner. deck clutch is engaged. ▲ Repairs or maintenance requiring engine power should be performed by trained personnel only. ▲ Never work under the machine or attachment unless it is safely supported with stands, blocks or a hoist. - Page 8 109823 2/09...
-
Page 9: Section 2: General
SECTION 2: GENERAL General Notes Before Service 1. Clean the exterior of the engine, drain oil, fuel and cooling water as necessary before disas- sembly. 2. Keep the service shop clean, free from dust, and with adequate lighting. 3. Remove oil and grease from disassembled parts, and place them in groups on a clean table. 4. -
Page 10: Torque Specifications
Torque Specifications Bolt Grade No. Coarse Thread Fine Thread Size Pitch Tightening torque Pitch Tightening torque (mm) (mm) lbf•ft N•m lbf•ft N•m 4T, 4.8 18.6-35.4 in•lb 2.8-4.0 ----- ----- 7T, 8T, 8.8 43.4-61.1 in•lb 4.9-6.9 10T, 11T 59.3-83.2 in•lb 6.7-9.4 4T, 4.8 43.4-61.1 in•lb 4.9-6.9... -
Page 11: Engine Sectional Drawing
Engine Sectional Drawing 109823 2/09... -
Page 12: Specifications
Specifications Items Specifications Engine model S773L N843 N843L Engine type 4-cycle water cooled in-line 4-cycle water cooled in-line 4-cycle water cooled in-line overhead valve overhead valve overhead valve No. of cylinders-bore × 3-3.031(77) × 3.189(81) 3 - 3.307(84) x 3.54(90) 3 - 3.307(84) x 3.94(100) -
Page 13: Engine Removal
Engine Removal Note: Asterisks (*). Items may vary depending on the type of equipment in which the engine is Installed. 1. If necessary, remove engine cover or hood. 2. Remove the muffler and mounting brackets from the engine. 3. Disconnect the wiring from the air cleaner clogging sensor if so equipped. -
Page 14: Parts And Descriptions
Parts and Descriptions Index Description Alternator Oil filter Relief valve Oil level gauge•Gauge guide Engine stop solenoid•Seal washer Fuel injection lines Injection pump assembly and shim Note: 1. Remove the injection fuel lines and engine stop solenoid before remov- ing the injection pump. 2. - Page 15 Index Description Fuel return line Injection nozzle•Gasket Oil transfer pipe•Eye bolt •Seal washer Connector•Glow plug Oil pressure switch Thermostat housing•Gasket Valve cover•O-ring•Intake manifold•Spacer Rocker arm assembly•O-ring•Cap NOTE: Remove the caps from intake valves and exhaust valves. Push rod Cylinder head assembly•Head gasket NOTE: Loosen the cylinder head bolts in several steps and remove the cylinder head assembly.
- Page 16 Index Description V-belt•Cooling fan•Fan holder•Fan pulley Water pump assembly•Gasket Crankshaft pulley and nut Not available Timing gear case assembly•Gasket Note: Remove the engine stop solenoid and injection pump assembly first. Idle gear•Oil pump assembly Cam shaft assembly•Plate Note: Remove the bolts and plate before pulling the camshaft assembly. Front plate•Gasket 109823 2/09...
- Page 17 Index Description Oil pan•Gasket•Suction filter•Suction pipe Fly wheel Rear plate or Flywheel cover Oil seal Piston and connecting rod assembly NOTE: 1. Before extracting piston, remove the carbon deposit from the top of the cylinder. 2. Keep pistons, connecting rods, caps and bearings grouped by cylinder number and reassemble to their original locations.
- Page 18 2-10 109823 2/09...
-
Page 19: Section 3: Disassembly And Inspection Of Engine
SECTION 3: DISASSEMBLY AND INSPECTION OF ENGINE Caution: before starting disassembly 1. Check the cylinder block and cylinder head for wear, leakage or damage. 2. Clean oil passages with compressed air and check for clogging. 3. Thoroughly clean parts to remove dust, contaminated oil, carbon, and other foreign mate- rial. -
Page 20: Cylinder Head Assembly
3. Check the valve cap-contact surface for uneven wear and streaks. If wear is insignificant, grind flat with oilstone or grinder, otherwise, replace. Cylinder head assembly Disassembly 1. Using a valve spring compressor, compress the valve spring to remove the valve cotter, retainer, spring and valve. - Page 21 d. Replace the valve if the clearance between the stem and guide exceeds the service limit. Clearance between valve stem and valve guide in(mm) Intake valve Exhaust valve Standard Service limit Standard Service limit Clearance assembling assembling value value 0.0012- More than 0.0016- More than...
-
Page 22: Cylinder Block
4. Valve spring a. Check the valve spring visually for damage. Squareness b. Measure the squareness of the spring using a square on a surface plate and replace if the service limit is exceeded. c. Check the free length and spring force with a spring tester and replace if the service limit is exceeded. -
Page 23: Piston And Piston Ring
Piston and piston ring Disassembly 1. Remove the piston ring using a piston ring tool. 2. Remove the snap ring and extract the piston pin. Inspection 1. Piston a. Check the piston for cracks, streaking and burnout on the outside surface and replace if excessive. b. - Page 24 N843L 115017491 Piston ring kit Part No. S773L 115107240 N843 & N843L 115107960 e. Piston ring installing procedure: Install the piston ring to the piston as shown in Fig. 3-18. Piston pin outside dia. ø in(mm) 3. Piston pin Measure the outside diameter of the piston pin and replace...
-
Page 25: Connecting Rod
Connecting rod Inspection 1. Check for torsion, parallelism and damage. Measure the torsion and parallelism using a connecting rod aligner and correct or replace if the repair value is exceeded. Torsion and parallelism of connecting rod in(mm) Standard assem- Repair value bling value Torsion (per Less than... - Page 26 1. Heat the piston to about 212°F(100°C) with a piston Bearing code No. Crankshaft pin outside dia. heater or equivalent and install it aligning the Finishing dimension ø “SHIBAURA” mark in the piston and match mark at in(mm) (A) of the connecting rod. 198517602 1.6128-1.6132 2.
-
Page 27: Disassembly, Inspection And Reassembly Of Bearing Holder
Disassembly, inspection and reassembly of bearing holder Disassembly and inspection Center bearing Bearing Bearing part No. Crankshaft center 1. Remove the bearing holder, and replace the bearing size journal finishing if peeling, melting, uneven wear, or improper contact dia ø in(mm) is noticed. -
Page 28: Crankshaft
Inspection 1. Check the bearing and replace if peeling, melting, uneven wear, improper contact, or other damage is noticed. 2. Measure the oil clearance of the bearing and crankshaft journal using a cylinder gauge and micrometer. 3. If out of specification, replace the bearing and/or crankshaft. -
Page 29: Flywheel And Ring Gear
Inspection 1. To measure run-out of the crankshaft, support the Crankshaft run-out in(mm) crankshaft using a V block as shown inFig. 3-28. Standard assembling Service limit Using a dial indicator as shown, measure the run-out value of the center to the crankshaft center journal, by Less than 0.0012(0.03) More than 0.0024(0.06) slowly rotating the shaft through one revolution. -
Page 30: Cam Shaft Assembly
Inspection Check the ring gear and replace if damaged or excessive wear is noticed. When the wear is limited to a small area, remove the, ring gear, turn it about 90 degrees and shrinkage-fit to reuse it. To shrinkage-fit the ring gear, heat it to 248-302°F(120– 150°C) to allow it to expand. -
Page 31: Oil Flow
Oil flow Fig. 3-34 1. Suction filter 4. Oil filter 2. Oil pump 5. Oil Pressure switch 3. Relief valve 109823 2/09 3-13... -
Page 32: Oil Pump
Oil pump Disassembly Removal from engine 1. Remove the snap ring. 2. Remove the collar, spring and shim. 3. Remove the idle gear, vane, and oil pump cover together. 4. Extract the rotor and thrust washer. 5. Extract the oil pump cover from the idle gear. Inspection and reassembly 1. -
Page 33: Water Pump Assembly And Thermostat
Water pump assembly and thermostat Type Wax pellet Disassembly and inspection Opening temperature 163.4-170.6°F 1. Remove the set plate and gasket. (73° - 77°C) 2. Inspect the water pump and replace if cracked, worn, Full-opening temperature 188.6°F(87°C) or damaged. Valve lift 0.24 in.(6.0 mm) Note: The pump main body is aluminum die cast and should be replaced as an assembly if... -
Page 34: Fuel Filter
Fuel filter Note: N843 and N843L engines (used in the Hustler 3500 and 3700) have an electric fuel pump. Fuel flow The fuel flows as shown in Fig. 3-40, from the tank, pressurized by the injection pump to high pressure, and fed to the nozzle and injected to the combustion chamber. -
Page 35: Nozzle And Holder
by authorized service personnel, only. Any service done by unauthorized personnel, will void the injection pump warranty. Note: No service parts are available for the fuel injection pump. Trouble-shooting Symptom Possible Cause Check or Remedy 1. Engine does not 1. Empty fuel tank or air mixed in fuel. 1. - Page 36 Disassembly and inspection 1. Place the nozzle holder (body) in a vise and disassemble turning the nozzle nut. Note: Be careful not to drop the needle valve when removing the nozzle. 2. Wash the nozzle and needle valve and check for seizure and sticking in the nozzle, and fuel leakage on the seat surface.
-
Page 37: Section 4: Engine Re-Assembly
SECTION 4: ENGINE RE-ASSEMBLY Caution: before assembling engine; 1. Clean parts to be installed. (Especially oil passages, bearings, pistons, and cylinder bores carefully.) 2. Coat the sliding and rotating parts of the cylinder bore, piston, bearing and other parts with new oil before installing. -
Page 38: Oil Seal
Oil seal Coat the seal lip of the oil seal prior to installing the seal in Roll pin the block. Oil seal Liquid packing Fig. 4-3 Rear plate Note: Apply the liquid gasket around the M8 screw holes on the rear plate Rear plate torque: 16.8-20.3 lb •ft (24–29 N·m) {2.4–3.0 kgf·m}... -
Page 39: Piston And Connecting Rod Assembly
Piston and connecting rod assembly 1. Coat the metal surface, piston and piston ring with engine oil. 2. Turn the ring to distribute the oil in the ring groove, and set the ring end gaps at 90° respectively avoiding piston pin direction and the direction at a right angle to the piston pin. -
Page 40: Oil Pan
Oil pan Start tightening the bolts of the oil pan from the center, then tighten the opposing bolt on opposite side on the diagonal and to specified torque. (See Fig. 4-9). Bolt torque 7.4-9.6 lb •ft (10–13 N·m) {1.0–1.3kgf·m} Oil dipstick · Dipstick guide Install the oil level gauge and gauge guide using two O- Rings. -
Page 41: Idle Gear · Oil Pump Assembly
Idle gear · Oil pump assembly 1. Install a thrust washer to the idle gear shaft. 2. Install the idle gear assembly. 3. Align the match marks of the idle gear, crankshaft gear and camshaft gear and install it to the idle gear shaft. -
Page 42: Crankshaft Pulley
Crankshaft pulley Install the key into the crankshaft, and install the crankshaft pulley and tighten with the nut. Crankshaft pulley torque 82.6-88.9 lbf•ft (118–127 N·m) {12–13 kgf·m} Fig. 4-15 Injection pump assembly 1. Install the shim, which was removed during Snap pin disassembly, connect the control rack of the injection pump and link, and install the snap pin. -
Page 43: Cylinder Head Assembly
Cylinder head assembly 1. Set the piston at top dead center (TDC) and Projection measure the projection or depression from the face of the cylinder block with a depth gauge or dial indicator. Notes: 1. Measure, holding the piston lightly by hand. -
Page 44: Cap · Push Rod · Rocker Arm Assembly
Cap · Push rod · Rocker arm assembly 1. Install the cap to the valve stem end. 2. Install the push rod and rocker arm assembly. Rocker arm assembly tightening torque 177.0-221.3. lb •in (20–25 N·m) {2.0–2.5 kgf·m} Fig. 4-19 Valve clearance adjustment Loosen the locking nut of the intake and exhaust valve rocker arm and adjust the valve clearance to 0.008 in (0.2... -
Page 45: Oil Pressure Switch
Oil pressure switch Oil pressure switch tightening torque 88.5-106.2 lb •in (10–12 N·m) {1.0–1.2 kgf·m} Oil pipe Eye bolt torque 88.5-115.1 lb •in (10–13 N·m) {1.0–1.3 kgf·m} Eye Bolt Fig. 4-21 Water pump assembly · Bypass hose 1. Install and tighten the gasket and water pump ➀... - Page 46 109823 2/09 4-16...
-
Page 47: Section 5: Electrical Systems
SECTION 5: ELECTRICAL SYSTEMS WARNING: Before working on any component of the electrical system, the negative (-) battery cable should be disconnected from the battery, as electrical shock or damage to system components may occur. Some testing requires 12 - volt power; care should be taken in cases where power is needed. -
Page 48: Engine Glow Plugs
Testing 1. Using a suitable measuring device, measure the protrusion distance, “A” ( page 5-2, Fig. 5-3), on the solenoid. The distance should measure between 1.00–1.04 in.(25.5 - 26.4 mm). If the distance is not within these specifications, the solenoid is defective and needs replaced. -
Page 49: Engine Oil Pressure Switch
2. Using an ohmmeter, touch one test probe to the glow plug electrode. Touch the other test probe to the glow plug body (see page 5-3, Fig. 5-7). 3. Observe the ohmmeter. A resistance reading of 1.0 ohm is maximum for the standard glow plug. If the resistance is higher than 1.0, the glow plug is defective and needs replaced. -
Page 50: Alternator (40 Amp Version) (No. 185046320)
1. Install the oil pressure switch into the engine cylinder head and tighten to 10.8–14.4 lb •ft(14.7–19.6 N•m) (1.5–2.0 kgf•m). 2. Install the ring terminal onto the oil pressure switch, and secure the terminal with the retaining screw, , ( page 5-3, Fig. -
Page 51: Alternator Diagnostic Procedures
Construction The principal components of the IC alternator are the stator, IC voltage regulator the rotor, the rectifier assembly, the IC voltage regulator, the Rotor front bracket, the rear bracket and the pulley. Pulley The rectifier assembly consists of two heatsinks, one positive and one negative, and diode trio. - Page 52 Disassembly 1. Mark both brackets and the stator with a scribe mark for assembly. 2. Remove the four (4) through bolts. Pry between the stator and front bracket with blade of a screwdriver. Carefully separate the front bracket , pulley rotor assembly from the stator and rear bracket assembly.
- Page 53 b. Check for continuity between both the slip rings, page 5-7, Fig. 5-16. If there is no continuity, the field coil is defective. Replace the rotor assembly. Fig. 5-16 c. Check for continuity between the slip ring and shaft (or core), page 5-7, Fig. 5-17. If there is continuity, the coil or slip ring is grounded.
- Page 54 b. Check for continuity between any stator lead and stator core, page 5-8, Fig. 5-19. If there is continuity, the coil is grounded. Replace the stator assembly Fig. 5-19 3. Rectifier Assembly a. Positive heatsink: Check for continuity between Stator coil lead terminal the positive (+) heatsink and stator coil lead connection terminal with a circuit tester.
- Page 55 c. Diode Trio: Using a circuit tester, check the three (3) small diodes for continuity in both directions. If Diode trio there is either continuity or an open circuit in both directions, the diode is defective. Replace the rectifier assembly. Rectifier Assembly Fig.
- Page 56 Bench Check To check the alternator on a test bench, proceed as follows: 1. Make connection as shown in the page 5-10, Fig. 5-25, except leave the load resistor disconnected. 2. Slowly increase the alternator speed and observe the voltage. 3.
-
Page 57: Maintenance
Maintenance Item/Model Name A007T03877(MITSUBISHI) Nominal output (V-A) 12–40 Polarity Negative ground Weight lb. (kg) Approx. 8.2(3.7) Rotational Direction (Viewed from the pulley) Clockwise Load characteristic (cold) Terminal Voltage (V) 13.5 Current (A) Min. 30 Rotational Speed (RPM) 2500 Brush length Original in(mm) 0.728(18.5) Limit in(mm) -
Page 58: Trouble Shooting
Trouble Shooting Symptom Part Cause Remedy Wiring, ammeter Open or short circuit Correct Loose connection Defective coils, short to ground Replace charging Alternator Defective rectifier Replace Defective RF resistor Replace Regulator Defective regulator Replace Wiring Open or short circuit Correct Loose connection Loose alternator drive belt Correct... -
Page 59: Starter Motor (M001T66081) (No. 185086551)
Starter Motor (M001T66081) (No. 185086551) Description This starter features a reduction mechanism consisting of a planetary gearing system and permanent magnets for magnetic field induction. Its reduction mechanism is comprised of an internal gear, three planetary gears, gear shafts (with overrunning clutch fitted by spline) and armature shaft gear. The structure is different from that of direct drive type, but the electrical wiring is the same between two types. - Page 60 Disassembly Reference page 5-14, Fig. 5-28. Socket Notes: 1. Before disassembling starter, alignment marks on the switch and yoke, To aid in correct reassembly. Do not clamp yoke in a vise or strike it with hammer during repair operations. Permanent magnets attached to yoke could be broken and yoke dented or deformed if mishandled.
- Page 61 b. Slide a piece of tubing of suitable size over shaft against stop ring ) (see page 5-14, Fig. 5-28 and page 5-15, Fig. 5-29). c. Then tap the tubing with a hammer to remove the stop ring and expose snap ring (see page 5-14, Fig.
- Page 62 c. To check brush holder assembly for grounds, touch one probe of a circuit tester to holder plate and the other probe to each of insulated holders. Replace brush holder assembly if any continuity is noted. d. Overrunning clutch and pinion gear. While holding clutch housing, rotate pinion.
- Page 63 b. Push pinion back by hand and measure the amount of the pinion movement as shown in page 5-17, Fig. 5-35. If the amount does not fall within limit, adjust it by adding or removing shims which are located between switch and front bracket. Adding shims decreases the amount of the movement.
-
Page 64: Maintenance
Maintenance Item Standard Value or Service Limit Volts No-load Characteristic Amps 110 Max R.P.M. 2400 Min. Commutator Outer Dia. 1.16in.(29.4mm) Service Limit 1.14in.(28.8mm) Brush Length 0.69in.(17.5mm) Service Limit) 0.40in.(10mm) Brush spring Tension 5.1–7.3 lb (22.5–32.5 N) Service Limit 2.3 lb (10 N) Pinion Movement (Pinion Gap) 0.020–0.079 (0.5–2.0mm) -
Page 65: Trouble Shooting
Trouble shooting Symptom Part Cause Remedy Wiring Open circuit: loose battery connection, Tighten connections. loose connection at ignition switch or at starter terminals. Pinion does not advance Key switch Defective ignition switch Replace even though the key switch is turned ON. Starting motor Helical spline on pinion shaft is scored Replace or correct... - Page 66 5-20 109823_2/09...
-
Page 67: Section 6: Trouble-Shooting
SECTION 6: TROUBLE-SHOOTING Symptom Cause Remedy Defective key switch Check electrical connection and contacts. Insufficient charging or completely dis- Charge. charged battery. No fuel. Check and refill fuel tank. Air mixed in the fuel system. Tighten all fuel system connections. Clogged fuel filter. - Page 68 Dropped battery voltage. Charge the battery. Starting motor does not Defective safety switch. Replace. operate. Trouble in starting motor. Check and correct the starting motor. Disconnected wire of fusible link. Replace. Insufficient engine oil. Replenish to specified gauge level. Oil pressure lamp does Trouble in oil pressure switch.
-
Page 69: Section 7: Servicing Specifications
SECTION 7: SERVICING SPECIFICATIONS * Unit for values without unit in the column of inspection item is in(mm). To be Standard Dimension Standard Value Allowable Limit Repaired Unit Part Inspection Items S773L N843(L) S773L N843(L) S773L N843(L) Remarks Cylinder compression More than More than Less than... - Page 70 To be Standard Dimension Standard Value Allowable Limit Repaired Unit Part Inspection Items S773L N843(L) S773L N843(L) S773L N843(L) Remarks Piston pin outside dia. .8266–0.8568 1.1021–1.1024 0.8260 1.1012 (20.996–21.002) (27.994–28.0) (20.98) (27.97) Clearance between small end 0.0003–0.0010 0.0004–0.0011 0.0003 0.0003 Oil clearance bush and piston pin (0.008–0.025)
- Page 71 To be Standard Dimension Standard Value Allowable Limit Repaired Unit Part Inspection Items S773L N843(L) S773L N843(L) S773L N843(L) Remarks Diameter of journal 1.890(48) 2.677(68) 1.8883–1.88888 2.6755–2.6760 1.8858 2.6535 (47.964–47.975) (67.957–67.970) (47.9) (67.4) Diameter of crank pin 1.614(41) 2.0472(52) 1.6128–1.3132 2.0458–2.0463 Ø1.6102 2.024...
- Page 72 To be Standard Dimension Standard Value Allowable Limit Repaired Unit Part Inspection Items S773L N843(L) S773L N843(L) S773L N843(L) Remarks Diameter of intake valve stem 0.2744 0.2744 0.2738–0.2744 0.2738–0.2744 0.2713 0.2713 (6.97) (6.97) (6.955–6.97) (6.955–6.97) (6.89) (6.89) Diameter of exhaust valve 0.2738 0.2738 0.2732–0.2738...
- Page 73 Injection timing Before 25–27° 18–20° T.D.C. Piston dis- 0.27-.31in N843: 0.16-0.19in 0.22-.26in placement (4.411–5.123ml) (2.594–3.187ml) (3.529- before N843L: 0.19-0.24 4.217ml) T.D.C. 3.195–3.923ml) Type S773L—131406440, N843(L)—(Nozzle) 105007-1170 (NP DN4PDN117) Injection pressure 1711.4(11.8){120} 2175.6–2349 1636–1778 PSI(MPa){kgf/cm 2 } (15.2–16.2) (11.28-12.26) {155–165} {115-125} Angle of injection direction 4°...
- Page 74 To be Standard Dimension Standard Value Allowable Limit Repaired Unit Part Inspection Items S773L N843(L) S773L N843(L) S773L N843(L) Remarks Cooling method Forced circulation water cooling Coolant water volume US 2.0(1.9) 5.3(5) Qt(L) Type 145206061 Thermostat open 167(75) 180(82) temperature F°(°C) Thermostat full-open 189(87) 203(95)
-
Page 75: Index
Index Alternator (40 amp version) ....5-4 Radiator ....... 3-15 Alternator Maintenance .
Need help?
Do you have a question about the N843L and is the answer not in the manual?
Questions and answers