Table of Contents
Advertisement
Quick Links
Advertisement
Table of Contents

Summary of Contents for ImmersionRC LapRF Personal Edition
- Page 1 LapRF Personal Timing System Preliminary Operator's Manual Rev 0.99 - May 2017 ...
-
Page 2: Specifications
Specifications 5.8GHz RF Detection Frequency 5.3-6.0GHz Programmable Attenuation 0-32dB Antenna Custom linearly polarized (Suitable for LHCP, RHCP, Linear use) Channels Arbitrary (defined by connected app.) Pilots 1-8, depending upon required precision and gate speed Mechanical Dimensions L =100mm, W = 100mm, H = 25mm Weight 121g Battery Cell 18650, 2600mAh, 3.7V nominal ~300mA @ 3.7V Consumption Bluetooth Standard BLE, Bluetooth Smart Antenna Internal CE-compliant, or external dipole for extra range (up to 50m) ... - Page 3 Introduction The LapRF Personal Edition is the first in a family of race timing systems from ImmersionRC. LapRF technology uses the emitted 5.8GHz RF from race quadcopters (or fixed wing aircraft) to detect a passage through the start-finish gate. Different from other offerings on the market, the LapRF uses custom timing receivers with specially designed antennas to ensure that only quads which pass through the ‘beam’ are timed, and other sources of interference are ignored. All that is required to use the LapRF in a race is to program the band, and channel that each pilot will use, place the timer in the start/finish gate, and go fly! N o transponders required . 3 ...
-
Page 4: Getting Started
Getting Started Charging the Battery Using a standard USB Micro cable charge the timing puck for at least 3 hours before use. Ok, so nobody actually wants to do this… the battery is delivered approx. 70% charged, and won’t be damaged if the timer is powered up, and a few laps flown. Do not run it for long though before charging it to prevent permanent damage to the battery. App. Download Search for the term ‘LapRF’ in either the iOS App. store, or the Google play store. Download the free app. and install. Powering On To power on the LapRF, press and hold the power button, located on the underside of the timer, for about 4 seconds until the LEDs light up, and the LapRF beeps. To power off, repeat this procedure. Connecting to the LapRF iOS: O pen the ‘Race Setup’ page of the LapRF app, and select your timer’s ID (shown on the label on the bottom of the timer) from the list shown. The ‘Start Race’ icon on the Race page should go green to indicate a good connection. Configuring the Bands/Channels Once the LapRF is connected, click on the ‘LapRF Setup’ icon and configure your bands and channels. The switch on the left enables/disables each pilot slot, be sure to disable unused slots for maximum accuracy. Once the band and channel have been selected, the frequency is displayed. Use the power switch to select the power level that you will be running. Click the ‘Write Settings to LapRF’ button to program the time. Note that once these are programmed, the settings will persist even when the timer is power cycled. Finally, Race! Click on the Race button, and then ‘Start Race’. ‘Goggles Down, Thumbs up’ Joe Scully - Some time in 2015 4 ... -
Page 5: Battery Charging
Placement The lapRF’s integrated patch antenna forms a beam which emits from the top of the product. Ideal placement is in the center of the gate, but that does expose it to strikes from low-flying (high speed) racers. A small hole in the ground works well to protect it for grass tracks, or where this is not possible, either protect the timer from strikes placing a solid object in front of it, or place the timer at a 45 degree angle from one corner of the gate. When laying out tracks for RF timing, avoid parts of the track which come close to the timing gate to prevent false readings. For start grid positioning, place it at least 5m from the gate to ensure that the first crossing is registered. Battery Charging The internal 18650 li-ion battery may be charged by simply connecting the puck to a USB power source using a standard micro-B cable. The maximum charge current is approx. 800mA, which results in a charge time of a little more than 3 hours. For extended use, the 18650 may be easily swapped out and replaced with a fully charged pack. W ARNING: 18650 batteries can be extremely dangerous if mishandled. Keeping unprotected batteries in your pocket, especially with other metallic objects, can result in an explosion, and severe burns. Always use a protective carrying case when transporting these cells. When purchasing batteries, name-brand cells from reputable sources are highly recommended. Many of the ‘budget’ cells available from online resellers may not be as safe as genuine cells. Battery Life The supplied 2600mAh cell should suffice for approx. 8 hours of racing. As the cell voltage reduces, the gate will automatically turn off, after beeping to warn the user approx. 5 minutes before. 5 ... - Page 6 iOS Application for iPhone and iPad Main Screen The main screen shows the lap times, including average, best, and total times, for each active pilot. Times in green are the best lap times for each pilot. Note: When a timing system is not connected, touching the large pilot number on the left side of the screen will create a manual time, and can be used to evaluate the app. The color if the ‘Start Race’ button currently indicates a valid connection to the lapRF. Red for no connection, Green for a good connection. 6 ...
- Page 7 LapRF Setup The lapRF setup page is where the number of active pilots is set, plus the band and channel that each pilot is using. In addition, the power level used for the race (all pilots should ideally use the same vTx power) is set here, along with a ‘sensitivity tweak’ which works a bit like the exposure correction on most high-end cameras. If you are missing laps, increase sensitivity, if you are getting false hits, decrease it. This is a good time to talk about pilot count, and its effect on resolution/accuracy/gate speed. The personal time has a single timing module, which scans each of the active channels. When a single pilot is enabled, the RF signal is ‘sampled’ at the maximum rate, and supports quads flying through the start/finish gate at over 160km/h. When a second pilot is enabled, the timing module has to toggle between the two channels, reducing the accuracy of each channel, and decreasing maximum gate speed. In practice, for 250 sized quads, with pilots of typical skill level, 4 pilots can easily share a single lap timer. For slower quads, tiny-whoop class for example, even more pilot slots may be enabled. For the best accuracy at 200km/h+ gate speeds, and up to 16 pilots, the lapRF Event system is a better choice, and should be used for larger events. A vailability July 2017. 7 ...
- Page 8 Race Setup The Race Setup page is where miscellaneous race settings/preferences are configured. Race Start Delay Configure the delay between hitting the ‘Start Race’ button and the race starting. Use it to give time to get your goggles on before flying. Start Time From FPV races are usually either configured to start from the tone (start grid is positioned after the Start/Finish gate), or from ‘First to Gate’, where the start grid is positioned before it. With the latter, lap times are for full laps, including the first lap. Race Type For races with a fixed number of laps, select ‘Lap Count’, and set the number of laps to be raced. For races which are fixed-time, select ‘Fixed Time’ and be sure to enter the Race time. For Practice events, select ‘Practice’, the race will continue to run and record lap times until your LiPos croak. N ote that only the first 8 times will be shown on the Race page. 8 ...
- Page 9 Diagnostics The diagnostics page shouldn’t normally be required, but can be a useful tool during debugging. The RSSI level of each configured pilot slot is shown. Power on video transmitters and walk them through the gate to ensure correct configuration of the lapRF, and the video transmitter itself. 9 ...
- Page 10 Bands, Channels, and Frequencies The applications which support the lapRF define the bands and channels that are available for a race. All of the commonly used bands are present. 1 2 3 4 5 6 7 8 L 5362 5399 5436 5473 5510 5547 5584 5621 Low Band* F 5740 5760 5780 5800 5820 5840 5860 5880 IRC/FS R 5658 5695 5732 5769 ...
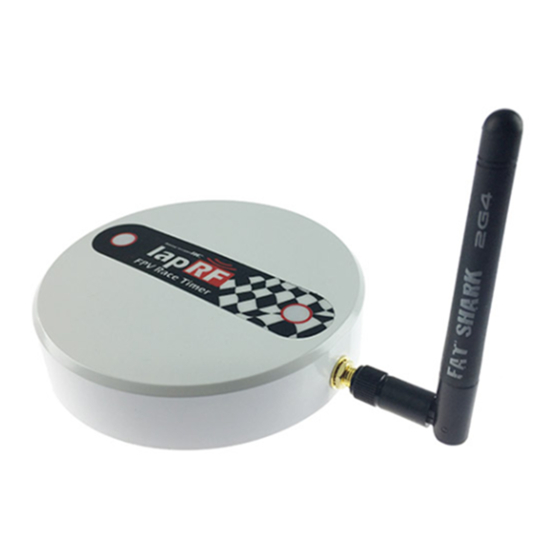
- Page 11 Increasing Bluetooth Range The internal bluetooth module uses a self-adhesive dipole antenna, fixed to the inside of the product. This antenna uses a standard U.FL connector, which may be removed, and replaced with an external antenna, by means of a 10cm U.FL to bulkhead SMA cable. When disassembling the case, a small plastic ‘blanking plate’ may be removed, to open up the hole through which to secure the SMA connector. For the antenna, the FatShark 2.4GHz dipole works well: http://www.getfpv.com/2-4-ghz-2-5-dbi-antenna-tested.html And for the required cable, U.FL to SMA: https://www.digikey.com/product-detail/en/amphenol-rf-division/336313-12-0150/ARF2362-ND/ 5417988 Note: ImmersionRC will be supplying a kit with the required antenna and cable in the near future, but in the interest of speed to market, the above combination will work well. 11 ...
-
Page 12: Firmware Update
Certification The CE, FCC, and other certificates for the integrated Bluetooth module are available from here: https://www.immersionrc.com/fpv-products/laprf/ Note that these certificates only apply when the internal antenna is used. Firmware Update Install a fully charged battery Press and hold the B ind button, while pressing the P ower button Run the ImmersionRC ‘Vortex Configurator’ application Press the F lash Firmware b utton, and point to the firmware file downloaded from the ImmersionRC website p roduct page for the LapRF. 12 ... -
Page 13: Troubleshooting
Troubleshooting Problem : LEDs are white on power-up Solution : Indicates an issue with the programming of the unique device ID, please contact support. 13 ...
Need help?
Do you have a question about the LapRF Personal Edition and is the answer not in the manual?
Questions and answers