
Summary of Contents for square connect SQ BLASTER PLUS
- Page 1 SQ BLASTER PLUS & SQ REMOTE (HD & LITE) USER GUIDE SQUARE CONNECT User Guide version 1.10...
-
Page 2: Table Of Contents
Deleting Controls! ................CONTENTS Moving Controls! ................Note on Images! ................Assigning (linking) Controls! ............Part 1: SQ Blaster Setup Guide! ..........Naming the Slide Out Control Panels or iPad Buttons! ....Connecting to your Home Wi-Fi network! ........Hints & Tips! .................. -
Page 3: Note On Images
SQ Remote HD are presented in an almost identical manner on both platforms. This was a conscious decision by Square Connect to make migration from the iPhone application to the universal application as simple and easy as possible. For this reason... -
Page 4: Part 1: Sq Blaster Setup Guide
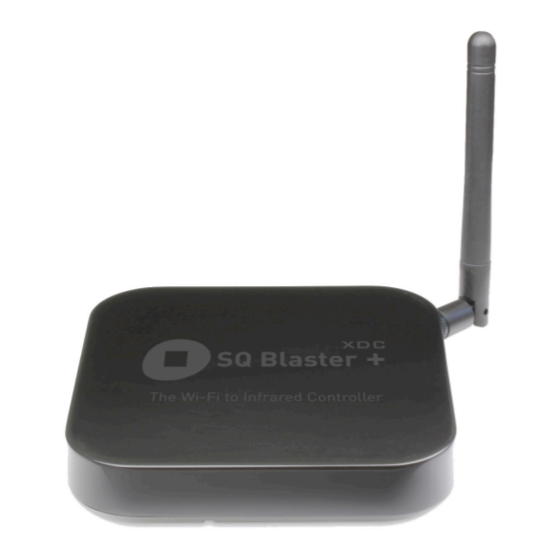
USER GUIDE - SQ BLASTER PLUS & SQ REMOTE The Setup Wizard Part 1: SQ Blaster Setup Guide Connect your SQ Blaster unit to your PC/Mac using the USB cable before starting the downloaded wizard application. Connecting to your Home Wi-Fi network The Setup Wizard searches for your blaster unit. - Page 5 USER GUIDE - SQ BLASTER PLUS & SQ REMOTE Press “Continue” to see the details of your blaster: External Antenna Note: The generation one blasters had an internal Antenna. If you have a Gen 2 blaster (Blaster Plus) then you should leave this option set to external as this version does not have an internal antenna.
- Page 6 USER GUIDE - SQ BLASTER PLUS & SQ REMOTE difficulty in connecting to the neytwork it will remain on and blink in a slow on/off pattern. Once you have set the network configuration of your unit, the setup of your blaster unit is complete. All further setup is carried out in the SQ Remote application on your iPhone, iPod touch or iPad device.
-
Page 7: Part 2: Introduction To Sq Remote
USER GUIDE - SQ BLASTER PLUS & SQ REMOTE Part 2: Introduction to SQ Remote The carousel This is the screen where you move between control pads or enter the The SQ Remote application is designed to be your complete remote... -
Page 8: The Setup Area
USER GUIDE - SQ BLASTER PLUS & SQ REMOTE Part 3: Setting up SQ Remote The setup area Introduction One control pad on the carousel is special: This Setup of SQ Remote is a straight forward process: is the setup control pad. When you launch SQ ๏... - Page 9 USER GUIDE - SQ BLASTER PLUS & SQ REMOTE Step 1: SQ Blasters & Devices Starting from the carousel enter the Setup area and tap "SQ Blasters and Devices" in the main setup screen. (see image below) Step 3. Select the brand of your device Search in the list of brand names for the brand of device that you want to add.
- Page 10 USER GUIDE - SQ BLASTER PLUS & SQ REMOTE Note: A quick “tap” on the button might result in a code that is too If you don’t find the exact match for your device type in this list you should try selecting a similar type first to see if there is a code set that will give you the...
-
Page 11: Adding Control Pads For Your Activities
USER GUIDE - SQ BLASTER PLUS & SQ REMOTE Step 3. Enter a name and select an image" Adding control pads for your activities In the "New Control Pad screen, enter a name and an image that Control pads are the containers for your controls and are where you makes the activity easy to identify. -
Page 12: Adding Controls To Your Control Pads
USER GUIDE - SQ BLASTER PLUS & SQ REMOTE Adding controls to your control pads Adding controls to your control pads is quite easy, and once you understand the approach to editing control pads you will soon be creating your own layouts and designs. - Page 13 USER GUIDE - SQ BLASTER PLUS & SQ REMOTE Step 3. Open the ADD Controls screen Tap the "Edit" button in the top right hand corner of the screen... then tap the big green "+" button at the top of the screen.
- Page 14 USER GUIDE - SQ BLASTER PLUS & SQ REMOTE Step 5. Select the controls that you want to add There are several types of pre-grouped controls to choose from, including the typical layouts you will find on classic remote control units.
-
Page 15: Setup Faq's
USER GUIDE - SQ BLASTER PLUS & SQ REMOTE this manual for more detailed information on how to assign individual Setup FAQ’s buttons. Not all buttons work! - When you associate the controls on a preset If the command code that you want is missing, you will need to learn it. -
Page 16: Using Sq Designer
USER GUIDE - SQ BLASTER PLUS & SQ REMOTE Tip: Each control pad that you create has 7 areas called “control SQ Designer is also the key for creating and customizing your own panels”: look and feel for SQ Remote. More and more pre-made themes will come available as users make and share their own. -
Page 17: Part 4: Learning Ir Command Codes
USER GUIDE - SQ BLASTER PLUS & SQ REMOTE Part 4: Learning IR Command Codes If there is a button missing in your setup, and you can't find the code, or if you can't find your device in the library of codes, you can learn infrared command codes from your original remote. - Page 18 USER GUIDE - SQ BLASTER PLUS & SQ REMOTE This will bring up the learning screen: Tip:You will find the IR receiver positioned slightly to the right of center on the front of the blaster. The position of the receiver is also shown on the bottom of the unit.
-
Page 19: Record A New Command
USER GUIDE - SQ BLASTER PLUS & SQ REMOTE Record a NEW command You can either select a standard name from this list or tap the "+" To record a new command follow the steps as detailed in the previous button in the top left hand corner of the screen to enter a new name. -
Page 20: Learning A Complete Command Code Set
USER GUIDE - SQ BLASTER PLUS & SQ REMOTE Select the brand of your device. If you cant find your brand in the list, tap the "Add new brand" option at the top of the list of brands. Test the new command... - Page 21 USER GUIDE - SQ BLASTER PLUS & SQ REMOTE Next find your newly added device in the "SQ Blasters and Devices" The screen showing the list of standard names is shown below. You screen and then select it. (SQ Remote takes you to this screen can either scroll through the list or use the search bar to look for a automatically after you add the new device).
-
Page 22: Add Command Codes To A Template Device
USER GUIDE - SQ BLASTER PLUS & SQ REMOTE Repeat for all codes that you want to learn Repeat the steps for adding and learning commands until you have recorded each command on the remote. You can miss out the commands that you never use... -
Page 23: Learning When Assigning A Command To A Button
USER GUIDE - SQ BLASTER PLUS & SQ REMOTE Learning when assigning a command to a button SQ Remote also allows you to learn a command during the assign (command linking) process. If you are assigning a command to a button, and you find that the... -
Page 24: Part 5: Editing Control Pads
USER GUIDE - SQ BLASTER PLUS & SQ REMOTE Learn the command Part 5: Editing Control Pads Learn the command as described in the previous sections. This section of the manual provides a short guide to the editing When you have completed the learning and testing procedure, save possibilities and some suggestions on how to get some good looking the newly recorded command and then select the green “Set”... -
Page 25: Adding Controls
USER GUIDE - SQ BLASTER PLUS & SQ REMOTE ๏ ๏ Assign (link) controls AV Grouped Controls - Grouped circle controls for AV equipment that can be assigned to infrared command codes and macros. ๏ Name control panels ๏ Guide / Alignment Elements - These are lines or grids that you ๏... -
Page 26: Moving Controls
USER GUIDE - SQ BLASTER PLUS & SQ REMOTE When you have positioned your controls how you want them, tap the Then tap the red "Delete" button in the top right hand corner of the "back" button to exit the "Move Mode" and return to "Edit Mode". -
Page 27: Naming The Slide Out Control Panels Or Ipad Buttons
USER GUIDE - SQ BLASTER PLUS & SQ REMOTE Depending on the kind of control you have selected, you will be presented with different screens to assign the control Note: stepping into edit mode and tapping the Assign Icon, is a great ๏... -
Page 28: Hints & Tips
USER GUIDE - SQ BLASTER PLUS & SQ REMOTE Hints & Tips A few tips to help you get more out of your control panels... Add Layout grids and Lines to your control panels when editing. These can be helpful as layout guides: Enter "Edit Mode"... - Page 29 USER GUIDE - SQ BLASTER PLUS & SQ REMOTE Frames and status labels can be added as follows: Enter "Edit" mode The control types for each preset control panel will differ based on the then select Add > MiOS Controls > Status Labels type of control panel that you select, and you can link the different controls to different devices.
-
Page 30: Part 6: Macros
USER GUIDE - SQ BLASTER PLUS & SQ REMOTE Part 6: Macros Macros are a powerful way of setting up and sending multiple commands with one button press. Macros can be setup to send commands to your entertainment equipment, and to start MiOS / Vera scenes, so you can use macros to set up a complete activity, including your lights, window settings and others. -
Page 31: Creating Macros
USER GUIDE - SQ BLASTER PLUS & SQ REMOTE The delays between the commands are important as they allow your equipment to finish reacting to any previous command, such as the Then follow these steps: "Power ON" command or a previously sent channel number. -
Page 32: Linking Control Buttons To Macros
Trial and error and perseverance are the key. You might This gives you the possibility to re-send a command that did not reach want to visit the forums on the Square Connect website to share the equipment correctly (because someone stood in-front of the hands on experience from and with others. -
Page 33: Part 7: Lists And List Controls
USER GUIDE - SQ BLASTER PLUS & SQ REMOTE When you tap Add List Item, you will be asked to select “Channel, Part 7: Lists and List Controls Macro or Scene… select the one you want to add. If you select Scene In order to use list controls you must create some lists. -
Page 34: Images (Icons) In Command Lists
USER GUIDE - SQ BLASTER PLUS & SQ REMOTE Images (icons) in Command Lists Both SQ Remote HD and SQ Remote Lite have the ability to show icons in the list control. Icon Images are added to SQ Remote by downloading them from your box.net account. -
Page 35: Adding List Controls To Control Panels
USER GUIDE - SQ BLASTER PLUS & SQ REMOTE Don’t forget to exit the edit mode before trying to use your new list Adding List Controls to Control Panels control. When you first add a list control it will look like this: Additional Useful Information: Delay between channel numbers. -
Page 36: Part 8: Web Views
USER GUIDE - SQ BLASTER PLUS & SQ REMOTE Part 8: Web Views Web Views are screens that fill a control panel that can be pointed at favorite web pages on the internet, or at local devices that have a web page - such as an IP camera. -
Page 37: Part 9: Saving And Sharing Your Configuration
USER GUIDE - SQ BLASTER PLUS & SQ REMOTE Part 9: Saving and Sharing your Configuration Once you have set up your configuration you can save it and share it with others SQ Remote will create an automatic name for the backup, but you can Saving and sharing requires that you set up a free (personal) account override this and give the saved configuration different name. -
Page 38: Hints & Tips
Remote to crash, and you might have to delete the application to make a fresh start. Square Connect does not support user edited configurations, so if you start to play with the configuration files, you are on your own! ... -
Page 39: Part 10: Using Sq Remote With A Mios System
USER GUIDE - SQ BLASTER PLUS & SQ REMOTE you control with your MiOS system. Part 10: Using SQ Remote with a MiOS system How do I tell that SQ Remote has discovered my system(s)? The setup of SQ Remote with a MiOS system such as Vera from If you are setting up SQ Remote for the first time, you can immediately... -
Page 40: Step 2: Add Control Pads To The Carousel
USER GUIDE - SQ BLASTER PLUS & SQ REMOTE SQ Remote does not discover my local system(s) what shall I do? Starting from the carousel enter the Setup area and tap "Control Pads". If your MiOS or Vera system is not being discovered it will most probably be one of the following reasons: ๏... -
Page 41: Step 3: Add Controls And Link Them To Your Equipment
USER GUIDE - SQ BLASTER PLUS & SQ REMOTE Step 3: Add controls and link them to your equipment After you have added one or more control pads to the carousel, you can begin adding controls and linking them to your devices. Just follow the steps described below: 1. - Page 42 USER GUIDE - SQ BLASTER PLUS & SQ REMOTE 4. Select MiOS Controls 5. Select the Control Type 3. Enter Control Panel Edit Mode and select the "Add Control" button Enter "Edit mode" by tapping the "Edit" button in the top right corner of the screen.
- Page 43 USER GUIDE - SQ BLASTER PLUS & SQ REMOTE ๏ Lighting Controls ๏ Scene Controls ๏ Status Labels - for your light, motion, power, door, window, lock and temperature detectors and more. Group your sensor labels and build status panels for your home ๏...
- Page 44 USER GUIDE - SQ BLASTER PLUS & SQ REMOTE 7. Link your new control(s) to device(s) Tap the assign (link) button to begin assigning controls to devices. Select one of the newly added controls (its gray assign icon will turn red).
-
Page 45: Part 11 Themes
You also have the options to download from box.net or from the Tap the Selection Row, and this will show you the available themes Square Connect website. Below these options you will see a list of within your SQ Remote: loaded themes. - Page 46 Then restart and you will find that the images have been updated. You can also download themes from the Square Connect website for you to edit with SQ Designer (where editing becomes a simple drag and drop exercise).
-
Page 47: Part 12: Blaster Plus - Setting The Ir Channel
Part 12: Blaster Plus - Setting the IR Channel external channels as the power levels employed by the blaster could With the release of the SQ Blaster Plus, users now have the option of reduce their effective life-time considerably. setting the IR channel that a device uses. By selecting a specific channel you can be sure that the commands that you are sending to a specific device actually reach that device and not others that might use... -
Page 48: Part 13: Additional Options And Settings
USER GUIDE - SQ BLASTER PLUS & SQ REMOTE The application settings are as follows: Part 13: Additional Options and Settings ๏ Control Pad Editing - Show or hide the “edit button in your control pads. Disabling this helps protect your configuration from SQ Remote has several options that are set outside the application. -
Page 49: Part 13. Troubleshooting
USER GUIDE - SQ BLASTER PLUS & SQ REMOTE ๏ ๏ Sound - Enable or disable the button clicking sounds and Rapid Flashing (green): Add-hoc network mode. The blaster has carousel swish sounds. created its own Wi-Fi network for setup purposes. Press and hold the Reset Button B (on the base of the unit) for longer than 5 ๏... -
Page 50: Sq Blaster Reset
USER GUIDE - SQ BLASTER PLUS & SQ REMOTE SQ Blaster Reset The blaster Plus has a reset button that is accessible via a pin hole opening on the side of the device. - Press the reset button once quickly to force the blaster to restart the internal software and re-join the last known network.
Need help?
Do you have a question about the SQ BLASTER PLUS and is the answer not in the manual?
Questions and answers