Table of Contents
Advertisement
Advertisement
Table of Contents

Summary of Contents for bioMerieux LabGuard 3d Tomguard
- Page 2 Intentionally left blank.
- Page 3 Document history VERSION DATE MODIFICATIONS 05/11/2013 Creation...
- Page 4 User manual - Pictograms Note Equipment optimization tip Prohibited action notice Noteworthy point warning Danger or potential risk warning Reminder of the pre-requisites for implementation of the next instructions ™ Labguard is one of bioMérieux's registered trademarks. The information and graphs contained in this manual are not binding. bioMérieux therefore reserves the right to implement changes to the document without prior notice.
-
Page 5: Table Of Contents
Contents Unpacking the device ......... . . 6 Learning about the equipment . -
Page 6: Unpacking The Device
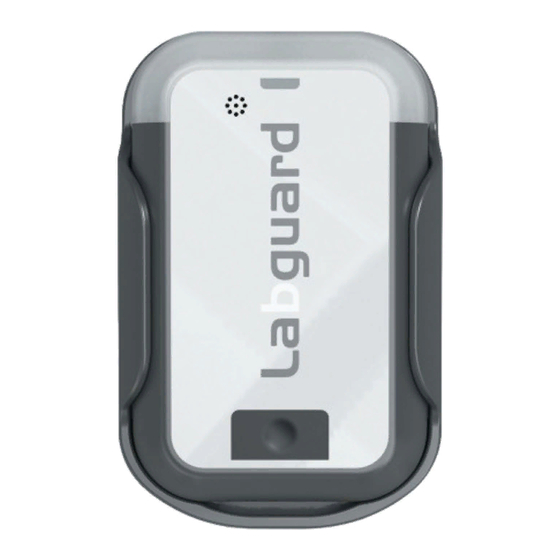
Unpacking the device Check that the device has not been damaged during transport. Then check that all the accessories listed below are present. Transmitter • Unit • Unit support Labguard 3 MOBI_HR_QSG_EN-A... -
Page 7: Learning About The Equipment
Learning about the equipment ™ Labguard 3D equipment ™ With Labguard 3D equipment, you can: • Simultaneously measure the different physical parameters of the laboratory (temperature, humidity, CO2). • Provide alerts with visual alarms in real time in case of anomalies. ®... -
Page 8: Rear
Rear 4 battery access screws. Labguard 3 MOBI_HR_QSG_EN-A... -
Page 9: Installing The Device
Installing the device 1. Fix the Tomguard support to the wall or to the unit to be monitored using the two screws or adhesive strips at the rear of the support. 2. Slide the device into the support. 3. For greater security, you can add a padlock. Labguard 3 MOBI_HR_QSG_EN-A... -
Page 10: Switching The Equipment On / Off
Switching the equipment on / off Turning the device on To turn the device on, press and hold the multi-function button for 5 seconds. The status light turns green. Turning the device off To turn the device off, press and hold the multi-function button for 5 seconds. The status light turns red. -
Page 11: Understanding The Indicator Lights
Understanding the indicator lights Alarm indicators The transmitter signals technical problems or measurement problems via alarms. The alarm indicators specify the type of alarm: Indicator lights Color Alarm origin Type of alarm Sensor Time threshold exceeded. Orange Sensor Threshold exceeded. Purple Sensor Sensor absent. -
Page 12: Status Indicator
Status indicator Check the status of the battery and the power of the radio signal by pressing the multi-function button for one second: • The status indicator lights up and indicates the battery status. • The status indicator lights up again and indicates the power of the radio signal status. Indicator lights Status Good. -
Page 13: Technical Characteristics
Technical characteristics Environmental Altitude up to 2,000 m conditions Temperature from 0 to 40°C max. Relative humidity from 10 to 80% (Rh) Product power Battery: supply • 2 Li AAA batteries 1.5 V; 1,200 mAh, compliant with CEI 60086-4 standard Pollution level Atmospheric pressure 700 hPa to 1,100 hPa... -
Page 14: Maintenance
Maintenance Changing the batteries Risk of explosion : • Do not place the battery the wrong way round. • Do not short circuit. • Do not use damaged or leaking batteries. • Do not incinerate, recharge, dismantle, crush or expose to water. 1. -
Page 15: Options And Accessories
Options and accessories Use the following options and accessories for optimum use of the device. Reference Designation 416053 Mains power supply µUSB_EU 416055 Mains power supply µUSB_UK 416054 Mains power supply µUSB_US 416056 Mains power supply µUSB_AU/CN 416068 Li batteries AAA 1.5V (2u) 416057 Sensor extension cable 1 m 416070... -
Page 16: Equipment Conformity
Equipment conformity FCC compliance This equipment has been declared in compliance with FCC regulations, section 15, applicable to class B digital equipments. These regulations are designed to provide adequate protection against harmful interferences in a residential installation. This equipment generates, uses and may emit radio-electric waves. -
Page 17: Ec Compliance
EC compliance This class B numeric equipment complies with the relevant EC directives and standards listed in the accompanying certificate(s). Class B equipment is equipment suitable for use in domestic establishments and in establishments directly connected to a low voltage power supply network which supplies buildings used for domestic purposes. - Page 18 Intentionally left blank.
- Page 19 Intentionally left blank.
Need help?
Do you have a question about the LabGuard 3d Tomguard and is the answer not in the manual?
Questions and answers