Table of Contents
Advertisement
Quick Links
Advertisement
Table of Contents

Subscribe to Our Youtube Channel
Summary of Contents for imtmedical CITREX H4
- Page 1 User Manual CITREX H4...
- Page 2 Gewerbestrasse 8 9470 Buchs (SG) Switzerland www.imtmedical.com...
-
Page 3: Table Of Contents
Table of Contents Introduction Intended use Safety instructions Representation of hazards, cautions and notes Personnel Responsibility and guarantee Service life Symbol explanation Start-up Power supply Mechanical connectors Electrical interfaces Replacing the CITREX battery Operation Switching the device on/off Screen lock Dim screen User controls Settings Numerical readings... - Page 4 13 Accessories and spare parts 13.1 Accessories table 14 Disposal 15 Directives and approvals 16 Specifications 16.1 Measurement parameters 16.2 Interface definition 16.3 Gas type 16.4 Power supply 16.5 Battery operation 17 Appendix 17.1 Principle of flow measurement 17.2 Trigger 17.3 Measurement parameters and units 17.4 Gas standards for flow and volume readings 17.5...
-
Page 5: Introduction
In the case of older or newer versions there may be discrepancies in relation to this User Manual. Subject to technical modifications without notice. To avoid possible injuries, please read all the safety instructions be- fore you use the product. The device is not intended for use outside a building. imtmedical ag... -
Page 6: Intended Use
CITREX H4 is a measuring instrument for checking and calibrating ventilators and anaesthetic equipment. It must not be used for patient monitoring. During patient treatment by the ventilator it is not allowed to connect to CITREX H4. It is not allowed to measure liquids with CITREX H4. imtmedical ag... -
Page 7: Safety Instructions
Service life The maximum service life of the device has been specified as 10 (ten) years, provided it is handled properly in accordance with this User Manual. imtmedical ag... -
Page 8: Symbol Explanation
Caution: observe the safety instructions in the User Manual Reusable packaging Manufacturer's specification and date of manufacture Keep away from heat Temperature range for storage and transport CSA monogram with C/US indicator California Energy Commission Compliant Table 1: Symbol explanation imtmedical ag... -
Page 9: Start-Up
Start-up Start-up CITREX H4 Power supply plug with country-specific adapters USB cable MicroSD card Dust filter RT019 Laminar inlet pipe CITREX carrying case Network cable Car adapter Adapter set Table 2: Scope of delivery imtmedical ag... -
Page 10: Power Supply
When operating CITREX H4 via the USB port only use the original power supply unit included! The device indicates visually and audibly when the battery has to be charged. Please do not store the battery in a depleted state. Caution: depletion can damage the battery beyond repair! imtmedical ag... -
Page 11: Mechanical Connectors
Oxygen Measuring range 0 – 100 % Accuracy ± 1 % O Pressure in flow Measuring range −50 – +150 mbar channel Accuracy ± 0.75 % of reading or ± 0.1 mbar Flow channel Figure 2: Flow channel imtmedical ag... - Page 12 " P ". Diff Differential pressure connector Figure 3: Differential pressure connector Measuring range ± 200 mbar Accuracy ± 0.75 % of reading or ± 0.1 mbar Pressures above 1 bar damage the differential pressure sensor be- yond repair! imtmedical ag...
- Page 13 ± 1 % of reading or 10 mbar Pressures above 15 bar damage the high-pressure sensor beyond repair! Do not use a tool to tighten the adapter on the high-pressure port since this can damage the plastic casing. Please only tighten manu- ally. imtmedical ag...
- Page 14 Figure 5: Oxygen sensor holder Measuring range 0 – 100 % Accuracy ± 1 % O (absolute) 5.2.5 Installing the oxygen sensor 1. Remove the protective cap from the sensor port of the device. Figure 6: Protective cap imtmedical ag...
- Page 15 CITREX H4 by inserting it into the hole provided, which is labelled "O ". Figure 8: Oxygen sensor cable 4. Perform an oxygen calibration. The calibration procedure is described in the sec- tion "Calibration". Calibration ensures that the measured values of the new sensor are correct. imtmedical ag...
-
Page 16: Electrical Interfaces
"Interface definition". Ethernet The Ethernet interface is used to configure the device and it is used as a data interface. You will find more informa- tion in the section "Reading measurement data". Table 3: Description of electrical interfaces imtmedical ag... -
Page 17: Replacing The Citrex Battery
Then the battery can be re- moved and replaced. Check to make sure the new battery is inserted properly. For this purpose the terminals must be above one another. Figure 10: Replacing the battery imtmedical ag... -
Page 18: Operation
As soon as a button is pressed, the screen comes on again. The setting for how long it takes until the display is dimmed can be customised using the configuration tool. You will find further information on this in the section "Config- uration tool". imtmedical ag... -
Page 19: User Controls
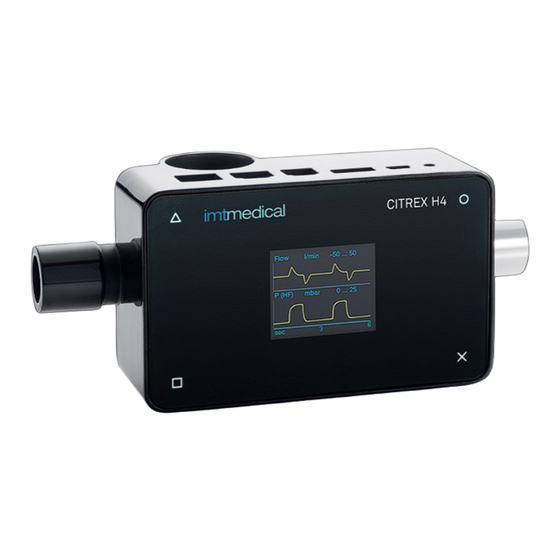
User controls Figure 11: User controls Change, Edit Context button; long press: key lock on/off On/Off button Menu button; zero point adjustment Charge indicator Flow direction indicator Screen Measurement values Malfunction indicator Measurement curves Table 4: User controls imtmedical ag... -
Page 20: Settings
The setting does not have to be confirmed and it is enabled as soon as it is visible on the screen. More information about the settings is available in the section "Web server". Figure 14: Ethernet interface imtmedical ag... - Page 21 With the button you can switch between the various gas standards. As soon as a gas standard is displayed, it is enabled. There is a list of available gas standards in the Appendix in the section "Gas standards for flow and volume read- ings". Figure 16: Gas standard imtmedical ag...
- Page 22 Setting the X-axis Here the time axis of the graph view can be set. 2, 4, 6, 8 and 10 seconds are avail- able for selection. The setting can be changed with the button. Figure 19: Setting the X-axis imtmedical ag...
-
Page 23: Numerical Readings
The web server and how to make the settings are explained in the section "Web server". 1, 2, 4 and 6 readings can be displayed in each configured view. Figure 22: Numerical readings imtmedical ag... -
Page 24: Graphical Readings
The following filters are available: • No filter (indication of the last value measured without any threshold) • Low (mean above 240 ms) • Medium (mean above 480 ms) • High (mean above 960 ms) The "high" filter is set by default. imtmedical ag... -
Page 25: Calibration
100 % oxygen. This so-called two-point calibration adjusts the oxygen sensor more accurately and takes about four minutes. Calibration can be selected by pressing the button more than once. imtmedical ag... - Page 26 ). Press the button until the screen shows "O2 and Air" in green letters. To start calibration, press the button. Calibration for air and oxygen takes 120 seconds for each one. Figure 26: Screen displays "Calibration Oxygen and Air" imtmedical ag...
-
Page 27: Connecting The Device
The filter also prevents dust, oil and grease from contaminating the CITREX H4 measuring instrument and thus prevents discrepancies in measurement results. The measurement setups shown below are dependent on the direction of gas flow being measured. CITREX H4 Air O2 man Ppeak mbar... -
Page 28: Measurement Setup For Checking Ventilators
Connecting the device CITREX H4 CITREX H4 CITREX H4 Air O2 man Air O2 man Air O2 man Ppeak Ppeak Ppeak mbar mbar mbar PEEP PEEP PEEP mbar mbar mbar Measurement setup for CITREX H4 is ideal for checking ventilators. The best measurement results are checking ventilators achieved with the measurement setup shown below. -
Page 29: Profile Editor
SD card reader. Then open the drive of the SD card. There you will find the file "ProfileEditor.html", which has to be opened using Internet Explorer, resulting in the picture below. Figure 31: Profile editor in Internet Explorer imtmedical ag... - Page 30 Save the file in the "Profiles" folder on the SD card. When you have saved the new profile on the SD card, place the card back in CITREX H4 and start the device. The newly created profile can be loaded in the "Profiles" menu. imtmedical ag...
-
Page 31: Configuration Tool
Enter an IP address between 192.168.1.2 and 192.168.1.255 and subnet mask 255.255.255.0 in the form on the screen. Confirm with "OK". Now open Internet Explorer and enter IP address 192.168.1.1 in the address field. The connection to CITREX H4 is established. imtmedical ag... -
Page 32: Monitoring Option
To do this, press the "Export" button: an Explorer window opens in which you can select the storage location and the storage type. There are XML files (*.xml) and CSV files (*.csv) available for selection. Figure 33: Monitoring numerics imtmedical ag... - Page 33 To do this, press the "Export" button: an Explorer window opens in which you can select the storage location. The curves can be saved in the form of a PNG file. Figure 34: Monitoring panels imtmedical ag...
-
Page 34: Reading Measurement Data
Measurement data can be read via the microSD card, via the Analog OUT interface or via the RS-232 interface. For information about us- ing these interfaces please contact your dealer or imtmedical directly. 11.1 Saving measurement data on Press the button and keep it pressed for approx. 3 seconds. A snapshot of all the the microSD card parameters is taken in a CSV file and saved on the SD card. -
Page 35: Servicing And Care
Factory calibration and servicing to ensure reliable measurement; it may only be per- formed by imtmedical or an authorised partner. To have CITREX H4 calibrated at the manufacturer's, imtmedical, visit the website www.imtmedical.com/easycal. The EasyCal service makes it possible for users to have CITREX H4 calibrated and adjusted quickly and easily. - Page 36 Accessories and spare parts 13 Accessories and spare parts On the website www.imtmedical.com you will find the original spare parts and other products from imtmedical. Ordering address: imtmedical ag Gewerbestrasse 8 CH-9470 Buchs, Switzerland Tel: +41 (0) 81 750 66 99 Email: sales @ imtmedical.com...
- Page 37 In this context, wastes must be recycled or destroyed … • without endangering human health. • without using processes or methods that harm the environment, especially water, air, soil, animals and plants. • without causing noise or odour nuisances. • without having a detrimental effect on the surroundings or landscape. imtmedical ag...
- Page 38 EN61010-1:2010 2014/30/EU (EMC) DIRECTIVE 2014/30/EU OF THE EUROPEAN PARLIAMENT AND OF THE COUNCIL of 26 February 2014 on the harmonisation of the laws of the Member States relating to electromagnetic compatibility tested according to EN61326-1:2013 imtmedical ag...
- Page 39 ± 0.75 % * or ± 0.1 mbar ** In flow channel −50 – 150 mbar ± 0.75 % * or ± 0.1 mbar ** Barometer 500 – 1150 mbar ± 1 % * or ± 5 mbar ** Table 9: Measurement parameters imtmedical ag...
- Page 40 ± 0.75 % * or ± 0.1 mbar ** Plateau IPAP Compliance 0 – 1000 mL/mbar ± 3 % * or ± 1 mL/mbar ** Stat Trigger Adult, Pediatric, HFO Flow, Pressure and External Table 11: Ventilation parameters imtmedical ag...
- Page 41 Pin 1: VIN 12 VDC ± 20 % – 24 VDC ± 20 % Pin 2: CAN 120 Ω Pin 3: CAN Pin 4: Connectable Pin 5: terminating resistor Pin 6: GND Table 13: Interfaces Figure 35: Interface definition imtmedical ag...
- Page 42 The service life of the battery is extended if the battery is charged completely only after a prompt by the device. * This operating time is reached in non-networked operation (i.e. the interfaces are not in use or they are switched off) imtmedical ag...
- Page 43 The resulting information constitutes the basis for ventilation parameter calculation. If the trigger is not set properly or if it is not possible to detect a trigger, the ventilation parameters will be calculated incorrectly or not at all. Figure 36: Trigger imtmedical ag...
- Page 44 As a result, a trigger is only activated if the set trigger level continues to apply after the delay time. If the trigger level is no longer reached after the delay time, no trigger is activated. The delay time can be set. Figure 37: Delay imtmedical ag...
- Page 45 Inspiratory peak flow Insp Expiratory peak flow Expiratory volume mL, L, cf Inspiratory volume mL, L, cf Ventilation rate Rate Breaths/min Inspiratory/expiratory ratio Expiratory time Inspiratory time Compliance mL/mbar, L/mbar, mL/cmH Stat mL/cmH Table 14: Measurement parameters and units imtmedical ag...
- Page 46 Normal Temperature and Pressure NTPD 1013.25 mbar (760 mmHg) 20.0 °C (68 °F) Normal Temperature and Pressure, Saturated NTPS 1013.25 mbar (760 mmHg) 20.0 °C (68 °F) 100 % Table 15: Gas standards for flow and volume readings imtmedical ag...
- Page 47 1 bar 1000 mbar 1000 750.06 torr (760 torr = 1 atm.) 750.06 mmHg (at 0 °C) 29.53 inHg (at 0 °C) 1019.74 (at 4 °C) 401.47 (at 4 °C) 14.50 psi, psia Table 16: Conversion factors imtmedical ag...
- Page 48 Figure 30: Measurement setup for gases at high pressure Figure 31: Profile editor in Internet Explorer Figure 32: Profile editor "configuration" Figure 33: Monitoring numerics Figure 34: Monitoring panels Figure 35: Interface definition Figure 36: Trigger Figure 37: Delay imtmedical ag...
- Page 49 Measurement parameters 39, Safety instructions DISS adapter Measurements Service life Dynamic viscosity Measurement setup Servicing Mechanical connectors Servicing operations Meteorological readings Settings MicroSD Spare parts Monitoring option Specifications Electrical interfaces Start-up Ethernet Switching the device on/off Symbol explanation imtmedical ag...
- Page 50 Appendix Trigger Trigger signal Units USB port User controls Ventilation parameters Web server Zero point imtmedical ag...
- Page 52 . Gewerbestrasse 8 . 9470 Buchs . Switzerland T +41 81 750 66 99 . www.imtmedical.com...
Need help?
Do you have a question about the CITREX H4 and is the answer not in the manual?
Questions and answers