Table of Contents
Advertisement
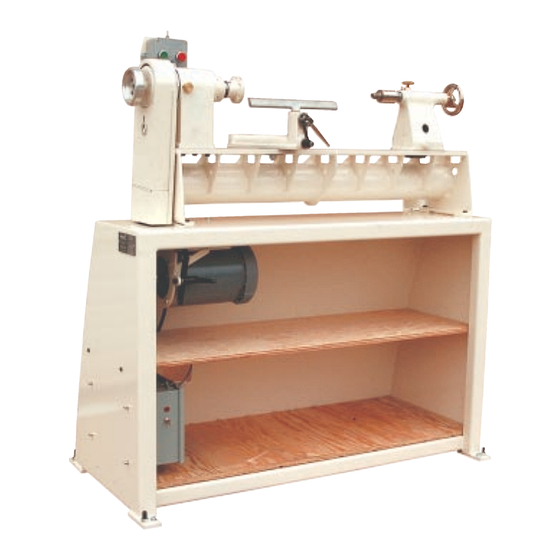
A Revolution in Lathes!
1224 Lathe
O w n e r ' s
POWER AND PRECISION FOR TODAY'S WOODTURNER
241 Monteith Ave, Stratford, ON, N5A 2P6, Canada
Phone: 1-519-271-7611
Fax: 1-519-271-8892
E-Mail: postbox@oneway.ca
1 - 8 0 0 - 5 6 5 - 7 2 8 8
w w w. o n e w a y. c a
M a n u a l
Table of Contents
General Specifications
Control Description
If The Drive Does Trip Out
M0185 - Banjo Assembly
M0181 - Tailstock Assembly
3
4
4
4
5
6
7
8-9
10
10
11
11
12
13
13
13
14-15
16
17
18
19
20
21
22
23
24
25
2
Advertisement
Table of Contents

Related Manuals for Oneway 1224

Summary of Contents for Oneway 1224
-
Page 1: Table Of Contents
The Bed w w w. o n e w a y. c a The Headstock The Spindle The Banjo/Toolrest Base 1224 Lathe Bearings The Tailstock Assembly and Set Up O w n e r ’ s M a n u a l... -
Page 2: The Bed
Congratulations on your purchase of a ONEWAY 1224 Lathe. tube. The assembly is stress relieved and precision machined. This manual describes general use and features of the ONEWAY 1224 Bedways are offset so chips and debris fall straight thru without sacri- Lathe. -
Page 3: The Banjo/Toolrest Base
When replacing the bearings it is best to replace the front bearings with a matched set from ONEWAY Mfg. The rear bearings can be How do I adjust the Toolrest clamp lever? replaced by any equivalent bearing. -
Page 4: The Tailstock
Assembly & Setup The Tailstock The hardware required for setting up the ONEWAY 1224 Lathe is generally The tailstock on the ONEWAY 1224 is precision machined with a number attached at it's final destination. Most steps involve removing hardware, attach- two morse taper which allows the use of stronger live centres and larger drills. -
Page 5: The Drive
Step 6: Remove the Bench from the Wooden Pallet The Drive It is a good idea to remove the bench from the wooden skid, while the lathe assembly is not attached. Remove the four nuts, and tap the carriage bolts AC Electronic Variable 0 - 4000 RPM down so the lathe can be easily removed from the wooden pallet. -
Page 6: Common Problems & How To Avoid Them
Common Problems & How to Avoid Them Maintenance & Lubrication ONEWAY Lathes, like any mechanical device, needs lubrication to function at 1. The most common cause of the unit shutting itself off is stopping large its optimum. Woodturning creates dust and turning wet wood sprays water pieces too quickly which causes excess voltage and the drive tripping out and chemicals onto the lathe. -
Page 7: Changing The Belt
ONEWAY Lathes are very heavy solid machines and can rotate pieces 2. Open the belt cover compartment. faster than most other lathes. ONEWAY Lathes are also very quiet and it is easy 3. Loosen the speed handle and lift the motor. Tighten the speed handle to to run the lathe faster than you think it is going. -
Page 8: Accessories
ATHE XTENSION A 24” extension which bolts onto the end of the 1224 is available which increas- While You Are Working es the distance between centres from 24” to 48 9. Stop the lathe before moving the toolrest. If you move the rest while the inches. -
Page 9: Manufacturers Limited Warranty
Manufacturers Limited Warranty Date Purchased: This Oneway product is backed by a warranty period of 5 years from the date of purchase. Non-manufactured parts (i.e. Drive, Motor, Bearings etc) are not cov- ered under this warranty; please refer to the relevant Warranty information pro- vided with the lathe. - Page 10 Wiring Diagram neon light Voltage Doubler Drive Power Switch white from wall socket Motor Wires black from wall socket Operator Station yellow Speed Reverse Stop Start Short Acc/Dec Contact Contact Long Acc/Dec orange...
- Page 11 M0181 M0220...
- Page 13 M0083...
Need help?
Do you have a question about the 1224 and is the answer not in the manual?
Questions and answers
WHAT IS THE PART NUMBER FOR THE J7 DRIVE USED IN THE ONEWAY 1224 LATHE
The part number for the J7 drive used in the Oneway 1224 lathe is Yaskawa GPD 305/J7.
This answer is automatically generated