Table of Contents
Advertisement
Quick Links
Instruction Manual
TM
Remote Monitoring System
TM
Important Installation Notice: To reduce installation time and avoid multiple trips to and
from the job site gathering necessary tools and materials locate the following sections in the
Table of Contents and carefully review each section before installation begins:
• System Requirements
• Tool Requirements
• Material Requirements
• Installation Sequence
Have a copy of the Instruction Manual(s) for all the water heating appliances being
connected to the iCOMM™ remote monitoring system on hand before installation begins.
Instruction Manuals can be obtained at the manufacturer's web site or by calling the
technical support phone number listed on the back cover of this manual.
COMM™
888 928-3702
i
•
• www.stateconnect.com
Printed 06/09
315985-000
Advertisement
Table of Contents

Summary of Contents for iCOMM State
- Page 1 Have a copy of the Instruction Manual(s) for all the water heating appliances being connected to the iCOMM™ remote monitoring system on hand before installation begins. Instruction Manuals can be obtained at the manufacturer’s web site or by calling the technical support phone number listed on the back cover of this manual.
-
Page 3: Table Of Contents
Estimated Operating Costs ....... 1 Wiring .............. 27 Appliance Run Time .......... 1 Connection & Wiring Diagrams ....... 28 iCOMM™ Compatible Appliances ......2 START UP ..............29 iCOMM™ System Components ......2 Final Installation Checks ........29 iCOMM™ System Limitations........2 Establish The Network ........... -
Page 4: Introduction
Appliances are connected to the iCOMM™ system’s CM (communication module - page 6) and the CM is connected to the Internet. Users log on to a secure web site maintained by the appliance manufacturer to monitor appliances. -
Page 5: Icomm™ Compatible Appliances
Alarm Box - optional system component - see page 21. ICOMM™ SYSTEM LIMITATIONS • The iCOMM™ system does not allow users to adjust or change appliance settings from the iCOMM™ web site. • The BACnet wiring terminal on the CM (Figure 2 on page 6) allows BACnet compliant supervisory controls to monitor and control some appliance settings - see page 31. -
Page 6: Installation Considerations
• One available socket at a 120 VAC wall outlet for the iCOMM™ system’s CM for all installations. • If the optional Alarm Box (page 21) is being installed a second 120 VAC socket will be needed. -
Page 7: Tool Requirements
• A 120 VAC power strip or 120 VAC outlet multiplier may be required if there are not enough 120 VAC outlets available. This is not included with any iCOMM hardware and is to be provided by customer if needed. -
Page 8: Installation Sequence
Internet access point (male RJ45 cable) and navigate to the iCOMM™ web site at www.stateconnect.com using the computer’s browser software. If the computer is able to connect to the iCOMM™ web site continue with the installation. If the computer is unable to connect to the iCOMM™ web site advise the customer (building/business owner) immediately so they can take steps to provide Internet access to the iCOMM™... -
Page 9: Communication Module Installation
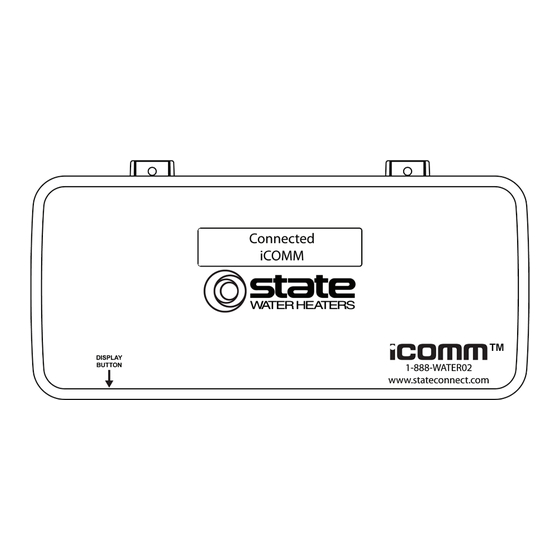
COMMUNICATION MODULE INSTALLATION COMMUNICATION MODULE INSTALLATION The CM (communication module) is the heart of the iCOMM™ remote monitoring system - see Figure 2. The CM connects to the Internet and transmits operational and diagnostic data between the water heating appliances connected to it and the iCOMM™ web site. -
Page 10: Location Requirements
• Location must have a field supplied Cat 5 network cable with a male RJ45 plug end that provides “always on” Internet access. Internet access must allow the CM to connect to the iCOMM™ web site on the Internet. See System Requirements on page 3. -
Page 11: Installation
COMMUNICATION MODULE INSTALLATION INSTALLATION 1 Using the CM’s (communication module) mounting tabs as a template align the CM on the wall where it is to be mounted. Mark the wall with a pencil or awl through the holes in the mounting tabs while holding the CM level. See Figure 3 and the Location Requirements on page 7. -
Page 12: Power Up Test
CM - see Figure 4. The CM should now be energized and initiate it’s boot sequence. The CM’s LCD should display a “Booting iCOMM Please Wait” message. If the CM is not energized (no text appears on the LCD) see the Service Note below. -
Page 13: Leak Detector Installation
LEAK DETECTOR INSTALLATION LEAK DETECTOR INSTALLATION This section provides instructions for connecting the Leak Detector to the iCOMM™ system’s CM (communication module). The Leak Detector comes with a 25 foot length of 18 gauge two conductor (18/2) SJ cord - see Figure 5. Operation is based on continuity; a water level of approximately 1/4”... -
Page 14: Connecting Tank Type Water Heaters
CONNECTING TANK TYPE WATER HEATERS CONNECTING TANK TYPE WATER HEATERS This section provides instructions for connecting “tank type” water heaters to the iCOMM™ system’s CM (communication module). Tank type water heaters that are compatible with the iCOMM™ remote monitoring system are listed in Table 2. -
Page 15: Single Appliance Networks
- see Figure 15 on page 20. Multiple Appliance Networks are formed when two or more water heating appliances are connected to an iCOMM™ network - see Figure 15 on page 20. Proceed to Connecting Gas Fired Water Heaters below or Connecting Electric Water Heaters on page 14. - Page 16 CONNECTING TANK TYPE WATER HEATERS CONNECTING GAS FIRED WATER HEATERS (CONT) Gas Water Heater Display Circuit Board Location SUF60/100/130 (120 - 400 MBtu/hr) Models SHE/GP6 50 YTPDT Models Display Circuit Board Display Housing Splitter – T Adaptor Display Circuit Board Socket Figure 7...
-
Page 17: Connecting Electric Water Heaters
CONNECTING TANK TYPE WATER HEATERS CONNECTING ELECTRIC WATER HEATERS Turn off power to the water heater at the main disconnect switch or breaker. There will always be hot surfaces on operating water heating appliances. Be careful to avoid contact with hot pipes and other surfaces when working on or near water heating appliances. Open the control cabinet and locate the CCB (central control board). - Page 18 CONNECTING TANK TYPE WATER HEATERS CONNECTING ELECTRIC WATER HEATERS (CONT) CCB (central control board) Location SSE Model (door open) CSB IFE Model (door removed) Knockout Knockouts both sides of control cabinet. CSB IFE Model (top view) CSB IFE Model 1/2” Knockout Location Approximately 1”...
-
Page 19: Multiple Appliance Networks
Universal Knockout Bushing (for commercial electric tank type water heaters only) †. Cat 5 cable included for connecting one tank type water heater to the iCOMM™ network. Longer cables can be obtained from local computer stores/home centers or fabricated in the field. -
Page 20: Multiple Appliance Network Guidelines
CONNECTING TANK TYPE WATER HEATERS Multiple Appliance Network Guidelines If more than one water heating appliance will be connected to the network the “MULTI PORT” socket on the CM (communication module) must be used to connect the first appliance. See Figure 11 and Figure 15 on page 20. -
Page 21: Mda Connections
CONNECTING TANK TYPE WATER HEATERS MDA Connections Ensure the power to all tank type water heaters is still turned off. Locate the J2 socket on the display circuit board for all gas fired models and the J9 socket on the CCB circuit board for all electric water heaters being connected - see Figure 7 on page 13, Figure 13 on page 19, Figure 9 on page 15 and Figure 14 on page 19. -
Page 22: Mda Connections - Gas Fired Water Heaters
CONNECTING TANK TYPE WATER HEATERS MDA Connections - Gas Fired Water Heaters MDA (multiple device adapter) End View (see Figure 7 on page 13 for location) MDAs are used when more than one water heating appliance is connected to the network. -
Page 23: Water Heater Networks
CONNECTING TANK TYPE WATER HEATERS Water Heater Networks Single Appliance Network Multiple Appliance Network (communication module) MULTI SINGLE MULTI SINGLE PORT PORT PORT PORT “SINGLE PORT” “MULTI PORT” socket is used. socket is used. MDA (multiple device adapter) not required when only one tank type water heater is connected. -
Page 24: Alarm Box Installation
The Alarm Box can be installed near the iCOMM™ system’s CM or in a different location for remote monitoring. Keep in mind the Display Button on the CM (Figure 21 on page 30) must be pressed to silence the alarm when considering a remote location. -
Page 25: Installation
ALARM BOX INSTALLATION INSTALLATION Wall Mounting Choose an indoor location with adequate wall space to mount the Alarm Box. The Alarm Box can be installed near the CM (communication module - page 6) or in a remote location. When choosing a remote location keep in mind the Display Button on the CM (Figure 2 on page 6) must be pressed to silence the alarm when activated. -
Page 26: Wiring
ALARM BOX INSTALLATION Wiring Cut two pieces of the included 18/2 SJ cord (Table 4 on page 21) to length. Cut the first piece of wire to run between the Alarm Box and the right edge of the CM - see Figure 16 on page 21 and Figure 18. -
Page 27: Connection & Wiring Diagrams
ALARM BOX INSTALLATION Connection & Wiring Diagrams Alarm Box mounted - wiring routed inside enclosure Alarm Box Connection Diagram CM Alarm Relay Contact Terminal Strip Wire Nuts Alarm Light 24 VAC Alarm Buzzer Power Supply Plug In Transformer Dotted Line - Alarm Box Enclosure Alarm Box Wiring Diagram Figure 19... -
Page 28: Start Up
CM follow the procedure outlined in the Service Note on page 9. During the boot up process the CM will attempt to establish a connection with the iCOMM™ web site and look for connected appliances on the network. The “Connecting to Server and Units”... -
Page 29: Assign Network Addresses
START UP ASSIGN NETWORK ADDRESSES On Single Appliance Networks (page 12) with one “tank type” water heater connected: The network address for the tank type water heater is automatically set to “1.” The installation technician does not need to make any changes in the appliance control system menus. There will not be an active menu item for viewing or changing the network address in the water heater’s control system. - Page 30 START UP ASSIGN NETWORK ADDRESSES (CONT) The CM should now recognize all appliances properly connected and addressed on the network. The network addresses of all connected appliances should appear on the “Units At Address” information screen IE: 1, 3, 6, 31. Use the Display Button (see page 30) on the CM to advance through the information screens until the “Units At Address”...
-
Page 31: Establish Internet Connection
If the CM is unable to detect a local network, unable to acquire an IP address or is unable to connect to the iCOMM™ web site it will display one of the following three error messages respectively: “No Network Found” - “Limited Network” or “No Connection.” See the Troubleshooting section on pages 39, 40 and 41 to correct these problems. -
Page 32: Registration
START UP REGISTRATION Locate the iCOMM™ Registration sheet that came with the CM - part number 315984-000 or 315986-000. Record the location and customer contact information on the included Registration Sheets. Record the Model Number(s), Series Number(s) and Serial Number(s) for all water heating appliances connected to the iCOMM™... -
Page 33: Display Button Operation
Pressing the Display Button on the CM (see Figure 21) repeatedly will cycle through the available system information screens that include: • iCOMM™ Connected or Not Registered message - main or default screen • Units @ Addresses (list of connected appliance network addresses separated by comas) •... -
Page 34: Connecting Bacnet
A process value might be a simple on/off switch or as complicated multi-state value such as control state, but each counts as one of the 75 object per device limit. Every effort has been made to provide the most information possible. -
Page 35: Hardware Interface
They are wired together in a “Daisy Chain” fashion from one to another - see Figure 22 on page 33. The iCOMM™ CM BACnet interface supports auto-baud rate detection with a default of 9600baud. Minimum baud rate is 9600 baud and maximum baud rate it is 76,800 baud. It has been tested at 19,200 and 38,400 baud. -
Page 36: Bacnet Cable Connections
The network uses shielded twisted pair wire. The BACnet wiring terminal connector on the iCOMM™ system’s CM (communication module) is a 5 pin cage-clamp type plug. One twisted pair is used for the D+ and D- signals and connected to their respective terminals. A third wire (if supplied) is used for the Reference (or common wire) and is connected to the R terminal. -
Page 37: Bacnet Ms/Tp Network Address
CONNECTING BACNET BACNET MS/TP NETWORK ADDRESS The iCOMM-CM defaults to a BACnet MS/TP network address of 80. This is the base address with all the connected water heating appliances having MS/TP addresses equal to the base address + its iCOMM™ network addresses. The iCOMM™network addresses can be viewed (see Assign Network Addresses on page 26) with the control system display on each appliance. - Page 38 CONNECTING BACNET Changing BACnet MS/TP Network Address (cont) The CM will go through a boot sequence and should display the “Booting iCOMM™ Please Wait” and the “Connecting to Server and Units” messages. If the CM is unable to detect a local network it will display the “No Network Found” error message.
- Page 39 10 To change the BACnet base address of the CM from the default value of 80 to a new (example) address of 27 type “BA=27” at the iCOMM> command prompt in the telnet window and press the enter key. If entered correctly the command window (see Figure 25) will include the following text: Welcome to iCOMM Communications Module Stand Alone Mode Setup Type: H at the prompt at any time for a list of commands.
-
Page 40: Bms Mode Only
CONNECTING BACNET BMS MODE ONLY If the iCOMM™ web interface will not be used and the CM will only be connected to a BACnet compliant BMS (building management system) configure the CM for “BMS Mode Only” to disable the “No Network Found” error message using the same telnet session methods described above for changing the CM’s BACnet base address - see Figure 26. -
Page 41: Troubleshooting Error Messages
TROUBLESHOOTING ERROR MESSAGES TROUBLESHOOTING ERROR MESSAGES This section is provided to help diagnose and correct iCOMM™ system operational problems. In the tables that follow the first column shows the error message as displayed on the CM (communication module) LCD screen. The first column also includes an explanation, a list of possible causes and applicable service notes. -
Page 42: No Network Found
CM is not providing access to the LAN Correcting local area network access issues ARE Service Note: NOT the responsibility of the iCOMM™ manufac- turer or the water heating appliance manufacturer Press the Display Button on the CM several times to - see the System Requirements on page 3. -
Page 43: Limited Network
• Contact the customer and/or their IT staff to cor- rect the problem. Correcting IP address assignment issues ARE NOT the responsibility of the iCOMM™ manufac- CM LCD Error Message turer or the water heating appliance manufacturer. The iCOMM™ remote monitoring system requires... -
Page 44: No Connection
Logging into a user account is not neces- • Network security/firewall settings are preventing sary for this test. If the iCOMM™ web site is dis- access to the iCOMM™ web site. played in the browser window the test was Service Note: successful. -
Page 45: Water Detected
Do not Closely inspect the wiring between the CM and return to service any appliance or iCOMM™ the Leak Detector for damage, pinched or shorted component until the surrounding floor and area wiring - replace any damaged or shorted wiring. -
Page 46: Unit # Low Temp Alarm
Low Temp Alarm Contact the customer and/or their IT staff to obtain set point established on the iCOMM web site. The # their iCOMM™ user name and password. symbol in the error message is replaced with the effected appliance’s network address on the... -
Page 47: Unit # In Fault
Fault or Alert condition active or log onto the iCOMM™ web site with the customer/location user name and password to determine which appliance is effected. -
Page 48: Appendix
VB scripts or JavaScripts. The CM does not have the ability to interpret scripts. Can you give a brief overview of the hardware/OS used by the iCOMM™ CM and include what services are active on the device? The hardware used is an 8bit Rabbit processor (Rabbit Semiconductor now owned by DIGI International) with 512K of flash memory. - Page 49 There are no plans to change the CM to a iCOMM™ web site communications strategy. Assuming this is an http post to the iCOMM™ web site but this detail is lacking in the documentation. Is the communication from the CM to the back end web site over SSL/ port 443? All communications use port 80 HTTP type requests (GET &...
-
Page 50: Wireless Network Guidelines
APPENDIX WIRELESS NETWORK GUIDELINES The iCOMM™ remote monitoring system can connect to the internet through a wireless adapter which may reduce installation costs. Below are some general guidelines and recommendations concerning wireless network connections. However, the iCOMM™ and appliance manufacturers do not support installing, establishing, maintaining or servicing a customer’s local network or Internet access. -
Page 51: Glossary
MAC Address: Media Access Control address - a unique address that identifies a device on a network. MDA: Acronym for “Multiple Device Adapter” an iCOMM™ system component - see page Multiple Appliance Network: iCOMM™ network with more than one water heating appliance connected - see page 16. -
Page 52: Terms And Conditions
This section contains the Terms and Conditions under which you may use the website owned by A. O. Smith Water Products Company, a division of A. O. Smith Corporation [State Industries, Inc.] in connection with the iComm remote monitoring system (the “Website”). - Page 53 TERMS AND CONDITIONS PROHIBITED USES OF THE WEBSITE General Rules Users may not use or reference the Company's Website in order to transmit, distribute, store or destroy material (a) in violation of any applicable law or regulation; (b) in a manner that will infringe the copyright, trademark, trade secret or other intellectual property rights of others or violate the privacy, publicity or other personal rights of others;...
- Page 54 Website, the Material or the internet connection for operating of the iComm remote monitoring system. The use of the Website, the Material and the iComm is at your own risk. Changes are periodically made to the Website and may be made at any time.
- Page 55 TERMS AND CONDITIONS No Resale or Unauthorized Commercial Use You agree not to resell or assign your rights or obligations under these Terms of Use. You also agree not to make any unauthorized commercial use of the Website. Further, since the Website are a source for reference only, you agree not to cite the Website as any type of authoritative or information source.
- Page 56 These Terms and Conditions are governed by the internal substantive laws of the State of Tennessee. Jurisdiction for any claims arising under this agreement shall lie exclusively with the courts within Cheatham County, and all parties submit to the jurisdiction of the venue of these courts.
- Page 57 NOTES...
- Page 58 NOTES...
- Page 60 888 928-3702 • • www.stateconnect.com 500 Tennessee Waltz Parkway, Ashland City, TN 37015 Technical Support: 800 365-0577 www.statewaterheaters.com...
Need help?
Do you have a question about the State and is the answer not in the manual?
Questions and answers