Advertisement
Quick Links
Assembly Manual
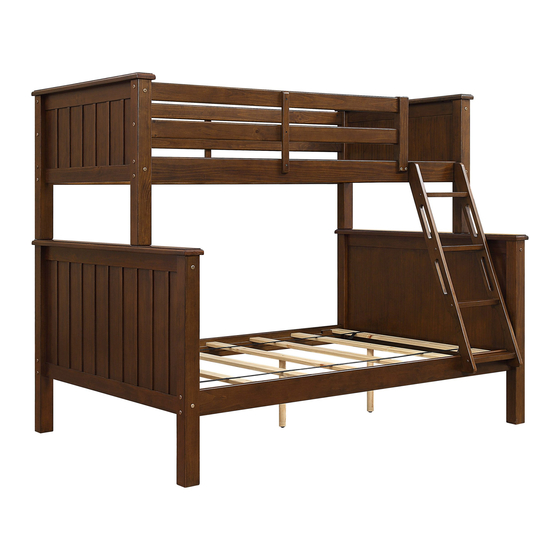
Tenley Twin Over Full Bunk Bed
Stock # TENTOFBB-BR
# TENTOFBB-GR
# TENTOFBB-BR-E
# TENTOFBB-GR-E
THIS INSTRUCTION BOOKLET CONTAINS IMPORTANT SAFETY INFORMATION.
PLEASE READ AND KEEP FOR FUTURE REFERENCE.
Date 2018-05-29 Rev. 0001-A Factory: JIYIFO
Advertisement

Subscribe to Our Youtube Channel
Summary of Contents for Mamber's Mark TENTOFBB-BR
- Page 1 Assembly Manual Tenley Twin Over Full Bunk Bed Stock # TENTOFBB-BR # TENTOFBB-GR # TENTOFBB-BR-E # TENTOFBB-GR-E THIS INSTRUCTION BOOKLET CONTAINS IMPORTANT SAFETY INFORMATION. PLEASE READ AND KEEP FOR FUTURE REFERENCE. Date 2018-05-29 Rev. 0001-A Factory: JIYIFO...
-
Page 2: Important Safety Information
We are so confident you will be delighted with your Member’s Mark purchase that we promise to refund or replace any item you find unsatisfactory. We aim to delight all our members and would love to hear about your discoveries! Call us at: 1-888-301-0332 (toll-free), 8am - 5pm CST Monday - Friday. - Page 3 Mattress thickness is from 7 in. (17.78 cm) to 9 in. (22.86 cm) use on lower bunk bed, and maximum mattress thickness must not exceed 9 in. (22.86 cm) use on upper bunk bed. Use only mattress which is 74 in. (1.88 m) to 75 in. (1.90 m) long and 37 ½ in. (95.25 cm) to 38½...
- Page 4 TO HELP PREVENT SERIOUS OR FATAL INJURIES FROM ENTRAPMENT OR FALLS Follow the information on the warnings appearing on the upper bunk end structure and on the carton. Do not remove warning label from bed. Always use the recommended size mattress or mattress support, or both, to help prevent the likelihood of entrapment or falls.
- Page 5 Parts and Hardware List Please read completely through the instructions and verify that all listed parts and hardware are present before beginning assembly. A- Lower Post (Qty. 2) B- Lower Post (Qty. 2) C- Lower Cap Rail (Qty. 2) D- Lower Top Stretcher (Qty. 2) E- Lower Bottom Stretcher (Qty.
- Page 6 Parts and Hardware List Please read completely through the instructions and verify that all listed parts and hardware are present before beginning assembly. (1) 1/4” x 110 mm Bolt (2) 1/4” x 38 mm Bolt (Qty. 24+1 extra) (Qty. 5+1 extra) (3) Floor Protector (4) 6.5 mm x 100 mm Tapping Bolt (Qty.
- Page 7 Step 1 6.5 mm x 48 mm Tapping Bolt 10 mm x 50 mm Wood Dowel (8 used in this step) (4 used in this step) ⑤ ⑦ a) Unpack the units and confirm that you have all hardware and required parts. b) Place one Lower Cap Rail (C) on a level and protected surface with the holes facing up.
- Page 8 Step 2 6.5 mm x 100 mm Tapping Bolt 10 mm x 50 mm Wood Dowel ④ (8 used in this step) (8 used in this step) ⑦ a) Fit one Lower Panel (F) between the Lower Stretchers (D and E). b) Insert four Wood Dowels (7) into the large holes of the Lower Stretchers (D and E) at both ends.
- Page 9 Step 3 1/4” x 110 mm Bolt Barrel Nut (8 used in this step) (8 used in this step) ⑥ NOTE: Please follow the instructions carefully to insure a safe and sturdy bed. Do not fully tighten the bolts until all rails and guardrails are attached. a) Insert 2 Barrel Nuts (6) into each end of the Lower Mattress Side Rail (O) and Lower Ladder Side Rail (N).
- Page 10 Step 4 6.5 mm x 48 mm Tapping Bolt 10 mm x 50 mm Wood Dowel (6 used in this step) (4 used in this step) ⑤ ⑦ a) Place one Upper Cap Rail (J) on a level and protected surface with the holes facing up. b) Insert two Wood Dowels (7) into the large holes of one Upper Top Stretcher (K) and attach to the Upper Cap Rail (J) using three 48 mm Bolts (5).
- Page 11 Step 5 6.5 mm x 100 mm Tapping Bolt 10 mm x 50 mm Wood Dowel ④ (8 used in this step) (8 used in this step) ⑦ Repeat step 2 to form the upper headboard and footboard. Need Assistance? Call us at 1-888-301-0332 from 8am to 5pm CST Monday - Friday...
- Page 12 Step 6 Barrel Nut 1/4” x 110 mm Bolt (12 used in this step) (12 used in this step) ⑥ 10 mm x 50 mm Wood Dowel (4 used in this step) ⑦ a) Insert the Wood Dowels (7) into the drilled large holes of Long Guardrail (R) at both ends. Attach 2 Long Guardrails (R) and the Upper Mattress Side Rail (Q) between the Upper Posts (G and H) using eight 110 mm Bolts (1) and eight Barrel Nuts (6) as shown above.
- Page 13 Step 7 1/4” x 110 mm Bolt 1/4” x 38 mm Bolt ② (4 used in this step) (2 used in this step) 10 mm x 50 mm Wood Dowel Barrel Nut (4 used in this step) (4 used in this step) ⑦...
- Page 14 Step 8 4 mm x 30 mm Screw (6 used in this step) ⑨ a) With the pilot holes as a guide, align and attach one Guardrail Support (Z) to the center of the Long Guardrails (R) and the Upper Mattress Side Rail (Q) by using three 30 mm Screws (9) through the countersunk holes and screw into place.
- Page 15 Step 9 Bed Connector Pin ⑩ (4 used in this step) a) Now, place the two assembled bunks where you want to place your bunk bed. b) Insert 4 Bed Connector Pins (10) into the top holes of lower bunk. c) Now, ask for assistance to stack the upper bunk onto the Bed Connector Pins (10) on the lower bunk.
- Page 16 Step 10 6.5 mm x 48 mm Tapping Bolt 10 mm x 50 mm Wood Dowel (8 used in this step) (8 used in this step) ⑤ ⑦ a) Insert the Wood Dowels (7) into the large holes of Ladder Steps (X) at both ends. b) Attach Left and Right Ladder Supports (V and W) to the Ladder Steps (X) using the 48 mm Tapping Bolts (5).
- Page 17 Step 11 6.5 mm x 48 mm Tapping Bolt (4 used in this step) ⑤ Align and attach the assembled Ladder to the Ladder Side Rails (P and N) using the 48 mm Tapping Bolts (5). Need Assistance? Call us at 1-888-301-0332 from 8am to 5pm CST Monday - Friday...
- Page 18 Step 12 1/4” x 38 mm Bolt ② 4 mm x 35 mm Screw (3 used in this step) (28 used in this step) ⑧ a) Lay out the Upper Mattress Support Slats (U) between the wood stoppers on the Upper Ladder Side Rail (P) and the Upper Mattress Side Rail (Q).
- Page 19 Step 13 Floor Protector (4 used in this step) ③ NOTE: The bunk bed can be separated into a twin bed and a full-size bed. In this cas e, attach four Floor Prot ectors (3) onto the bottom of the Upper Posts (G, H and I) Guardrails are not necessary.
Need help?
Do you have a question about the TENTOFBB-BR and is the answer not in the manual?
Questions and answers