
Summary of Contents for Synrad FH FLYER
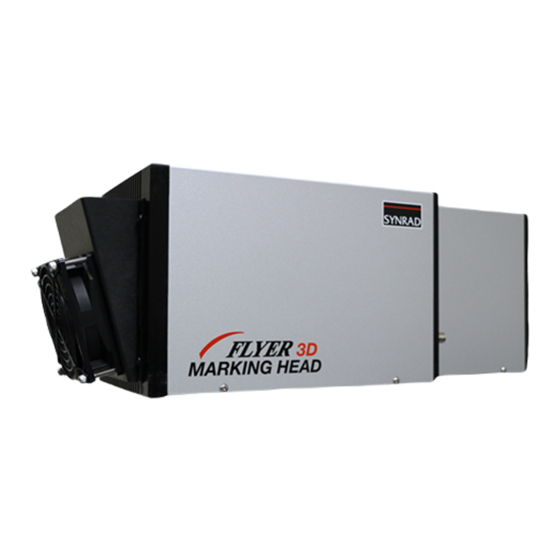
- Page 1 ™ FLYER MARKING HEAD Flyer 3D Head Operator’s Manual 4600 Campus Place Mukilteo, WA 98275 1.800.SYNRAD1 1.425.349.3500 1.425.349.3667 e-mail synrad@synrad.com www.synrad.com...
- Page 2 FLYER MARKING HEAD Flyer 3D Head Marking System Operator’s Manual Version 3.4 SYNRAD is a registered trademark of Novanta Corporation. Novanta Corporation © © 2018. All Rights Reserved. No reproduction without written authorization. DATE: February 2019...
- Page 3 Laser ..............................Cooling ..........................1-12 Connecting ........................1-13 1-13 DC Power cable ..........................1-14 Laser Control cable ........................1-16 USB Communication cable ......................1-17 DB-25 User Interface connector ....................1-17 Gas Purge port ..........................Synrad FH Flyer Marking Head Operator’s Manual Version 3.4...
-
Page 4: Table Of Contents
Configuring a network share ...................... Configuration ........................3-16 3-16 Stand-alone development ......................3-18 Stand-alone automation ......................3-20 Stand-alone, Master Control File ....................Tracking Introduction ........................4-2 Tracking setup ..........................Tracking definitions ....................4-3 Tracking mark criteria ....................4-7 Synrad FH Flyer Marking Head Operator’s Manual Version 3.4... - Page 5 USB connections ..........................5-25 Electrical isolation/electrical noise ................... Ethernet port ........................5-26 5-26 Ethernet overview .......................... 5-26 Ethernet port LEDs ......................... 5-26 Ethernet/Flyer cabling ........................Fast Acting Safety Interlock ..................5-29 Flyer web interface .....................5-31 Synrad FH Flyer Marking Head Operator’s Manual Version 3.4...
- Page 6 FH Flyer/Firestar v40/t-Series/f100 mounting ..........5-56 FH Flyer packaging instructions ................5-57 FLMK-1A packaging instructions ................5-58 FLMK-2A packaging instructions ................5-59 Maintenance/Troubleshooting Maintenance .........................6-2 Daily inspections ..........................Storage/shipping ..........................Lens mount removal/replacement................... Cleaning optics ..........................Troubleshooting ......................6-8 Synrad FH Flyer Marking Head Operator’s Manual Version 3.4...
- Page 7 Power measurements ....................B-2 Setup ..............................Input measurements ........................Output measurements ......................... Appendix C Alternate mounting configurations..............C-2 Mounting guidelines ........................Standard mounting ........................In-line mounting ..........................Offset mounting ..........................Beam expansion/path length .................C-4 Index Synrad FH Flyer Marking Head Operator’s Manual Version 3.4...
- Page 8 FH Series Flyer hazard label and CE mark locations ....4 Figure 2 European compliance mark ............7 Figure 1-1 Typical FH Flyer static marking setup ..........1-2 Figure 1-2 FH Flyer shipping kit contents ............1-5 Figure 1-3 Installing the Mounting Rail ............1-9 Figure 1-4 Mounting the L-bracket ..............1-9...
- Page 9 Figure 4-19 Part sensor setup .................4-17 Figure 4-20 Tracking properties on “Flyer device” tab ........4-19 Figure 4-21 Drawing Canvas coordinates relative to FH Flyer ....4-20 Figure 4-22 Upstream part sensor, rising edge trigger .........4-20 Figure 4-23 Downstream part sensor, rising edge trigger ......4-21 Figure 4-24 X-Y position Object Reference Point coordinates....4-21...
- Page 10 Figure 5-18 Clearing Mark properties ..............5-33 Figure 5-19 Clearing Mark Interval ...............5-34 Figure 5-20 Test Mark Control dialog box ............5-36 Figure 5-21 FH Flyer marking head package outline and mounting dimensions ...................5-42 Figure 5-22 FH Flyer/Model 48-1/48-2 package outline and mounting dimensions, Sheet 1 of 2 ..............5-43...
- Page 11 (cont.) List of Figures Figure 5-26 FH Flyer/Firestar v40 package outline and mounting dimensions ...................5-47 Figure 5-27 FH Flyer/Firestar t70i package outline and mounting dimensions ...................5-48 Figure 5-28 FH Flyer/Firestar t-Series package outline and mounting dimensions ...................5-49 Figure 5-29 FH Flyer/Firestar f100 package outline and mounting dimensions ...................5-50...
- Page 12 (cont.) List of Figures Figure C-5 Maximum 48 Series/f100 beam path ...........C-5 Figure C-6 Maximum Evolution beam path ............C-5 Figure C-7 Maximum Firestar v-Series/t-Series beam path .......C-6 Synrad FH Flyer Marking Head Operator’s Manual Version 3.4...
- Page 13 Output pin assignments ..............5-14 Table 5-9 FH Flyer output signal parameters ..........5-14 Table 5-10 Possible output signal configurations for FH Flyer ....5-17 Table 5-11 FH Index/Tracker to FH Flyer I/O conversion ......5-18 Table 5-12 Index/Tracker input conversion .............5-19 Table 5-13 Index/Tracker output conversion—all RTN lines grounded (sinking current) .............5-19...
- Page 14 USB LED indications ................6-9 Table 6-5 Ethernet LED indications ..............6-9 Table A-1 Temperature curve selection based on lens size and minimum object size .................A-5 Table A-2 Focusing lens scale factors ..............A-5 Synrad FH Flyer Marking Head Operator’s Manual Version 3.4...
- Page 15 Packaging Instructions may void the warranty. Customers may incur additional repair charges due to shipping damage caused by improper packaging. Before beginning any maintenance or inspections of your FH Flyer laser, be sure to complete-ly disable the laser by disconnecting the DC Power cable (or cables) from the rear of the laser.
- Page 16 Warranty information This is to certify that FH Series Flyer Marking Heads are guaranteed by SYNRAD, Inc. to be free of all defects in materials and workmanship for a period of one year from the date of purchase. This warranty does not apply to any defect caused by negligence, misuse (including environmental factors), accident, alteration, or improper maintenance.
- Page 17 Reference materials Your Regional Sales Manager can provide reference materials including Outline & Mounting drawings, Operator’s Manuals, Technical Bulletins, and Application Newslet- ters. Most of these materials are also available directly from SYNRAD web site at http:// www.synrad.com EU headquarters...
- Page 18 Operating system license information SYNRAD Inc. ’ s FH Series Flyer Marking Head incorporates certain open source operating system software distributed under the GNU GENERAL PUBLIC LICENSE Version 2 and GNU LESSER GENERAL PUBLIC LICENSE Version 2.1 as defined by the Free Software Foundation, Inc.
- Page 19 Thus, it is not the intent of this section to claim rights or contest your rights to work written entirely by you; rather, the intent is to exercise the right to control the distribution of derivative or collective works based on the Program. Synrad FH Flyer Marking Head Operator’s Manual Version 3.4...
- Page 20 In such case, this License incorporates the limitation as if written in the body of this License. Synrad FH Flyer Series Operator’s Manual Version 3.4...
- Page 21 Gnomovision comes with ABSOLUTELY NO WARRANTY; for details type `show w’ . This is free software, and you are wel- come to redistribute it under certain conditions; type `show c’ for details. Synrad FH Flyer Marking Head Operator’s Manual Version 3.4...
- Page 22 Synrad FH Flyer Series Operator’s Manual Version 3.4...
- Page 23 License and to the absence of any warranty; and distribute a copy of this License along with the Library. You may charge a fee for the physical act of transferring a copy, and you may at your option offer warranty protection in exchange for a fee. Synrad FH Flyer Marking Head Operator’s Manual Version 3.4...
- Page 24 Otherwise, if the work is a derivative of the Library, you may distribute the object code for the work under the terms of Section 6. Any executables containing that work also fall under Section 6, whether or not they are linked directly with the Library itself. Synrad FH Flyer Series Operator’s Manual Version 3.4...
- Page 25 Library subject to these terms and conditions. You may not impose any further restrictions on the recipients’ exercise of the rights granted herein. You are not responsible for enforcing compliance by third parties with this License. Synrad FH Flyer Marking Head Operator’s Manual Version 3.4...
- Page 26 “copyright” line and a pointer to where the full notice is found. <one line to give the library’s name and a brief idea of what it does.> Synrad FH Flyer Series Operator’s Manual Version 3.4...
- Page 27 FreeType Project (in both source and object code forms) and derivative works thereof for any purpose; and to authorize others to exercise some or all of the rights granted herein, subject to the following conditions: Synrad FH Flyer Marking Head Operator’s Manual Version 3.4...
- Page 28 Discusses bugs, as well as engine internals, design issues, specific licenses, porting, etc. Our home page can be found at: http://www.freetype.org Synrad FH Flyer Series Operator’s Manual Version 3.4...
- Page 29 FreeType Project (in both source and object code forms) and derivative works thereof for any purpose; and to authorize others to exercise some or all of the rights granted herein, subject to the following conditions: Synrad FH Flyer Marking Head Operator’s Manual Version 3.4...
- Page 30 Discusses bugs, as well as engine internals, design issues, specific licenses, porting, etc. Our home page can be found at: http://www.freetype.org Synrad FH Flyer Series Operator’s Manual Version 3.4...
- Page 31 Mounting – describes how to mount Flyer to your SYNRAD laser and associated components. Cooling – lists situations that may require you to externally cool your FH Flyer head. Connecting – explains how to connect power, control, communication, and I/O ...
-
Page 32: Figure 1-1 Typical Fh Flyer Static Marking Setup
Control modes Basic marking setup The FH Flyer marking head is SYNRAD’s third generation marking product that is evolved from years of experience with FH Index, Tracker, and Smart heads as well as our SH and DH Series marking heads many of which are still in use today at customer sites throughout the world. - Page 33 FH Series Flyer marking heads incorporate the latest DSP-based optical scanner technology that combines speed with precise position resolution. FH Flyer can achieve commanded mark velocities up to 300 inches per second (7,620 mm/s) across the field of a 370 mm focusing lens. This same technology allows Flyer to maintain a position resolution of less than 3 microns (<0.0001") across the field of an 80 mm lens.
- Page 34 Upon arrival, inspect all shipping containers for signs of damage. If you discover shipping damage, docu- ment the damage (photographically if possible), and then immediately notify the shipping carrier and SYNRAD, Inc. The shipping carrier is responsible for any damage that occurs during transportation from SYNRAD, Inc. to your receiving dock.
-
Page 35: Figure 1-2 Fh Flyer Shipping Kit Contents
(except laser) shipped with a complete marking package. If you ordered a SYNRAD 48 Series 10 W (FLMK-1A) or 25 W (FLMK-2A) fan-cooled marker, it is shipped completely assembled—ready to use out of the box after marking power and control connections. - Page 36 Contents description A description of each item listed in Table 1-1 follows: SYNRAD FH Flyer marking head – marks a variety of products and materials in Index or Tracking mode. FH Flyer Operator’s Manual – provides setup, operation, and maintenance information.
- Page 37 A description of each item listed in Table 1-2 follows: Mounting Rail – serves as a mounting base for the FH Flyer head, L-bracket, and your SYNRAD laser. L-bracket – serves as a mount for the Flyer head. When used in conjunction with the appropriate Mounting Rail and laser, the L-bracket maintains the precise alignment required between the head and laser.
- Page 38 When replacing an FH Index/Tracker head with FH Flyer, mount your Flyer head to a Flyer (clear an- odized aluminum) L-bracket. If Flyer is mounted to a standard FH (black anodized) L-bracket, then the center of Flyer’s beam exit is moved 2.54 mm (0.10") away from the center of the FH Index/Tracker mark field in the –X direction (to your right when facing Flyer’s membrane panel).
-
Page 39: Figure 1-3 Installing The Mounting Rail
FH Index/Tracker mark field in the –X direction (to your right when facing Flyer’s membrane panel). The FH Flyer head is positioned by dowel pins on the L-bracket, which in turn is dowel-pinned to the Mounting Rail. To mount the L-bracket to the Mounting Rail, refer to Figure 1-4 and perform the following... -
Page 40: Figure 1-5 Mounting The Flyer Head
Mounting FH Flyer marking head To mount your FH Flyer marking head to the L-bracket, refer to Figure 1-5 and perform the following steps: LASER CONTR OL STATUS ETHER NET TEST MARK POWE R USER INTER FACE M AR KI N G H EA... -
Page 41: Figure 1-7 Mounting The Laser
Verify that the beveled end of the Beam Enclosure Tube is seated in the laser’s beveled aperture open- ing and then tighten the four button socket screws that fasten the tube to the L-bracket. Connect water, power, and control hookups according to instructions in the laser’s Operator’s Manual. SYNRAD FH Series Flyer Operator’s Manual Version 3.4... - Page 42 Status indicator. If the Status indicator turns from green to yellow (indicating air temperatures at or above 65 °C near the power amplifiers), then you should consider adding an external cooling fan. FH Flyer will stop marking—when the Status indicator turns from yellow to red—if ambient air temperature reaches 65 °C (measured near the CPU).
- Page 43 DC Power cable FH Flyer requires a +30 VDC, 4-ampere power supply for operation. If the laser uses a +30 VDC power supply and has 120 watts of excess capacity, you can use the same supply to power Flyer. To connect the...
-
Page 44: Figure 1-9 Polarity Of Flyer's Power Jack
Attach the power cable’s black wire to the negative (–) terminal on the DC supply. Attach the power cable’s green wire to earth ground. Caution FH Flyer marking heads require a DC power supply voltage of +30.0 VDC ± 2.0 V. The Flyer head may not function properly if the DC possible supply voltage drops below +28.0 VDC. - Page 45 Flyer head. Attach the other end of the cable to the control input, labeled Control In, located on the front or rear panel of the RF-3000 RF power supply. SYNRAD FH Series Flyer Operator’s Manual Version 3.4...
-
Page 46: Figure 1-11 Connecting The Usb Communication Cable
Plug the USB “B” connector (the square end) into the USB port on the side of the Flyer head as shown in Figure 1-11. Note: When both USB and Ethernet cables are connected, the USB port takes precedence over the Eth- ernet port for control purposes. SYNRAD FH Series Flyer Operator’s Manual Version 3.4... - Page 47 Purging the Flyer head creates a slight positive pressure inside the optical scanner housing that prevents vapor and debris from accumulating on internal optical surfaces. To connect FH Flyer’s low-pressure Gas Purge port, perform the steps described below: Connect nitrogen or breathing-grade air to the Gas Purge port using 1/4-inch plastic tubing.
- Page 48 High Purity Grade 99.9500% purity or better Breathing Grade 99.9996% purity or better Compressed 99.9950% purity or better, water-free; oil filtered to 5 mg/m3 or better; particulate filtered to < 1.0 micron SYNRAD FH Series Flyer Operator’s Manual Version 3.4...
-
Page 49: Figure 1-12 Creating A New Flyer Device Name
Flyer head a unique identity based on location or process. To edit the head’s Object Name property, refer to Figure 1-12 and perform the following steps: Figure 1-12 Creating a new Flyer device name SYNRAD FH Series Flyer Operator’s Manual Version 3.4... - Page 50 Table 1-4 Recommended property values Property Name Recommended Value Pline Start Delay 0 µs Pline End Delay 200 µs Interseg Delay 75 µs Off Vector Delay 250 µs Off Vector Velocity 200 in/sec SYNRAD FH Series Flyer Operator’s Manual Version 3.4...
- Page 51 If WinMark Pro does not connect to Flyer after boot-up, go to the Devices menu and click Con- nect To Ethernet Flyer. In the Select Ethernet IP Address dialog box, enter Flyer’s Ethernet IP address (the value you entered for the Ethernet IP Address or Host Name property). SYNRAD FH Series Flyer Operator’s Manual Version 3.4...
- Page 52 Ethernet configuration via peer-to- peer Ethernet connection FH Flyer marking heads are now pre-configured at the factory to a fixed address of 192.168.100.100. This allows you to make a peer-to-peer Ethernet connection and eliminate the need for an isolated USB con- nection in order to configure Flyer’s Ethernet network settings.
-
Page 53: Figure 1-13 Flyer Ip Address Ranges Dialog
In WinMark Pro under the Tools menu, click Flyer IP Address Range. Enter your user password. The default factory password is “pass” (without the quotes). Once the Flyer IP Address Ranges dialog opens, enter a range of authorized IP addresses. SYNRAD FH Series Flyer Operator’s Manual Version 3.4... - Page 54 (2) Modbus-Asynchronous protocol, a SYNRAD-modified Modbus protocol for peer-to-peer communica- tions; and (3) SmartFH protocol, provided as legacy support for customers who have upgraded existing FH Smart systems to FH Flyer and wish to continue using custom programs written specifically for FH Smart marking heads.
- Page 55 Modbus is a request/reply (master/slave) protocol. FH Flyer is set to be a Modbus slave device (server). Note: For customers who wish to write applications where the Flyer marking head is the only device on the network, use the SynComm Modbus-Asynchronous protocol. The Modbus-Asynchronous protocol provides additional features that are not part of the standard Modbus/IP protocol such as I/O events, log messages, and intermediate end of mark messages.
- Page 56 This page intentionally left blank. SYNRAD FH Series Flyer Operator’s Manual Version 3.4...
- Page 57 Do not allow the laser beam to contact a person! This product emits an invisible laser beam that is capable of seriously burning human tissue. Always be aware of the beam’s path and always use a beam block while testing. SYNRAD FH Series Flyer Operator’s Manual Version 3.4...
- Page 58 For laser systems being used or sold outside the U.S.A., customers should refer to and follow the laser safety precautions described in European Normative and International Electrotechnical Commission documents IEC/ TR 60825-14:2014, Safety of Laser Products – §14: A User’s Guide. SYNRAD FH Series Flyer Operator’s Manual Version 3.4...
- Page 59 Do not use air dusters containing difluoroethane in any area adjacent to CO 2 laser systems because difluoroethane persists for long time periods over wide areas. SYNRAD FH Series Flyer Operator’s Manual Version 3.4...
- Page 60 Always wear safety glasses or protective goggles with side shields to reduce the risk of dam- age to the eyes when operating the laser. SYNRAD FH Series Flyer Operator’s Manual Version 3.4...
- Page 61 III, Chapter 6 and Appendix III are good resources for laser safety information. Another excellent laser safety resource is the Laser Institute of America (LIA). Their compre- hensive web site is located at http://www.lia.org. SYNRAD FH Series Flyer Operator’s Manual Version 3.4...
- Page 62 TESTED AT: 30 VOLTS MFG: August 31, 2009 4600 Campus Place, Mukilteo, WA 98275 (425) 349-3500 AVOID EXPOSURE Ser#: FHFL033070003 Invisible laser radiation is emitted from this aperture. Figure 2-3 Hazard label locations. SYNRAD FH Series Flyer Operator’s Manual Version 3.4...
- Page 63 Standards for complete laser processing systems as specified by 21 CFR, §1040 or EN 60825-1. SYNRAD assumes no responsibility for the compli- ance of the system into which OEM laser products are integrated.
- Page 64 § §§ of 47 CFR, 213. Interference Potential In our testing, SYNRAD has not discovered any significant electrical interference traceable to laser lasers. System Maintenance Ensure that all exterior covers are properly fastened in position. Measures to Correct Interference If you suspect that your laser interferes with other equipment, take the following steps to...
- Page 65 OEM lasers are OEM products intended for incorporation as components in laser processing systems. As supplied by SYNRAD, these lasers do not meet the requirements of EN 60825-1 without additional safeguards. European Union Directives state that “OEM laser products which are sold to other manufacturers for use as components of any system for subsequent sale are not subject to this Standard, since the final product will itself be subject to the Standard.
- Page 66 Illuminates green when laser temperature is within operating limits, changing to red when thermal limits are exceeded. Warning laser exterior labels Labels attached to various external housing locations to warn personnel of potential laser hazards. 1 Not available on laser OEM lasers SYNRAD FH Series Flyer Operator’s Manual Version 3.4...
- Page 67 ® responsible for meeting all applicable Standards to obtain the CE mark. To aid this compliance process, SYNRAD testing program has demonstrated that laser lasers comply with the relevant requirements of Directive 2014/30/EU, the Electromagnetic Compatibility Directive, as sum- marized in the table below.
- Page 68 EN 61000-4-8:2009 Magnetic Immunity *OEM FH Flyer Marking Head’s do not comply with EN 60825-1:2014, Safety of Laser Products. Buyers of SYNRAD OEM products are solely responsible for meeting applicable Directives and Standards for CE compliance and marking. Corporate Officer:...
-
Page 69: Operation
Use information in this chapter to familiarize yourself with Flyer’s controls and indicators and to begin marking operation. This chapter contains the following information: Controls and indicators – displays and describes FH Flyer marking head controls and indicators. Initial start-up – explains how to start FH Flyer and verify proper operation. -
Page 70: Controls And Indicators
(see the Stand-alone Operation chapter for details). USB Indicator – illuminates green when the FH Flyer and the computer are both powered up and connected via the USB Communication cable. The USB LED turns red when WinMark Pro is com- municating with Flyer. -
Page 71: Initial Start-Up
Because working distance is unique to each individual lens, consult the Final Test Report shipped with your FH Flyer head to determine the actual working distance of your lens. Refer to Table 6-1 in the Technical Reference chapter for FH Series focusing lens specifications. - Page 72 Ensure that all personnel in the area are wearing the appropriate protective eyewear and then apply power to Flyer and the laser. FH Flyer’s operating system requires approximately 25–30 seconds to boot up. During this time, the Status lamp blinks green at a slow (2 Hz) rate. Flyer is operational when the Status LED illuminates solid green.
-
Page 73: Marking In Winmark Control Mode
(10 Hz) rate during marking operations. The test pattern, shown in Figure 3-3, locates the center of the mark field to assist in part position- ing. If the FH Flyer head fails to mark properly, refer to Troubleshooting in the Maintenance/Trouble- shooting chapter. - Page 74 FH Flyer. Open WinMark and verify that the Mark button displays the name of the FH Flyer head you are op- erating (see Figure 3-4). If not, refer to Troubleshooting in the Maintenance/Troubleshooting chapter. WinMark Pro “Mark” Button Figure 3-4 WinMark Pro’s Mark button...
- Page 75 Always be aware of the beam’s path and always use a beam block while testing. Click the Mark button, or select Mark from the File menu. After the Synrad WinMark (Launcher) dialog opens, click the Start-F1 button to begin marking.
- Page 76 This page intentionally left blank. SYNRAD FH Series Flyer Operator’s Manual Version 3.4...
-
Page 77: Stand-Alone Operation
Use information in this chapter to configure your FH Series Flyer marking head to oper- ate in “stand-alone” mode. In stand-alone mode, FH Flyer can operate independently of the marking computer. This chapter contains the following information: ■... -
Page 78: Introduction
Flyers, this scheme allows multiple Flyer heads to access common mark files in a central location. Upload – An upload action occurs when FH Flyer sends a file, resident in the Filestore, up to a specified location on a computer or server. -
Page 79: Supported Functions
Extended Code 3 of 9 Interleaved Code 2 of 5 All 2D Codes including UID/Composite codes All bitmap color reduction methods including Grayscale Radial marking Banner-style tracking No Cross property Spot Marking Style property SYNRAD FH Series Flyer Operator’s Manual Version 3.4... -
Page 80: Winmark Pro/Fh Flyer Interface
Version requirements for stand- alone operation FH Flyer marking heads are meant for use with WinMark Pro Laser Marking Software version v5 or v6. To verify the software build, open WinMark Pro, click the Help menu, and then choose About Synrad WinMark…... -
Page 81: Stand-Alone Toolbar
When a new file is created or opened on the Drawing Canvas, click the Mark Current File on Canvas button to save the file to FH Flyer’s Filestore (to a default file named Canvas.mkh) and download the file to temporary storage (RAM), where the vector elements are converted to microvectors and im- mediately marked. -
Page 82: Filestore Structure
Click the Save Current File to Filestore button to save the mark file displayed on the Drawing Can- vas to the FH Flyer Filestore. You are prompted for a filename and can also specify a path, if one or more subfolders exist in the Filestore. - Page 83 Note that a plus (+) sign appears below the file to indicate it is being copied. Flyer’s menu structure allows files with the same name as long as they are stored in a different folder or subfolder. SYNRAD FH Series Flyer Operator’s Manual Version 3.4...
- Page 84 If not, a dialog box appears and reminds you to first delete or move files from the folder. Figure 4-4 shows the Filestore (Flyer Files window) after several folders, subfolders, and mark files have been saved. SYNRAD FH Series Flyer Operator’s Manual Version 3.4...
- Page 85 Selecting this function changes two important properties in the FH Flyer head. First, it enables the Mark On Startup property so that FH Flyer begins marking as soon as power is applied and the head is booted up (stand-alone operation). Second, the mark file selected is the file that is marked on startup.
- Page 86 WinMark Pro/FH Flyer interface Upload File Uploads the selected mark file from the FH Flyer Filestore to a computer location or server using the Save As dialog box. Open File Opens the selected mark file in WinMark Pro’s Drawing Editor and also loads the file into RAM as the current active file for marking.
- Page 87 When copying files from a computer or server to the Flyer Filestore, the WinMark Pro Hardlock (USB or parallel port type) must be installed on the computer running WinMark before this operation is allowed to proceed. Rename Folder Renames the selected folder. SYNRAD FH Series Flyer Operator’s Manual Version 3.4...
- Page 88 Open dialog box. Note: When copying files from a computer or server to the FH Flyer Filestore, the WinMark Pro Hardlock (USB or parallel port type) must be installed on the computer running WinMark before this operation is allowed to proceed.
-
Page 89: Fonts
After reformatting the Filestore, which could take several minutes, the FH Flyer head performs a soft boot. Check the status message displayed at the bot- tom of the Flyer Files window for operational status before continuing file or marking operations. - Page 90 After a font file is added or removed from the Flyer Fonts folder on the network share, you must refresh the Flyer font cache. To do this, right-click in the Flyer Filestore window and select Refresh from the contextual menu. SYNRAD FH Series Flyer Operator’s Manual Version 3.4...
-
Page 91: Configuring A Network Share
Configuring a network share When operating FH Flyer in stand-alone mode, you can store mark files, data files, and font files in the Flyer Filestore or you can store them in a share folder on a computer connected to your Ethernet network. -
Page 92: Configuration
Getting Started chapter for information on setting Ethernet parameters. Power up the FH Flyer head and allow 30 seconds for the operating system to boot. Open WinMark Pro and go to the “Device” tab under Tools / General Settings… . - Page 93 Launcher’s Preview window is blank because WinMark Pro is not generating microvector data during the mark. The file you downloaded to FH Flyer now resides in RAM and is also saved in the Filestore as Canvas.mkh. Press on the computer keyboard or click Start-F1 in the Launcher window to lase another mark. You can hover your mouse pointer over the Mark button to verify the correct file is loaded into Flyer RAM.
-
Page 94: Stand-Alone Automation
Stand-alone automation When the Filestore contains at least one .mkh mark file, you can configure FH Flyer to automatically load a mark file and begin marking as soon as the head boots up. Typically the mark file will contain input/out- put (I/O) automation that, in conjunction with corresponding wiring on the User Interface connector, coordinates laser marking with automated parts handling equipment. - Page 95 Always be aware of the beam’s path and always use a beam block while testing. Power down FH Flyer, then restart Flyer or reboot Flyer by right-clicking in the Filestore and choos- ing Reboot Flyer. If your mark file automation is set-up following WinMark Pro’s basic automation scheme, a mark is lased each time a ‘start mark’...
-
Page 96: Stand-Alone, Master Control File
Stand-alone, Master Control File In FH Flyer’s stand-alone Master Control File mode, the head is configured to load a text file named master.ctl, which must be saved in the Filestore’s root directory. This feature allows a single file, the Master Control File (MCF), to cause Flyer to load and mark two or more mark files based on the status of the User Interface digital inputs. - Page 97 Configuration Store mark files internally in FH Flyer’s 8 MB flash memory or store files on a network share. Operate in either continuous mode, where FH Flyer reads input status and loads the appropriate file before every mark, or strobed mode, where Flyer marks the same file each time until a strobe input dictates that another file be loaded and marked.
- Page 98 CO lasers emit an invisible laser beam that is injury capable of seriously burning human tissue. Always be aware of the beam’s path and always use a beam block while testing. SYNRAD FH Series Flyer Operator’s Manual Version 3.4...
- Page 99 If connected to the WinMark computer via USB or Ethernet during the time that FH Flyer is actively marking in stand-alone Master Control File mode, you can click the Mark button, to open the Launcher window and view piece count/cycle time information.
- Page 100 RAM at the beginning of a mark session. If master.ctl does not exist or if FH Flyer finds an error in the file, then the head operates as if Use Control File is set to No.
- Page 101 The Master Control File can direct Flyer to read the state of all eight digital inputs or it can configure Flyer to read up to 16 bit states using a multiplexed scheme. FH Flyer inputs and their corresponding decimal and hexadecimal equivalents are shown below. For clar- ity, hexadecimal values are preceded with an “0x”...
- Page 102 An input mask is required for FileMask and Strobe keywords. For example, the Strobe key- word is used by the MCF strobed mode of operation to define the input state causing FH Flyer to perform another read of the inputs. The first argument is the mask value and the second argument is the required input state.
- Page 103 In this example, OUT5 is Set and OUT6 is Cleared to indicate that a file match was success- ful. Note that outputs OUT7, OUT4, and OUT3–OUT0 are unchanged because of the mask operation. SYNRAD FH Series Flyer Operator’s Manual Version 3.4...
- Page 104 1 Start mark session and run On Before Mark Session automation (if any) in the mark file. 2 Run On After Mark Session automation (if any) in the mark file and end mark session. Figure 4-9 Master Control File flowchart—continuous mode SYNRAD FH Series Flyer Operator’s Manual Version 3.4...
- Page 105 1 Start mark session and run On Before Mark Session automation (if any) in the mark file. 2 Run On After Mark Session automation (if any) in the mark file and end mark session. Figure 4-10 Master Control File flowchart—strobed mode SYNRAD FH Series Flyer Operator’s Manual Version 3.4...
- Page 106 A “1” indicates strobed operation, where the currently loaded file is marked repeatedly until a valid strobe input causes Flyer to read file input bits and load another mark file. SYNRAD FH Series Flyer Operator’s Manual Version 3.4...
- Page 107 The Strobe is a command to load another mark file into memory. When the speci- fied input state matches the Strobe value, FH Flyer sets the output state specified by the optional SetDigitalInit keyword and then delays a minimum of InitialDelay (optional) milliseconds before performing a comparison of the inputs to determine the next file match.
- Page 108 Format: “FileMask=arg1” where arg1 is a single decimal or hexadecimal value. Argument: The FileMask indicates the range of valid inputs to use for file comparison and can accommodate up to 16 bits. SYNRAD FH Series Flyer Operator’s Manual Version 3.4...
- Page 109 # remember that a space is a data delimiter! # next step in Master Control File. Delay16 Keyword: Operation: Continuous, strobed Required: No Format: “Delay16=arg1” where arg1 is a single integer value. SYNRAD FH Series Flyer Operator’s Manual Version 3.4...
- Page 110 “SetDigitalMatch=arg1 arg2” where the arguments consist of decimal or hexadeci- mal values. Argument: Arg1 is a mask that defines the output bits to set or clear. Arg2 is the desired out- put state. SYNRAD FH Series Flyer Operator’s Manual Version 3.4...
- Page 111 10000 are ignored and the actual delay is set to 10000 ms. Example: # enter a 30 millisecond delay before input status is rescanned for a file match. NullFile=30 # next step in Master Control File. SYNRAD FH Series Flyer Operator’s Manual Version 3.4...
- Page 112 # and check inputs again. NullFile=10 # Add Error command keyword to set output state before mark session ends if # error condition occurs. Set OUT7 to “0” and OUT6 to “1” on error. SYNRAD FH Series Flyer Operator’s Manual Version 3.4...
- Page 113 # Because there are only nine valid matches, input states 0 and 10–15 will not match. # These “no match” states are caught by the NullFile command keyword, so Flyer # will loop without marking until a valid match occurs. # End of file. SYNRAD FH Series Flyer Operator’s Manual Version 3.4...
- Page 114 # not use the 0 state where IN3 – IN0 are all “0” because this could indicate # the inputs are disconnected or otherwise unavailable. We want to ensure that only # an active input state causes lasing to occur. # Remember path and filenames are case sensitive!! SYNRAD FH Series Flyer Operator’s Manual Version 3.4...
- Page 115 # Because there are only nine valid matches, input states 0 and 10–15 will not match. # These “no match” states are caught by the NullFile command keyword, so Flyer # will loop without marking until a valid match occurs. # End of file. SYNRAD FH Series Flyer Operator’s Manual Version 3.4...
- Page 116 This page intentionally left blank. SYNRAD FH Series Flyer Operator’s Manual Version 3.4...
-
Page 117: Tracking
The order of information presented in this section is the same as the order of tasks that you will need to perform. The best way to get FH Flyer ready for tracking operation is to start at Introduction and work your way through Tracking optimization. You should have al- ready completed the steps in the Getting Started and Operation chapters of this manual. -
Page 118: Introduction
Introduction Unlike static laser marking systems that require parts to be at rest during marking, the FH Flyer head in tracking mode is capable of marking parts “on-the-fly” as they move through the marking field at line speeds up to 400 feet per minute. Initial material samples should be tested by SYNRAD’s Applications Lab to determine the optimum power, speed, and lens size settings for your application. -
Page 119: Tracking Definitions
Before calculating the approximate tracking line speed for Flyer marking heads in a given application, sev- eral terms must be defined. To obtain the highest possible line speed and mark quality, please review these definitions carefully before designing your FH Flyer tracking application. Mark The Mark is the object, or collection of objects, defined by the bounding box when all marking objects are selected in your WinMark Pro .mkh mark file. - Page 120 Tracking Window is the smaller of Usable Field Size, which is 128 mm, or Mark Pitch, which measures 90 mm. In this case, the actual Tracking Window is limited to 90 mm. SYNRAD FH Series Flyer Operator’s Manual Version 3.4...
- Page 121 Target Area The Target Area is the area on the part, or array of parts, that will be lased with the Mark as parts move underneath the FH Flyer head. See Figure 5-5. ABCDEFG 1 2 3 4 5 6...
- Page 122 The Object Reference Point is the X-Y coordinate of the Mark’s top left corner (in the direction of part mo-tion) as viewed on WinMark’s Drawing Canvas. See Figure 5-6. Part Motion 270° Object Reference Point (X = –1.0, Y = 2.0) Figure 5-6 Object Reference Point SYNRAD FH Series Flyer Operator’s Manual Version 3.4...
-
Page 123: Tracking Mark Criteria
Important Note: If your Flyer system is configured for Encoderless Tracking, the Encoder Resolu- tion property is not valid. Instead use the Product Line Speed property to fine-tune tracking to actual part motion. SYNRAD FH Series Flyer Operator’s Manual Version 3.4... - Page 124 Tracking Window Line 1 Line 2 Tracking Window Part Motion 270° Line 1 Line 2 Target Area on Part Figure 5-9 Maximum marking position in Tracking Window SYNRAD FH Series Flyer Operator’s Manual Version 3.4...
-
Page 125: Tracking Hardware
DC power supply to power both the part sensor and encoder. Although the components described above are not provided with your FH Flyer marking head, some or all of these components may already exist in the equipment that performs your automated parts handling. - Page 126 Tracking hardware Encoder connection Encoder outputs are connected directly to FH Flyer’s DB-25 User Interface connector. If you are using a unidirectional (single output) encoder, connect your wiring as shown for ‘A’ phase (øA) in the following diagrams. To connect a position encoder, refer to the appropriate connection diagram. Figure 5-10 shows a customer-supplied power supply driving a current-sinking NPN open collector encoder.
- Page 127 Verify that field wiring is correct after all encoder connections are complete using the Digital Scope ap- plication (DigScope.exe in the WinMark folder). If the encoder is properly connected, inputs IN1 and IN2 should toggle as the position encoder rotates through its range of motion. SYNRAD FH Series Flyer Operator’s Manual Version 3.4...
- Page 128 The required line speed is 144 ft/min (731.52 mm/s). Multiplying the line speed of 731.52 mm/s by the encoder’s 28.8 pulses/mm of travel gives an input frequency of 21.067 kHz, which is within FH Flyer’s input frequency limit of 40 kHz.
- Page 129 Encoder Resolution. If the longer line is upstream of the shorter lines, then decrease resolution. Accuracy to the second decimal point may be required depending upon the resolution of your particular encoder. SYNRAD FH Series Flyer Operator’s Manual Version 3.4...
-
Page 130: Part Sensor
32 mA typical; 47 mA maximum at 24 VDC Part sensor connection The part sensor output is connected directly to input IN0 on FH Flyer’s User Interface connector. To con- nect the part sensor, refer to the appropriate connection diagram. Figure 5-15 shows a customer- supplied power supply driving a current-sinking NPN open collector part sensor. - Page 131 Figure 5-18 shows how to power the same type part sensor from Flyer’s +15 VDC power supply. PIN # SIGNAL NAME IN0_A IN0_B PART SENSOR DC POWER SUPPLY Figure 5-17 Wiring diagram for current-sourcing (PNP open collector) part sensors SYNRAD FH Series Flyer Operator’s Manual Version 3.4...
- Page 132 Verify that field wiring is correct after all part sensor connections are complete using the Digital Scope application (DigScope.exe in the WinMark folder). If the part sensor is properly connected, input IN0 should toggle when the part sensor activates. SYNRAD FH Series Flyer Operator’s Manual Version 3.4...
- Page 133 Measure the distance (at the instant the part sensor activates) from the centerline of the test mark (Marking Window) to the leading edge of the desired mark location on the part. Enter this number (in the selected units of measure) for the Sensor Distance value in WinMark Pro. SYNRAD FH Series Flyer Operator’s Manual Version 3.4...
-
Page 134: Dc Power Supply
DC power supply The FH Flyer marking head incorporates an internal +15 VDC, 400 mA power supply output that can power a part sensor and position encoder as long as the combined current load does not exceed 400 mA. If your I/O components sink or source a total of more than 400 mA, you must provide an appropriately-sized DC power supply to power your I/O devices. -
Page 135: Winmark Pro Tracking Setup
IP address or a reference to its physical location such as “AssemblyLine3”. Figure 5-20 Tracking properties on “Flyer device” tab To setup your FH Flyer marking head for tracking, make sure that your Flyer head is communicating with WinMark Pro v6 and then edit the tracking parameters described below. Motion Vector Set the direction of part movement through the marking field. - Page 136 Marking Window to the leading edge of the desired mark location on the part. Unlike other marking systems that are time-based, FH Flyer uses a distance-based marking scheme. This is because at the moment a part is sensed (on the rising or falling edge of the part sense signal), FH Flyer begins counting encoder pulses.
- Page 137 Drawing Canvas. In Figure 5-24, the text object’s top left coordinate value is X = –0.5, Y = 2.0 (inch- es). If the Motion Vector is 270°, then Sensor Distance must be 2.0 inches or greater. Figure 5-24 X-Y position coordinates Object Reference Point SYNRAD FH Series Flyer Operator’s Manual Version 3.4...
- Page 138 Encoderless Tracking In constant velocity (line speed) applications, Encoderless Tracking allows Tracker part marking without using an external encoder. When Yes is selected, FH Flyer generates internal encoder pulses corresponding to the product velocity specified by the Product Line Speed property.
- Page 139 Internal Part Trigger property to create an internal part sense signal. When Internal Part Trigger is enabled (set to Yes), FH Flyer generates an internal trigger signal at the distance interval specified by the Part Pitch property.
-
Page 140: Determining Line Speed
Refer to Figure 5-26 and read through the following sample line speed calculation. S/N063 101602 Tracking Window Usable Field Size 152 mm Part Mark Pitch Motion 180 mm 270° S/N063 101602 Target Area on Part Figure 5-26 Tracker line speed calculation #1 SYNRAD FH Series Flyer Operator’s Manual Version 3.4... - Page 141 Cycle Time for the mark is 0.20 seconds. Line Speed = Tracking Window / Cycle Time = 30 mm / 0.20 sec Line Speed = 150 mm/sec = 9 m/min = 29.5 ft/min SYNRAD FH Series Flyer Operator’s Manual Version 3.4...
-
Page 142: Tracking Optimization
When marking a file containing non-filled stroke text (such as the “123XYZ” mark shown in Figure 5-28), FH Flyer starts marking when the Target Area encompassing “123XYZ” reaches the edge of the Tracking Window. Marking can continue up until the moment the last portion of text to be marked (the last part of the “Z”) exits the Tracking Window. -
Page 143: Graphics
Tracking optimization Because FH Flyer marks text characters from left to right and top line to bottom line, proper orientation of the Mark on the Drawing Canvas will maximize the area available for marking. To achieve optimum line speeds, perform the following steps: Orient either the text or the part to be marked as shown in Figure 5-29 so that the laser mark is made moving against, or counter to, the direction of part motion. -
Page 144: Mark Placement
When marking small 2D codes, set the 2D Barcode Bitmap property (located on the Format tab) to No. This forces WinMark Pro to mark vector circles instead of raster-filling cells. Simplify line art. SYNRAD FH Series Flyer Operator’s Manual Version 3.4... -
Page 145: Summary
(such as motion controllers or automation software) to complete their respective tasks between each mark. These factors must be accounted for when determining the actual throughput of your production line. As with any factory automation proposal, proof-of-concept testing is highly recom- mended. SYNRAD FH Series Flyer Operator’s Manual Version 3.4... - Page 146 This page intentionally left blank. SYNRAD FH Series Flyer Operator’s Manual Version 3.4...
-
Page 147: Technical Reference
Use information in this chapter as a technical reference for your FH Flyer marking head. This chapter contains the following information: FH Flyer technical overview –describes SYNRAD’s FH Flyer technology. Input/Output circuitry – explains Flyer’s Input/Output (I/O) capability and provides ... - Page 148 Flyer/Firestar v40/t-Series/f100 mounting – illustrates an exploded assembly drawing for Flyer with a Firestar v40 (40 W), Firestar t70i (70 W), Firestar t-Series (60, 80, or 100 W) or Firestar f100 (100 W) laser. SYNRAD FH Series Flyer Operator’s Manual Version 3.4...
-
Page 149: Fh Flyer Technical Overview
WinMark Pro laser marking software sends vector data and laser power commands to FH Flyer through a USB or Ethernet connection where the processor on Flyer’s control board converts vector data to microvector commands. -
Page 150: Lens Specifications
Note: FLA370 lenses for FH Flyer heads have a notched mounting ring to provide clearance for 5X expanders. The 370-mm lens mount is dowel-pinned so it mounts in an orientation that provides clearance for heads fitted with the longer 5X expander. -
Page 151: Input/Output Circuitry
Pin 13 Pin 1 A simple parts handling system utilizing FH Flyer I/O to control marking might operate like this: A con- veyor stops with a new part positioned under the marking head and then delivers a ‘start mark’ signal to Caution The pin assignments on Flyer’s DB-25 User Interface connection... - Page 152 Flyer then waits until another ‘start mark’ signal is received. The digital I/O capability of SYNRAD’s FH Flyer marking head enables this kind of automated process control. Refer to the WinMark Pro Laser Marking Software User Guide or our Laser Marking FAQ on the WinMark web site (http://www.winmark.com) for details on configuring a basic automation sequence.
-
Page 153: Internal +15 Vdc Supply
Input/Output circuitry Internal +15 VDC supply An internal 15-volt (+15 VDC, 400 mA) isolated power supply is available to drive FH Flyer inputs or outputs in lieu of a customer-supplied power source. When powering input/output devices or tracking components such as part sensor and position encoder hardware, remember that the total current demand of these devices cannot exceed 400 mA. - Page 154 Inputs IN0 and IN3–IN7 are protected by 50 mA self-resetting fuses. Refer to Table 6-6 for IN0 and IN3–IN7 input specifications. When driving FH Flyer inputs IN0 and IN3 through IN7, your signal device must be capable of providing the maximum current value shown in Table 6-6 at the appropriate input voltage.
- Page 155 User Interface connector must be left floating unless you are using Flyer’s +15 VDC auxiliary power output as the I/O signal source. Input/Output circuitry Figure 6-3 illustrates an equivalent circuit diagram of FH Flyer’s optically-isolated input circuitry. Figure 6-3 FH Flyer’s equivalent input circuit...
- Page 156 NPN Open-Collector Output Device signals from external devices. When an external device sinks or sources current through an input, FH Flyer senses a high-level state (1); when no current flows through the input, Flyer senses a low-level state (0). FH Flyer inputs are designed for compatibility with standard industrial control circuit voltages in the range from 5 V to 24 VDC.
- Page 157 Flyer marking head. + 5.0 V FH Flyer Input Section + 24 VDC IN0_A Flyer Input Circuitry IN0_B Relay Contact Foot Switch Input/Output circuitry SYNRAD FH Series Flyer Operator’s Manual Version 3.4...
- Page 158 See Table 6-7 for a listing of possible input signal configurations. Figure 6-7 illustrates the same foot switch or relay contact device connected in a current sink-ing configuration. Figure 6-7 Driving Flyer from current sinking switch or relay device SYNRAD FH Series Flyer Operator’s Manual Version 3.4...
- Page 159 In tracking applications, connect Flyer’s high-speed inputs IN1 and IN2 to your position encoder. These two inputs can accept input frequencies up to 40 kHz. Figure 6-8 illustrates a circuit for connecting position encoder outputs to the FH Flyer marking head. Figure 6-8...
-
Page 160: Digital Output Circuitry
OUT7, share a common return line that allows the user to configure all six outputs as either high-side switches or low-side switches. Table 6-8 summarizes output pin assignments while Table 6-9 shows output signal specifications. FH Flyer outputs are able to sink or source 30 mA maximum. Table 6-8... - Page 161 Turn-Off Time, max. 0.2 ms Off State Leakage Current, max. 1.0 µA Input/Output circuitry Figure 6-9 illustrates an equivalent circuit diagram of FH Flyer’s optically-isolated output circuitry. Figure 6-9 FH Flyer’s equivalent output circuit SYNRAD FH Series Flyer Operator’s Manual Version 3.4...
- Page 162 Circuitry IN0_A FH Flyer’s optically-isolated outputs are used to create flexible automated systems. Typically, one of these outputs is used to indicate completion of a mark. Another might drive a warning light when the laser beam is active, or increment a parts counter. Several circuits for interfacing to Flyer outputs are shown on the following pages.
- Page 163 (V+) side. OUT2_A through OUT7_A are tied to the high side of the load and the other side of the load is returned back to the I/O power supply’s return or common. OUT2–7_B OUT2_A through OUT7_A LOAD Table 6-10 Possible output signal configurations for FH Flyer Output High Side Output Low Side OUT0_A OUT0_B OUT0_B...
-
Page 164: Fh Index/Tracker To Flyer Conversion
Flyer’s DB-25 User Interface connector. Important Note: The voltage level for FH Flyer inputs is between 5 V and 24 VDC. This range differs from the input voltage range of previous FH Series marking heads. If your existing equipment interface uses voltages above 24.0 VDC, you must adapt your circuit or... - Page 165 I/O circuit’s DC common or return (FH outputs function as low-side switches and are sinking cur-rent). Refer to Table 6-14 when all output lines (OUT4–OUT7) are connected to the I/O circuit’s DC voltage supply (V+) (FH outputs function as high-side switches and are sourcing current). SYNRAD FH Series Flyer Operator’s Manual Version 3.4...
- Page 166 On the Flyer DB-25 User Interface connector, outputs OUT2–OUT7 share a common return—OUT2–7_B on Pin 2. This wiring scheme assumes that OUT4–OUT7 are all tied to the I/O supply’s positive DC (V+) voltage (FH outputs are sourcing current). SYNRAD FH Series Flyer Operator’s Manual Version 3.4...
- Page 167 The pin assignments on Flyer’s DB-25 User Interface connection are NOT compatible with FH Smart’s DB-25 Parts Handling Control possible connection. If you are integrating an FH Flyer head into an exist- ing FH Smart marking system, you must revise any I/O field wiring equipment connected to Flyer’s DB-25 connection.
-
Page 168: Fh Smart To Flyer Conversion
Handling Control connector to Flyer’s DB-25 User Interface connector. Important Note: The voltage level for FH Flyer inputs is between 5 V and 24 VDC. This range differs from the input voltage range of previous FH Series marking heads. If your existing equipment interface uses voltages above 24.0 VDC, you must adapt your circuit or... - Page 169 If your existing FH Smart head has the return (common) from input IN7 (IN7 RTN) wired to Pin 14, you must move this input return connection to Pin 13, IN3–IN7_B, on the FH Flyer marking head. ** On the Flyer DB-25 User Interface connector, outputs OUT2–OUT7 share a common return—OUT2–7_B on Pin 2. This wiring scheme assumes that OUT4/OUT5 RTN and OUT6/OUT7 RTN are all tied to the I/O supply’s DC common or return side (FH...
- Page 170 IN0_B If your existing FH Smart head has the return (common) from input IN7 (IN7 RTN) wired to Pin 14, you must move this input return connection to Pin 13, IN3–IN7_B, on the FH Flyer marking head. Input/Output circuitry Output circuit conversion Tables 6-17 and 6-18 show pin to pin connections for converting existing Index/Tracker output signals to Flyer’s DB-25 User Interface connector.
-
Page 171: Usb Port
DC (V+) voltage (FH Smart outputs are sourcing current). If four or more outputs are required in a current sourcing arrangement (FH Flyer offers a total of eight out- puts—two with isolated return lines, the other six share a common return), then rewire your Smart output circuitry to take advantage of this functionality. -
Page 172: Ethernet Port
Started chapter for information on Ethernet configuration via a USB or peer-to-peer Ethernet connection. Note: When marking with FH Flyer in tethered mode (where the computer is sending mark data to Flyer in real-time through a USB or Ethernet connection), you must consider Ethernet latency issues when mark cycle times are very short (<... -
Page 173: Ethernet/Flyer Cabling
TX + (1) (1) TX + TX – (2) (2) TX – WHT/GRN RX + (3) (3) RX + RX – (6) (6) RX – BLUE WHT/BLUE WHT/BRN Table 6-19 Ethernet pin assignments—straight-thru connection SYNRAD FH Series Flyer Operator’s Manual Version 3.4... - Page 174 TX + (1) (3) RX + TX – (2) (6) RX – WHT/GRN RX + (3) (1) TX + RX – (6) (2) TX – BLUE WHT/BLUE WHT/BRN Table 6-20 Ethernet pin assignments—crossover connection SYNRAD FH Series Flyer Operator’s Manual Version 3.4...
-
Page 175: Fast Acting Safety Interlock
SYNRAD lasers are equipped with a Remote Interlock feature that disables laser firing, typically when a safety switch on an access door or enclosure is opened. - Page 176 Move switch 1 on switch bank SW1 to the “ON” position to enable FASI ent on input IN3. When an enable signal is applied, FH Flyer responds to the rising edge transition in less than 1 millisecond (ms). Important Note: The Fast Acting Safety Interlock (FASI) function does NOT disable the laser.
-
Page 177: Flyer Web Interface
OFF Flyer web interface FH Flyer marking heads offer a web-based Internet interface that allows you to access read-only informa- tion including log files, firmware release notes, and head configuration data using a standard web browser as shown in Figure 6-16. -
Page 178: Firmware Upgrades
FH Flyer’s flash memory contains the operating code—firmware—that controls the marking head. As improvements or changes are made to the firmware by SYNRAD Engineers, these firmware updates are posted to the WinMark Pro web site (see FH Series Resources at http://www.winmark.com). -
Page 179: Clearing Mark
Figure 6-17 Checking Flyer’s firmware version In the About Synrad WinMark dialog, press the Update F/W button and from the Marking Head Firm- ware Update dialog, click Update. In the Open dialog, navigate to the location of the latest firmware update (Update_x-xx.fhz) file. By default, a copy is placed in the C:\Program Files\WinMark folder during the WinMark installation. - Page 180 Scroll down to the Clearing Mark On Begin Mark Session and Clearing Mark Interval properties. See Figure 6-18. Figure 6-18 Clearing Mark properties Clearing mark In most applications, a clearing mark is not necessary. Set Clearing Mark On Begin Mark Session SYNRAD FH Series Flyer Operator’s Manual Version 3.4...
-
Page 181: Over-Temperature Warning
(indicating power amp air temperatures at or above 65 °C), then you should consider cooling the environ- ment in which the Flyer head is operating. FH Flyer will stop marking if the CPU’s ambient air tempera- ture reaches 65 °C (when the Status indicator turns red). If this happens, marking will halt and you must cool the Flyer head. -
Page 182: Custom Test Mark Feature
65 °C and additional cooling is required. The activation of output OUT7_A occurs when the color-coded Status indicator in the About Synrad WinMark… dialog box transitions from green to yellow, which indicates power amp air temperatures are at or above 65 °C. -
Page 183: Overview
Overview FH Flyer customers have the ability to download a custom test mark to the Flyer head. Like the standard test pattern shown in Figure 3-3 in the Operation chapter, a custom test mark downloaded into Flyer’s non-volatile memory is marked each time the Test Mark pushbutton is pressed. However, unlike the stan-... -
Page 184: Creating A Custom Test Mark
FH Flyer does not support a Tracking custom test mark. The Tracking Mark option appears dimmed when the Tracking feature is unavailable. See the Stand-alone Operation chapter for instructions on how to setup Flyer to perform stand-alone Tracker marking. Creating a custom test mark Use WinMark Pro v6 to develop a custom test mark the same way you would create any other mark file. -
Page 185: Downloading A Custom Test Mark File
After file transfer is complete, a dialog box confirms a successful download. FH Flyer memory can contain only one custom test mark at a time, but a new mark file can be downloaded at any time. A copy of the factory installed test pattern (FactoryTestMark1.mkh) is provided in the Program Files\WinMark folder so that the default test mark file can be reloaded into memory as required for lens testing or mark centering. -
Page 186: General Specifications
Digital Before Piece command be “Set” before the automation loop can continue. Outputs FH Flyer is able to set or clear outputs (OUT0–OUT7) when marking a custom test mark. This output capability is available when using any Set Digital commands on the Drawing’s Automation tab or when using SetDigitalState Event Builder commands during On Before Mark Session, On Before Mark Piece, On After Mark Piece, and On After Mark Session stages of the automation loop. - Page 187 3 The typical focal length (working distance) is marked on each lens mount. Because the actual working distance may vary from lens to lens, it is important to provide a Z-axis adjustment between the FH Flyer marking head and the marking surface. Consult your marking head’s Final Test Report for the actual measured working distance.
- Page 188 Mounting Kit Weights 10 W Mounting Kit (48-1) 5.44 kg (12 lbs) 10 W Mounting Kit w/ Fan Shroud 6.80 kg (15 lbs) SYNRAD FH Series Flyer Operator’s Manual Version 3.4...
- Page 189 25 W Mounting Kit (48-2) 7.26 kg (16 lbs) 25 W Mounting Kit w/ Fan Shroud 9.98 kg (22 lbs) 30 W Mounting Kit (v30) 4.50 kg (10 lbs) SYNRAD FH Series Flyer Operator’s Manual Version 3.4...
- Page 190 40 W Mounting Kit (v40) 6.80 kg (15 lbs) 50 W Mounting Kit (48-5) 8.16 kg (18 lbs) 60 W Mounting Kit (t60) 6.80 kg (15 lbs) SYNRAD FH Series Flyer Operator’s Manual Version 3.4...
- Page 191 70 W Mounting Kit (t70i) 6.80 kg (15 lbs) 80 W Mounting Kit (t80) 6.80 kg (15 lbs) 100 W Mounting Kit (t100) 6.80 kg (15 lbs) SYNRAD FH Series Flyer Operator’s Manual Version 3.4...
- Page 192 100 W Mounting Kit (Evolution 100) 8.16 kg (18 lbs) 100 W Mounting Kit (Firestar f100) 6.80 kg (15 lbs) 125 W Mounting Kit (Evolution 125) 9.07 kg (20 lbs) Specifications subject to change without notice. SYNRAD FH Series Flyer Operator’s Manual Version 3.4...
-
Page 193: Fh Flyer Package Outline Drawing
5 Mounting kit consists of appropriate Mounting Rail, L-bracket, Beam Enclosure Tube, and fasteners. Laser and FH Flyer head not included. FH Flyer package outline drawing SYNRAD FH Series Flyer Operator’s Manual Version 3.4... - Page 194 Figure 6-21 FH Flyer marking head package outline and mounting dimensions FH Flyer/Model 48-1/48-2 SYNRAD FH Series Flyer Operator’s Manual Version 3.4...
- Page 195 Figure 6-22 FH Flyer/Model 48-1/48-2 package outline and mounting dimensions Sheet 1 of 2 SYNRAD FH Series Flyer Operator’s Manual Version 3.4...
- Page 196 FH Flyer/Model 48-1/48-2 package outline drawings Figure 6-23 FH Flyer/Model 48-1/48-2 package outline and mounting dimensions Sheet 2 of 2 SYNRAD FH Series Flyer Operator’s Manual Version 3.4...
-
Page 197: Fh Flyer/Model 48-5 Package Outline Drawing
FH Flyer/Model 48-5 package outline drawing Figure 6-24 FH Flyer/Model 48-5 package outline and mounting dimensions SYNRAD FH Series Flyer Operator’s Manual Version 3.4... -
Page 198: Fh Flyer/Firestar V30 Package Outline Drawing
FH Flyer/Firestar v30 package outline drawing Figure 6-25 FH Flyer/Firestar v30 package outline and mounting dimensions SYNRAD FH Series Flyer Operator’s Manual Version 3.4... - Page 199 FH Flyer/Firestar v40 package outline drawing Figure 6-26 FH Flyer/Firestar v40 package outline and mounting dimensions SYNRAD FH Series Flyer Operator’s Manual Version 3.4...
- Page 200 FH Flyer/Firestar t70i package outline drawing Figure 6-27 FH Flyer/Firestar t70i package outline and mounting dimensions SYNRAD FH Series Flyer Operator’s Manual Version 3.4...
- Page 201 FH Flyer/Firestar t-Series package outline drawing SYNRAD FH Series Flyer Operator’s Manual Version 3.4...
- Page 202 Figure 6-28 FH Flyer/Firestar t-Series package outline and mounting dimensions FH Flyer/Firestar f100 package SYNRAD FH Series Flyer Operator’s Manual Version 3.4...
- Page 203 Figure 6-29 FH Flyer/Firestar f100 package outline and mounting dimensions SYNRAD FH Series Flyer Operator’s Manual Version 3.4...
- Page 204 FH Flyer/Evolution 100 package outline drawing SYNRAD FH Series Flyer Operator’s Manual Version 3.4...
- Page 205 Figure 6-30 FH Flyer/Evo 100 package outline and mounting dimensions FH Flyer/Evolution 125 package SYNRAD FH Series Flyer Operator’s Manual Version 3.4...
- Page 206 This page intentionally left blank. SYNRAD FH Series Flyer Operator’s Manual Version 3.4...
-
Page 207: Maintenance
Series Flyer marking head. This chapter contains the following information: ■ Maintenance – explains typical maintenance procedures for the FH Series Flyer marking head. ■ Troubleshooting – describes how to troubleshoot common marking head problems. SYNRAD FH Series Flyer Operator’s Manual Version 3.4... -
Page 208: Daily Inspections
Perform the following steps daily to keep your FH Flyer marking head in optimum operating condition. Except for the procedures described below, no other service is required or should be attempted. Shut off power to the laser and FH Flyer head. Close the laser’s shutter if it is equipped with one. Danger Ensure that DC power to the laser is turned off and locked out before inspecting optical components in the beam path. -
Page 209: Storage/Shipping
The 80 mm, 125 mm, 125HP, and 200 mm FLA lenses used on FH Flyer marking heads are held in place by three cap screws. Older FLA lenses, and all FLA 370 mm lenses, include a dowel pin that indexes the lens to a specific orientation relative to the head. - Page 210 Maintenance To replace the FH Flyer focusing lens, perform the following steps: If the focusing lens assembly has a dowel pin on its inside face, refer to Figure 7-2 and position the lens mount so that the dowel pin lines up with the non-threaded dowel pin hole in Flyer’s bottom plate.
-
Page 211: Cleaning Optics
Shut off and lock out all power to the laser and marking head. You must verify that the laser is OFF before proceeding with the optical inspection and cleaning! SYNRAD FH Series Flyer Operator’s Manual Version 3.4... - Page 212 To prevent streaking during the final ethyl alcohol cleaning, drag the lens wipe slowly across the surface so that the cleaning liquid evaporates right behind the wipe. SYNRAD FH Series Flyer Operator’s Manual Version 3.4...
-
Page 213: Troubleshooting
Repeat Steps 5 through 8 as required, removing all possible contaminants and deposits. 10 Reinstall the focusing lens. If the cleaned optic will not be used immediately, wrap it in lens tissue and place in clean, dry storage. SYNRAD FH Series Flyer Operator’s Manual Version 3.4... -
Page 214: Indicator Leds
Indicator LEDs FH Flyer has several LEDs that indicate operational status or fault conditions. LEDs may change color and/or blink at a slow (2 Hz) or fast (10 Hz) rate depending on the state of the Flyer head. Each LED and its corresponding status indications are described in detail below. -
Page 215: Fh Series Flyer Marking Head
Ensure that the proper DC voltage (+30 VDC ±2.0 V @ 4 A) is available under full-load conditions. Symptom: The Flyer head exhibits a high-frequency hiss after boot-up when the Status LED turns solid green. Possible Causes: This is normal operation for Flyer. SYNRAD FH Series Flyer Operator’s Manual Version 3.4... - Page 216 Flyer is in alternate boot mode because it has failed to fully boot-up five times in a row. Allow the alternate boot sequence to continue. If the Status lamp starts blinking red at a fast (10 Hz) rate, then the alternate boot mode was successful. Contact SYNRAD Technical Support for instructions on how to proceed.
- Page 217 FH Flyer and the computer, but WinMark Pro v6 does not “see” the FH Flyer marking head. The “Search for heads again” option does not locate the head, forc- ing WinMark Pro v6 to open in demo mode with the Mark button grayed out.
- Page 218 Flyer device. Possible Causes: Communication between Flyer and WinMark Pro is not synchronized and WinMark has recognized, and defaulted to, a Fiber Link Controller Card (FLCC) previously installed in the marking computer. SYNRAD FH Series Flyer Operator’s Manual Version 3.4...
- Page 219 WinMark, power down the Flyer head, wait 30 seconds, and then reapply power. When Flyer’s Status LED illuminates green, open WinMark Pro. Symptom: The laser mark produced by FH Flyer is much larger or much smaller than the image drawn on the WinMark Pro Drawing Canvas. Possible Causes: ...
-
Page 220: Stand-Alone Mode
Settings… is Yes), then you must apply a 5 V–24 VDC signal on Flyer input IN3 to fire the laser. Symptom: FH Flyer is not marking properly or there are indications of operational faults within the head. Possible Causes: ... -
Page 221: Tracking Mode
IN1 and input IN2 toggle as the encoder rotates through its range of motion. The part sensor signal is not being read by the FH Flyer head. Close WinMark Pro and open Digital Scope (DigScope.exe). Trigger the part sensor and verify that input IN0 toggles as the part sensor activates. -
Page 222: Automation I/O
The actual part motion vector is different from the value entered as the Motion Vector. Check that actual part motion under the marking head equals the entered Motion Vector (on the “Device” tab under Tools / General Settings…). WinMark Pro v6 and FH Flyer support Motion Vector values in 0.01° increments. -
Page 223: Laser Marking Faq
General troubleshoot- ing, WinMark Pro automation, Tracking operation, ActiveX, and others. The Laser Marking FAQ also includes links to various SYNRAD technical bulletins. SYNRAD FH Series Flyer Operator’s Manual Version 3.4... - Page 224 This page intentionally left blank. SYNRAD FH Series Flyer Operator’s Manual Version 3.4...
- Page 225 This appendix contains the following information: ■ Cooling – explains how to determine when operating conditions and the type of marking application indicate a need for auxiliary cooling of your FH Flyer marking head. SYNRAD FH Series Flyer Operator’s Manual Version 3.4...
-
Page 226: Cooling
You can monitor Flyer head temperature in real-time using our WinMark Pro laser marking software. To do this in WinMark Pro, click the Help menu and then click About Synrad WinMark… . The About Synrad WinMark… dialog box displays internal air temperature near power amplifier and CPU components along with a color-coded Status indicator. - Page 227 The standard mounting orientation for a marking system is to place the laser/head assembly in a horizontal plane with the focusing lens pointed downward. Any other non-standard mounting configuration should include some means of cooling Flyer’s heat sink. SYNRAD FH Series Flyer Operator’s Manual Version 3.4...
-
Page 228: Calculating Heat Load
With the Minimum Dimension obtained in Step 2, use Table A-1 to locate the appropriate tempera- ture curve (A, B, C, or D). To do this, find your lens in the Lens Size column and follow across to the column containing the Minimum Dimension from Step 2. SYNRAD FH Series Flyer Operator’s Manual Version 3.4... - Page 229 Example – the Marking Velocity from Step 5 is 45 IPS and our Scale Factor is 1.570, so the Normal- ized Marking Velocity is 70.65 IPS. You may round this value up to 71 IPS. Normalized Marking Velocity equals ______ IPS. SYNRAD FH Series Flyer Operator’s Manual Version 3.4...
- Page 230 Value (in °C) is ______ . Determine the duty cycle of the mark. To do this, divide mark cycle time (in seconds) by the number of seconds between successive ‘start mark’ signals. SYNRAD FH Series Flyer Operator’s Manual Version 3.4...
- Page 231 Flyer should reach, so no external cooling is required in this case. Remember that this Heat Load calcula- tion is based on “worse-case” parameters including still air temperatures—even a small amount of airflow over Flyer’s heat sink will reduce the maximum internal air temperature significantly. SYNRAD FH Series Flyer Operator’s Manual Version 3.4...
-
Page 232: Mounting An Auxiliary Cooling Fan
Before mounting a cooling fan or ductwork, refer to Figure 5-20 in the Technical Reference chapter for a diagram showing dimensions of the four user-accessible mounting holes in Flyer’s heat sink. The mounting holes are tapped for standard 6–32 UNC screws with a maximum depth of 0.25" (6.35 mm). SYNRAD FH Series Flyer Operator’s Manual Version 3.4... - Page 233 This appendix contains the following information: ■ Power measurements – describes how to measure laser output power through an FH Series Flyer marking head. SYNRAD FH Series Flyer Operator’s Manual Version 3.4...
-
Page 234: Power Measurements
Remove the Beam Enclosure Tube from between the L-bracket and the laser. Power down the FH Flyer head and then connect your computer to the marking head via USB or Ethernet. - Page 235 Repeat Steps 3 through 8 two or three times to get a good average power reading. When measuring power levels above 100 watts, give the Power Wizard time to cool between measurements. SYNRAD FH Series Flyer Operator’s Manual Version 3.4...
-
Page 236: Output Measurements
Inspect the lens for contaminants and, if required, carefully clean the lens as described in Maintenance in the Maintenance/Troubleshooting chapter. If the FH Flyer marking head is mounted in a non-standard configuration (without using the SYNRAD designed L-bracket and Mounting Rail), verify that alignment to the laser is correct. Ensure that the beam is located in the center of both input and output optics. - Page 237 Beam expansion/path length – briefly describes beam expansion characteristics of 48 Series, Evolution, and Firestar lasers and how those properties affect the beam path length and “remote” mounting of the FH Flyer marking head. Important Note: Mounting the laser and FH Series Flyer marking head in non-standard configurations...
-
Page 238: Alternate Mounting Configurations
–X direction (to your right when facing Flyer’s membrane panel). Mount FH Flyer so that your marking surface is parallel to the bottom of the focusing lens mount. Build in a Z-axis adjustment for either the marking surface or the mounting platform. -
Page 239: In-Line Mounting
Top View Side View Beam path Beam path Offset FH Marking Head/laser mounting Figure C-3 Offset mounting SYNRAD FH Series Flyer Operator’s Manual Version 3.4... -
Page 240: Beam Expansion/Path Length
2.5X expander; and Firestar v-Series and t-Series lasers (2 mm / 7 mrad) require a 5X expander. In situations where the FH Flyer marking head is mounted “remotely” on a non-standard mount, the beam path may not exceed certain distances as illustrated in Figures C-5–C-7, otherwise the laser beam will overflow the input aperture optic, potentially damaging the head. - Page 241 Evolution 100, FH Head 125 laser 2.5X Beam Expander CUSTOM EXPANDER LOCATION < 136" Max Beam Path Evolution 100, FH Head 125 laser 2.5X Beam Expander Figure C-6 Maximum Evolution beam path SYNRAD FH Series Flyer Operator’s Manual Version 3.4...
- Page 242 Firestar v-Series, FH Head t-Series laser 5X Beam CUSTOM EXPANDER LOCATION Expander < 136" Max Beam Path Firestar v-Series, FH Head t-Series laser 5X Beam Expander Figure C-7 Maximum Firestar v-Series/t-Series beam path SYNRAD FH Series Flyer Operator’s Manual Version 3.4...
- Page 243 Test Mark pushbutton, 2-2, 2-5 USB indicator, 1-17, 2-2 operating system boot up, 2-4 USB port, 1-16, 1-17, 2-2, 2-5 Test Mark power level, 2-5 User Interface connection, 2-2 power measurement, B-2 Cooling toxic exposure, 6-2 SYNRAD FH Series Flyer Operator’s Manual Version 3.4...
- Page 244 Digital Scope 4-11, 4-16, 6-15, 6-17, B-2, B-3, B-4 Ethernet security configuration, 1-23–1-24 Dimensions Flyer, 5-41 EU Directives 7 Flyer outline and mounting, 5-42 European Union (EU) Disposal 3 Declaration of Conformity, 8 SYNRAD FH Series Flyer Operator’s Manual Version 3.4...
- Page 245 6-8–6-17 General specifications. See Specifications valid file types, 3-7 web interface, 5-31 FH Flyer Filestore 1-3, 3-2, 3-3, 3-5, 3-6, Hardlock 1-19, 3-5, 3-6, 3-7, 3-8, 3-11, 3-7, 3-8, 3-9, 3-10, 3-11, 3-12, 3-13, 3-12 3-14, 3-15, 3-18, 3-19, 3-20, 3-21,...
- Page 246 Lens field size daily, 6-2 nominal/maximum, 5-4 incoming, 1-4 Lens mount removal/replacement 6-3–6-4 Instructions. See Packaging instructions draw- Lens size ings setting, 2-6, 6-13 Internal Part Trigger 4-9, 4-14, 6-15 Lens specifications 5-4 SYNRAD FH Series Flyer Operator’s Manual Version 3.4...
- Page 247 On Before Mark Session 5-38, 5-39 configuration, 1-24–1-25 protocol guidelines, 1-24–1-25 Open Network Mark File button 3-6 Modbus User Function 1-24 Operator’s Manual. see FH Flyer Operator’s Manual Motion Vector 4-4, 4-7, 4-12, 4-13, 4-21, SYNRAD FH Series Flyer Operator’s Manual Version 3.4...
- Page 248 Sensor Distance 4-7, 4-17, 4-27, 4-28 Pline Start Delay 1-20 property, 4-20–4-22 Position encoder 4-2, 4-22, 6-15 SetDigitalState 5-39 connecting, 4-10–4-12 Set Marking Order 4–27 description, 4-9 setup, 4-12–4-13 Share Name 3–15 SYNRAD FH Series Flyer Operator’s Manual Version 3.4...
- Page 249 Tracking Window 4-7, 4-8, 4-20, 4-24, Standalone Mark Log Level 3-18, 3-21 4-25, 4-26, 4-27, 4-28, 6-15 property, 3-16 definition, 4-4–4-5 Stand-alone Toolbar 3-5–3-6 Track Marking Object 4-12, 6-15 property, 4-19 Start-F1 button. See F1 function key SYNRAD FH Series Flyer Operator’s Manual Version 3.4...
- Page 250 5-23, 5-24, 5-35, 6-17 6-13 caution, 5-5 connector layout, 5-5 overview, 5-5–5-6 pin assignments, 5-6, 5-7, 5-8 Z-axis adjustment 1-2, 1-8, 2-3, 2-7, 3-17, 3-19, 3-22, 4-2, 4-13, 6-13, C-2 Velocity 4-28, 5-37 SYNRAD FH Series Flyer Operator’s Manual Version 3.4...
Need help?
Do you have a question about the FH FLYER and is the answer not in the manual?
Questions and answers