Table of Contents
Advertisement
Quick Links
Sig Mfg. Co., Inc....401-7 South Front Street....Montezuma, Iowa 50171
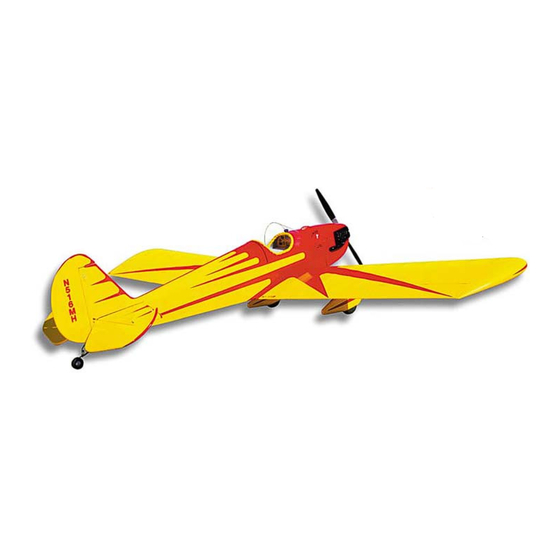
The Spacewalker Story
In the small town of Henderson, North Carolina, lives a man who has been quietly designing and selling his homebuilt designs
for several years now. His J-3 Kitten won Best New Design at the 1983 Sun-'N-Fun EAA Fly-In. He won a Grand Champion
Prize at Oshkosh in 1984 with his J-4 Sportster, and in 1985 at Oshkosh, his J-6 Karatoo won the Outstanding New Design
award. This prolific designer then decided to build himself a personal fun plane and in 1986 it flew for the first time. That airplane
was named the Spacewalker and the designer of all of these prize-winners was Jesse Anglin.
Advertisement
Table of Contents

Related Manuals for spacewalker SIGRC61

Summary of Contents for spacewalker SIGRC61
- Page 1 Prize at Oshkosh in 1984 with his J-4 Sportster, and in 1985 at Oshkosh, his J-6 Karatoo won the Outstanding New Design award. This prolific designer then decided to build himself a personal fun plane and in 1986 it flew for the first time. That airplane was named the Spacewalker and the designer of all of these prize-winners was Jesse Anglin.
- Page 2 Country Air, Inc. The classic lines of the Spacewalker remind most aviation enthusiasts of Pete Bower's Fly Baby or the Ryan trainers. One writer even thought at first glance it was a Les Long creation of the Great Depression era. This is exactly the kind of feeling that Jesse wanted to evoke with this design.
- Page 3 Interestingly, the caption reads "Skywalker," a common mistake when talking about this airplane. KITPLANES, July 1987 -The Spacewalker is featured on the cover of this issue. It is a flight shot with Jesse at the controls wearing his "color coordinated" helmet. The helmet is a feature you may want to add to your scale pilot. Shows the original windshield, new exhaust system, and no cylinder shrouds.
-
Page 4: Plastic Parts
Stick Balsa 18 3/32"x1/4"x36" Capstrips 2 3/32"x3/4"x30" Bottom Aileron 1 1/8"x1/8"x24" Top Main Spar 8 1/8"x1/4"x36" Aileron Spars, Sheeting Spacers Fill-Strips, Fabric Attach Strips 7 1/8"x3/8"x36" Top Stringers, Cable 3 1/8"x3/4"x36" Leading Edges 2 3/16"x1/4"x18" Fill-Strips 3 3/16"x3/8"x36" Tail Surface Exit Guides, Fill-Strips Diagonal Ribs 18 1/4"x1/4"x36"... - Page 5 Hardware Pack 6 2 56 x1/2" Mounting Bolts (1 2 4-40 x3/8" Mounting Bolts (for 8 4-40 x1/2" Mounting Bolts (for 8 4-40 x1" Mounting Bolts (for rudder control horn, 5 tail elevator control horn) rear wing joiner channels) front wing joiner channels) brace wires) 10 6 32 x3/4"...
- Page 6 A 2ft.x6ft. board is recommended for the Spacewalker. Cover the top surface of the building board with a piece of celotex-type wall board or foam board, into which pins can be easily pushed.
-
Page 7: Radio Requirements
Radio Requirements You will need at least a four-channel radio system for your Spacewalker to operate the ailerons, elevator, rudder and throttle. Heavy-duty servos intended for use on 1/4-scale models are required for all of the flight controls. Also, use a receiver battery with at least a 1000mA capacity to power those servos for a safe amount of time. -
Page 8: Wing Subassemblies
Wing Subassemblies Before beginning construction on the wing, there are a number of subassemblies that should be built and set aside until needed. This is done to avoid interruptions during the flow of the wing construction. 1. The main wing spars are laminated from 1/8"x3/4" spruce sticks as shown in the "Main Spar Assembly Diagram" on the plans (Plate 3). - Page 9 Epoxy together two die-cut 5/32" plywood IW-1 inner webs and use a weight to hold them flat while drying. Glue the 3/16"x1"x4" plywood landing gear block doublers to the tops of the front landing gear blocks. Wing Construction The wing is built in two halves, each consisting of an outer panel and half of the center section. After construction, the outer panels are cut free and the center section halves are joined to complete the three-piece wing.
- Page 10 a. Cut a 1/4"x1/2"x12" balsa rear spar from one of the 36" lengths provided and glue it to the top of the center section ribs. b. Glue a 1/4"x1/2"x36" balsa rear spar in position on top of the outer panel wing ribs. This spar should butt up against the center section rear spar at the wing joint, but should not be glued to it.
- Page 11 a. Accurately drill JW-l at the marks with a 3/32" drill bit and the JW-2 pieces at the marks with a 1/8" drill bit. Reinstall the joiner webs in the wing again, but do not glue. b. Bolt the aluminum wing joiner assembly in place using the hardware as indicated on the plan (Plate 3, see "Section A-A"...
- Page 12 25. Glue the 3/32"x1/4" capstrips to the tops of the wing ribs and aileron ribs as indicated on the plan. When dry, remove the wing from the building board. 26. Glue in the remaining SW-4 shear webs on the back of the main spar. BUILDER'S TIP : Now is a good time to look over your basic wing structure for any joints that may need another coat of glue.
- Page 13 32. Carefully sand the entire wing half until all joints are smooth. Use a large sanding block to avoid sanding down anyone area too much. 33. Use a deep blade razor saw (such as an X-Acto No. 236) to cut through the top and bottom main wing spars and the temporary balsa spacers at the wing joint.
- Page 14 REFER NOW TO THE FUSELAGE INSTRUCTIONS, STEP 85, BEFORE PROCEEDING. Several steps in the fuselage instructions actually involve work on the wing center section. Construction must be completed through Step 91 before continuing in this section. a. Fit the basswood rear landing gear blocks to the wing by beveling the ends to match at the center where they meet.
- Page 15 a. Glue in the 1/8"x3/8" lite-ply rib stiffeners. Don't forget the short pieces just inboard of the aileron. b. Sand down the inboard end of the wing panel bringing the spars, leading edge, and trailing edge flush with the side of the W-2 rib.
- Page 16 One of the difficulties of modeling a homebuilt aircraft is trying to keep up with all of the changes that are inevitably made by the aircraft's owner or designer. In the case of the Spacewalker, the ailerons were the primary focus of early redesign.
-
Page 17: Tail Assembly
TAIL ASSEMBLY Before beginning construction on the tail surfaces, carefully cut out all of the "5", "E", and "R" parts from the 3/8" printed balsa sheet (Sheet #3). A jig saw works best for cutting these out. Cut just outside the lines, leaving all of the lines on the parts. -
Page 18: Fin And Rudder
57. When dry, remove the elevator from the board and trim it to the correct outline. An easy way to do this is to make a tracing of one elevator half and cut it out. Place the tracing over the elevator, draw around the outline, then sand it down to the line. -
Page 19: Fuselage Construction
Before beginning work on the fuselage, you should decide what engine you plan to install. Since there are so many engines available that can be used on the Spacewalker, it was impossible to design the kit with a standard nose section. See "About the Firewall (F-1) Location"... - Page 20 a. Pin the front fuselage main frames upside-down over the fuselage top view (Plate 1). The plywood side pieces (PS-1) should be facing inward. Make certain the sides are vertical and use temporary braces (marked with a "T" in the photo) to hold them in position. b.
- Page 21 a. Construct the firewall by gluing the two 5/32" plywood F-I formers together with Sig Kwik-Set epoxy. Use a heavy weight to hold the two pieces perfectly flat while drying. b. When dry, use "Cross Section at F-I" drawing (Plate 1) to draw the vertical centerline and thrust line on the firewall.
- Page 22 tr> 79. Use scissors to remove the "Cockpit Cutout Pattern" from the plans (Plate 1). Follow the directions printed on the pattern to cut out the cockpit opening. 80. Glue the die-cut lite-ply PF pieces to the sides of the fuselage as shown on the plan.
- Page 23 Fitting The Wing To The Fuselage NOTE: The wing center section, completed through Step 38, is needed for the following steps. 85. The wing saddle area must be carved at an angle for the wing to seat properly on the fuselage. Use the plywood side pieces PS-1 and PS-2 to act as guides which should not be altered.
- Page 24 a. Tape or pin the wing to the fuselage, making sure that it is in perfect alignment. Carefully and accurately mark the position of the wing hold-down bolts on the bottom surface of the wing. Visually confirm that a hole drilled at the marks will pass through the approximate center of the wing mounting blocks.
- Page 25 The simplest, most balsa in place on each fuselage trouble-free tank set-up to use in the Spacewalker is normal suction feed side to serve as cable exit guides. with two vents, as shown in the diagram below. Both vent tubes should c.
-
Page 26: Helpful Hint
a. Trial fit the fin on top of the stab. You will have to trim the center top stringer to fit against the fin leading edge, and the fin trailing edge will need a small cutout to clear the elevator joiner. The extended tail post on the fin should be in good contact with the fuselage end. -
Page 27: Completing The Model
103. Hold the legs of the 3/16" main I.g. wires together and add the 1/8" bottom shock strut wire between them. Rebend the wires slightly, if necessary, to get all of the wires to line up properly. Cyanoacrylate adhesive can be used to hold the wires together temporarily. - Page 28 Cowling 109. a. The scribe lines molded into the cowling indicate the edges of the air intake openings. Cut out the openings with a sharp knife or a Dremel tool with a drum sander attachment. Bring the cutouts right up to the scribe lines using small sanding tools or a fine-tooth file.
-
Page 29: Radio Installation
Two pieces of 1/64"x5/8"x48" plywood are provided for optional wing straps to simulate the aluminum straps used by Maxey Hester on his fullscale Spacewalker. (Jesse Anglin did not install wing straps on the prototype airplane.) The straps may be omitted from the model, but you will probably find that they help cover-up any inaccuracies or gaps at the wing joints. - Page 30 Aileron Hookup The Spacewalker has been designed to use two aileron servos, one in each outer wing panel. Use servo extension wires with a "Y" harness at the center section to connect the servos to the receiver. Radio manufacturers generally have these items available as stock equipment or will make them on order.
- Page 31 Sand the model VERYLIGHTLY with FINE sandpaper after the second coat is dry. The next two coats will completely seal and begin to fill the weave of the fabric. When dry, sand again. Your Spacewalker is now ready to be finished with its colored paint scheme.
- Page 32 Maxey Hester solved this problem for the modelers by applying 3/16" wide black tape on his full-scale Spacewalker, so 1/16" tape is perfect for the model. Other homebuilt Spacewalkers should be appearing shortly all around the country with other paint schemes. If you are not particularly interested in scale competition, you will probably want to come up with your own design.
-
Page 33: Decal Application
Some modelers enjoy spending many hours providing their models with intricate detailing, while others spend no time at all. The cockpit area of your Spacewalker can be given as much scale detailing as you wish, however no materials (except for the plywood instrument panel) are provided in the kit. The following recommendations will add immensely to the overall impact and realism of the model without taking too much time. - Page 34 It's a fun and easy aircraft to fly, but it is not a basic trainer. Do not attempt to fly your Spacewalker unless you've logged some flight time on other low-wing aircraft.
-
Page 39: Limit Of Liability
LIMIT OF LIABILITY: In use of our products, Sig Mfg. Co.'s only obligation shall be to replace such quantity of the product proven to be defective. User shall determine the suitability of the product for his or her intended use and shall assume all risk and liability in connection therewith. - Page 40 © Copyright SIG Mfg. Co., Inc. SIG MFG. CO., INC....Montezuma, Iowa 50171-0520...
Need help?
Do you have a question about the SIGRC61 and is the answer not in the manual?
Questions and answers