Table of Contents
Advertisement
Advertisement
Table of Contents

Related Manuals for EST Centurion W

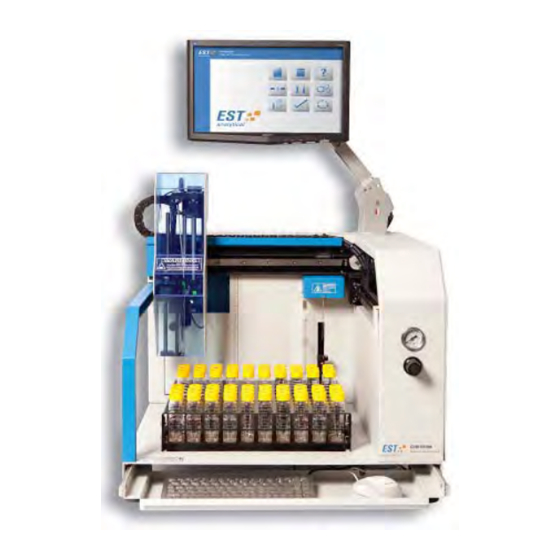
Summary of Contents for EST Centurion W
- Page 1 Centurion W and WS Manual Original Operating Instructions Rev. 7.6...
- Page 3 EST Analytical 503 Commercial Dr. Fairfield OH, 45014 USA Acknowledgements Encon® is a registered trademark of EST Analytical Tekmar® LSC2000 and Tekmar® LSC3000 are registered trademarks of Teledyne Technologies, Inc. OI®4460, 4560 and 4660 are registered trademarks of OI Analytical, Inc.
-
Page 4: Warranty
EST expressly disclaims all warranties not stated herein. In the event the product is not free from defect as warranted above, the purchaser’s sole remedy shall be provided above. Under no... - Page 5 La mention AVERTISSEMENT signale un danger. Il attire l'attention sur une procédure ou une pratique exploitation, ou le comme ça, s'il n'est pas correctement effectuée ou respectée, peut entraîner des blessures de la mort. Ne pas aller au-delà d'une mention AVERTISSEMENT...
- Page 6 Introduction …………………………………………………………Chapter 1 Product Description Design Features Product Specifications Warnings and Symbols Disposal and Recycling Information Centurion W/S Installation and Setup …………………………………………………………Chapter 2 General Information Work Space Requirements Power Requirements Unpacking the Centurion Centurion Setup/Installation 2.5.1 Connections on the Back of the Centurion 2.5.2...
- Page 7 Soil Sample Tab (OPTION) 3.11 Run Status Screen 3.12 Run Log Screen 3.13 Help Screen User Maintenance and Troubleshooting ……………………………………………………………Chapter 4 Technical Support Contact Information Cleaning the Centurion W/S Filling the Water Reservoir Diagnostics Screen 4.4.1 E-Stop 4.4.2 Flow Pathway Dropdown Menu 4.4.3...
- Page 8 ……………………………………………………………Chapter 5 Appendix A Instructions for the Water and Methanol Extraction Feature Appendix B Installation of the Centurion W or WS to an OI 4660 Concentrator Appendix C Installation of the Centurion W or WS to a Tekmar Stratum Concentrator...
- Page 9 User Manual Introduction Chapter 1...
-
Page 10: Product Description
10°C. To process a water sample, the 40ml VOA vial is placed in the tray. The Centurion W or WS robotic arm moves to the programmed vial location and the sample needle is lowered into the sample vial to a calibrated depth. -
Page 11: Design Features
Foam Sensor option on the Evolution. The Centurion W or WS works with the Evolution to rinse the sparge tube with a pre-programmed number of hot water rinses whenever a foaming sample is detected. -
Page 12: Product Specifications
Easy hook up and installation to all manufactured purge and trap systems. Hot water rinse utilizes a cartridge heater to heat blank water to 90C prior to flushing sample pathways and the purge vessel. Optional Dual concentrator mode for both water and soil matrices. ... -
Page 13: Warnings And Symbols
Les avertissements dans le manuel ou sur le Centurion à respecter lors de l'installation , le fonctionnement , le service et / ou la réparation de l'instrument . EST analytique n'assume aucune responsabilité pour les clients qui ne respectent pas les consignes de sécurité... - Page 14 See Accompanying Instructions for more Information Voir les instructions d'accompagnement pour plus d'informations Indicates an Electrical Hazard Indique un danger électrique Indicates Hot Surface Indique surface chaude Indicates a Risk of Hand Entanglement Indique un risque d'étranglement pour les mains Indicates a Sharp Point Indique une pointe acérée...
-
Page 15: Disposal And Recycling Information
Indicates Bulky/Heavy Item, Use Two Person Lift Indique objet volumineux / lourds, utilisez deux personnes ascenseur 1.5 Disposal and Recycling Information United States: This symbol indicates that your product must be disposed of properly according to local laws and regulations. When your product reaches its end of life, contact your local authorities to learn about recycling options. - Page 16 User Manual Installation and Setup Chapter 2...
-
Page 17: General Information
The system setup and installation section is intended to be as thorough as possible. If in- doubt at any point, please contact EST Analytical toll free at (800) 283-3510. If installation is not directed or performed by EST Analytical personnel, the operator must be thoroughly familiar with setup and installation sections of this manual. - Page 18 Before un-strapping the Centurion Box, visually inspect the shipping carton for any damage. Call EST Analytical at (800)283-3510 immediately if visual damage is present. Cut the strapping and lift the top box cover off the box and put aside. Lift the outer box shell off the Centurion and put aside.
- Page 19 With the help of another person tilt the Centurion on one side and remove the foam inserts. The Centurion in now ready to place on the bench. With one person on EACH side of the Centurion transfer the Centurion to the bench. NOTE: The Centurion needs to be lifted from the base of the instrument.
- Page 20 Figure 2e: Waste Line Concentrator (1)-PEEK Tubing, see Figure 2e and 2f o Super Flangeless Nut-black o Super Flangeless Ferrule-ring/PEEK ferrule o Connect to Concentrator (1) three way valve-green nut and natural ferrule. Figure 2f: Water Transfer Line Connection to Concentrator ...
- Page 21 Figure 2g: PEEK Lines from Centurion to Encon Evolution o Connect other end of the PEEK tubing (red) to the Centurion WS port labeled Concentrator (1) Purge Bulkhead using Reverse Nut PEEK and ferrule. See Figure 2h. Figure 2h: PEEK lines on the back of the Centurion...
- Page 22 o Connect PEEK tubing (blue) to Concentrator (1) glassware on the purge side using the 1/16-1/4 Union. See Figure 2g. o Connect the other end of the PEEK tubing (blue) to the Centurion WS port labeled Concentrator (1) Sparge Tube using Reverse Nut PEEK and ferrule.
- Page 23 Cold Water Input (C)-Teflon Tubing, See Figure 2j o Flangeless Nut-Green o Flangeless Ferrule-PEEK Hot Water Input (W)-Teflon Tubing, See Figure 2j o Flangeless Nut-Green o Flangeless Ferrule-PEEK 2.5.2 Water Reservoir Cap Assembly Install Nut and Ferrule on the reservoir end of the cold and hot water pickup lines.
- Page 24 Figure 2l: Water Line Frits Fill reservoir with organic free water. Install o-ring onto the smaller flange end of the reservoir plug Install the black pressure line into the cap allowing the end of the line to come through the hole and into the reservoir about 3-5mm deep or cut flush with the bottom of the cap insert.
- Page 25 Install a Tee to the end of the feed gas line and Tee in the feed gas to the Centurion W/S with the other end of the Tee going to the concentrator. NOTE: Make sure the pressure is between 60-80psi (414-552kPa).
- Page 26 2.5.6 Power Connection Plug the power cord into the Power Entry module on the back of the Centurion. See Figure 2o. WARNING: Ensure proper grounding of the Centurion system before powering the system up. AVERTISSEMENT: S'assurer de la bonne mise à la terre du système Centurion avant de mettre le système en place.
- Page 27 2.5.8 Internal Standard Reservoir Installation Rinse and fill IS reservoir(s) with methanol. Place the knurled nut(s) and teflon ferrules on the reservoir(s) and tighten the IS reservoir(s) in the respective position(s). NOTE: Tighten until finger tight and use the provided IS mount wrench to tighten the IS vessel about ¼...
- Page 28 Verify the water sample delivery time by evidence of gas flow into the sparge tube after complete water delivery. Refer to Table 2a for typical Method settings for the WS with a 5ml loop. Purge and Trap Auto-Sampler EST Centurion WS Sample Type Water Sample Loop Fill Time (sec)
- Page 29 User Manual Operation Chapter 3...
- Page 30 1. The user will control the operation of the Centurion with a mouse and keyboard. 2. <click> the Centurion icon on the desktop. 3. The EST Analytical screen will appear while the application is loading. 4. After the application has loaded the user will be prompted to log on with a password as shown in Figure 3a.
- Page 31 6. If the Centurion is a WS, the user will then be prompted: Is Gripper Clear from Soil Cup? As shown if Figure 3c. <click> Yes if the gripper is clear from the soil cup and the main screen will then be displayed. If the gripper is not clear <click> No and the user will be prompted to Please clear Gripper from Soil Cup as shown in Figure 3d.
- Page 32 Figure 3f: F/R Axis Movement Screen Gripper Movement and F/R Axis Movement: The Position count displayed is the current position of the gripper. To move the gripper, enter the desired Increments and select Jog + or Jog -. <click> Referenced to home the axis. 7.
-
Page 33: Power Off
Power Off 1. From the Main screen <click> Exit, this will close the Centurion application. 2. <click> Start from the taskbar. 3. Select Shut Down. 4. After Windows XPe has shut down it will prompt the user: It is now safe to turn ™... - Page 34 Instrument Information – Listed in the instrument information box is the instrument name, serial number and software version. This information is used when contacting EST Technical Support and generating key codes for options to the Centurion. Instrument Options – Listed in the instrument options box are the manufacturer supplied key codes to activate hardware options.
- Page 35 Figure 3i: Options Screen System Setup Tab Operation Selection: There are two options available: Remote or Local mode. Remote – When remote mode is selected the Centurion will only start the sample process when a purge ready signal is received from the concentrator.
-
Page 36: Sequence Screen
Figure 3j: Options Screen User Accounts Tab Add: This selection allows for the addition of Centurion users. Remove: This selection allows for the removal of Centurion users. Properties: This selection allows for the level of access to a specific user. The user(s) will be identified and set up by an authorized Field Service Engineer during installation. - Page 37 Figure 3k: Sequence Screen Concentrator Tab 3.9.1 Concentrator #1 (Concentrator #2) : <click> on the Concentrator #1 tab and the screen will appear as shown in Figure 3k. Line: This is the sequence line number. NOTE: The sequence always starts at line 1. Description: Description may be added by the user for information purposes only.
- Page 38 PR: Denotes that a priority sample has been added to a sequence in progress. 3.9.2 Populating the Sequence Table Start Vial: <click> Start Vial to enter the first tray position of a sample sequence. # of Vials: Enter the number of vials in the sample sequence. # of Blanks: Enter the number of Centurion system blanks to be run prior to each sample.
- Page 39 Priority: If the sequence is active and a sample(s) needs to be run as a priority, first establish the start vial and number of vials to be run as priority. Next, <click> the Priority button, shown in Figure 3o, the priority run(s) will be inserted into the sequence ahead of the next run in the sequence.
- Page 40 Dilution (Syringe Mode only): The Centurion is capable of performing dilutions. To do a dilution <click> on the sample that needs dilution and <click> on the arrow next to the dilution tab and a drop down menu will display several dilution factors.
- Page 41 3.9.3 Run Setup: <click> on the Run Setup tab and the screen will appear as shown in Figure Figure 3t: Run Setup Tab Concentrator Start Selection: In dual concentrator mode select Concentrator #1 or Concentrator #2 to begin the sequence. Error Setup Stop On No Vial: Select Stop On No Vial and the Centurion will stop if no sample vial is detected in the sample tray.
-
Page 42: Method Screen
Correct Entire Sample Table (Dual Mode): Select Correct Entire Sample Table. In dual concentrator mode if the Centurion does not receive a purge ready signal from one of the concentrators, the autosampler will adjust the sequence to run the remaining sequences for both concentrators on the active concentrator. NOTE: All corrected samples will be analyzed using the active concentrator’s method. - Page 43 Figure 3u: Loop General Setup Screen Figure 3v: Syringe General Setup Screen...
- Page 44 3.10.1 General Setup: <click> on the General Setup tab and the screen will appear as shown in Figures 3u and 3v. Loop General Setup (Figure 3u): Sample Type: Select from Blank, Soil or Water by <clicking> through the field. CAUTION: Soil vials may be hot. Use protective gloves when removing soil vials from the sampling station.
- Page 45 Number of Foam Rinse Cycles: Enter the number of additional sparge tube rinse cycles when a foaming sample is detected. NOTE: Operational with EST Encon Evolution concentrator only. Concentrator #1 Cycle Time (min): time of the total P&T cycle for Concentrator #1.
- Page 46 Figure 3w: Method Setup Internal Standards Screen Concentrator # 1: <click> through the volume field to select the desired internal standard vessel and addition volume in µl. Concentrator # 2: <click> through the volume field to select the desired internal standard vessel and addition volume in µl.
- Page 47 Figure 3x: Method Setup Soil Sample Screen Blank Water Volume (ml): Select On, enter the amount of water to be added to the soil sample vial. Choose from 5, 10, 15 or 20ml addition by <clicking> through the field. The water is added in 5mL increments with internal standard being added on the last 5ml addition of water.
- Page 48 Initial Hold Time (min) – This is the time in minutes the initial temperature is maintained. The initial hold time can be programmed from 0.0 to 999.9 minutes. Ramp Rate (°C/min) – This is the rate programmed in °C/min the sample preheat temperature will increase after the initial hold time has expired to the desired final temperature set point.
- Page 49 Purge Time (min): Enter the time the sample will purge. NOTE: The Centurion WS purge time must equal the concentrator purge time. Purge Temperature (°C): Enter the temperature the sample will heat during purge. CAUTION: Do not exceed the boiling point of water or the sample matrix.
- Page 50 NOTE: During this time there will be no flow out of the concentrator vent, bake flow is out through the soil needle sample pathway. NOTE: The Minimizer is an option only available with the EST Encon Evolution Purge and Trap Concentrator.
-
Page 51: Run Status Screen
Open a Saved Method: <click> the Open icon and all previously saved Methods are available to be loaded. 3.11 Run Status Screen The Run Status screen contains all of the information needed to monitor the Centurion during the sample process and contains the tabs necessary to apply the Start, Stop and Hold functions. - Page 52 Figure 3bb: Clear Run Log Popup Figure 3cc: Save Run Log Popup Figure 3dd: Start Sequence Popup Once the sequence is started, a Start Delay Screen will popup. See Figure 3ee. Here, the user is able to either start the sequence immediately by clicking start or add a start delay in half hour increments, then clicking start.
- Page 53 Hold: <click> the Hold button and the Centurion will remain in its current function. A popup will appear as shown in Figure 3ff and prompt the user to activate Hold <click> Yes or No. If Yes is selected the time in hold will be displayed as shown in Figure 3gg. To resume the sequence <click>...
- Page 54 Figure 3ii: Abort Sequence Popup 3.12 Run Log The Run Log is a routinely updated listing of the Centurion functions performed during a sample sequence. <click> on the Run Log screen icon. The Run Log screen will appear as shown in Figure 3jj. Prior to starting a sample sequence a popup will appear as previously shown in Figures 3bb, 3cc and 3dd with the choice to clear or save the run log.
-
Page 55: Help Screen
Saving the Run Log: <click> the Save icon. The Run Log can be saved. Opening a saved Run Log: <click> the Open icon. All previously saved Run Logs are available. 3.13 Help Screen <click> the Help icon and the Help screen will appear as shown in Figure 3kk. The Help screen provides the ability to view help files that are stored locally on the Centurion application. - Page 56 User Manual Maintenance and Troubleshooting Chapter 4...
-
Page 57: Technical Support
The purpose of this Chapter is to familiarize the user with the various integrated diagnostic functions. The Centurion W and W/S will require minimal maintenance or use of consumable items such as tubing, ferrules and valves. The interval at which maintenance is required depends on autosampler use and sample type. -
Page 58: Filling The Water Reservoir
Cleaning the Centurion WS 1. Wipe the outside of the Centurion W or WS with a clean, damp, lint-free cloth. Cloth should be dampened with water only. Avoid any cleaning agents that could cause a hazard as a result of a reaction with parts of the equipment of with the material contained in it. - Page 59 Figure 4a: Diagnostics Screen 4.4.1 E-Stop (Emergency Stop) : <click> on E-Stop and all Centurion movements will immediately stop, it will also abort an active sequence, see Figure 4b. To enable movement of the Centurion all axes must be homed from the Main screen Home icon. NOTE: This function is for emergencies ONLY.
- Page 60 4.4.2 Flow Pathway Dropdown Menu: Located in the upper right hand corner of the Diagnostics Screen there is a Flow Pathway Dropdown menu, as shown in Figure 4c. <click> on the selected flow pathway and the chosen pathway will appear on the screen. Figure 4c: Flow Pathway Drop Down Menu 4.4.3 Icons Concentrator Icons - <click>...
- Page 61 Figure 4d: Concentrator Status Screen 4.4.4 Vial Position The water needle (vial) position can be moved manually. <click> the control box above the Vial Position icon and the Move To Water Position control box will appear as shown in Figure 4e. Use the up and down arrows to adjust to the desired position and click GOTO, the needle will then move to the selected position.
- Page 62 4.4.5 Manual Heater Control The heated zones which consist of the Soil Transfer lines both 1 and 2, Soil Needle, Soil Vial, Rinse Water and Chiller (option) may be manually heated to a specific set point temperature. <click> the temperature control box located next to the respective icon for any given heated zone and the manual temperature control will appear as shown in Figure NOTE: The system continuously monitors for over temperature conditions and will provide a pop-up screen to alert of any over temperature problems.
- Page 63 Figure 4h: F/R Axis Manual Control F/R Axis Movement: The Position count displayed is the current F/R axis position. To change the current F/R axis position, enter the desired Increments and select Jog + or Jog -, an increment of 100 is equal to 1/16”. <click> Referenced to home the axis.
-
Page 64: Manual Functions
Soil Cup Axis Movement: First, use the Move To Soil Cup Position that is being addressed. Next, the Position count displayed is the current Soil Cup axis position. To change the current Soil Cup axis position, enter the desired Increments and select Jog + or Jog -, an increment of 100 is equal to 1/16”. - Page 65 Figure 4l: Water Needle Rinse Menu Figure 4m: Sparge Tube Rinse Menu Figure 4n: Start Syringe Rinse Menu 4.5.2 Drain Sparge Tube: <click> the Drain Sparge Tube tab and the popup will appear as shown in Figure 4o. Select the appropriate concentrator and <click> OK to drain.
- Page 66 Figure 4o: Drain Sparge Tube Tab Menu 4.5.3 Internal Standards: <click> the Internal Standards tab and the popup will appear as shown in Figure 4p. Figure 4p: Internal Standards tab Menu Prime: To prime the internal standards vessels <click> the Prime tab and a popup will appear as shown in Figure 4q.
- Page 67 Front Park: <click> the Front Park tab to front park the gripper. Rear Park: <click> the Rear Park tab to rear park the gripper. 4.5.4 Sweep Soil Needle: <click> the Sweep Soil Needle tab and the popup will appear as shown in Figure 4r.
- Page 68 4.5.6 Syringe Maintenance: <click> Syringe Maintenance and the screen will appear as shown in Figure 4t. <click> No and the window will close, <click> Yes and the gripper will move toward the front of the instrument and the syringe plunger will move down to the bottom of the syringe assembly.
- Page 69 Figure 4u: Remove Syringe Assembly screen Figure 4w: Image of the three lines to remove from the Syringe Assembly...
- Page 70 Figure 4x: Image of the removed Assembly After selecting “OK” when the syringe assembly is removed, the plunger on the assembly will rise up to approximately the half-way point, see Figure 4y and a screen will appear as shown in Figure 4z. Unscrew the plunger and replace it with a new one. (Part Number: M0160M0010).
- Page 71 Figure 4z: Remove and replace syringe plunger screen When the plunger has been replaced, <click> OK and the syringe plunger will lower down in order for the syringe assembly to be re-installed, see Figure 4x. Next, a screen will appear as shown in Figure 4aa. Re-install the syringe assembly, water lines and Allen screws and <click>...
- Page 72 Figure 4cc: Calibration button 2. <click> Motor Calibration, then <click> Calibration, finally <click> Auto Calibration, see Figure 4dd. Figure 4dd: Motor Calibration Tab Menu 3. Start Auto-Calibration, see Figure 4ee. Figure 4ee: Begin Auto Calibration screen 4. <click> Yes to begin the Auto Calibration routine and <click> No to exit the Auto Calibration routine.
- Page 73 Figure 4gg: Calibration Block 7. Place vials in locations 1, 10, and 91 and the calibration block in the wash station. <click> OK in order to begin calibration motion. See Figure 4ff. 8. The system will go to the wash station for calibration first. The needle will move over the calibration block and using the fiber optic sensor, the system will measure for the center of the calibration block.
- Page 74 Figure 4ii: Wash Station Calibration Screen 10. The Left/Right (L/R), Front/Rear (F/R) or Up/Down arrows are to the left of the screen. One click of the L/R or F/R arrow will move the needle 20 steps in the corresponding direction. While clicking the Down arrow will move 100 steps and the Up arrow will move 20 steps.
- Page 75 were in step 10. See Figure 4kk. When the needle is calibrated to the Vial 1 position, <click> Update Calibration. Figure 4kk: Vial 1 Calibration Screen 16. After the Vial 1 position is updated, the calibration routine will take you to vial position 10 for calibration.
- Page 76 Figure 4mm: Vial 10 Calibration Screen 18. The F/R axis is the only axis that needs adjustment for the Vial 10 position. (Note: If there are adjustments made to the L/R axis, they will not be saved.) If this axis needs adjustment refer to step 10.
- Page 77 10. When the position is calibrated, <click> Update Calibration. 22. This concludes the water axis calibration. If you have a Centurion W, the calibration routine will conclude at this point. If you have a Centurion WS, the soil axis also needs to be calibrated, proceed to 23.
- Page 78 Figure 4qq: Vial 1/Tray Position Calibration Screen 25. Make note of the tray spacing around the vial. The goal is to have even spacing around the vial in the tray by using the L/R and F/R buttons on the calibration screen. See step 10 for axis adjustments.
- Page 79 Figure 4ss: Gripper Axis Pop-up 28. <click> OK and the Gripper axis can be calibrated. See Figure 4qq. 29. Adjust the vertical height of the gripper so that there is at least a 1 to 2mm space between the top of the vial and the top of the gripper. Refer to step 10. 30.
- Page 80 Figure 4vv: Clearance Position Pop-up 33. <click> OK and the clearance position can be calibrated. See Figure 4ww. Figure 4ww: Clearance Position Calibration Screen 34. The only axis that needs adjustment here is the Up/Down axis. Refer to step 10. 35.
- Page 81 Figure 4xx: Image of Vial Clearance to Soil Cup 36. After the clearance position has been calibrated, the software will prompt you to calibrate the soil station position. See Figure 4yy. Figure 4yy: Soil Station Vial Position Pop-up 37. <click> OK, and the soil station position can be calibrated. See Figure 4zz.
- Page 82 Figure 4zz: Soil Station Vial Position Calibration Screen 38. Use this step to calibrate the L/R and F/R values in order to center the vial in the soil cup. Refer to step 10. The vial should be centered in the cup for this calibration. See Figure 4ab.
- Page 83 Figure 4ac: Gripper Axis in Soil Station Pop-up 41. <click> OK and the Gripper Axis can be calibrated, see Figure 4zz. 42. This step is used to calibrate the vertical height of the gripper axis in the soil cup. Adjust the vertical height so that the vial is loose in the gripper. Refer to step 10. See Figure 4ad for image of Gripper Axis at the soil station.
- Page 84 Figure 4ae: Auto Calibration Complete Screen 4.6.2 Manual Calibration 1. From diagnostic screen, <click> on the Calibration button, see Figure 4af. Figure 4af: Calibration button 2. <click> Motor Calibration, then <click> Calibration, finally <click> Manual Calibration, see Figure 4ag. Figure 4ag: Motor Calibration Tab Menu 3.
- Page 85 4. The next screen is the Manual Calibration screen. < Click> the position arrow at the top of the screen and choose the position that needs calibration. See Figure 4ai. 5. Next, <click> the position arrows in order to adjust the positions that need calibration. The Left/Right (L/R), Front/Rear (F/R) or Up/Down arrows are to the left of the screen.
- Page 86 4. In order to calibrate the syringe position, <click> Calibrate and the manual position screen will popup. See Figure 4ak. The position numbers in Figure 4ak represent the default position numbers set at EST Analytical. These numbers are the recommended settings. In this manual check, <click> Perform Position Check and the instrument will move the syringe plunger down to the 26mL mark and back up to the 0mL mark on the syringe and set the Position Check setting.
- Page 87 4.6.4 Heater Calibration: <click> Heater Calibration and a popup will be displayed as shown in Figure 4al. NOTE: This is Service ONLY Access. The PID settings should NEVER be changed unless advised by EST Analytical Technical Support. Figure 4al: Heater Calibration Menu 4.6.5 Digital Input / Output - <click>...
- Page 88 2. Analyze the sample by running a water sample on the Centurion with no internal standard added to the sample. 3. Analyze a Centurion blank that has been spiked with 1µl of internal standard through the internal standard addition of the Centurion. See Figure 4ap. 4.
- Page 89 Figure 4ap: Internal Standards Volume (µl) Addition Menu Figure 4aq: Internal Standards Time (ms) Adjustment Menu Internal Standard Manual Prime: <click> Internal Standards and a popup will appear as in Figure 4an. Next, <click> Manual Operation and a popup will appear as shown in Figure 4ar.
- Page 90 Figure 4ar: Internal Standard Manual Operation Menu 4.6.7 Stirrer Calibration: <click> Stirrer and a popup will appear as shown in ` Figure 4as. Figure 4as: Stirrer Calibration Menu Use the up and down arrows to change the stirrer control to High, Medium or Low. Use the keyboard to manually enter your stirrer speed from 1 to 100.
- Page 91 CAUTION: Oven cover from sampling station is hot. Power off instrument and allow system to cool before proceeding with sample station needle replacement. ATTENTION: Couverture Four de la station d'échantillonnage est chaud. Éteignez l'instrument et permettre au système de refroidir avant de procéder au remplacement de l'aiguille de la station d'échantillonnage.
- Page 92 3. Remove Valco short nut from the side of the sampling needle using a 1/4 inch wrench. See Figure 4ao. 4. Remove the two 6-32 x 1/4 inch screws holding down the needle bracket using a 7/64 inch allen wrench. See Figure 4ap. Figure 4ap: Needle Bracket Screws 5.
- Page 93 Figure 4aq: Water Needle with Socket Head Screw 2. After the needle is removed from the block, remove both tubing lines by backing out green nut with Teflon ferrules from the side and top of the needle. See Figure 4ar. Figure 4ar: Needle with Tubing Lines 3.
-
Page 94: Fuse Replacement
4.10 Fuse Replacement All of the printed circuit boards in the Centurion have fuses. If any of the fuses need replacement, power down the Centurion, remove the side panel, and replace the fuse. PWMTC Board EST Part Numbers: Z1838FP007 and Z1838FP008 Fuse Number Description/Type F1 2A 250V SLO BLO TR5 TYPE F2‐F13, F17 6.3A 250V SLO BLO TR5 TYPE ... - Page 95 User Manual Flow Diagrams Chapter 5...
- Page 96 Figure 5.1: Centurion W Standby/Ready...
- Page 97 Figure 5.2: Centurion W Sample Fill...
- Page 98 Figure 5.3: Centurion W Blank Loop Fill...
- Page 99 Figure 5.4: Centurion W Loop Equilibration Concentrator 1...
- Page 100 Figure 5.5: Centurion W Loop Equilibration Concentrator 2...
- Page 101 Figure 5.6: Centurion W IS Addition Concentrator 1...
- Page 102 Figure 5.7: Centurion W IS Addition Concentrator 2...
- Page 103 Figure 5.8: Centurion W Sample Loop Transfer Concentrator 1...
- Page 104 Figure 5.9: Centurion W Sample Loop Transfer Concentrator 2...
- Page 105 Figure 5.10: Centurion W Sample Needle Rinse...
- Page 106 Figure 5.11: Centurion W Sample Needle Sweep...
- Page 107 Figure 5.12: Centurion W Sample Loop Rinse...
- Page 108 Figure 5.13: Centurion W Sample Loop Sweep...
- Page 109 Figure 5.14: Centurion W Sample Drain Concentrator 1...
- Page 110 Figure 5.15: Centurion W Sample Drain Concentrator 2...
- Page 111 Figure 5.16: Centurion W Syringe Standby/Ready...
- Page 112 Figure 5.17: Centurion W Syringe Pre-Prime...
- Page 113 Figure 5.18: Centurion W Syringe Sample Fill...
- Page 114 Figure 5.19: Centurion W Syringe Blank Fill...
- Page 115 Figure 5.20: Centurion W Syringe Blank Loop Fill...
- Page 116 Figure 5.21: Centurion W Syringe Sample Transfer Concentrator 1...
- Page 117 Figure 5.22: Centurion W Syringe Sample Transfer Concentrator 2...
- Page 118 Figure 5.23: Centurion W Syringe Loop Equilibration Concentrator 1...
- Page 119 Figure 5.24: Centurion W Syringe Loop Equilibration Concentrator 2...
- Page 120 Figure 5.25: Centurion W Syringe IS Addition Concentrator 1...
- Page 121 Figure 5.26: Centurion W Syringe IS Addition Concentrator 2...
- Page 122 Figure 5.27: Centurion W Syringe Sample Loop Transfer Concentrator 1...
- Page 123 Figure 5.28: Centurion W Syringe Sample Loop Transfer Concentrator 2...
- Page 124 Figure 5.29: Centurion W Syringe Rinse...
- Page 125 Figure 5.30: Centurion W Syringe Needle Rinse...
- Page 126 Figure 5.31: Centurion W Syringe Sweep...
- Page 127 Figure 5.32: Centurion W Syringe Sample Needle Sweep...
- Page 128 Figure 5.33: Centurion W Syringe Sample Loop Rinse...
- Page 129 Figure 5.34: Centurion W Syringe Sample Loop Sweep...
- Page 130 Figure 5.35: Centurion W Syringe Concentrator 1 Sample Drain...
- Page 131 Figure 5.36: Centurion W Syringe Concentrator 2 Sample Drain...
- Page 132 Figure 5.37: Centurion WS Standby/Ready...
- Page 133 Figure 5.38: Centurion WS Sample Fill...
- Page 134 Figure 5.39: Centurion WS Blank Loop Fill...
- Page 135 Figure 5.40: Centurion WS Loop Equilibration Concentrator 1...
- Page 136 Figure 5.41: Centurion WS Loop Equilibration Concentrator 2...
- Page 137 Figure 5.42: Centurion WS IS Addition Concentrator 1...
- Page 138 Figure 5.43: Centurion WS IS Addition Concentrator 2...
- Page 139 Figure 5.44: Centurion WS Sample Loop Transfer Concentrator 1...
- Page 140 Figure 5.45: Centurion WS Sample Loop Transfer Concentrator 2...
- Page 141 Figure 5.46: Centurion WS Sample Needle Rinse...
- Page 142 Figure 5.47: Centurion WS Sample Needle Sweep...
- Page 143 Figure 5.48: Centurion WS Sample Loop Rinse...
- Page 144 Figure 5.49: Centurion WS Sample Loop Sweep...
- Page 145 Figure 5.50: Centurion WS Sample Drain Concentrator 1...
- Page 146 Figure 5.51: Centurion WS Sample Drain Concentrator 2...
- Page 147 Figure 5.52: Centurion WS Back Flush Soil Needle...
- Page 148 Figure 5.53: Centurion WS Loop Equilibration Soil Concentrator 1...
- Page 149 Figure 5.54: Centurion WS Loop Equilibration Soil Concentrator 2...
- Page 150 Figure 5.55: Centurion WS IS Addition Soil Concentrator 1...
- Page 151 Figure 5.56: Centurion WS IS Addition Soil Concentrator 2...
- Page 152 Figure 5.57: Centurion WS Loop Transfer Soil Concentrator 1...
- Page 153 Figure 5.58: Centurion WS Loop Transfer Soil Concentrator 2...
- Page 154 Figure 5.59: Centurion WS Soil Purge Concentrator 1...
- Page 155 Figure 5.60: Centurion WS Soil Purge Concentrator 2...
- Page 156 Figure 5.61: Centurion WS Soil Bake Minimizer Concentrator 1...
- Page 157 Figure 5.62: Centurion WS Soil Bake Minimizer Concentrator 2...
- Page 158 Figure 5.63: Centurion WS Syringe Standby/Ready...
- Page 159 Figure 5.64: Centurion WS Syringe Pre-Prime...
- Page 160 Figure 5.65: Centurion WS Syringe Sample Fill...
- Page 161 Figure 5.66: Centurion WS Syringe Sample Transfer Concentrator 1...
- Page 162 Figure 5.67: Centurion WS Syringe Sample Transfer Concentrator 2...
- Page 163 Figure 5.68: Centurion WS Syringe Loop Equilibration Concentrator 1...
- Page 164 Figure 5.69: Centurion WS Syringe Loop Equilibration Concentrator 2...
- Page 165 Figure 5.70: Centurion WS Syringe IS Addition Concentrator 1...
- Page 166 Figure 5.71: Centurion WS Syringe IS Addition Concentrator 2...
- Page 167 Figure 5.72: Centurion WS Syringe Sample Loop Transfer Concentrator 1...
- Page 168 Figure 5.73: Centurion WS Syringe Sample Loop Transfer Concentrator 2...
- Page 169 Figure 5.74: Centurion WS Syringe Rinse...
- Page 170 Figure 5.75: Centurion WS Syringe Needle Rinse...
- Page 171 Figure 5.76: Centurion WS Syringe Sweep...
- Page 172 Figure 5.77: Centurion WS Syringe Sample Needle Sweep...
- Page 173 Figure 5.78: Centurion WS Syringe Sample Loop Rinse...
- Page 174 Figure 5.79: Centurion WS Syringe Sample Loop Sweep...
- Page 175 Figure 5.80: Centurion WS Syringe Sample Drain Concentrator 1...
- Page 176 Figure 5.81: Centurion WS Syringe Sample Drain Concentrator 2...
- Page 177 Figure 5.82: Centurion WS Syringe Back-flush Soil Needle...
- Page 178 Figure 5.83: Centurion WS Syringe Blank Fill...
- Page 179 Figure 5.84: Centurion WS Syringe Blank Loop Fill...
- Page 180 Figure 5.85: Centurion WS Syringe Transfer Soil Concentrator 1...
- Page 181 Figure 5.86: Centurion WS Syringe Transfer Soil Concentrator 2...
- Page 182 Figure 5.87: Centurion WS Syringe Loop Equilibration Soil Concentrator 1...
- Page 183 Figure 5.88: Centurion WS Syringe Loop Equilibration Soil Concentrator 2...
- Page 184 Figure 5.89: Centurion WS Syringe IS Addition Soil Concentrator 1...
- Page 185 Figure 5.90: Centurion WS Syringe IS Addition Soil Concentrator 2...
- Page 186 Figure 5.91: Centurion WS Syringe Loop Transfer Soil Concentrator 1...
- Page 187 Figure 5.92: Centurion WS Syringe Loop Transfer Soil Concentrator 2...
- Page 188 Figure 5.93: Centurion WS Syringe Soil Purge Concentrator 1...
- Page 189 Figure 5.94: Centurion WS Syringe Soil Purge Concentrator 2...
- Page 190 Figure 5.95: Centurion WS Syringe Soil Bake Concentrator 1...
- Page 191 Figure 5.96: Centurion WS Syringe Soil Bake Concentrator 2...
-
Page 192: Appendix A-- Instructions For The Water And Methanol Extraction Feature (Syringe Option Only)
Appendix A-- Instructions for the Water and Methanol Extraction Feature (Syringe Option Only) Water/Soil Prep Mode The Centurion is capable of running a water sample in soil mode. To perform a water “extraction” follow the instructions below. 1. Write the water/soil preparation sample method. <click> on the Methods Screen tab on the left hand side of the Centurion software screen. - Page 193 Figure A2: Water/Soil Prep Mode Soil Sample Parameters 4. Save the sample method. 5. Set up the samples. NOTE: Samples need to be placed in positions 51 through 100, and empty vials need to be placed in positions 1 through 50. The sample in position 51 will be transferred to the empty vial in position 1, 52 would transfer to vial 2, etc…...
- Page 194 Figure A3: Sequence Table Example 10. The sample sequence is complete. The sequence can now be started. Methanol Extraction Sample Preparation Mode: The Centurion is capable of automatically pulling methanol extracts out of a sample vial and performing a 50x dilution. To do methanol extract samples, follow the instructions below. 1.
- Page 195 Figure A4: Motor Calibration Tabs 4. A pop-up screen will ask Home axes? Yes or No. See Figure A5. <click> Yes Figure A5: Home axes? Pop-up Screen 5. Next the Manual Calibration Screen will display. <click> the position arrow at the top of the calibration screen and set the position to Water Pos –...
- Page 196 Figure A6: Manual Calibration Screen 7. The Calibrate Extraction Depth Screen will display. <click> the position depth to be calibrated. Next, <click> on the up or down arrow. Once the depth required has been established, <click> Update Calibration to save the position. See Figure A7. Figure A7: Calibration Extraction Depth Screen 8.
- Page 197 10. After the calibration depths are set, methanol extract samples can be run in water or soil mode. 11. To run a methanol extract sample in Soil mode, write a Soil method as instructed for Water/Soil prep, set up the samples as directed in the Water/Soil prep portion of this appendix.
-
Page 198: Appendix B--Installation Of A Centurion Ws To An Oi4660 Concentrator
Appendix B--Installation of a Centurion WS to an OI4660 Concentrator 1. Unpack the Centurion as instructed in Chapter 2 of this manual. 2. Install all the lines and communication cables to the Centurion as Instructed in Chapter 2. 3. Set up the water reservoir as instructed in Chapter 2. 4. - Page 199 6. Plug the Centurion Communication cable into the back of the Centurion, see Chapter 2 of manual. Picture of Communication Cable below. 7. Wire the Centurion Communication cable to the OI4660. From Top to bottom, pins 1 through 8. See Picture below. ...
- Page 200 8. Plug in the vent cut-off valve power cable from the communication cable into the valve. Next, remove the barbed fitting from the bake bulkhead and connect the jumper line from the vent cut-off valve to the bake vent on the front of the concentrator. See image below. 9.
-
Page 201: Appendix C--Installation Of A Centurion Ws To An Stratum Concentrator
Appendix C--Installation of a Centurion WS to an Stratum Concentrator 1. Unpack the Centurion as instructed in Chapter 2 of this manual. 2. Install all the lines and communication cables to the Centurion as Instructed in Chapter 2. 3. Set up the water reservoir as instructed in Chapter 2. 4. - Page 202 6. Connect the heated soil transfer line to the four way tee. Feed the transfer line over top of the stratum transfer line to the GC. See picture below. 7. Connect the Drain/Vent cutoff valve to the end of the drain line of the stratum. The drain line from the Stratum should connect to the common port.
- Page 203 9. Plug the Centurion Communication cable into the back of the Centurion and the back of the Stratum. See picture below. 10. Most of Tekmar’s recommended Stratum method settings are appropriate. However the recommended flows for desorb and bake are too high and will make draining and rinsing the sparge tube difficult.
-
Page 204: Appendix D--Installation Of A Centurion Ws To A Tekmar 3100/3000 Concentrator
Appendix D--Installation of a Centurion WS to a Tekmar 3100/3000 Concentrator 1. Unpack the Centurion as instructed in Chapter 2 of this manual. 2. Install all the lines and communication cables to the Centurion as Instructed in Chapter 2. 3. Set up the water reservoir as instructed in Chapter 2. 4. - Page 205 5. Attach the swagelok nut on the line from the vent cutoff valve to the vent bulkhead on the 3000/3100 concentrator, refer to figure below. 6. Plug the Centurion Communication cable into the back of the Centurion, see Chapter 2 of manual.
Need help?
Do you have a question about the Centurion W and is the answer not in the manual?
Questions and answers