Table of Contents
Advertisement
Quick Links
- 1 Specifications
- 2 Charger Controls & Connections
- 3 Determining Battery Type & Specifications
- 4 Care & Handling of Li-Po & Li-Ion Batteries
- 5 DC Input Power
- 6 Setting a Battery into Memory - Selecting a Memory
- 7 Selecting & Starting Charge, Discharge or Cycle
- 8 Error Messages & Troubleshooting Guide
- Download this manual
™
Programmable Charger, Discharger and
Analyzer for R/C Cars, Trucks & Boats
INSTRUCTION MANUAL
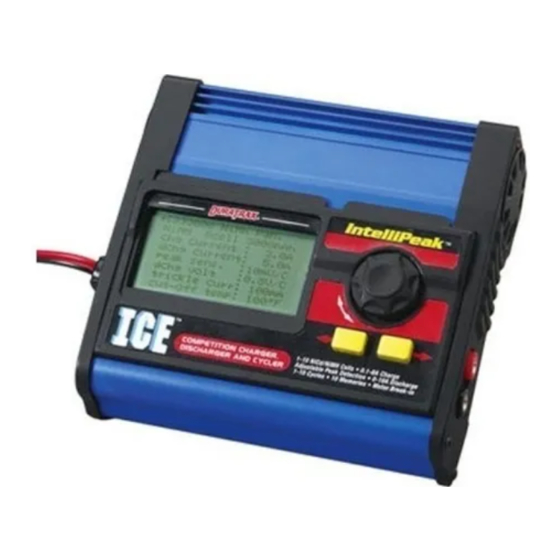
IntelliPeak
™
Ice
™
is a high performance computerized battery charger, discharger, and
cycler. IntelliPeak Ice is flexible enough to handle NiCd, NiMH, Li-Po and Li-Ion batteries,
and offers a large variety of adjustable functions, yet is very easy to program and
understand its numerous display screens. Quick reference flowcharts are included to
help understand the overall programming structure of IntelliPeak Ice. It is strongly
recommended to read this manual in its entirety, and to fully understand exactly
what types of batteries you have and how to care for them. Damage resulting from
misuse or modification of this charger will void your warranty.
INDEX
Specifications ................................................................................................2
Special Features............................................................................................2
Important Precautions ..................................................................................3
Charger Controls & Connections ................................................................4
Determining Battery Type & Specifications................................................5
Care & Handling of NiMH Batteries ............................................................6
Care & Handling of Li-Po & Li-Ion Batteries ..............................................6
DC Input Power..............................................................................................7
Navigating Menus..........................................................................................8
Setting a Battery into Memory - Selecting a Memory ..............................9
Selecting & Naming Battery Memories ....................................................10
Adjusting Settings in the Main Memory Screen ......................................10
Selecting & Starting Charge, Discharge or Cycle....................................16
Charge & Discharge Status Screens & Graphs ......................................22
Motor Break-In Menu ..................................................................................24
User Set-Up Menu ......................................................................................25
Data View......................................................................................................26
Cycle Displays ............................................................................................29
Four-Step Charge Setup ............................................................................30
Error Messages & Troubleshooting Guide................................................36
Made in Korea Entire Contents Copyright © 2004
DTXZ4170 for DTXP4170 V:1.0
Advertisement
Table of Contents

Summary of Contents for IntelliPeak Ice
-
Page 1: Table Of Contents
™ is a high performance computerized battery charger, discharger, and cycler. IntelliPeak Ice is flexible enough to handle NiCd, NiMH, Li-Po and Li-Ion batteries, and offers a large variety of adjustable functions, yet is very easy to program and understand its numerous display screens. Quick reference flowcharts are included to help understand the overall programming structure of IntelliPeak Ice. -
Page 2: Specifications
SPECIFICATIONS Input Voltage: 11-15V DC Battery Types, # of cells: 1-10 Nickel-Cadmium cells (1.2 - 12.0V NiCd) 1-10 Nickel-Metal Hydride cells (1.2 - 12.0V NiMH) 1-4 Lithium-Ion or Lithium-Polymer cells (3.6 - 14.8V Li-Ion/Li-Po) Battery Capacity Range: 100-9900mAh Fast charge current: 0.1 - 8.0A (1C max for Li-Ion/Li-Po) Fast charge methods: linear, reflex, impulse and 4-step... -
Page 3: Important Precautions
• Custom display graphs charge and discharge voltage curves – great for evaluating pack performance! • Motor break-in feature, adjustable from 1.0-8.0V, 1-180 minutes, and 10A constant (30A surge) for break-in of motors or operating commutation lathes • Adjustable sound cues, LCD contrast, fan operation, temperature scale and more •... -
Page 4: Charger Controls & Connections
Two adapter leads are included, one having alligator clips for connecting racing cells to Ice, and another having a standard battery connector for connecting pre-assembled packs. For transmitters, find a charge lead that best matches the type of radio that you are charging (see below). -
Page 5: Determining Battery Type & Specifications
HCAP0105 JR Tx and Rx charge leads HCAP0106 Hitec Tx and Rx charge leads HCAP0108 Charge leads, banana plugs to alligator clips HCAP0110 9V-style Tx connector, Futaba-J Rx charge lead HCAP0310 Banana Plugs (3 pair) HCAP0320 Heavy Duty Banana Plugs (2 pair) Always connect the charge lead to the charger first, then the battery to the charge lead. -
Page 6: Care & Handling Of Nimh Batteries
Do not to allow NiMH batteries to overheat! If overheated, disconnect the battery from the charger immediately and allow to cool. • Do not attempt to use Ice’s Li-Po/Li-Ion functions with NiMH batteries. • NiMH cells do not exhibit the “memory effect” like NiCd cells, so little cycling is needed. -
Page 7: Dc Input Power
There are two ways to connect the charger to 12V DC input power: 1. Connect the banana plugs on Ice’s input cord directly to banana jacks on a separate DC power supply. Always connect the charger’s red lead to the power source’s red, positive (+) terminal and the charger’s black lead to the... -
Page 8: Navigating Menus
NAVIGATING THE MENUS IntelliPeak Ice has 6 programming screens. Refer to the Main Programming Menu flowchart included with this manual for an overall view of Ice’s programming. The most commonly used screen is the “Main Memory” screen shown at the far left on the flowchart. To move to any menu to the right of the Main Memory screen (such as the Motor Break-in or Cycle Data menu, etc.) -
Page 9: Setting A Battery Into Memory - Selecting A Memory
Also on this sheet find a large printout of a blank memory chart. Use the blank chart to record your own personal memory settings. It is not required to use any of Ice’s memories. In such case, the Main Memory screen #0 acts as the main setup screen for manually changing the battery, charge, discharge, or cycle settings. -
Page 10: Selecting & Naming Battery Memories
Press the dial to highlight the adjustable value. Rotate the dial to adjust the highlighted value. Re-press the dial to confirm the selection. Ice will automatically store parameters into memory one second after being entered. There is no need to... - Page 11 1. Battery Info: Move the cursor next to the first line under the memory name. a. Press the dial to highlight the battery type. Rotate the dial to find the desired battery type that exactly matches your battery (NiCd, NiMH, Li- Ion or Li-Po).
- Page 12 For NiCd batteries the range is 5-25mV. For NiMH batteries the range is 3-15mV. A “ZEROpk” – or “Zero Volt Delta Peak” setting is also available for NiMHs which means Ice will try to detect the exact voltage peak, but the battery’s condition must be good and charge currents and voltages must be very clean and stable for ZEROpk to function properly.
- Page 13 4°F (2°C) below the max. temperature setting. 7. Cutoff Temperature: Ice can monitor the temperature of the battery which is connected to the banana jack outputs. This feature is used in conjunction with Ice’s optional Temperature Sensor (DTXP4171) which can be found at local retailers.
- Page 14 During charge, if the battery reaches the selected temperature setting the charge process will completely stop and will not re-start . Setting the temperature value too low may cause Ice to stop charging the battery before it reaches full charge. In this case, increase the temperature setting by a small amount, making sure not to allow the battery to overheat.
- Page 15 Press, then rotate the dial to find the desired max. capacity. For NiCd and NiMH batteries the adjustable range is 10-150%. This means, if peak voltage is not detected first Ice will automatically stop fast charge at the value equal to the battery capacity setting in point #1c on page 11 (“Pack Capacity”) multiplied by the percent entered in this maximum charge...
-
Page 16: Selecting & Starting Charge, Discharge Or Cycle
SELECTING & STARTING CHARGE, DISCHARGE OR CYCLE To start a charge, discharge or cycle function or to change the charge or discharge mode: 1. While in the Main Memory screen, press and HOLD the dial for 2 seconds. “Charge Press dial to highlight charge mode Discharge Press and hold dial to enter inside arrows. - Page 17 Press and hold dial to start reserve time charge process. fully charge the battery. Setting the “reserve” time to “80min” means Ice will wait 30 minutes (80 min. reserve time – 50 min. expect time) and THEN start the charge process. In the end, if the total time needed to charge the battery was indeed 50 minutes, this will leave 10 minutes (90 min.
- Page 18 600 minutes. Re-peak Charge Mode (NiCd and NiMH batteries only): In re-peak charge mode, Ice can peak charge the battery once, twice or three times in a row automatically. This is good for making certain the battery is fully charged, and for checking how well the battery receives fast charges.
- Page 19 IMPORTANT!! Make sure the proper battery type and temperature settings are entered before starting auto charge! Ice will likely charge batteries better if the normal charge mode is used (assuming all user settings are properly tailored to the battery), but the Automatic mode can be used.
- Page 20 Main Memory screen. When Li- Po batteries reach 4.20V per cell, or Li-Ion’s reach 4.10V per cell, Ice automatically stops delivering constant current and starts applying constant voltage to the battery. Here, the charger is no longer forcing current to the battery.
- Page 21 Ice automatically sets the current based on the condition of the battery. Discharge cutoff voltage is pre-set in this mode to 0.8V per cell. Ice will likely discharge batteries better if the normal discharge mode is used (assuming all user settings are properly tailored to the battery), but the automatic mode can be used.
-
Page 22: Charge & Discharge Status Screens & Graphs
Ice’s input connection the internal resistance of battery measured during discharge, in milli-ohms select the “voltage range” setting that Ice will use in voltage graphs, select “auto” or “manual” Note that the voltage reading in the Status Screen above will show the voltage of the battery while it’s under a load. - Page 23 (top- left), the charge/discharge current level will be shown in amps (top-center), and the voltage at Ice’s output at that instant will be shown (top-right). When a function ends while a graph is being shown, the audible tones will sound...
-
Page 24: Motor Break-In Menu
10 amps of current at a selected voltage for a selected time. Ice will try to maintain 10A on the output, but only if the motor will allow it. It is important that the power source for Ice can maintain 12 volts and 15 amps to fully utilize this feature. -
Page 25: User Set-Up Menu
Rotate the dial to adjust the value, then re-press the dial to confirm the selection. 1. Fan Control: Ice’s built-in fan has two modes, “auto” and “on.” In the “auto” mode, the fan will automatically turn on when the internal temperature of the charger reaches 122°F (50°C). -
Page 26: Data View
This name will appear on the opening screen when power is initially applied to Ice. Press the dial to enter the User Name Set-up screen to find the User Name Set-up Screen (see above). Rotate the dial to move the ^ symbol underneath the characters in the string of letters. - Page 27 7. Discharge Time: Records the amount of time needed to complete a discharge function. Shown in seconds. 8. Graphic Data View: Ice’s graphic display can also show voltage curve waveforms after a charge or discharge function has ended (not for cycles).
- Page 28 graph cursor to move sideways.To find the voltage at any point on the curve, move the cursor to that point on the curve. The voltage where the graph cursor line intersects the curve will be shown in the upper-right corner of the screen.
-
Page 29: Cycle Displays
Information is NOT shown in graph form for re-peak charge mode, time delays, top-off charge, cycles, or discharge-before-charge steps. CYCLE DISPLAYS While in the Main Memory screen, press three times to find the Cycle Data screen. This screen shows the battery’s capacity and voltage readings for each charge and discharge period for up to 10 full cycles. -
Page 30: Four-Step Charge Setup
Main Memory screen. The Four-Step and Main Memory screens are completely independent of each other. And, a temperature sensor is REQUIRED when using the Four-Step Charge mode. Ice will not allow Four- Step Charge to start unless a temperature sensor is connected. - Page 31 battery during the step. Be careful not to set the capacity value too high – especially in steps 2 and 3 where the current settings are higher. The higher the capacity setting, the longer that current will be applied to the battery during the step, and the more likely the temperature sensor will trip due to heating and stop the charge process prematurely.
- Page 32 a. Press the dial to highlight the number of cells. Rotate dial to adjust # cells to match the battery, ranging from 1 to 10 cells. Press to highlight the peak sensitivity value. Rotate dial to adjust as desired ranging from 3-15mV/cell (or “ZEROpk” for NiMH batteries). Set this value slightly higher for NiCd batteries.
- Page 33 “expected” to be needed to fully charge the battery while in four-Step Charge mode. This time will be shown on the “expect time” line. Note: This time does not include the temporary pauses that Ice needs to check battery temperatures (if applicable) and so on.
- Page 34 11. Temperature Check: The Four-Step Charge mode REQUIRES use of a temperature sensor! Ice will not allow the Four-Step charge mode to function without the sensor. This temperature sensing feature can be set to...
- Page 35 (see diagram on the previous page). In steps 1-3, if the battery’s temperature reaches the temperature setting at the top of the Four-Step Charge screen Ice will pause the charge function until the battery’s temperature drops approx. 4°F (2°C) below the temperature setting, then charge will re-start automatically.
-
Page 36: Error Messages & Troubleshooting Guide
“Short-circuit – Output short-circuited. Please check the output.” Note: When short circuit occurs on the output Ice will continue to try and charge for 2 minutes at the selected current. This is by design, as sometimes cells which have previously been completely discharged (after a race, with a cell discharger, even with Ice which can discharge to 0.1V) will have such low voltage that it might APPEAR that the output is short circuited... - Page 37 “High output voltage – Output voltage is higher than the selected cells or voltages. Please select proper cells or voltages.” Either Ice’s voltage setting is incorrect, or the battery is in poor condition. “No motor – A motor is not connected to the output. Please connect the motor to the output.”...
- Page 38 charge circuit…remove battery and connect directly to charger, or contact your radio manufacturer for details. (3) Battery is already discharged. (4) Defective cell in pack…replace battery. PROBLEM: Motor turning overheating, or turning too fast or slow during break-in. (1) The “set volt” value is too high or low…re-adjust to match the motor’s specs. (2) The selected run time is too long…reduce run time setting.
- Page 39 OTHER ITEMS AVAILABLE FROM DURATRAX DuraTrax ® 20A Discharger Discharge up to six individual sub-C NiCd or NiMH cells at up to 20 amps! Unique lever- lock handles and spring-loaded contacts make cell insertion and removal fast and easy. Status lights indicate each cell's condition. The built-in cooling fan can be powered by load cells or an external DC power supply (not included).
Need help?
Do you have a question about the Ice and is the answer not in the manual?
Questions and answers