Table of Contents
Advertisement
Advertisement
Table of Contents

Related Manuals for Pure Pressure Longs Peak

Summary of Contents for Pure Pressure Longs Peak
- Page 1 Pikes Peak V2 Longs Peak User Manual R2.1...
-
Page 2: Table Of Contents
Table of Contents Pressware Controls Introduction 4.1. Home Screen 1.1. Warranty 4.2. System Settings 1.2. What’s Included 4.3. Quick Press 1.3. Technical Specifications 4.4. Last Run Data 1.4. Disclaimers & Safety Precautions 4.5. Recipes Overview 1.5. Uncrating Your Press 4.6. Recipes Menu Options 4.7. -
Page 3: Introduction
Contact: your equipment, and much more. 720-446-9565 Unless otherwise noted, the instructions contained in this manual apply to both the Pikes Peak V2 and Longs Peak rosin presses identically and are interchangeable. purepressure.com Sales Inquiries: sales@gopurepressure.com... -
Page 4: Warranty
PurePressure guarantees the following warranty coverage for both the Pikes Peak and Longs Peak rosin presses: 2 year limited warranty against manufacturing defects for structural components (frame, truss and support legs) and pneumatic ●... -
Page 5: What's Included
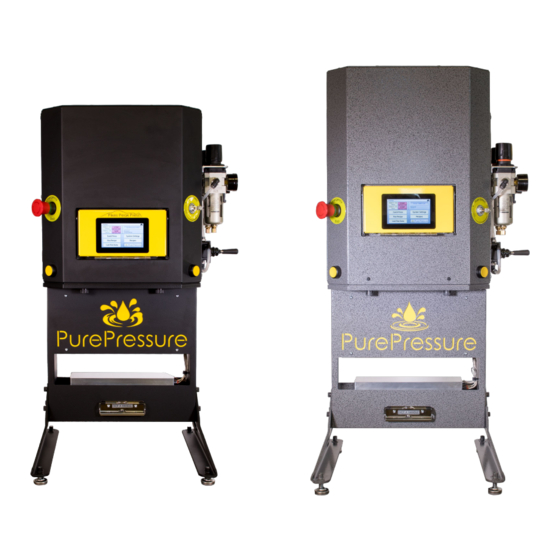
1.2 What’s Included Longs Peak Pikes Peak V2 What’s Included With Your Press (items may differ depending on kit or model) LED capacitive touch screen ● Two button safety start ● Emergency-stop ● Plate speed actuation dial ● Compressed air filter / regulator(s) ●... -
Page 6: Technical Specifications
1.3 Technical Specifications Specification Pikes Peak V2 Longs Peak Weight 120 lb 130 lb Overall Dimensions Horizontal: 29.2” x 19.7” x 13.5” Horizontal: 32.6” x 19.7” x 13.5” Depth x Width x Height Vertical: 15.5” x 19.7” x 33.3” Vertical: 15.5” x 19.7” x 36.8”... -
Page 7: Disclaimers & Safety Precautions
THE EMERGENCY STOP, TWIST THE BUTTON TO RELEASE. THIS WILL REBOOT THE SYSTEM AND RETURN YOU TO THE MAIN MENU. THE HEATERS WILL BE OFF AT THIS POINT. WARNING: DO NOT PRESS ANYTHING OTHER THAN SOFT PLANT MATERIALS IN THE PIKES PEAK, PIKES PEAK V2, OR LONGS PEAK PRESS. PRESSING OTHER OBJECTS WILL VOID THE WARRANTY. -
Page 8: Uncrating Your Press
1.5 Uncrating Your Press Steps to Safely Uncrate Your Press Figure 1A Figure 2A Note: Use two people to lift the press safely. Using a Phillips screwdriver or power tool, remove wood screws from top lid. (Figure 1A) Lift off crate cover. Remove contents from top section and remove crate shelf. -
Page 9: Press Setup
Vertical vs. Horizontal Orientation Most users will encounter greater utility and productivity using the Pikes Peak V2 or Longs Peak rosin press in the vertical orientation. This is because loading and unloading bags and parchment tends to be easier. It is our recommendation that you become familiar with the press in the vertical orientation first, and then move to the horizontal orientation if desired. -
Page 10: Vertical Orientation Setup
2.1 Vertical Orientation Setup Vertical Orientation Setup Vertically Oriented Pikes Peak Figure 2A Warning: HEAVY EQUIPMENT! Two people recommended for setting up the press vertically or horizontally. The vertical orientation requires the two triangular shaped legs. To change to the vertical orientation from the default horizontal orientation, carefully bring the two front legs off the edge of a table while ensuring the press will not fall forward. -
Page 11: Horizontal Orientation Setup
2.2 Horizontal Orientation Setup Horizontal Orientation Setup Horizontally Oriented Pikes Peak Figure 2A Warning: HEAVY EQUIPMENT. Two people recommended for setting up the press vertically or horizontally. The horizontal orientation requires the two short rectangular legs. To change to the horizontal orientation from the vertical orientation, first lean the press slightly forward and have a friend unscrew the leveling feet. -
Page 12: Vertical Dual Pressure Installation
Note: Your Dual Pressure system installs easily in both the horizontal and vertical 2.3 Vertical Dual Pressure orientations with just a Phillips screwdriver. There is a separate bag included in your Installation press kit with additional pneumatic tubing for the horizontal setup.. Hooking Up Your Dual Pressure Regulators Figure 1A Figure 3A... -
Page 13: Horizontal Dual Pressure
Note: Your Dual Pressure system installs easily in both the horizontal and vertical 2.4 Horizontal Dual Pressure Installation orientations with just a Phillips screwdriver. There is a separate bag included in your press kit with additional pneumatic tubing for the horizontal setup. -
Page 14: Using Push Connect Fittings
2.5 Using Push Connect Fittings Attaching & Using Push Connect Fittings Your push connect fittings securely hold your Figure 1A pneumatic tubing in place. To Insert: Simply take your pneumatic tubing and insert it as far into the fitting as it will sit. (Figure 1A) Verify it is fully connected and seated by gently tugging upward on the hose. -
Page 15: Electrical Power
Disconnecting power to the solenoid valve will cause the plates to immediately retract so long as an air supply (10 PSI minimum for the Pikes Peak and 20 PSI minimum for the Longs Peak ) is supplied. Figure 2A Figure 3A... -
Page 16: Compressed Air
Pneumatics Kit on our website. To hook up your air compressor, attach your pneumatic hose from your air compressor to your Pikes Peak V2 or Longs Peak rosin press with a ¼” industrial quick connect fitting. (Figure 1A) Make sure to check out our... -
Page 17: Rosin Extraction Basics
3. Rosin Extraction Basics Rosin is created with heat, pressure, and filtration. Consistencies & Textures The heat being applied to your material liquefies the ● glandular trichome heads present in cannabis, then the pressure forces the resulting cannabinoid-rich oil through the filtration media. Lower temperatures tend to produce budders and batters, where higher Technically speaking, rosin is a mechanical... -
Page 18: Tips & Tricks
3.1 Tips & Tricks Top Rosin Tips Tricks to Help You Press Amazing Rosin For the best, lightest color possible, use extremely freshly dried material. Making great rosin always starts in the garden. Certain strains will over perform, and others will Always make sure your material is properly underperform, so always go into the process with cured. -
Page 19: Choosing Your Material
3.2 Choosing Your Material Starting Material and Filter Type First and foremost, you will need to choose what kind of starting material you intend to press into rosin. The most common materials used in this process are freshly dried cannabis flowers, kief (or dry sift), or ice water bubble hash. - Page 20 PSI: The PSI on the X axis refers to the pressure at your bag, not the compressed air pressure that is available from your air compressor. While the Pikes Peak V2 and Longs Peak can automatically calculate bag pressure, the formula is as follows: (Pressing Force / Bag Area (sq inches) = PSI at the Bag...
-
Page 21: Filter Bag Preparation
Visit our YouTube channel for helpful 3.4 Filter Bag Preparation how-to videos! @GoPurePressure YouTube.com/c/GoPurePressure Figure 1A Figure 1B Figure 2B Properly Filling Your Rosin Filter Turn your PurePressure rosin filter bag inside out using the Quick Flip tool. (Figures 1-3A) Using the provided filling funnel, fill the bag with your material, making sure it is evenly distributed Figure 2A... -
Page 22: Pressware Controls
4. Pressware Controls The Pressware Interface Allows for Total Control Although the Pressware touchscreen interface may look Save Up to 30 Recipes Touchscreen LCD Tech intimidating at first, rest assured, it is extremely easy to learn and use. Heat, press time, pressure stage indicators, and more are all controlled by the interface. -
Page 23: Home Screen
4.1 Home Screen The Home Screen appears after startup from this screen you can manage heater settings, view active pressure values, view a loaded recipe and navigate to a variety of menu options. You cannot press while on the Home Screen. 5: Temperature Settings 6: Loaded Recipe Tap to set and change your temperature on... -
Page 24: System Settings
Note: Adjusting the temperature 4.2 System Settings and pressure units will require you to convert these values in any saved recipes. You can adjust your System Settings at any time. This will allow you to change a few key things, including whether your press displays numbers in Imperial or Metric, as well as how loud you want the beeping indicator to be (you can also silence it) to alert you during cycle pressure changes. -
Page 25: Quick Press
4.3 Quick Press Quick Press is one of Pressware’s most powerful features because it allows you to manually control pressure ramping and then save the recipe for later use! Set your temperature and starting pressure, and then begin pressing using two yellow start buttons. Hold for 5 seconds to fully initiate the press. -
Page 26: Last Run Data
Last Run Data Once you’ve pressed, the Last Run Data menu will tell you exactly what you did and how you did it. You can save this information directly into a new recipe, or just look to see what you want to change for your next press. The press records your average ●... -
Page 27: Recipes Overview
Recipes Overview With Recipes, you can save every variable and then your press will automatically run those settings at the push of a button. You can store up to 30 recipes. ● Recipes can be created either manually ● with these menu options, or from a Last Run Data set. -
Page 28: Recipes Menu Options
Recipes Menu Options 6: Weight 7: Bag Size 8: Micron 9: Speed Set the weight of your Set your bag size in order for Choose the ideal filter micron Choose Fast, Medium, or Slow as a material to have a repeatable the press to calculate for your material. -
Page 29: Running Recipes
Running Recipes From the Run Recipes screen, you can automatically load any saved recipe to be used immediately. There are two ways to run a recipe. First, you can load a recipe from the “Run Recipe” screen, or you can select the recipe you wish to use from the “Saved Recipes”... -
Page 30: Saved Recipes List
Saved Recipes List From the Recipes screen, all of your saved recipes are stored and catalogued. Each screen displays 5 recipes, ● including their name, material, weight, bag size, and micron type (if set). To access a specific recipe, simply tap ●... -
Page 31: Software Updates
Software Updates Figure 1A With PurePressure’s Pressware Connect software, you can always stay up to date with the latest version of our firmware. Using a T15 torx screwdriver (star bit), remove the 11 screws and the top panel from your rosin press. (Figure 1A) Set your screws and panel aside, and then locate the USB-B port on top of your electrical panel. -
Page 32: Press Operation
5. Press Operation Loading and operating your PurePressure rosin press is simple and intuitive. In the following sections, we will cover how to best operate your press. Basic Steps to Start Pressing Turn your press on. Set your desired temperature(s) and then turn on your top and bottom heaters. -
Page 33: Loading The Press
Note: We recommend using high 5.1 Loading the Press quality nitrile gloves whenever you are working with rosin. First, prepare your work area by having your pre-filled filter bags and parchment paper Figure 1A ready to go. WARNING: be mindful of your heated press plates! Step 1: Fold a 12”... -
Page 34: Pressure Control
Recommended Regulator Settings pressure Pikes Peak A: 10 PSI, B: 120 PSI [right] Longs Peak A: 20 PSI, B: 140 PSI Step 2: Using the Toggle Switch 3: Pressure The press will draw pressure from whichever regulator the toggle is Toggle... -
Page 35: Plate Speed Control
Note: Spend some time playing with 5.3 Plate Speed Control the speed controller to get a hang of what the press is capable of. Controlling the actuation speed of your plates is helpful depending on what material you are pressing. To adjust your plate actuation speed, simply turn the dial clockwise [right] to increase speed or counterclockwise [left] to decrease speed. -
Page 36: Pressing Material
Note: Check out Section 3 of this 5.4 Pressing Material manual for top tips, tricks, and ideas to get the most out of your PurePressure rosin press. Now it’s time to put it together and press! Once you’ve filled, packed, and gotten your bag ready to press, set your temperatures on the press. We highly recommend using the “Quick Press”... -
Page 37: Maintenance
6. Maintenance & Troubleshooting Your PurePressure rosin press is engineered to go the distance. Make sure do to the following to ensure long term reliability. Use an adequately grounded power outlet or a surge ★ protector. Use clean, dry compressed air with your press. ★... -
Page 38: Common Issues
6.1 Common Issues Problem: My plates won’t fully make contact. Problem: My bags are blowing out. Solution: Make sure to turn your plate speed Solution: Make sure that you are starting at the controller counterclockwise a few turns to open it up minimum pressure and that your Plate Speed Controller as it comes threaded all the way in for shipping. - Page 39 6.2 Frequently Asked Questions What Micron Filter Bag Should I Use? What Pressure Should I Use? We typically recommend 36 for kief and 115 For flower, use full pressure at a fast pressing speed. That μm μm flower or shake to start, but highly suggest means 120 PSI for the Pikes Peak and 140 PSI for the Longs experimenting with our 4 different micron types to see Peak.
- Page 40 6.2 Frequently Asked Questions cont. What Strains Yield the Best? How Do I Get a Lighter Colored Rosin? Highly resinous, trichome-rich, and high potency strains are Use the freshest material possible. Freshness of material is always going to be your best yielders. These tend to skew more critical to achieving clarity - the older it is, the darker it towards indicas and hybrids, but sometimes a sativa will tends to be.
- Page 41 720-446-9565 purepressure.com Sales Inquiries: sales@gopurepressure.com General Questions: info@gopurepressure.com Technical Support: support@gopurepressure.com User Manual R2.1 @gopurepressure We’re always here to help.
Need help?
Do you have a question about the Longs Peak and is the answer not in the manual?
Questions and answers