Linksys WUSB54GP User Manual
Wireless-g usb pen type network adapter
Hide thumbs
Also See for WUSB54GP:
- User manual (45 pages) ,
- Quick installation (2 pages) ,
- Product data (2 pages)
Table of Contents
Advertisement
Quick Links
Advertisement
Table of Contents

Related Manuals for Linksys WUSB54GP


Summary of Contents for Linksys WUSB54GP
- Page 2 European R&TTE directive 1999/5/EC, EMC directive 89/336/EEC, and Low Voltage fitness for any particular purpose. Linksys reserves the right to revise or update its products, directive 73/23/EEC: software, or documentation without obligation to notify any individual or entity.
-
Page 3: Table Of Contents
Chapter 1 community and countries that have adopted the European R&TTE directive 1999/5/EC and/or the CEPT recommendation Rec 70.03. For more details on legal combinations of power levels and antennas, contact Linksys Introduction 1 Corporate Compliance. P en Type Network Adapter... -
Page 4: Introduction
Connect your USB-equipped desktop or notebook computer to a wireless network Appendix B: Glossary 30 at incredible speeds with the Linksys Wireless-G USB Network Adapter. Appendix C: Specifications 38 By incorporating two new, blazing fast technologies -- USB 2.0 and Wireless- Environmental 39 G -- the Adapter delivers data rates up to 54Mbps (5 times as fast as 802.11b),... -
Page 5: Planning Your Wireless Network
Chapter 2: Planning Your Wireless Network Topology Ad-Hoc versus Infrastructure Mode If the wireless network is relatively small and needs to share resources only Network with the other computers on the wireless network, then the ad-hoc mode can be used. (See Figure 2-2.) Ad-hoc mode allows computers equipped with wireless transmitters and receivers to communicate directly with each other, eliminating the need for an access point. -
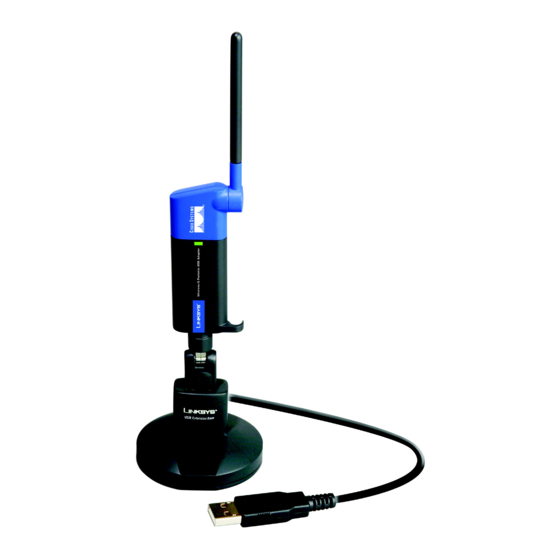
Page 6: Chapter 3: Getting To Know The
Chapter 3: Getting to Know the Chapter 4: Software Installation and Configuration for Windows 2000 Wireless-G USB Pen Type Network Adapter The Wireless-G USB Network Adapter Setup Wizard will guide you through the installation procedure. The Setup Wizard will install the WLAN Monitor The Network Adapter is connected to your PC through its USB port. - Page 7 (Service Set Identifier). The SSID is your network name and must be identical to use, select the default channel (Channel 6). for all devices in the network. The default setting is linksys (all lowercase). Next, choose a wireless mode. Click the Infrastructure Mode radio button...
-
Page 8: Chapter 5: Hardware Installation
Chapter 5: Hardware Installation 6. At this point, you may see a warning screen, such as that shown in Figure 4-6 , asking if you’d like to cease installation. You can click the Yes button to continue; the Adapter will function properly. 1. -
Page 9: Chapter 6: Driver Installation For Windows Xp
4. When Windows 2000 begins installing the Network Adapter’s driver file, a Chapter 6: Driver Installation for screen similar to that shown in Figure 5-3 will appear, stating that a digital signature was not found. This software has been tested and found to work properly with Windows 2000. -
Page 10: Windows Xp Wireless Zero Configuration
3. If WEP is enabled, the screen in Figure 6-6 will appear. Enter the WEP key of your wireless network in the Network key field, and re-enter it in the Confirm network key field. Then click 1. After installing the Adapter, the Connect button, and go the Windows XP Wireless to step 4. -
Page 11: Chapter 7: Using The Wlan Monitor
Chapter 7: Using the WLAN Monitor The Link Information screen, shown again in Figure 7-3, displays the signal strength and link quality information about the current connection and provides Use the WLAN Monitor to check the link information, search for available a button to click for additional status information. -
Page 12: Link Information
The Site Survey screen, shown in Figure 7-5, displays a list of infrastructure and ad-hoc networks available for connection. Wireless Network Status Status - The status of the wireless network connection. SSID - The unique name of the wireless network. Wireless Mode - The mode of the wireless network currently in use. - Page 13 Import - Click the Import button to The Profiles screen, shown in Figure 7-6, lets you save different configuration import a profile profiles for different network setups. You can also import or export profiles. that has been saved The default profile holds the initial configuration saved when you ran the Setup in another location.
-
Page 16: Profiles
7. The Confirm New Settings screen will appear (shown in Figure 7-15). To save the new settings, click the Yes button. To cancel the settings and return to the P r o f i l e s screen, click the Cancel button.
Need help?
Do you have a question about the WUSB54GP and is the answer not in the manual?
Questions and answers