
Subscribe to Our Youtube Channel
Related Manuals for Shelly SENSE


Summary of Contents for Shelly SENSE
- Page 1 Smart sensor with WiFi USER GUIDE WARRANTY & WARRANTY TERMS Allterco Robotics EOOD Sofia, Bulgaria © 2017...
-
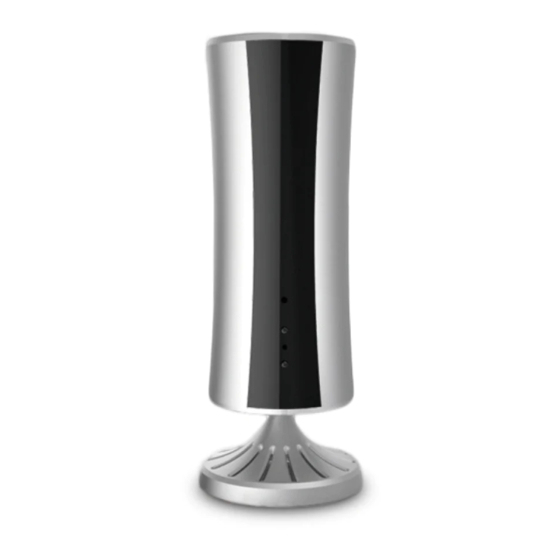
Page 2: Specification
IR. With Shelly Sense you can control ACs, TVs, Hi-Fis and others. Shelly Sense has an integrated battery, which provides up to a week of usage without power supply. Shelly may work as a standalone Device or as an accessory to She or other home automation controller. - Page 3 Power supply: Radio protocol: 5V/1A DC WiFi 802.11 b/g/n Battery: Frequency: Li-Ion 4400mAh 2.4 GHz; Charging port: WiFi Operational range (depending on local Micro USB construction): Battery life: • up to 50 m outdoors Up to 10 days • up to 30 m indoors Working temperature: Dimensions (HxD): -20 ÷...
- Page 4 WiFi modes - Access Point (AP) and Client mode (CM). To ® operate in Client Mode, the Device must be located within the range of a WiFi router. Shelly ® devices can communicate directly with other WiFi devices through HTTP protocol. An API can be provided by the Manufacturer.
- Page 5 MOBILE APPLICATION FOR SHELLY ® Allterco Robotics EOOD Sofia, Bulgaria © 2017...
- Page 6 App Store (iOS - fig. 2) and install the Shelly Cloud app. fig. 1 fig. 2 Registration The first time you open the Shelly Cloud mobile app, you are asked to create an account to manage your Shelly devices. ®...
- Page 7 After registering, create your first room (or rooms) - fig. 3, where you are going to add and use your Shelly devices. Shelly Cloud gives you the opportunity to create scenes for automatic turning on or off of the Devices at predefined hours or based on other parameters like temperature, humidity, light etc.
- Page 8 Settings > WiFi and connect to the WiFi network created by Shelly, e.g. shellysense-16327b. If using Android: your phone/tablet will automatically scan and include all new Shelly Devices in the WiFi network that you are connected to (fig. 6). Upon successful Device Inclusion to the WiFi network you will see the following pop-up - fig.
- Page 9 fig. 11 fig. 8 fig. 9 fig. 12 fig. 13 fig. 10...
- Page 10 Shelly Devices Settings fig. 14 After your Shelly device is included in the app, you can control it and change its settings. To enter the details menu (fig. 12) of the respective Device, simply click on it’s name. From the details menu you may see current temperature, humidity, illumination, motion, as well as edit its appearance and settings.
-
Page 11: Add Remote Control
“Next”. Step 3 Here (fig. 16) select the Shelly Sense, to which you want to add a remote control and press “Next”. Step 4 Here (fig. 17) you choose the type of device, that you want to control: •... - Page 12 The detail menu has all the buttons for control of every device, and also on the top right corner - current air temperature and humidity, illumination, motion detection, battery percentage and name of Shelly Sense. fig. 19 Edit Device - allows you to change the remote’s name, room and picture.
- Page 13 Client Mode (СМ) – the mode in which the Device is connected to another WiFi network Initial inclusion Step 1 After connecting Shelly to the power grid, it is ready for setup. If the Device is off, turn it on. Step 2 Shelly creates own WiFi network (own AP), with name (SSID) such as Shellysense-16327b.
- Page 14 WiFi network. After entering the correct details, press Connect. ATTENTION! If you have entered incorrect information (wrong settings, usernames, passwords etc.), you will not be able to connect to Shelly and you have to reset the Device. WARNING: If you do not see an active WiFi network with SSID like shellysense- 16327b, or you want to add the Device to another Wi-Fi network, please reset it.
-
Page 15: Safety Usage
Factory reset: Return Shelly to its factory settings. Firmware Upgrade: Shows present firmware version. If a newer version is available, officially announced and published by the Manufacturer, you can update your Shelly Device. Click Upload to install it to your Shelly Device. -
Page 17: Warranty Terms
Manufacturer using the contact data of the Manufacturer’s company. 6. The User may contact the Manufacturer via e-mail at support@Shelly.cloud for operational problems that may be resolved remotely. It is recommended that the User contact the Manufacturer before sending the Device for servicing. - Page 18 • Intentional or negligent improper handling, storing or transportation of the Device, or in the event of non-observance of the instructions included in this warranty.; • When a non-standard power supply, network, or faulty Devices have been used; • When there is a non-compliance between warranty card and/or without a purchase receipt, or attempted forgery of these documents, including (but not limited to) the warranty card or the documents proving the purchase.
- Page 19 12. The Manufacturer is not responsible for any property damage caused by a defect in the Device. The Manufacturer is not liable for indirect damages (including but not limited to loss of profits, savings, lost profits, claims by third parties) in connection with any defect of the Device, nor for any property damage or personal injury arising out of or related to the use of the Device.
- Page 20 Warranty Card Smart sensor with WiFi Shelly Sensе ® ........................Serial number: ........................Date of purchase: ........................Signature of Merchant (Seller): Please save this part of the Warranty card. For carrying out the rights under the current warranty, you need to provide an original invoice and/or receipt, proving your purchase was valid.
Need help?
Do you have a question about the SENSE and is the answer not in the manual?
Questions and answers