Table of Contents
Advertisement
Advertisement
Table of Contents

Subscribe to Our Youtube Channel
Summary of Contents for Antec VFX Series
- Page 1 Venturi FX VFX Series MANUAL V100...
-
Page 2: Table Of Contents
Venturi FX TABLE OF CONTENTS For local area support, please Product Overview contact your local Antec Controls Safety Precautions ............1 Representative Caution to Contractors ..........1 For more information visit Receiving Inspection ............ 2 AntecControls.com Flow and Pressure Data ..........2 Installation and Mounting Instructions Installing the Venturi FX Unit ........ -
Page 3: Product Overview Safety Precautions
Venturi FX PRODUCT OVERVIEW Safety Precautions Caution to Contractors Installation work and electrical wiring must be done Venturi Valves are not intended for use as temporary heat by qualified person(s) in accordance with all applicable or ventilation sources during building construction. The codes and standards, including fire-rated construction. -
Page 4: Receiving Inspection
Venturi FX Product overview receiving inspection Venturi FX After unpacking the assembly, check carefully for shipping damage. If any damage is found, report it immediately to the delivering carrier. Damage may result from improper handling. Do not tamper with actuator positioning as it is shipped factory calibrated. -
Page 5: Installation And Mounting Instructions
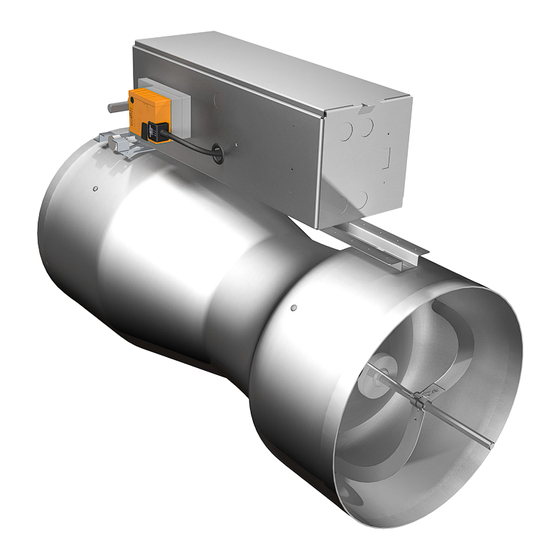
Venturi FX INSTALLATION & MOUNTING INSTRUCTIONS installing the Venturi FX unit FiGure 1 Before Installation Visually inspect the valve for damage AntecControls.com · Damage to the flow measuring stations in the valve can be detrimental to performance · Damage to the coating on fume hood valves can lead to corrosion Inspect the tamper proof paint to ensure it has not be removed. - Page 6 Venturi FX INSTALLATION & MOUNTING INSTRUCTIONS Slip-Connection Venturi FX FiGure 4 Mount the Venturi FX by slipping both the inlet and the discharge one inch (1 in.) into the appropriate sized ductwork. Fasten the venturi valve to the ductwork using six (6) sheet metal screws per a slip connection as shown in Figure 4.
- Page 7 Venturi FX INSTALLATION & MOUNTING INSTRUCTIONS Venturi FX with Silencer FiGure 10 Position silencer before the inlet of the Venturi FX when the Venturi FX is operating as an Exhaust valve. Position SUPPLY CONFIGURATION silencer on the discharge of the Venturi FX when the Venturi FX is operating as a supply valve.
-
Page 8: Operation & Maintenance
5. Verify the tubing has not been kinked, damaged, and that the red tube is connected to the high port and the green tubing is connected to the low port replacement Parts Replacement parts are available. Please contact your local Antec Controls Representative. technical Support If further technical support is required, please contact FieldSupport@AntecControls.com. - Page 9 Venturi FX NOTES AntecControls.com | VFX - Manual...
- Page 10 Venturi FX NOTES VFX - Manual | AntecControls.com...
- Page 11 Venturi FX NOTES AntecControls.com | VFX - Manual...
- Page 12 All goods described in this document are warranted as described in the Limited Warranty. The complete product catalog can be viewed online at AntecControls.com ® Antec Controls by Price is a registered trademark of Price Industries Limited. © 2018. Printed in Canada. v100...
Need help?
Do you have a question about the VFX Series and is the answer not in the manual?
Questions and answers