Advertisement
Table of Contents
V1-11.15
Assembly Instructions
(W x D x H): 1.70m x 0.60m x 0.43m/0.32m
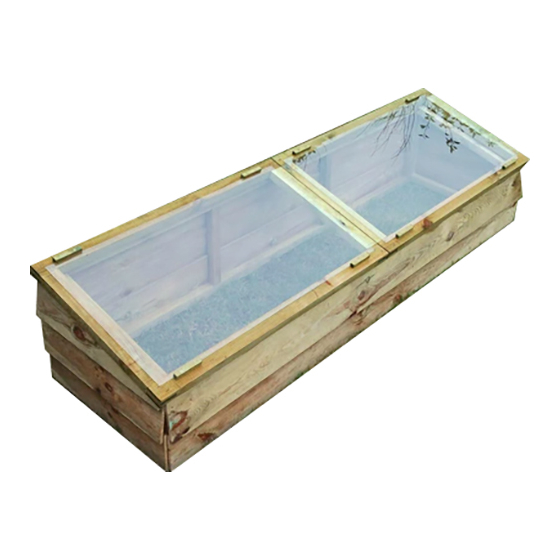
Product Name: Sleeper Cold Frame
Pressure Treated products should not be treated with any other products for the first month.
PLEASE KEEP THIS INSTRUCTION
Zest4Leisure
01352 752555 option 1 – sales@zest4leisure.co.uk
Advertisement
Table of Contents

Related Manuals for Zest 4 Leisure Sleeper Cold Frame


Summary of Contents for Zest 4 Leisure Sleeper Cold Frame
- Page 1 V1-11.15 Assembly Instructions (W x D x H): 1.70m x 0.60m x 0.43m/0.32m Product Name: Sleeper Cold Frame Pressure Treated products should not be treated with any other products for the first month. PLEASE KEEP THIS INSTRUCTION Zest4Leisure 01352 752555 option 1 – sales@zest4leisure.co.uk...
- Page 2 Sleeper Cold Frame Assembly Instructions Requires 2 person assembly. Tools required: Corded / Cordless Drill, Pozi-drive Bit / Screwdriver, 3mm Drill Bit required in order for you to drill all screw holes before construction. The colour version of this document can be downloaded from: www.zest4leisure.co.uk/downloads/category/C1...
- Page 3 Attach Window Support D to Side Panel A1 using 1no 50mm Screw (Fig.2). Similarly fix remaining Window Support D to Side Panel A2. Attach Hinged Windows E to Back Panel C as shown in Fig.3 using 12no 25mm Screws, 3no per hinge. Sleeper Cold Frame is now complete.
Need help?
Do you have a question about the Sleeper Cold Frame and is the answer not in the manual?
Questions and answers