Advertisement
Table of Contents
External Spring Trampoline
User Manual
[Revision 4.0 October 2018]
READ THIS MANUAL CAREFULLY BEFORE USE – FAILURE TO DO SO MAY RESULT IN INJURY, PROPERTY
DAMAGE AND MAY VOID WARRANTY. • KEEP THIS MANUAL FOR FUTURE REFERENCE. • Products covered by
this manual may vary in appearance, assembly, inclusions, specifications, description and packaging.
E&OE
©2018 Upshot
Advertisement
Table of Contents

Subscribe to Our Youtube Channel
Summary of Contents for Mytopia UpShot
- Page 1 READ THIS MANUAL CAREFULLY BEFORE USE – FAILURE TO DO SO MAY RESULT IN INJURY, PROPERTY DAMAGE AND MAY VOID WARRANTY. • KEEP THIS MANUAL FOR FUTURE REFERENCE. • Products covered by this manual may vary in appearance, assembly, inclusions, specifications, description and packaging. E&OE ©2018 Upshot...
-
Page 2: Safety
If the equipment is to be moved after assembly, fully lift it off the ground and carry it to the new location. Do NOT drag the equipment as this may weaken or damage the frame and will void any warranty. E&OE ©2018 Upshot... - Page 3 External Spring Trampoline Table of Contents Safety ..............................2 Parts Identification ..........................4 Assembly ............................5 Anchoring the Trampoline ........................ 8 E&OE ©2018 Upshot...
-
Page 4: Parts Identification
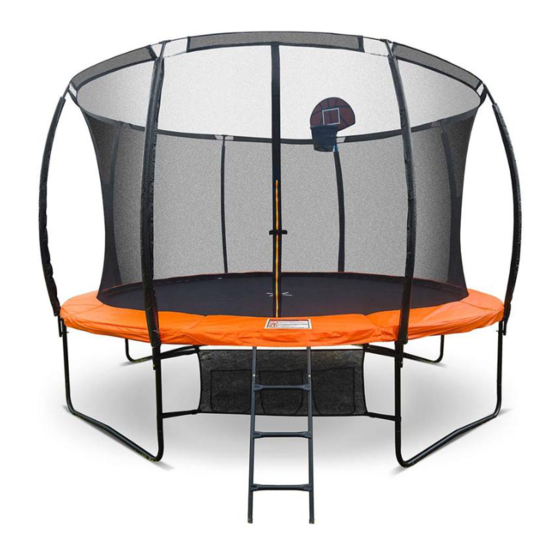
Basketball Hoop, Ball and Pump Shoe Net Spring Tool For models equipped with a basketball hoop, one pole will feature a "fork" at the top, for attaching the hoop. Applicable to some models only. Typical unpacked and unassembled trampoline E&OE ©2018 Upshot... -
Page 5: Assembly
First 2 springs at 12 and 6 o’clock positions. Be sure to count the frame spring holes and mat spring loops accurately so the correct mat spring loop connects to the correct frame spring hole. − Next 2 springs at 3 and 9 o’clock positions. − Then, continue with all remaining springs in any order. E&OE ©2018 Upshot... - Page 6 14. Insert a plastic T-shaped tip into the top of each safety net pole and push it in firmly. For models that feature a basketball hoop, insert the tip into the more vertical tube as the other tube is used for attaching the basketball hoop. E&OE ©2018 Upshot...
- Page 7 To help reduce trampoline movement during use or due to winds etc, it is strongly recommended to fix the legs to the ground using suitable anchors or pegs from a hardware supplier. If the trampoline is set up on a hard surface, sandbags over the legs may suffice. E&OE ©2018 Upshot...
-
Page 8: Anchoring The Trampoline
"screw" it into the earth until there is roughly 50mm (2") from the ground to the top of the stake. Ensure that the opening in the eye of the stake is facing toward the centre of the trampoline. E&OE ©2018 Upshot... - Page 9 3. Feed the end of the remaining section of each anchor strap through the eye of the anchor stake and into the buckle so it wraps around the buckle pin then under the buckle teeth. Pull the end of the strap so the strap is taught. 4. Repeat the above procedure for each anchor. E&OE ©2018 Upshot...
- Page 10 ©2018 Upshot. All rights reserved. No part of this document, including descriptive content, concepts, ideas, diagrams or images may be reproduced or transmitted in any form or by any means, electronic or mechanical, including photocopying, scanning or recording, or any information storage and retrieval system, without express permission or consent from the publisher.
Need help?
Do you have a question about the UpShot and is the answer not in the manual?
Questions and answers