Advertisement
XT 001A
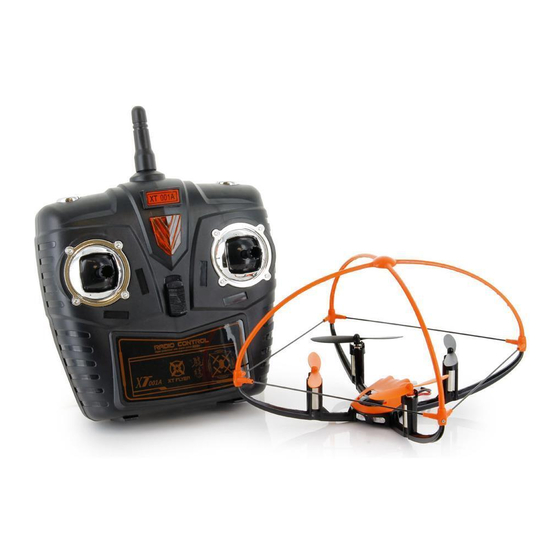
XT FLYER Instructions
XT FLYER
®
Please read this manual before using this product! Please keep this manual, for future reference.
Specifications
Propeller:
ø 54mm
135x135x101 (mm)
Dimensions:
Lithium Battery: 3.7V 390mAh
Weight:
40g
1.Foreword
Thank you for purchasing a new XT Flyer! Please read the instructions carefully for most
enjoyable and easy use before operating this aircraft. Also, please retain these instructions so
that you may refer to them in the future when you wish to adjust and maintain your aircraft. If
you wish to make adjustments to the aircraft, please do so outside, without windy conditions.
Important Notice
The aircraft is not an ordinary toy, and though it is small, there is still a risk involved (as with any
flying vehicle) in operating it. Please observe the safety precautions and proper use of the model.
Improper disassembly or modifications can cause unpredictable behavior in the craft, creating
danger or an accident.
NOTE! During any use of the remote control aircraft, the manufacturer or distributor is not
responsible or liable for the loss of the craft, harm to individuals or the environment due to improper
assembly, or an accident occurring in an insecure environment. This product is intended to be
operated by children and adults ages 8 years and older. Before flying the craft always be sure that
the environment is safe and that you are aware of people and objects in the vicinity. Stay safe!
2.Safety Precautions
Flying a model aircraft involves risk. Be sure to stay away from crowds and other objects when
flying. Improper assembly or mechanical failure, the loss of electronic control, and not being
familiar with the operation of the craft, may lead to loss of control and damage and other
unexpected accidents. Please be sure to pay attention when flying, and understand the
responsibility of any accident caused by negligence.
Important Notice
During indoor or outdoor flight,
please stay away from obstacles.
In order to avoid a vehicle collision, poor landing,
or entanglement do not operate in an unsafe environment,
such as near fire, electrical wires, power supply, in the
rain, etc.
3.Standard accessories
Battery3.7V390mAh 20c
USB charger cable
4.Part Name
Motor:
ø7x20 (mm) 4 PCS
Charging time: 40minute
Flight Time:
6-8minute
Gyro:
6-axis gyro
1
Propeller
3
Lithium battery safety
Compared with other batteries, lithium batteries have a higher risk
during use. Please read the instructions carefully before use, and follow
these precautions while using and charging the battery. The
manufacturer and distributor will not be held liable for any damages
caused by improper use.
1.Do not use of batteries and chargers from other manufacturers to
avoid possible When the battery is used for a long time or appears
aging or swollen,please replace them timely.
2.Do not disassemble or alter the battery in any way (such as reversing
the positive and negative terminals).
3.Do not burn the battery, cause metal objects to touch the positive and
negative terminals, short-circuit, or let sharp objects piercing the
battery. Avoid the risk of battery fire.
4.Please be careful when charging the battery. Charge in an area
where you can see the battery and keep it away from small children to
avoid danger.Battery should be put in the dried or ventilated place with
environment temperature about 18~25℃,keep it far away from heat
source or explosive product.
5.When the batteries are fully charged,if you do not remove it from the
charger for a long time,the battery may discharge automatically,which
may cause lower than the rated voltage,the charger will re-charger the
battery until it is fully charged.Charging or discharging too often or
repeated charging or discharging may reduce the using life of the
batteries.
6.When the battery needs to be stores for a long time,please charge
the battery for about 50~60% of the volume.
7.If you do not use it for more than 1 months,it's highly recommended
that you need to check the battery voltage every month so as to make
sure the voltage no less then 3V.
8.Please dispose of the battery properly in strict accordance with
national and regional waste clean-up programs. Prevent pollution of
the environment.
Keep Away from Humid Environments
The aircraft is constructed with many precision prevent any moisture or
water from entering the product. Do not use i electronic parts.
Absolutely n the bath, wet conditions, or rain. Unexpected accidents will
occur.
Do not use the product incorrectly
Do not disassemble or modify this product. Please use only our product
parts in order to ensure the safety of the aircraft.
Instructions for Battery Use
Be sure to install the positive and negative terminals properly. Do not
mix old and new batteries, as this will shorten and affect battery life. If
you are not going to use the product for a long time, remove the
batteries to avoid battery leakage. If the batteries are found to have
leaked or are damaged in any way, immediately discontinue use and
dispose of the batteries in accordance with state law. Prevent pollution
of the environment.
Keep away from Heat
This product, both the structure and the internal electronics are
sensitive to heat. Do not leave the craft in a hot car or other hot
environment where the structure may become deformed or damaged
due to high temperatures.
Avoid Operating While Alone
This product is suitable for ages 8 and older. When learning to pilot a
remote control aircraft there is a certain degree of difficulty. Guidance
from an experienced pilot can help you learn and enjoy flying your craft.
5. Battery charging operation
1.Insert plug from the battery into USB charger.
2.Connect USB cable to a standard USB outlet. USB charger indicator light is off during charging,
the aircraft is being charged, the USB charger indicator light is on, the battery is fully charged,
(charging time is approximately 40 minutes)
6. Remote Control Part Names
1.Speed gear's switch
2.360 ° ready to roll button
3.Lights
NOTICE:The default power indicator is orange.
A slow flashing orange lights indicates inadequate power.
Press the 360°roll button, the direction stick to the maximum,
it will roll 3D! Proceed with caution!
7. Install the Remove Control Battery
2
4.Switch
5.Throttle Rocker
6.Direction of the rocker
Open the Battery Door ,
install 6 AA Size Battery in the
battery box.
Be sure to install the positive and
negative terminals properly.
4
Advertisement
Table of Contents

Summary of Contents for XT FLYER XT 001A
- Page 1 5.When the batteries are fully charged,if you do not remove it from the charger for a long time,the battery may discharge automatically,which Thank you for purchasing a new XT Flyer! Please read the instructions carefully for most may cause lower than the rated voltage,the charger will re-charger the enjoyable and easy use before operating this aircraft.
- Page 2 • Increase the distance between the equipment and receiver. • Connect the equipment into an outlet on a circuit different from that to which the receiver is connected. • Consult the dealer or an experienced radio/TV technician for help. Distributor: XT FLYER LIMITED...
Need help?
Do you have a question about the XT 001A and is the answer not in the manual?
Questions and answers