Table of Contents
Advertisement
Quick Links
Advertisement
Table of Contents

Summary of Contents for ALINKER R-volution Small
- Page 1 R-volution R-volution ® User manual AL-RV 1.0 EN...
-
Page 3: Table Of Contents
Fold the Alinker in/out ....................15 6.2.1 Fold in the Alinker ................................15 6.2.2 Fold out the Alinker ................................15 Mount/dismount the saddle ..................16 6.3.1 Mount the saddle ................................16 6.3.2 Dismount the saddle ..............................16 Place the Alinker into the car ................... 16... - Page 4 Get on/off ........................17 7.2.1 Get on ......................................18 7.2.2 Get off .......................................18 Put the Alinker on the stand ..................19 Brakes........................... 19 Use the parking brake ....................20 7.5.1 Set the parking brake of the Alinker ........................20 Ride on a slope ......................21 7.6.1...
-
Page 5: About This Manual
About this manual Congratulations with your purchase of the Alinker R-volution. This manual contains instructions for adjusting and using the Alinker. Carefully read these instructions and keep them at an easily accessible place for future reference. Always observe the advices and tips included in these instructions. -
Page 6: Guarantee
Guarantee Guarantee conditions: If you want to make use of the Alinker guarantee, you must always be able to hand over the proof of purchase and the ‘Proof of ownership’ to the dealer or Alinker® Europe bv. For guarantee matters you can always contact your dealer, who has the knowledge to handle this in conformity with the guarantee conditions. -
Page 7: Safety
Safety Safety 3.1 Intended use The Alinker R-volution is a mobility vehicle for people who want to remain active. Skills 3.1.1 These are the skills that you must have for using the Alinker: • Be able to walk to some extent, which means that you must have control of your legs. -
Page 8: Safety Instructions
• Do not go faster than 5 km/hour (3.1 mi/h) • If you have not got used to the Alinker yet or if you cannot react quickly without loosing your balance, do not use the Alinker in traffic. You must at least have these skills: –... -
Page 9: Description
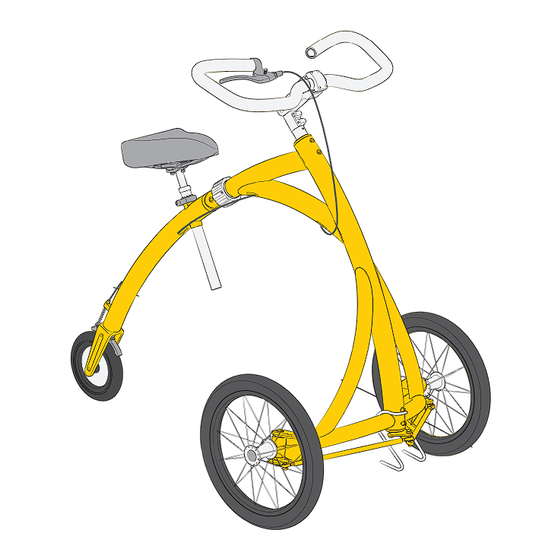
The Alinker is delivered completely assembled. 4.3 Options (accessories) There are no accessories for the Alinker yet. Bicycle accessories (e.g. a saddle, saddle pin, steering bar, handlebars attachment, handlebars basket, lighting, etc.) can be mounted unto the Alinker. Specific accessories for the Alinker will be developed. Regularly look at the website... -
Page 10: Adjust The Alinker
Adjust the Alinker Adjust the Alinker With the operations given below you can adjust the Alinker for maximum convenience: • Adjust the saddle. • Adjust the handlebars. • Adjust the brake. 5.1 Adjust the saddle Choose a saddle 5.1.1 The default saddle on the Alinker is a narrow gel saddle with springs. -
Page 11: Put The Saddle At The Correct Height
• Choose the handlebars most comfortable for you. Choose the correct holder for the handlebars. Every type of holder can be mounted on the Alinker. There are also holders with a quick release for easily taking the handlebars off the Alinker for transport in the car. -
Page 12: Adjust The Brake
Adjust the Alinker Turn the handlebars themselves 1. Loosen the 4 bolts (A) with a socket head wrench. 2. Put the handlebars (B) in the correct position. 3. Tighten the 4 bolts (A) with a socket head wrench. Turn the handlebars holder 1. -
Page 13: Transport The Alinker
Transport the Alinker Transport the Alinker The Alinker is foldable. The wheels can be clicked off the Alinker and the saddle can be removed from the Alinker. This makes the Alinker easy to transport. 6.1 Mount/dismount the front wheels Mount the front wheels 6.1.1... -
Page 14: Dismount The Front Wheels
Transport the Alinker Dismount the front wheels 6.1.2 1. Hold the wheel (A) with one hand at the hub. 2. Press and hold the black button (B) with your thumb and place your fingers around the spokes. 3. Remove the wheel (A). -
Page 15: Fold The Alinker In/Out
3. When the frame is fully folded out, turn the black ring (A) downward. The ring makes a clicking sound when the opening is fully turned downward. The Alinker can only be used when the ring is closed. Caution: Do not get on when the... -
Page 16: Mount/Dismount The Saddle
2. Remove the saddle with the saddle pin (B) from the frame (C). 3. Fold the quick release (A) inward. 6.4 Place the Alinker into the car 1. Fold in the Alinker. 2. Dismount the wheels. 3. Dismount the saddle, if necessary. -
Page 17: Use The Alinker
• Get used to the speed of the Alinker. 7.2 Get on/off You get on and off from the rear side of the Alinker to make sure that you do not get out of balance. Set the parking brake of the Alinker when getting on and off. -
Page 18: Get On
Get on 7.2.1 1. Put the Alinker on the parking brake. See 7.5.1. Set the parking brake of the Alinker. 2. Hold the handlebars and go stand behind the Alinker. 3. Slightly lift your leg and step over the saddle. -
Page 19: Put The Alinker On The Stand
7.3 Put the Alinker on the stand 1. Fold in the Alinker. See 6.2.1 Fold in the Alinker. 2. Put the Alinker on the stand (A). 7.4 Brakes Apply the following two methods for braking: 1. Use your feet to brake. Just as with walking, slow down using your heels. -
Page 20: Use The Parking Brake
Use the Alinker 7.5 Use the parking brake The parking brake can be used to block the Alinker. Use the parking brake when getting on and off. Set the parking brake of the Alinker 7.5.1 1. Squeeze the handbrake (A). -
Page 21: Ride On A Slope
Ride on or off a step. 7.6.1 Carry out the following instructions simultaneously: • Ride on or off the slope with the Alinker straight, making sure that both wheels go on or off at the same time. • Keep your weight on the saddle. This increases the stability. -
Page 22: Ride On A Sloping Surface
7.9 Ride along an obstacle When riding too close along an obstacle, a front wheel can come off the Alinker. • Do not ride too close to walls. • Check if the black button on the front wheel does not stick out while riding. -
Page 23: Maintenance
Maintenance Maintenance The following maintenance activities you can carry out yourself: • Clean. • Repair a puncture Contact your dealer • For other maintenance and repair. • Order or replace parts. 8.1 Clean • Only use hot water with a mild liquid soap and a cotton cloth for large surfaces •... -
Page 24: Repair A Puncture
Maintenance 8.2 Repair a puncture You can repair a puncture yourself. If you are not able to do this, have a bicycle repairer repair the puncture or replace the tire. You can best have a puncture repaired by a bicycle repairer. This instruction has been described for the front wheels. - Page 25 Maintenance Step 3 1. Press in the valve. 2. Pull out the tube (A). Step 4 1. Pump up the tube. • With a large puncture you can hear the air escape. • In case of a smaller puncture, submerge the tube in water (for example in a bucket).
- Page 26 Maintenance Step 6 1. Put back the tube into the tire. The valve must come straight out of the hole in the rim. 2. Tighten the rim nut a few turns. 3. Tighten the valve. 4. Pump up the tube a little to prevent the tube coming out of the tire.
-
Page 27: Product Specifications
Product specifications Product specifications Small Medium Large Suitable for people of 4’9” – 5’5” 5’5” – 5’11” 5’11” – 6’6” 1,45 – 1,65 m 1,65 – 1,80 m 1,80 – 2,00 m Length (L) 1150 mm / 45” 1240 mm / 49” 1350 mm / 53”... - Page 28 www.theAlinker.com AL-RV 1.0 EN...
Need help?
Do you have a question about the R-volution Small and is the answer not in the manual?
Questions and answers