Advertisement
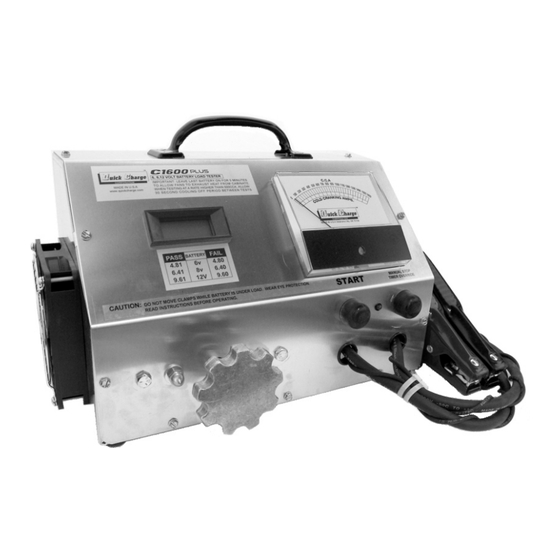
C1600 PLUS BATTERY LOAD TESTER
INTRODUCTION:
The C1600 is designed for high volume testing of 6, 8 and 12 volt starting, and deep cycle lead
acid batteries.
IMPORTANT: DO NOT USE THIS TESTER UNTIL YOU HAVE READ ALL THE
INSTRUCTIONS.
CAUTION: Always wear protective eye shields and clothing when working with
batteries. Batteries contain acids which can cause bodily harm. Do not put
wrenches or other metal objects across the battery terminal or battery top.
Arcing or explosion of the battery can result. Do not wear jewelry when
working around batteries. Arcing can cause sever burns.
Do not operate this tester if it shows any signs of physical damage.
Provide adequate ventilation for the batteries and tester. Do not obstruct the flow of cooling air
around the tester. Provide at least 10" of space around tester. Do not allow clothing, blankets
or other material to cover the tester. Certain parts of the tester will become hot when testing large
volumes of batteries.
DO NOT USE THIS TESTER IF:
The DC output clamps, or connector is loose, worn or does not make good contact; The leads are
cut or have exposed wires; The DC output leads or connector/clamps feel hot when used, or if
one or both fans do not come on when clamps are connected to battery.
Advertisement
Table of Contents

Summary of Contents for Quick Charge C1600 plus
- Page 1 C1600 PLUS BATTERY LOAD TESTER INTRODUCTION: The C1600 is designed for high volume testing of 6, 8 and 12 volt starting, and deep cycle lead acid batteries. IMPORTANT: DO NOT USE THIS TESTER UNTIL YOU HAVE READ ALL THE INSTRUCTIONS.
- Page 2 NORMAL OPERATION: 6, 8, & 12 VOLT BATTERIES NOTE: Only load test batteries at or above 75% state of charge. 1). Throughly clean post’s with a wire brush. This is important for volt meter accuracy. Observing polarity, connect clamps to battery per illustration. Both fans should come on, if they don’t, have them replaced by a qualified person.
- Page 3 2.) Press and hold the STOP button. Connect the negative clamp to battery. The time is shown in the display. Release button. 3). Locate the 1/4" hole in back of tester. Using a miniature screwdriver, turn the potentiometer to the desired time. Resetting the clamp will make the tester run on this time until it is changed. Careful when turning the pot, it is made of plastic and is easily chewed up if too large a screwdriver is used.
- Page 4 12.00, the secondary volt meter should read between11.94 - 12.06. If the reading falls outside this range, the load tester meter should be re-calibrated or replaced. If you replaced the clamps, they MUST be crimped and soldered. Contact Quick Charge for illustrative instructions on re-calibrating and replacing meter.
- Page 5 Oklahoma City, OK. 73109 Quick Charge, will at it’s option, repair or replace the charger or component in question. The repaired item will then be returned, freight prepaid by Quick Charge. This warranty is void if the charger or component have been altered, changed, or repaired by anyone not authorized by Quick Charge, or if the charger or component, have been subjected to misuse, negligence, or harsh environmental conditions.
Need help?
Do you have a question about the C1600 plus and is the answer not in the manual?
Questions and answers