Table of Contents
Advertisement
Quick Links
The Lemur Owner's Manual
Revision of 1 August 2005
© 2005 JazzMutant SAS and Cycling '74 — All rights reserved
Congratulations on your choice of the JazzMutant Lemur. This manual tells you:
•
Important safety information
•
How to network your Lemur and your computer
•
How to create interfaces for your Lemur using the JazzEditor application for Mac OS
X and Windows XP
•
How to use your Lemur to control software compatible with the Open Sound Control
protocol
Before using this unit, carefully read the IMPORTANT SAFETY
INFORMATION included in this manual, which provides important
information concerning the proper operation of the unit.
To understand the features and possibilities of your new Lemur, we recommend that you
read the Owner's Manual in its entirety and retain it for future reference.
1
Advertisement
Table of Contents

Summary of Contents for JazzMutant Lemur
- Page 1 • How to network your Lemur and your computer • How to create interfaces for your Lemur using the JazzEditor application for Mac OS X and Windows XP • How to use your Lemur to control software compatible with the Open Sound Control...
-
Page 2: Table Of Contents
Example 5: Updating a Project You Changed While Disconnected........37 Example 6: Saving a Project Under a New Name ..............38 Example 7: Downloading Your Lemur’s Contents into Your Computer......38 Using the Lemur with Open Sound Control Applications..............40 Lemur Object Reference .......................49 Area............................50... - Page 3 About the Pads ADSR .........................65 SignalScope ..........................67 Switches.............................69 Variables and Expressions ......................71 Advanced Expression Features ......................85 Time Code Example ........................89 LFO Example..........................90 Updating the Firmware of Your Lemur ...................91 Index ............................94...
-
Page 4: Contact Information
Contact Information For software updates, examples, and other supporting software, visit the JazzMutant web site at www.jazzmutant.com For the United States and Canada Cycling ’74 (distributor for JazzMutant) 379A Clementina San Francisco, CA 94103 - USA + 1 (415) 974-1818 support@cycling74.com... -
Page 5: Important Safety Information
• Do not attempt to repair the unit, or replace parts within it. Refer all servicing to your retailer or authorized JazzMutant distributor, as listed on the Information page. • Never use or store the unit in places that are: •... - Page 6 • The unit has been exposed to rain (or otherwise has become wet); • The unit does not appear to operate normally or exhibits a marked change in performance. • In households with small children, an adult should provide supervision until the child is capable of following all the rules essential for the safe operation of the unit.
-
Page 7: What's Included In The Box
• CD containing the JazzEditor applications for Mac and Windows that you’ll use to program the Lemur, a PDF version of this documentation, a demo of Max/MSP, and useful Max goodies for working with the Lemur. -
Page 8: Regulatory Information
Regulatory Information For EU Countries CE This product complies with the requirements of European Directive 89/336/EEC. For USA FCC REGULATION WARNING This equipment has been tested and found to comply with the limits for a Class B digital device, pursuant to Part 15 of the FCC Rules. These limits are designed to provide reasonable protection against harmful interference in a residential installation. -
Page 9: Notes For Proper Operation
Such noise could occur when receiving or initiating a call, or while conversing. Should you experience such problems, try relocating the wireless devices so that they are further from this LEMUR, or switch them off. - Page 10 • Never use benzine, thinners, alcohol or solvents of any kind; such chemical may cause discoloration and/or deformation. Additional Precautions • When working with the unit’s buttons, display, or other controls or when using its cords and cables try to be reasonably gentle. Rough handling can lead to malfunctions.
-
Page 11: Getting Started With The Lemur
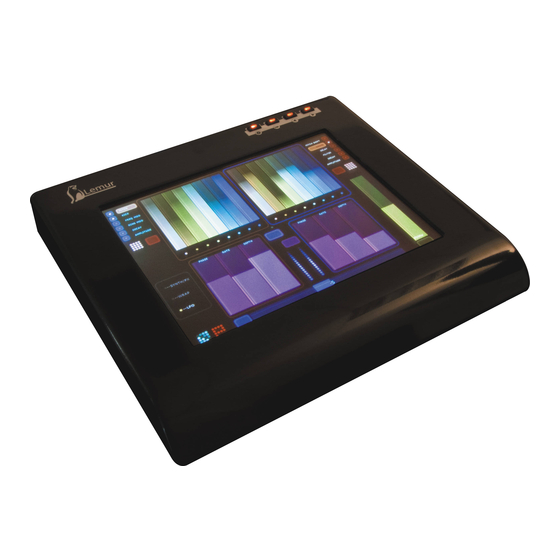
Getting Started with the Lemur Know Your Lemur The top of the Lemur includes a touchscreen and four buttons. The Settings button displays the current Lemur network configuration and software • version. • The Interface List button displays a gallery of thumbnails corresponding to each interface currently stored on the unit. - Page 12 Plug in the Lemur using its supplied AC adaptor. • Turn on the power switch on the back of the Lemur. You should see the four buttons on the top of the unit light up. After the startup sequence has finished, a yellow Lemur...
- Page 13 If you don’t see the yellow Lemur but you are sure the unit is turned on and plugged in, the unit may be malfunctioning. Please contact your JazzMutant retailer or distributor for technical support and/or repair service. Lemur Networks The Lemur uses an Ethernet-based network to communicate with your computer. This allows it to be connected directly to your computer with a single Ethernet cable, or placed on a local area network.
-
Page 14: Mac Os X Direct Configuration
Connecting a Lemur Directly to Your Computer First, turn on your Lemur and connect a network cable to the Ethernet jack on the back of the unit. Then connect the other end of the cable to your computer’s Ethernet jack. -
Page 15: Windows Xp Direct Configuration
Set the first two numbers of the IP address to 169.254. Set the next two numbers to anything that does not match the Lemur’s IP address as shown in the Settings window on the touchscreen. For instance, if the Lemur’s IP address is displayed as 169.254.0.2, you can enter 169.254.0.74. - Page 16 First, let’s examine the existing network connections on our computer. • Click Start, the right click on My Network Places in the Start menu. Choose Properties from the pop-up menu that appears. The Network Connection settings window will appear. In the window you will see different categories of network devices.
- Page 17 plugged in (or the target device is not on or working properly then you may see the following: To configure the IP address of your computer, right-click on the Local Area Connection (or whatever you’ve decided is the name of your Ethernet connection.) Choose Properties from the pop-up menu.
- Page 18 Select the Internet Protocol (TCP/IP) and click the Properties button. This brings up the TCP/IP Properties window. • For a direct connection to the Lemur not on a network and not using DHCP, click Use the following IP address and enter the following information: IP address: 169.254.0.100 Subnet mask: 255.255.0.0...
-
Page 19: Using A Router
• Connect your Lemur to the router by connecting one end of a network cable to the Ethernet jack on the back of the Lemur, and the other end to an Ethernet input jack on the router. •... -
Page 20: Mac Os X
Drag the JazzEditor to the Applications folder on your computer. When you first play with the Lemur, you’ll probably be firing up the JazzEditor a fair amount, so you may want to add it to your dock. Drag the JazzEditor icon from its location in your Applications folder to the dock. - Page 21 • installed the JazzEditor software Now we’ll use the JazzEditor application on your computer to find the Lemur on the network and talk to it. • Launch the JazzEditor. You’ll see the main window with a yellow lemur. Click the...
- Page 22 After clicking Connect, you’ll see the following window: The Connection Window If the JazzEditor can see your Lemur, you should see the word lemur followed by an IP address at the top of the window. If you have multiple Lemurs connected, you may see several IP addresses listed.
- Page 23 Before you get too excited and click the Connect button, you need to select the desired Lemur by clicking on its IP address as shown here: You can either double-click the IP address of the Lemur, or click it once and then click the Connect button.
-
Page 24: Interfaces And Objects
In other words, Projects are the Lemur’s documents. You’ll save them to your computer’s hard drive, and open them when you want to send them to the Lemur. We’ll discuss Projects in more detail in the next chapter, but first, we want to get you started creating Interfaces and Objects. - Page 25 When you first open the JazzEditor, the default Project contains no data. • If the JazzEditor is not already connected to the Lemur, click the Connect button, choose the desired Lemur in the Connection window, and click Connect. You can create interfaces with the JazzEditor without being connected to a Lemur.
- Page 26 A dialog will appear where you name the interface. Use the default name or type in a new one (you can change it later). After you create the interface, the main window (and the screen of the Lemur) will turn black. In additon, the Project Browser at the bottom left of the JazzEditor window will show a new interface with the name you typed in.
- Page 27 For this exercise, select Area and click OK. A new Area object should appear on your JazzEditor screen and your Lemur. If the Area does not appear on your Lemur, make sure that the button on the top of the main window does not say Connect (it should say Disconnect, indicating that a connection with the Lemur has been established).
-
Page 28: Project Browser Settings
Lemur shortly after you make it on your computer. Resizing an Object • Try touching the Area on your Lemur. You should see the purple ball should move around on your Lemur and your computer. Changing Object Properties Now we’ll look at using the Project Browser and Properties sections of the JazzEditor to... - Page 29 Name must be checked before the object will send any data to the computer when you are using the Lemur to control an application. In addition, the check box next to x must be checked in order for the Lemur to send horizontal positional data when you touch this Area object.
- Page 30 Try the Interpolation setting by clicking the Interpolation checkbox. • Touch the Lemur screen somewhere in the Area, but not on top of the ball. The ball moves toward your finger according to the value of the Attraction property instead of immediately.
- Page 31 Creating Objects • Modifying Object Properties For more information on working with the other Lemur objects, refer to the Object Reference chapter. Navigating Interfaces Now that we’ve created one interface, it’s worth creating a second one so you can see how the Lemur allows you to change the interface that appears on the screen.
- Page 32 • Press the Interface List button on the top of your Lemur. The upper left corner of the screen of the Lemur should look something like this. • Touch the picture of the interface you want to use, and it instantly covers the entire screen.
-
Page 33: Projects
You can use the Project Browser to select the current interface you want to edit. However, this does not switch the interface currently displayed on the Lemur. To sync up the Lemur with the JazzEditor, use the Interface List button to select the desired interface. - Page 34 The relationship between the Project you are editing in the JazzEditor, what is saved on the hard drive of your computer, and what is currently in the Lemur is potentially confusing. The JazzEditor software attempts to be somewhat intelligent about managing...
-
Page 35: Example 1: Opening A Saved Project
There is no straightforward way to erase the current contents of your Lemur. Well, actually there is one, but you might not like it: turn the Lemur off and back on again: The Lemur has no non-volatile memory for Projects. -
Page 36: Example 2: The New Button, Part 1
Lemur will be sent back to the JazzEditor. The principle is this: when connected to your Lemur, the JazzEditor wants its state to be the same as the Lemur. Use the Disconnect button to edit Lemur interfaces “off-line.”... -
Page 37: Example 4: Opening A Project, Again
JazzEditor. Click No if you want to remain disconnected and leave the state of the Lemur as is. Again, the principle is this: if you want to connect to the Lemur, you’d better be prepared to reconcile its state with the JazzEditor. -
Page 38: Example 6: Saving A Project Under A New Name
Example 7: Downloading Your Lemur’s Contents into Your Computer Let’s say we get ourselves into a situation in which the Lemur holds the only copy of our Project. This might happen if you quit the JazzEditor without saving your project. Or, perhaps we made some changes while disconnected that we don’t want, and we would... - Page 39 Click the Connect button. After choosing the desired Lemur and connecting, the contents of the Lemur have returned to the JazzEditor. In short, the technique for downloading what’s on your Lemur is to click New before connecting. This causes the JazzEditor to believe (correctly) that the contents of the Lemur are more valuable than nothing.
-
Page 40: Using The Lemur With Open Sound Control Applications
IP address (called the Target IP). Similarly, if you want to send OSC messages to a Lemur, you have to specify an IP address. In short, to use OSC you have a few more things to keep in mind, but the flexibility of the system is your reward for a small amount of advance setup work. - Page 41 Settings window from the perspective of the Lemur, not your computer. You are telling the Lemur the target for its messages. If you plan to use the Lemur to control your computer, the target will be your computer .
- Page 42 It’s important to copy the IP address into the Target IP field exactly as it appears in the IP1 display. Next, we want to set the port on which the Lemur will transmit OSC data. Ports are something like channel selectors that allow multiple applications to share the same IP address and not get in each other’s way.
- Page 43 • If you have not done so already, copy the Lemur Extras folder to your hard drive. • Launch Max/MSP.
- Page 44 Open Sound Control protocol so it can handle messages coming from the Lemur. It outputs a Max message consisting of the Open Sound Control message name (the object plus variable name preceded by a slash) followed by the message values.
- Page 45 /Andy.x <value> /Andy.y <value> As we saw above, if a Lemur object has only a single value—such as the Fader—its value is transmitted as x. In other words, a Fader named Fred will transmit /Fred.x followed by a single value. However, it’s also possible that the x variable contain a list of numbers. This is true of the MultiSlider, Pads, and Switches.
- Page 46 / variable combinations you want to receive from the Lemur. For example, suppose you had this interface on the Lemur with an Area and a Fader.
- Page 47 The advantage of this technique is that if we now add a new object to our Lemur Interface, for instance, Paul the Pad (button), we can simply add a new receive object, Paul.x, to our patch, and it will receive data from the Button object on the Lemur.
- Page 48 Touch the OK button on the Lemur screen to close the Settings window on the Lemur • Scroll the number box in the patch from 0 to 1. The Fader on the Lemur should be changing its value. All OSC messages understood by the Lemur start with the OSC message selector (the forward slash followed immediately by the Lemur object name, followed by a dot, followed by the variable name of the variable you want to change on the object).
-
Page 49: Lemur Object Reference
Lemur Object Reference The Lemur contains seven objects you can use to build interfaces. This section explains the features, options, and OSC message format of each of object. The object names appear in the picker window you see when clicking the Object button at the bottom of the JazzEditor window. -
Page 50: Area
Area The Area object tracks your finger with a purple ball within a rectangular space. Variables The horizontal location of the ball. By default, the left edge of the space is 0, and the right edge is 1. The vertical location of the ball. By default, the top edge of space is 0, and the bottom is 1. - Page 51 The x and y variables are transmitted from the Lemur with one value representing the ball’s position in each dimension. /ObjectName.x <value> /ObjectName.y <value> Host->Lemur The x and y variables can be received by the Lemur with one value representing the ball’s position in each dimension. /ObjectName.x <value> /ObjectName.y <value>...
-
Page 52: Fader
Fader The Fader tracks your finger with a vertical oriented virtual “knob” and transmits one value corresponding to the vertical position of the knob. Variables The vertical location of the knob. When the knob is at the top of the fader, the value is 1 by default. When it is at the bottom, the value is 0. - Page 53 Color Drag the color bar to change the background color of the fader. The knob remains a translucent green with pink outline. Properties Example This collection of General properties can be used to configure a fader that displays values in decibels, where 0 dB is considered the maximum.
- Page 54 Values of 1 for Attraction and Friction are essentially the same as if No Physic(s) was checked. Another consideration is that with lower values of Attraction and Friction when using Mass-Spring mode, the Lemur will send the knob’s position constantly. Attraction See Interpolation and Mass-Spring above.
- Page 55 OSC Data Lemur->Host The x variable is transmitted from the Lemur followed by one value representing the knob’s position. /ObjectName.x <value> Host->Lemur The x variable can be received by the Lemur followed by one value representing the knob’s position. /ObjectName.x <value>...
-
Page 56: Monitor
Monitor The Monitor sends no data when you touch it. Its purpose is to display information sent to the Lemur by your computer. Variables value Represents the value of the Monitor to be displayed. Dimensions Minimum 50 pixels wide and 22 pixels high. The font size of the monitor is adjusted as the object is resized. - Page 57 OSC Data Lemur->Host The value variable is transmitted when the Monitor’s value changes. /ObjectName.value <value>...
-
Page 58: Multiball
Multiball The Multiball object assigns each finger to track one of a number of balls (up to 10) in a rectangular space. Balls can either always be visible or only appear when you touch the space; the latter is called ephemeral mode . The brightness of the balls is sent as the z variable in the object. - Page 59 Drag the color bar to change the color of the outline around the Multiball’s rectangular space. The colors of the balls are fixed as follows: 1: faded purple 2: lime green 3: “lemur” yellow/orange (see screen shot above) 4: lemon yellow 5: red 6: teal blue 7: deep blue...
-
Page 60: About The Multiball Adsr
OSC Data Lemur->Host The x, y, and z variables are transmitted from the Lemur with a list of values representing the positions of each of the balls. The number of items in the list of values is equal to the number of balls... - Page 61 /ObjectName.z <value-for-ball-1> <value-for-ball-2> etc. Host->Lemur The x, y, and z variables can be set by sending the Lemur a list of values representing the positions of each of the balls. The number of items in the list of values should be equal to the number of balls the object is using.
-
Page 62: Multislider
MultiSlider The MultiSlider object tracks movement across an array of sliders. You can “wipe” all the faders to a set value with one horizontal gesture. This is pretty hard to do with real—or virtual—faders. Variables A list of the vertical positions of all the individual sliders. Dimensions Default 100 x 100 pixels... - Page 63 The x variable is transmitted by the Lemur as a list of numbers representing the height of each slider. /ObjectName.x <slider-value-1> <slider-value-2> etc. Host->Lemur The x variable can be received by the Lemur as a list of numbers representing the height of each slider. /ObjectName.x <slider-value-1> <slider-value-2> etc.
-
Page 64: Pads
Pads The Pads object is a two-dimensional array of buttons that are triggered by touch. They are intended to trigger events instead of represent state, since they eventually return to an “off” value after you touch them. Variables A list of the envelope (brightness) values of the pads in the object. Dimensions Default 100 x 100 pixels... -
Page 65: About The Pads Adsr
Behavior Properties About the Pads ADSR The four behavior properties of a Pads object relate to its “brightness” or x variable envelope. You specify time values for the Attack, Decay, and Release in seconds as well as a Sustain level between 0 and 1. Unlike a keyboard ADSR, the Pads ADSR goes through its entire cycle when you touch the surface to trigger it. - Page 66 OSC Data Lemur->Host The x variable is transmitted by the Lemur as a list of numbers representing the brightness of each pad. /ObjectName.x <pad-value-1> <pad-value-2> etc. The pads are reported in the following order: Host->Lemur The x variable is received by the Lemur as a list of numbers representing the brightness of each pad.
-
Page 67: Signalscope
SignalScope The SignalScope displays values of other objects and variables on your Lemur. The “trace” shows a recent history of the value of what you are monitoring. Variables None Dimensions Default 100 x 100 pixels Minimum 32 x 32 pixels General Properties ... - Page 68 A variable or constant expression that will be periodically evaluated and plotted against X. For example, to plot the x variable of a Fader object called chan1, enter chan1.x in the text field.
-
Page 69: Switches
Switches The Switches object is a two-dimensional array of toggle switches) whose values are reversed when you touch them. Switches can be used to represent and transmit one or more on-off states. Variables A list of the on-off values of the switches in the object. The list starts with the top-left corner, and traverses the first row before starting at the beginning of the second row (see diagram under OSC Data). - Page 70 OSC Data Lemur->Host The x variable is transmitted by the Lemur as a list of numbers representing the state of each switch. /ObjectName.x <switch-value-1> <switch-value-2> etc. The switches are reported in the following order: Host->Lemur The x variable is received by the Lemur as a list of numbers representing the state of each switch.
-
Page 71: Variables And Expressions
Variables and Expressions This chapter includes a preliminary discussion of the powerful expression language lurking inside the Lemur. Instead of a complete description of the feature, we’ll focus on teach you how to do three things: • How to make Lemur objects control each other’s behavior •... - Page 72 The interface should look like this: • If you have not done so, Connect to your Lemur and test it out. As you change the Faders, the physical modelling properties of the two Areas change. Let’s examine how this Project works.
- Page 73 OSC message coming from your Lemur. • On the Lemur, raise the Frict and Attract faders so that there isn’t any constant output coming from the Area objects. •...
- Page 74 When we move the Fader object named Frict, the Lemur transmits what could be interpreted as two functionally identical OSC messages, one which represents the value of the fader, and one which represents the value of the friction being controlled by the Fader object’s x variable.
- Page 75 Friction property previously set to Frict.x with MoreFriction. • Move the Frict fader on the Lemur again, and take a look at the Max window. You should see something like this: print: /Frict.x 0.333333 print: /Andy.friction 0.666667...
- Page 76 Max/MSP patch. Now, it’s certainly true that we could do this scaling fairly easily in Max, but the Lemur is capable of similar feats, so transforming control values into appropriate ranges no longer requires a host computer.
- Page 77 Whoosh.mxb found in your Lemur Extras folder. • Turn on the audio. Touch the Pad object on the Lemur. You should hear a filter sweep the noise from 0 to 1000 Hz. The fader will change the amount of resonance.
- Page 78 • Click the disclosure triangle on the Default interface in the JazzEditor Project Browser to see the objects in the patch. Then click on the disclosure triangles of each of the two objects resfader and trig to see what’s lurking inside of them. You may want to expand the width of the Project Browser to see everything.
- Page 79 When the fader is moved, the OSC message /resfader.rezzo <value> is transmitted by the Lemur. In the Max patch, a route object captures this value and uses it to adjust the filter resonance. The resonance parameter of the lores~ object actually goes from 0 to 1. But the interesting range is between 0.8 and 1.
- Page 80 We’re going to use the first slider for Attack, the second for Decay, the third for Sustain, and the fourth for Release. As with the x variables of all Lemur objects, the MultiSlider x variable varies between 0 and 1. This is not really enough of a range for the time values of our envelope, so we need to scale these values.
- Page 81 not scale the value for Sustain, since this is just a value between 0 and 1. We will later scale the envelope’s amplitude” with the cutto variable. When you’re done, your trig object should look like this: • The final step is to enter these variable names in the Behavior Properties of the trig object.
- Page 82 Using Variables and Expressions to Display Data In this example, we’ll show how a Lemur object can receive OSC messages from the computer and display values. We’re going to use the Lemur as a remote monitor on a process happening on our computer.
- Page 83 Open the Lemur Project file ProcessMonitor.xml. The interface is shown below. The Lemur project has a tiny Pad object, a Monitor, and a SignalScope. Let’s examine the Project Browser view of what’s going on. Open up the Default interface and the object called mini, which is the Pad in the upper-left-hand corner of the screen.
- Page 84 0 to 1, since there is no need to scale the value. Now let’s take a look at how the Max patch sends data to the Lemur, and see if we can get the Lemur to do some status monitoring.
-
Page 85: Advanced Expression Features
Advanced Expression Features There are two types of expressions supported by the Lemur: Variables and Functions . In previous chapters we defined variable expressions that belonged to Lemur objects. In this chapter we introduce the concept of global variables as well as global user-defined functions. - Page 86 Defining and Using Functions In addition to built-in functions and operators, you may define your own mathematical functions to use in other Lemur variables and expressions. Here’s how to do it: • Click the Expression button to create a new Expression. The Expression editor...
- Page 87 A vector (also known as an array or list), is a variable that holds more than one element (number). The Lemur expression syntax allows operations on vectors and access to the elements. You can access the data in certain Lemur objects (Multislider, Multiball, Pads, Switches) as vectors.
- Page 88 The time variable is a millisecond value you can use for creating time-varying behavior in your Lemur. It represents the number of milliseconds since your Lemur was turned on, although it resets to 0 every hour. The time value is intended to be manipulated by mathematical operators, particularly multiplication (*), division (/), and the modulo operator (%).
-
Page 89: Time Code Example
Lemur objects. For example, here is the Properties Browser view for a monitor object that would display a global Seconds variable. Even if you are not connected to a Lemur, the resulting Monitor object will begin changing immediately after you enter a time-based variable. -
Page 90: Lfo Example
LFO = sin(time * 2) *0.5 + 0.5 You can display this in a SignalScope. You can assign time-based variables to properties in Lemur objects (such as Friction or the ADSR envelopes) to create objects that change over time. However, you can’t assign the values of objects (other than the Monitor and SignalScope), so you can’t use the time... -
Page 91: Updating The Firmware Of Your Lemur
Lemur. The firmware version is displayed at the top of the Window. If the current version on the web site is the same as the version in your Lemur, you don’t need to update. If it is older, click the Lemur.bin link to download it. - Page 92 The file Lemur.bin will now be located on your in browser’s download folder. Connecting To Your Lemur and Updating the Firmware • If you have done so yet, make sure your Lemur is on a network connected to your computer. •...
- Page 93 During this time, the Lemur will become disconnected from the JazzEditor. • After you see the yellow Lemur appear on the Lemur screen, click the Connect button in the JazzEditor. If all went well, you should see the Lemur and its IP listed in the Connection window. •...
-
Page 94: Index
Interfaces ........... 24 connecting the Lemur creating multiple Interfaces .... 31 firmware update ......92 interference .......... 9 connecting the Lemur to Max/MSP ..42 internal IP address......14 controlling Max/MSP with the Lemur 45 JazzEditor controlling the Lemur from Max/MSP 47 application on CD ...... - Page 95 93 Switches object ......70 maintenance ......... 9 Pads ADSR ........65 Max/MSP Pads object......... 64 connecting the Lemur..... 42 Positional data forward object........47 enabling ......... 29 power input jack......... 12 OSC port number ......42 power supply........7, 9 port 8000........
- Page 96 Variables ..........49 Variables and Expressions....71 Area object........50 Windows XP configuration, direct ....... 15 displaying data ....... 82 configuration, IP Address ....18 Fader object ........52 configuration, local area connection16 Monitor object........ 56 JazzEditor software installation ..20 Multiball object ......
Need help?
Do you have a question about the Lemur and is the answer not in the manual?
Questions and answers