Table of Contents
Advertisement
Advertisement
Table of Contents

Subscribe to Our Youtube Channel
Related Manuals for Rachio 680474003150


Summary of Contents for Rachio 680474003150
- Page 1 Let’s get started! www.rachio.com/support...
- Page 2 Rachio’s products include a 2 year limited warranty and a 30 day return policy. www.rachio.com/warranty Outdoor Installation This Rachio controller is designed to be installed indoors. If you need to install yours outside, a weatherproof enclosure is required. You can purchase an enclosure at www.rachio.com/store For outdoor install instructions visit www.rachio.com/outdoors...
- Page 3 What’s in the box? cover base power adapter 4 screws with anchors...
- Page 4 What you’ll need... Wi-Fi Access 2.4 GHz The Rachio controller uses wireless communications and must be installed within range of a strong signal source for optimal performance. If the Wi-Fi signal strength is low, you may need to move your wireless router or install a Wi-Fi extender.
- Page 5 phillips screwdriver wire strippers drill hammer (for drywall installs ) (for drywall installs)
- Page 6 Easy Install 4 Steps...
- Page 7 Use your phone to take a few photos of your old controller’s wiring from a few angles. This will come in handy when it’s time to wire your Rachio controller. Unplug your old controller. Disconnect the wires from your old controller and then remove it from the wall.
- Page 8 Install Attach it to the wall. Remove the controller’s cover from the base. Locate the 4 mounting locations on the base. Attach the base to the wall using the included screws. Wall anchors are included for drywall. Wire it up. Insert sprinkler wire through the opening on the base.
- Page 9 Required Wiring Connect common wires to any of the four terminal locations labeled with a “C”. Zone wires connect to the numbered terminals “1-16”. Only install a single valve wire per terminal. Power and ground wires are not needed. Advanced Wiring If you have a master valve, pump start relay, hydraulic indexing valve, or sensor see Advanced Wiring on page 28.
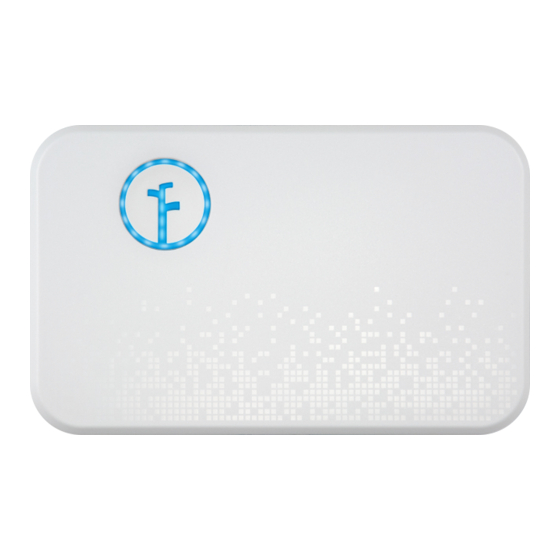
- Page 10 Connect Download the Rachio app. www.rachio.com/appstore Create a Rachio account. You’ll need to create a username and password to connect your controller. Connect your controller to Wi-Fi using the app tutorial. The Rachio app will guide you through the process. The lights...
- Page 11 Wi-Fi, the light will turn solid. Light Three (Connecting to Rachio Cloud) This light will begin blinking as the controller attempts to connect to Rachio’s servers. Once connected, it will turn solid. Light Four (Online) This light will begin blinking until you enter the controller’s serial number.
- Page 12 Tips for Connecting While the controller is compatible with numerous platforms, it must be setup via the Rachio mobile app for initial activation, including zone and scheduling configuration. If the controller fails to connect, a Wi-Fi reset will be required to clear the controller’s network settings.
- Page 13 Control The app will now guide you through the setup process in order to create your first schedule. The Rachio controller uses your local weather data combined with the specifics of your landscape to create accurate and efficient schedules. You can change the national weather station you use, or even choose a personal weather station.
- Page 14 Your Zones Every yard is different. Customize each zone’s vegetation, soil, shade, nozzle and slope types. Your controller will use this information to better predict when and where you’ll need water. You can adjust each zone over time and your schedules will automatically adjust, watering more effectively.
- Page 15 Your Schedules Fixed Schedules Water on a static schedule; Rachio adjusts watering durations using statistical data and skipping schedules based on local weather forecasts. Flex Schedules Water only when needed; Rachio dynamically adjusts watering days based on soil moisture needs. Promotes root growth and...
- Page 16 Rain Delay Manually pause watering for a specific duration of time. This can be disabled or adjusted within the app. Integration Partners Rachio integrates with numerous platforms and products. Learn more at www.rachio.com/integration-setup...
- Page 17 Congratulations! Your Rachio Sprinkler Controller is now up and running.
- Page 18 Manual Controls Manually Start and Stop Zones Press the Arrow Buttons up or down to select the zone you want to run. Press the Select Button to start and stop the selected zone. When you start a zone, it will begin watering immediately and then stop after a short duration.
- Page 19 Wi-Fi Reset Perform a Wi-Fi Reset when you need to reconnect your controller to your Wi-Fi network. It will clear the controller’s network settings, but not the yard or schedule settings. Press and hold the Down Arrow and Select Button simultaneously until the LED light ring is fully illuminated.
- Page 20 Troubleshooting...
- Page 21 Restart the controller. Power cycle the controller. Simply unplug the device and plug it back in. Keep an eye on the Rachio light; what light (1-4) does it light up to? If stuck at light 2, perform a Wi-Fi reset on the...
- Page 22 “Applications Manager.” Swipe your finger across the screen to the left until you are on the “Running” tab. Scroll down until you find the Rachio app and tap on it. Tap on either the “stop” button or “force stop” button to shutdown the app.
- Page 23 Is the Master Valve toggle enabled? If your system has a master valve or pump start relay, ensure the master valve toggle is enabled within the Rachio App’s device settings. Common Wire Is the issue isolated to one or all zones? If all zones, move common wire to a different common terminal to see if the issue continues.
- Page 24 Not Stopping/Slow Leak Is there debris in valve? Turn off water to the system. Remove top of valve via twist or screws. Remove diaphragm assembly and clean the interior of the valve. Inspect the diaphragm for tears. Replace the diaphragm assembly if torn. Make sure all components are installed properly when reassembled.
- Page 25 Are your wires properly connected? Check wiring for loose connections. For a master valve/pump start relay, ensure it’s enabled in advanced settings in the Rachio App. Wires loose? Corroded connections? Check your system’s wiring for damaged wires. Check all connec-...
- Page 26 Schedule or weather are inaccurate. Have you picked an accurate weather station? Verify the reported weather matches what you observed. If the weather reported is incorrect, report the station. Try to find the most accurate weather station in your area, and keep in mind Personal Weather Stations (PWS) can be inaccurate.
- Page 27 Make sure your Rain Sensor is working. Verify operation of the rain sensor and proper wiring. 1. Ensure the rain sensor toggle is enabled in the Rachio App’s device settings. Re-enable the rain sensor toggle if it is disabled.
- Page 28 Advanced Wiring...
- Page 29 Master Valve Wiring Install in the “M” terminal slot, and enable the Master Valve from the device settings under Advanced within the Rachio App. Complete this wiring only if you have a master valve installed in your irrigation system. A master valve is a “normally closed”...
- Page 30 Do I have a Pump Start Relay?
- Page 31 Pump Start Relay Wiring A pump start relay serves as a switch that activates 110-220VAC power to the pump when the Rachio controller’s master valve is enabled. Since the Rachio controller outputs 24VAC, a pump start relay is required when using a pump with the Rachio controller.
- Page 32 Do I have a Hydraulic Indexing Valve?
- Page 33 If your system’s water supply comes from city water, install following the Master Valve wiring instructions, page 29. Since the Rachio controller outputs 24VAC, a pump start relay is required when using a pump with an Indexing valve (See page 30).
- Page 34 Rain Sensors Rain Sensors will temporarily suspend watering by the irrigation controller when moisture is detected. Rain sensors normally have 3 wires; common, normally open, and normally closed. Rachio controllers use normally closed wiring (sometimes labeled NC). For more information, visit www.rachio.com/rain-sensor...
- Page 35 Insert one (1) of the 24VAC leads and common wire into the SC terminal slot. • Insert the other 24 VAC lead into the SP terminal slot. • Enable & set up the sensor terminal under the advanced settings in the Rachio App.
- Page 36 • Insert one (1) of the leads into the SC terminal slot. • Insert the other lead into the S1 or S2 terminal slot. • Enable & set up the sensor terminal under the advanced settings in the Rachio App.
- Page 37 Hard Wiring An enclosure is required for hard wiring installations and/or out- door installation; For details, reference www.rachio.com/outdoors Multiple Controllers If you’re using more than one controller, do not share ANY wires between them. A relay is required. For further details reference www.rachio.com/relay...
- Page 38 Defective Product during the Limited Warranty Period by visiting www.rachio.com/returns and return the Defective Product to Rachio on or within thirty (30) days following the date you notified Rachio in writing of the Defective Product. You must provide Rachio with proof of the original purchase of the Defective Product from Rachio or an authorized dealer.
- Page 39 We will always ask for permission before sharing personally identifiable information like your email address, and we keep your data safe with the same security tools banks use. Learn more about our Privacy Policy at www.rachio.com/privacy Recycle Recycle your old controller. www.rachio.com/recycle...
- Page 40 ©2016 Rachio, Inc.
Need help?
Do you have a question about the 680474003150 and is the answer not in the manual?
Questions and answers