Table of Contents
Troubleshooting

Summary of Contents for Air innovations HEPAir 24S050
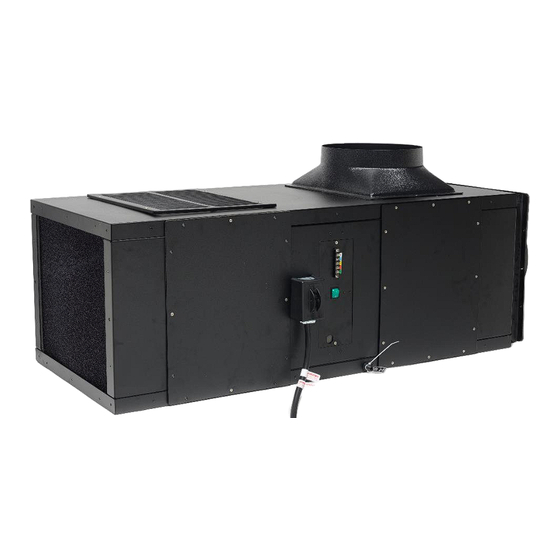
- Page 1 HEPAir Installation, Operation and Maintenance Manual (Model shown may not be reflective of your model) Manufactured by: 7000 Performance Drive North Syracuse, NY 13212 Edition 10-2018 © Air Innovations 2018 Part No. 15H0222-00...
-
Page 2: Table Of Contents
TABLE OF CONTENTS Directory of Terms ......................5 Receiving, Inspecting and Unpacking the HEPAir Unit ............ 6 Review the Packing Slip to Verify .................... 6 Check the unit for ........................6 General Description ......................7 Standard Specifications ....................8 The HEPAir Unit Contains ....................8 Accessories and Optional Equipment ................ - Page 3 Performing a Pre-installation Check ..................26 Locating the Unit ........................26 Grilles ........................... 26 Reducing Noise from the Unit ....................26 Mounting the Unit ......................27 Floor Mounting ........................27 Wall Mounting ........................27 Ceiling Mounting ........................27 Installing the Condensate Drain Connection ................. 27 Installing the Drain Line ......................
- Page 4 Troubleshooting ......................40 Typical Start-up Problems ....................40 Unit Does Not Start-up ......................40 Power Switch Light is Off ...................... 40 Power switch light is on and the thermostat light is off ............40 Power switch light is on and the thermostat light is on ............40 Unit is operating and blows evaporator air, ................
-
Page 5: Directory Of Terms
Directory of Terms Ambient Air – The surrounding area outside the space to be conditioned such as a room, basement, garage or outdoors. BTUH – British thermal units per hour. CFM – Cubic feet per minute. A unit of measurement for the amount of air handled by the fan. Condensate / Condensation –... -
Page 6: Receiving, Inspecting And Unpacking The Hepair Unit
Receiving, Inspecting and Unpacking the HEPAir Unit NOTE: HEPAir units are factory assembled and tested prior to shipment. HEPAir units are shipped in individual corrugated boxes. ✓ Lift at the designated handhold locations only or fully support from underneath. A shipment may include one or more boxes containing accessories. -
Page 7: General Description
General Description Refer to overview illustrations starting on page 12 The HEPAir is a self-contained air conditioning unit using R-134a refrigerant. HEPAir was designed primarily for ease of installation, operation and service. Conditioned air is discharged to the room while condenser air is discharged above the ceiling. The unit is designed for use in a clean room, where environmental and tight tolerance conditions are required. -
Page 8: Standard Specifications
The water-cooled HEPAir system requires cooling water to be piped to the unit for proper operation. The cooling water absorbs the refrigerant heat through the unit’s water-cooled condenser coil. Warm water is then directed out of the unit back to the cooling water system or to a drain. -
Page 9: Accessories And Optional Equipment
Accessories and Optional Equipment Heating Coils An optional heating coil is built-in and requires no additional power source. The electric heating option is factory installed and includes primary and secondary over-temperature protection devices per UL and NEC. Water Cooled Option A water-cooled option is available that uses a tube-in-tube heat exchanger in place of the condenser coil and fan. -
Page 10: Overview Of The Hepair Unit
Overview of the HEPAir Unit Refer to overview illustrations starting on page 11 Cabinet – The cabinet and access doors are constructed of aluminum with a powder coated finish for corrosion protection and an attractive, maintenance-free appearance. Areas in contact with cold temperatures are lined with insulation to prevent condensation. -
Page 11: General Overview Illustration Of The Hepair Unit
General Overview Illustration of the HEPAir Unit (may not be representative of all applications) Fig. 1 Fig. 2... -
Page 12: Overview Illustration Of Water-Cooled System
Overview Illustration of water-cooled system Fig. 3 Fig. 4 Water In... -
Page 13: Wiring Diagram For Hepair
Wiring Diagram for HEPAir Fig.5... -
Page 14: Wiring Diagram For Hepair With Remote Control
Wiring Diagram for HEPAir with Remote Control Fig.6... -
Page 15: Hepair Dimensional Data
HEPAir Dimensional Data... -
Page 16: Hepair Dimensional Data
HEPAir Dimensional Data Model Number 24S050 24S088 24S200 Dimension – Nominal – add 0.375 inches for each grille A – Depth Inches 22.38 B – Height Inches C – Width Inches 32.63 32.63 49.50 D – Evap. discharge location Inches 23.38 23.38 37.19... -
Page 17: Hepair Specifications Sheet
1. Net cooling capacity at entering temperature and humidity conditions of 57 Deg F and 55% RH at rated airflow . Reduce capacity by 3% for each 10% reduction in evaporator airflow . 2. Air Innovations reserves the right to make changes to this document w ithout prior notice at its sole discretion. 3. All rating at sea level. -
Page 18: Hepair Specifications
HEPAir Specifications 24S088 HepAir in WG chassis HEPAir All data at 90F air entering condenser Evaporator entering air Evaporator CFM Condenser CFM Sensible / Latent 70F/35% RH 8036/107 70F/40% RH 7762/597 70F/45% RH 7356/1227 70F/50%RH 7044/1750 70F/55% RH 6621/2342 70F/35% RH 9048/0 70F/40% RH 8927/0... - Page 19 24S200 HepAir in WG chassis HEPAir All data at 90F air entering condenser Evaporator entering air Evaporator CFM Condenser CFM Sensible / Latent 70F/35% RH 15061 / 718 70F/40% RH 14375 / 1753 70F/45% RH 13733 / 2947 70F/50%RH 13154 / 3890 70F/55% RH 12317 / 5208 70F/35% RH...
-
Page 20: Safety
Safety Before installing or maintaining the HEPAir unit do the following: 1. Read these instructions. 2. Keep these instructions. 3. Heed all warnings. 4. Follow all instructions. IMPORTANT The equipment described in this manual uses electricity. Be sure to follow the safety procedures outlined in the HEPAir Manual. -
Page 21: Lockout/Tagout Procedure
Following is a typical example of a Caution message as it could appear in the manual: CAUTION RISK OF PERSONAL INJURY OR DAMAGE TO EQUIPMENT Improper installation may result in the equipment malfunctioning and a safety hazard. Read all of the installation instructions before installing the HEPAir unit. Lockout/Tagout Procedure 1. -
Page 22: Moving Parts Hazards
Moving Parts Hazards The motor and blower must be disconnected prior to opening access panels. The motor can start automatically. Disconnect all power and control circuits prior to servicing to avoid serious injuries or possible dismemberment. The fans are free-wheeling after the power is disconnected. Allow the fans to stop completely before servicing the unit to avoid cuts or dismemberment. - Page 23 • All supports for the unit must be designed to meet applicable local codes and ordinances. • Do not remove access panels until fan impellers have completely stopped. Pressure developed by moving impellers can cause excessive force against the access panels. •...
-
Page 24: Installation
Installation WARNING SHARP EDGES RISK OF SERIOUS INJURY SHARP EDGES ARE PRESENT INSIDE THE HEPAIR SYSTEM Pre-installation Test Test the system before installing it to check for non-visible shipping damage. To test the system: ✓ Set the system on the floor or a sturdy level surface. ✓... -
Page 25: Air Flow Illustration
Air Flow Illustration Fig. 1 and 2 Evaporator inlet (Return Air from conditioned space) 1 of 3 possible Evaporator Supply Air Locations (Cool air to conditioned space) Planning the Installation Addressing Items in the Planning Process ✓ Where to locate the unit? Mounted remotely and ducted into the conditioned space? ✓... -
Page 26: Performing A Pre-Installation Check
Performing a Pre-installation Check ✓ Check for the proper installation of the electrical plug configuration. ✓ Check for the properly sized breaker. ✓ Is the conditioned built with adequate insulation and vapor barriers? ✓ Are ducts installed above the ceiling or in accessible places properly sized before being covered? ✓... -
Page 27: Mounting The Unit
Mounting the Unit CAUTION RISK OF PERSONAL INJURY OR DAMAGE TO EQUIPMENT Check supporting structure for load bearing capacity to support the HEPAir. All supports must be designed to meet applicable local codes and ordinances. If in doubt, consult a qualified architect, engineer or contractor. NOTE: Review the mounting illustrations on page 52 before mounting the unit. -
Page 28: Installing The Drain Line
Installing the Drain Line ✓ Drain tubing should have an inside diameter of half an inch. ✓ The drain line must extend from the unit to an external open floor drain or condensate pump (an external trap is not required as HEPAir units are built with an internal trap). ✓... - Page 29 Sample serial plate DO NOT: ✓ DO NOT MODIFY THE PLUGS IN ANY WAY! ✓ Do not use extension cords. IMPORTANT The electrical power supply must be either 115 volts or 230-volt AC, 1 phase, 60 cycle, depending on the model of the unit, and cannot vary more than plus or minus 4% or damage may occur to the unit.
-
Page 30: Installing The 24V Field Supplied Thermostat, If Not Pid Control Option
Installing the 24v field supplied thermostat, if not PID control option The HEPAir unit allows for a remote interface controller field supplied that operates on 24V. Each HEPAir unit is supplied with a remote interface controller. It is wired at the factory for testing prior to shipment. -
Page 31: Location Of Supply And Return Grilles
Location of Supply and Return Grilles Locate the supply and return grilles inside the conditioned space to create an airflow pattern that maximizes air circulation in the room. Avoid short circulating of the air. Do Not: Install the return air grilles directly on the floor as the grilles will collect dust from the floor. -
Page 32: Using Ductwork
Using Ductwork Cold Air to/from the Conditioned Space ✓ Connect the supply air ductwork from the conditioned space to the supply air duct collar at the HEPAir unit. ✓ Connect the return air ductwork from the conditioned space to the return air duct collar at HEPAir unit. -
Page 33: Ducting Options
Ducting Options Single Outlet Duct Installation Supply Air to Space Supply Air to Space Supply Air to Space Supply Air to Space Supply Air to Space... -
Page 34: Inspection And Start-Up Checklists
Inspection and Start-up Checklists Receiving and Inspecting Unit received undamaged Unit received complete as ordered including accessories Handling and Installing Unit mounted on solid level surface Sufficient space allowed for access to unit and accessories. Proper electrical service provided ... -
Page 35: Starting Up And Operating The Hepair
Starting Up and Operating the HEPAir Now that the installation is complete, it’s time to start the unit up. Check to make sure all ductwork and electrical connections are secure. Replace all panels that were removed during installation. Check that all of the openings in the unit are covered with a blank a panel, ductwork connection or a grille. -
Page 36: Hgbv (Hot Gas Bypass Valve)
Cooling coil, and therefore increase the cooling coil leaving air temperature, if that would be helpful for the application. Air Innovations does not recommend making an adjustment without consulting Technical Support at the factory, to confirm this adjustment would be useful to make, based on your application. -
Page 37: Maintenance
Maintenance General WARNING BEFORE PERFORMING MAINTENANCE ON THE UNIT, READ AND UNDERSTAND THE SAFETY INFORMATION CONTAINED WITHIN THE SAFETY CHAPTER OF THE HEPAIR MANUAL. DANGER HIGH VOLTAGE - RISK OF SERIOUS INJURY OR DEATH High voltages are present in the cabinets. Turn off all power. Use the Lockout/ Tagout procedure before opening panels. -
Page 38: Cleaning The Condensate Drain System
5. Inspect and clean the face of the coil. Sharp edges are present on the fins and coils. 6. Reinstall the filter. 7. Replace the duct collar. Cleaning the Condensate Drain System The condensate drain system traps dust and dirt. Clean the drain system once a year. 1. -
Page 39: Maintenance Schedule
Maintenance Schedule Monthly (or quarterly depending on experience with individual space) ✓ Check filter and drain trap – clean if needed. ✓ Check for noise or vibration. ✓ Check for short-cycling of the unit – a turning on and off of the compressor unit more than eight times/hour. -
Page 40: Troubleshooting
Troubleshooting WARNING BEFORE PROCEEDING, READ AND UNDERSTAND THE SAFETY INFORMATION CONTAINED IN THE SAFETY SECTION OF THE HEPAIR MANUAL. IMPORTANT This section is intended as a diagnostic aid only. For detailed repair or parts replacement procedures, contact a qualified service company. Check the following table for some solutions before calling a service technician. -
Page 41: Unit Is Operating And Blows Evaporator Air
Unit is operating and blows evaporator air, but the supply air is not colder than the return air from the space Possible Cause Solution Compressor not operating High pressure switch open (button up) Alarm will appear on thermostat Condenser airflow is blocked Remove blockage Clean filter and coil (if needed) High pressure (HP) switch is open... -
Page 42: Problems Controlling Space Humidity
Problems Controlling Space Humidity Humidity too low or supply air is too cold, without optional humidifier Possible Cause Solution Not enough evaporator airflow Remove blockage in supply or return ductwork Check and clean filter and coil Coil frozen – shut off unit for two hours Defective thermal expansion valve If under warranty call for service If not under warranty call a refrigeration... -
Page 43: Humidity Too High When Unit Is Not Running
Humidity too high when unit is not running Possible Cause Solution Unit needs to run to dehumidify Run unit. Seal openings around doors (gasket and sweep) Humidity too high when unit is running and cooling Possible Cause Solution Too much moisture in space Poor vapor barrier installation Humidifier malfunction refer to the humidifier instructions. -
Page 44: Basic Troubleshooting
Basic Troubleshooting A. Room Temp Too Low Possible Causes Recommended Action Detective temperature sensor Check and replace Defective controller Check and recalibrate or replace Defective re-heat coil or SSR Check and replace Check and adjust mixture or evaporator air and Too much evaporator air return air Check room load against capacity of unit. - Page 45 E. Excessive Unit Cycling (More than 8 times per hour) Possible Causes Recommended Action Check room load against capacity of unit. May Low room load need to adjust factory setting on HGBV Check mixture of evaporator air and return air Too much evaporator air against design conditions.
-
Page 46: Advanced Troubleshooting
Advanced Troubleshooting A. High Discharge Pressure Possible Causes Recommended Action Dirty condenser or filter Clean coil; clean or replace filter Condenser air path restricted Check and remove obstruction Remove excess refrigerant slowly. Normal sub- Refrigerant overcharge cooling is 10 degF Condenser fan motor not running or blade Check and replace defective parts. - Page 47 D. Coil Freezing Possible Causes Recommended Action Low evaporator airflow Check vs. design airflow volume Restriction In refrigerant system Check suction pressure and reset as required HGBV May need to adjust factory setting of HGBV E. Hot Gas Line Too Cold Possible Causes Recommended Action Measure condenser airflow volume...
-
Page 48: High Pressure Switch Has Shut Down The Unit
High Pressure Switch has Shut Down the Unit Every HEPAir unit has a manual reset high pressure switch in the refrigeration system. This switch shuts the compressor and condenser down if the head pressure in the system is too high. It is intended to protect the compressor. -
Page 49: Advanced Troubleshooting (Continued)
Advanced Troubleshooting (continued) IMPORTANT This section is intended for qualified refrigeration service technicians only. The technician should repeat all the previous troubleshooting steps before taking action on these more technical solutions. Evaporator coil is freezing Possible Cause Solution Charge too low Check for leaks Add refrigerant TXV malfunctioning... -
Page 50: Warranty
LIABILITY Air Innovations liability shall be limited to the repair or replacement (at its option) of any part, which, at our sole discretion, is determined to be defective. The purchaser shall pay all transportation costs. Additionally, if a malfunction occurs within the first year from the date of invoice, Air Innovations will reimburse the reasonable cost of labor required for the repair or replacement provided authorization is obtained from one of our authorized representatives prior to incurring any labor charges. -
Page 51: Contact And Warranty Information
The HEPAir unit serial number is noted on all packing lists and bills of lading and, along with the shipping date, is kept on file at Air Innovations for warranty purposes. All correspondence regarding warranty must include the model number and serial number of the unit involved. Note that the warranty is null and void if the serial number on the unit or compressor is altered, removed or defaced.
Need help?
Do you have a question about the HEPAir 24S050 and is the answer not in the manual?
Questions and answers