Advertisement
Advertisement

Summary of Contents for Transtech iPOSTER P2.5
- Page 1 USER MANUAL iPOSTER Indoor series:P2.5/P1.9...
-
Page 2: Table Of Contents
Index Index ························································································································································ 1 Safety information ······························································································································· 2 Specification ·········································································································································· 7 Installation ··········································································································································· 10 Serviceability ······································································································································· 11 Accessories ·········································································································································· 12 Package ················································································································································· 15 Control system ··································································································································· 16 Maintenance & Repair ····················································································································· 63... -
Page 3: Safety Information
Safety information: WARNING! Read the safety precautions in the section before installing, powering, operating or servicing this product. The following symbols are used to identify important safety information on the product and in this manual: WARNING! WARNING! WARNING! WARNING! WARNING! WARNING! Refer to Hazardous... - Page 4 PROTECTION FROM ELECTRIC SHOCK ﹡Connect the product to AC mains power within the range 90-264V nominal at 50 or 60 HZ only. ﹡Disconnect the product from power when not in use. ﹡Always ground (earth) the product electrically ﹡ Before using the product, check that all power distribution equipment and cables are in perfect condition and rated for the current requirements of all connected devices.
- Page 5 PROTECTION FROM INJURY Created an installation by installing panels at the top and working downwards. Disassemble an installation by removing panels at the bottom and working upwards. Check that all external covers and rigging hardware are securely fastened. Block access below the work area and work from a stable platform whenever installing, servicing or moving the product.
- Page 6 Data cables: The data cables provided with this system have special properties for safety. They are not user serviceable. If the data cables are damaged, replace them only with new ones. Never try to repair a data cable. Per requirements of the National Electrical Code in the USA, the length of a data cable must not exceed 100m (332feet).
- Page 7 Before work on the system, the power must be disconnected, and the system must be checked for absence of power and secured against further connection power. All repairs of the system may only be carried out by Transtech LED Co.,Ltd respectively by authorized and qualified technical personnel.
-
Page 8: Specification
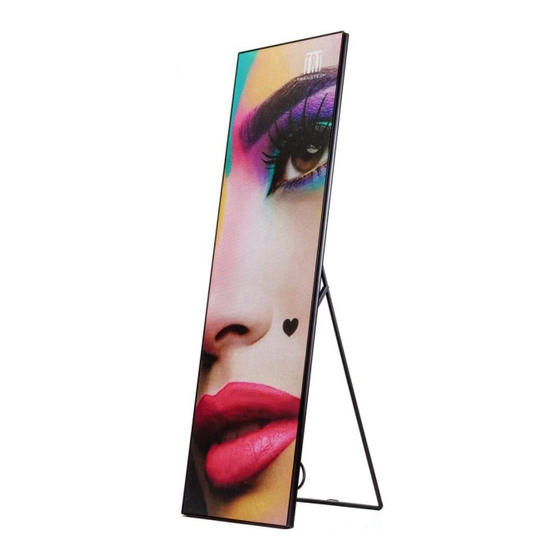
Specification: Developed by Transtech team alone, iPoster series all new digital poster can be controlled with fixed or portable Windows, IOS & Android devices. The content can be refreshed and stored in built-in media player through WIFI or USB to achieve asynchronous play. - Page 9 IPoster diagram ③ ② ① ④ ⑤ ⑥ ⑯ ⑮ ⑬ ⑭ ⑦ ⑫ ⑪ ⑩ ⑨ ⑧ Note: USB port ⑧ Supporter groove ⑭ ① Display area Power indicator, ⑨ Power ⑮ ② Main frame signal indicator ⑩ WIFI antenna ③...
- Page 10 Note: 1. Acrylic panel 2. Module & lamp panel 3. Sides frame 4. Top frame 5. HUB board 6. Corner sealer 7. Pneumatic rod 8. Hand-holding 9. Track 10. Backboard 11. Power 12. Antenna 13. Back frame...
-
Page 11: Installation
Installation Supporter standing Pedestal standing Put the cabinet onto base, fixed with screw Open the folded supporter to stand From①to⑤ ① ② ③ ⑤ ④ Wall-mounted Hanging installation... -
Page 12: Serviceability
Serviceability: Front service Rear service Suck out the module with maintenance tools Move the backboard screws Maintenance tools Module... -
Page 13: Accessories
Accessories: Screws Connect the base and hanging or wall-mounted accessories. Size M6*25 Quantity 4PCS/set Material SUS304 Wall-mounted accessories Mount iposter on the wall. Size 410*45.5*27.5mm Color Black Material SPCC Power cord ( three core ) Connect the electric closet to screen; 3*2.5m wires connects 8-10 cabinets. - Page 14 Power cord Connect the power between cabinets. Length 0.5m Color Black Weight 0.1kg Base Adopt stainless steel rope for rigging. Material A6063 Color Black Size L571.8*W410mm Power supply Mount iposter on pedestal. Voltage Color Silver Weight 0.66kg Module Spare module. Color Black Size...
- Page 15 Flat cable Connect HUB board and module Length 0.26m Color White Weight 0.1kg HDMI cable Sync connect computer Material Copper wire Color Black Weight 0.54kg RJ45 cable Connect Iposter with LAN or internet Length 6-8m Color Blue Weight 0.6kg...
-
Page 16: Package
Package: Flight case delivery: 4pcs per case Size: Wooden case delivery: 4pcs per case Only suitable for long or short distance of fixed products: Wooden case + Pearl cotton... -
Page 17: Control System
Control system: IPoster control system is composed by main controller (C6). Specification: Wororking Voltage 100~240VAC Rated power consumption Working temperature -20°C ~ 85°C Communication port USB/RJ45 Controlled products C Series Data transmission port 1000M Ethemet Material SPCC Dimension 315*205*44mm Weight 1.5kg Main controller (C) Note:... - Page 18 Software installation First download the installation package of LEDVISION software from Transtech's official website www.trtled.com, and complete the installation according to the diagrams shown below. 1. Run the software package, and select [ English ] for installer language. Click [ OK ] to move on.
- Page 19 C6 Parameter Settings Connection Settings 1. Before connecting your C6 to the computer, first click the control menu [ Control ] → [ Screen Control ], then select [ C-Series Play Box ] in Select Sending Device, then set up [ LED Screen Window Management ]. Note: If you do not complete this step, LEDVISION may not function properly because of a conflict between Net Card mode and C6 config interface.
- Page 20 3. Left-click [ Direct USB ] and then right-click choose [ Refresh ], your C6 will show up in program publishing window, select your device to set parameters and choose what content to play. Basic settings ● Ensure LED display is under normal configuration before setting on C6 parameters. ●...
- Page 21 The surface development of your C6’s parameter setting interface is shown below: Advanced settings 1. Playing parameters The [ width ]/ [ Height ] you input must be equal to or slightly larger than he actual screen resolution. ② Output Every Frame ( Default ).
- Page 22 2. Network settings ① WiFi Check [ WiFi ] in network tab, and input your WiFi login information for [ network name ] and [ password ], then click [ Apply ] and [ Refresh ] to complete setting, click [ detail...
- Page 23 ③ LAN (Network Cable) A. Automatically Obtain an IP Address (Default) When you connect your C6’s LAN port to a networked router, your C6 will automatically obtain an IP address. B. Use the Following IP Address To use a specific IP address, enter information for [ IP ], [ Subnet Mask ] and [ Gateway ], then connect C6 LAN port to the router.
- Page 24 Async Content Publishing 1. Publish Contents through Direct USB ① In [ program editing area ], after finishing content editing, select the [ program page ] that you are going to publish; ② Click [ C6 ] and then right-click to choose [ Publish Program to current playbox ], you must rename the content and allow it to finish uploading to fully publish your program.
- Page 25 2. Content Publishing through USB disk To begin publishing through USB, first insert your USB stick to the PC USB port. Click [ Publish Program to C Series Playboxes ] (as shown in the red box) to extend program publishing window. Note: USB stick should be empty before publishing for best performance.
- Page 26 ③Select the drive letter under USB stick group, and then right-click to choose [ Publish the current program to the selected disk ], after publishing program successfully, insert USB stick into C6 USB port. Note: A rotating circle in LED upper left corner will appear during the upload procedure.
- Page 27 Network Management of C6 Connection and Management 1. LAN Connection: Connect C6 to network through WiFi or LAN port. 2. C6 network management: After controlled end ( PC, smart phone, or other device) and C6 are connected into same LAN, select [ LAN ] then [ Refresh ].
- Page 28 Cloud operation Internet ID Application Firstly, you need apply an Internet ID to login our server, and the ID is not open for everyone to register, the application to our company is necessary. Internet ID Login You can login our server(URL:https://colorlightcloud.com) to manage terminal equipment while you have an Internet ID.
- Page 29 Equipment Management 1. New/Edit/Delete Terminal Group On the home page, click Terminal-->Select Group, and click to enter the page for adding a new terminal group (Figure 1.3.1-1). As shown in Figure 1.3.1-2, fill in the information and click Submit, a new terminal group is built. Figure 1.3.1-1 Figure 1.3.1-2...
- Page 30 Click , and you can re-edit the information of terminal group, the interface is shown in Figure 1.3.1-3 (Note: You cannot re-edited initial terminal group, only the child terminal group can be re-edited). Figure 1.3.1-3 Click , and you can delete selected terminal group and terminals under it, as shown in Figure 1.3.1-4 (Note: Initial terminal group cannot be deleted).
- Page 31 2. New/Edit/Delete Terminal As shown in Figure 1.3.2-1, you can add a new terminal. Click New as shown in Figure 1.3.2-2, fill in the information and click Submit to complete (Note: Please write down the terminal account, as it’s the LED player account in the server, which should later be used to setup the LED player).
- Page 32 After filling in the information and submitting, we can see the existing terminal under corresponding terminal group. The new terminal is gray, which means it’s not online at the moment as shown in Figure 1.3.2-3. Figure 1.3.2-3 The operation of deleting terminal is in Edit, click and you can not only edit the information of terminal, but select Delete in the bottom-left corner to delete the terminal, as shown in Figure 1.3.2-4.
- Page 33 3. Terminal Connection with Internet The C6 can be connected to Internet by WIFI, 3/4G, and network cable. In order to connect with the server, you should: A. Connect the computer via USB cable provided, B. Start LEDVISION, C. Click "Publish program to C6 player", D.
- Page 34 G. Enter Password: 168, H. Select the "Led" tab in the "Advanced Settings" window, I. Connection status could be found in the Internet section as shown in Figure 1.3.3-1. Please check the figure below for the Username, Password and URL. After filling in corresponding information, click Apply.
- Page 35 4. Terminal Management After setting up the terminal, login the server in the browser for checking its online status. The green frame means that the device is online as shown in Figure 1.3.4-1 below. 1. Finish the initialization by click the device, and take a screenshot. 2.
- Page 36 Figure 1.3.4-2 You can click for instantly checking out what is displayed on the LED screen for the moment, as shown in Figure 1.3.4-3; Click to publish a program of single line text, as shown in Figure 1.3.4-4. Figure 1.3.4-3...
- Page 37 Figure 1.3.4-4 5. Terminal Package Updated Click Advanced Settings, select Terminal being updated, the interface is shown in Figure 1.3.5-1, and click , select right upgrade package to start upgrade. Figure 1.3.5-1...
- Page 38 Media Management 1. Media Upload To upload media which users need to the server, click Media Management->File Upload as shown in Figure 1.4.1-1. Click Select File, find the media, click Open to complete; or drag the media in the dotted box directly. (PS: Capacity of single media is limited to 512M Bytes) Figure 1.4.1-1 2.
- Page 39 Program Management 1. Program List Program Management is shown in Figure 1.5.1-1. It displays all programs of Internet created by this account, also including programs sent from C/S. Figure 1.5.1-1 You can click to build a new program, click to edit the program (for being created from B/S only), click to delete the program uploaded to server by the account.
- Page 40 after building it, and it can be allotted freely or re-edited. Figure 1.5.2-1 3. Program Allocation Program can be clicked in the program list after building programs, as shown in Figure 1.5.3-1, click , as shown in Figure 1.5.3-2, you can select terminal group to send the program to all terminals of it;...
- Page 41 Figure 1.5.3-2 Figure 1.5.3-3 Figure 1.5.3-4...
- Page 42 Security Monitoring When unknown users attack server maliciously, or account and password input error exceed 6 times, the server will lock corresponding IP of the user, the user also can unlock it. As shown in Figure 1.6-1, all blocked users on the server can be recorded. Figure 1.6-1 Command Schedule Command Schedule locates under Terminal Management, it’s necessary to select a...
- Page 43 Figure 1.7-2 Language Switch Switching language is on the left toolbar, as shown in Figure 1.8-1. Click Account Info-->Personal Setting-->Language to switch Simplified Chinese, Traditional Chinese or English. Figure 1.8-1 Account Management The module applies to multi-users management, register new user and bind corresponding terminal group, there are two permission assignments: administrator and program maker (Only administrator can register new users).
- Page 44 Figure 1.9-1 Figure 1.9-2 C/S settings Connection with Server Start LEDVISION and enter operation interface of C series products, as shown in Figure 2.1-1, click Cloud, enter username and URL, click Login and you can see all terminal groups and terminals of this account. ( URL:https://smart.lednets.com/clt/)...
- Page 45 Figure 2.1-1 Add/Delete Terminal (New LEDVISION Function) Drag terminal in related terminal group by LEDVISION directly, as shown in Figure 2.2-1. It’s OK to connect with USB or LAN. Figure 2.2-1...
- Page 46 Select deleted terminal and right click to delete, as shown in Figure 2.2-2. Figure 2.2-2 Connection with Server 1. Program Editing and Publishing Program is edited by LEDVISION (Please look up related document and help of LEDVISION), program publishing is same as the way of LEDVISION by USB or LAN, right-click terminal group or terminal and select Publish, also, you can drag program in the terminal group or terminal to complete, the progress window of uploading and downloading will pop up, as shown in Figure 2.3.1-1.
- Page 47 2. Terminal Management Click the terminal, as shown in Figure 2.3.2-1, and you can see the terminal information, like version, running time and etc. Click , they are Power on, Sleep and Restart; click to conduct program management, like program switch and delete. Figure 2.3.2-1 C-Cloud Chrome Plugins Setup and User Instruction Setup...
- Page 48 2. After downloading, select More Tools-->Expanded Program (Figure 3.1-2), drag downloaded Chrome extension (CRX) in the interface and add, at the moment, as shown in Figure 3.1-3, select Detailed Information-->Create a Shortcut on the desktop. Figure 3.1-2 Figure 3.1-3...
- Page 49 User Instruction 1. Click the desktop or Chrome extension to start C-CLOUD, as shown in Figure 3.2-1. Figure 3.2-1 Fill in the server name and URL, select Add, as shown in Figure 3.2-2, click Enter, it’s same as the login interface of entering browser. After the first login, user can enter directly without inputting username and password again;...
- Page 50 IOS app operation This function requires Colorlight LED Player >= 1.32 and, iOS "LED Assistant" version >= 2.7.8. Please download the latest Colorlight "LED Assistant" by scanning code below: Power on the iposter before entering software operation. Open the WLAN interface of phone and connect the wife whose username is on the backboard and the password is 12345678.
- Page 51 1. Connect to Colorlight LED Player...
- Page 52 2. Find and Select Target Colorlight LED Player...
- Page 53 3. Create a New Program...
- Page 54 4. Edit the Default Region...
- Page 55 5. Make the Region "Carousel" Region Type...
- Page 56 6. Add PNG (Support Transparent) or JPG Logo...
- Page 57 7. Select Picture...
- Page 58 8. Type in Text...
- Page 59 9. "Back" to Program Edit UI...
- Page 60 10. Upload "Carousel" Program to LEDPlayer...
- Page 61 11. Any Program Name Will Do...
- Page 62 12. Check the Screenshot from LED...
- Page 63 13. Even Check the Full Screenshot...
-
Page 64: Maintenance & Repair
Maintenance & Repair: Routine maintenance: 1.Regular use. After put into use, 25-30 hours and 5 times usage per month is necessary to keep the display dry and deliver a stable performance. 2.Regular clean. Normally one time every half of a year is OK. Cut off the electricity power, and then use a dry brush to sweep from top to the bottom. - Page 65 THE END 4th Floor, Block12C, Jugao Technology Park, Tianliao Community, Gongming Town, Guangming District, Shenzhen, China. Phone: +86 (755)27150399 E-mail: info@trtled.com...
Need help?
Do you have a question about the iPOSTER P2.5 and is the answer not in the manual?
Questions and answers